


Paper Mache Clay Barnacles

by
Terry
7 Materials
$5
4 Days
Medium
Hi everyone! Are you ready for another Coastal Craft? I didn’t know I was until my sister, who knows how much I like to craft and gives me unusual things to use for inspiration for new projects, gave me something—an old wooden mirror base (missing the mirror) with a chain for hanging. I looked at it with a blank expression since I had no idea what I could do with it. I decided I wasn’t going to mosaic it or draw anything since I’m not an artist in any way. Well, I was cruising the internet and found an article about toilet paper clay. I decided to make clay barnacles and attach them to the wooden mirror base. There's a great website for making paper mache clay that I referred to for the recipe (www.ultimatepapermache.com). You can also make these and use them for cute bowls or decorations.
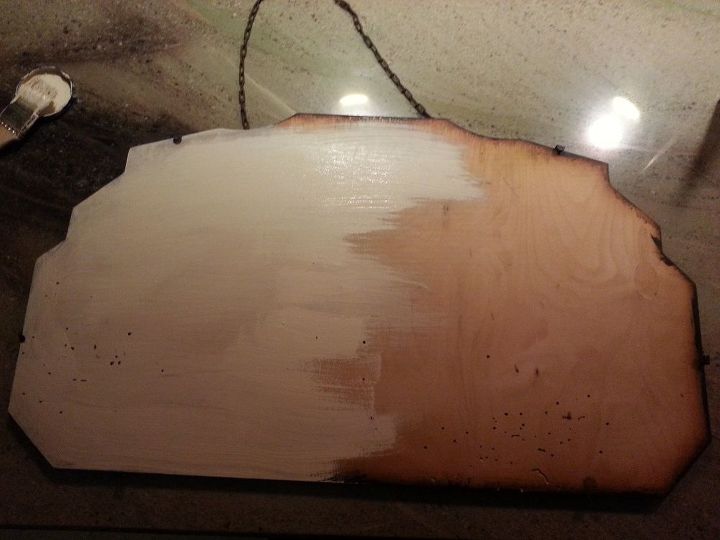
Here is the mirror base as I began painting it. The wood had some paint over spray that the mirror had previously covered and I didn’t want it to show through.
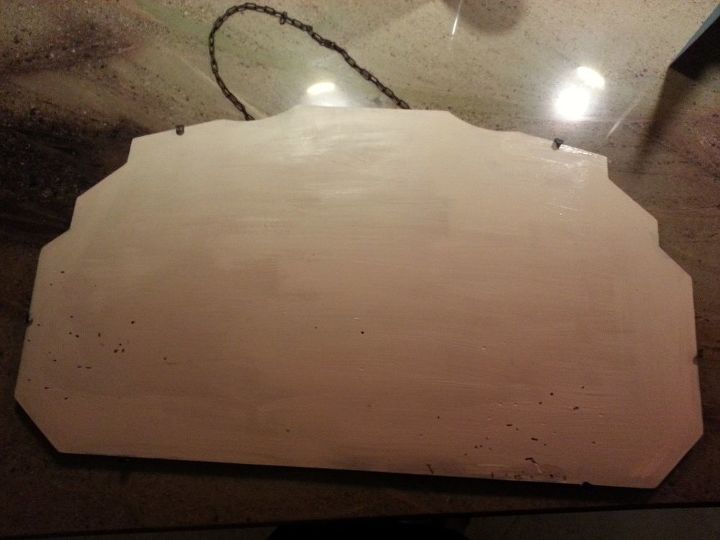
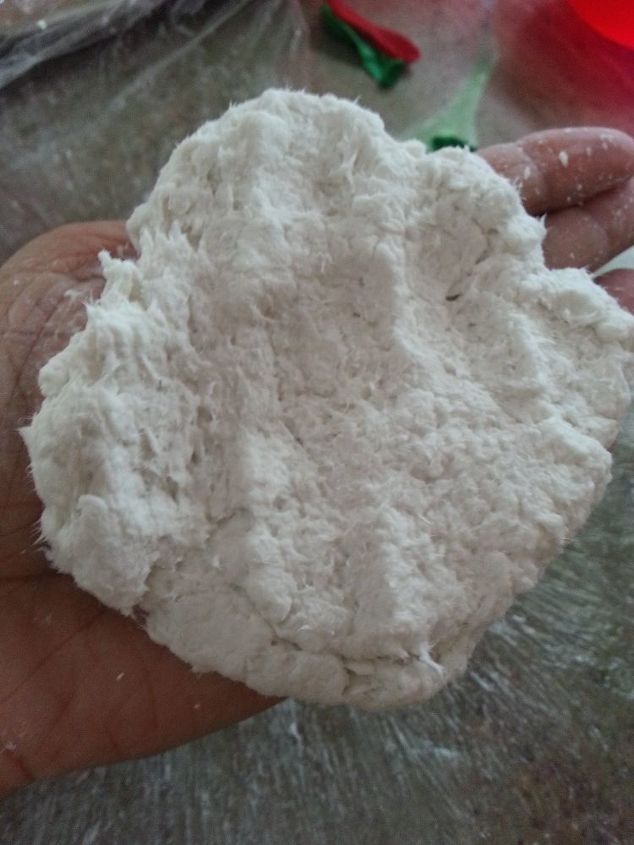
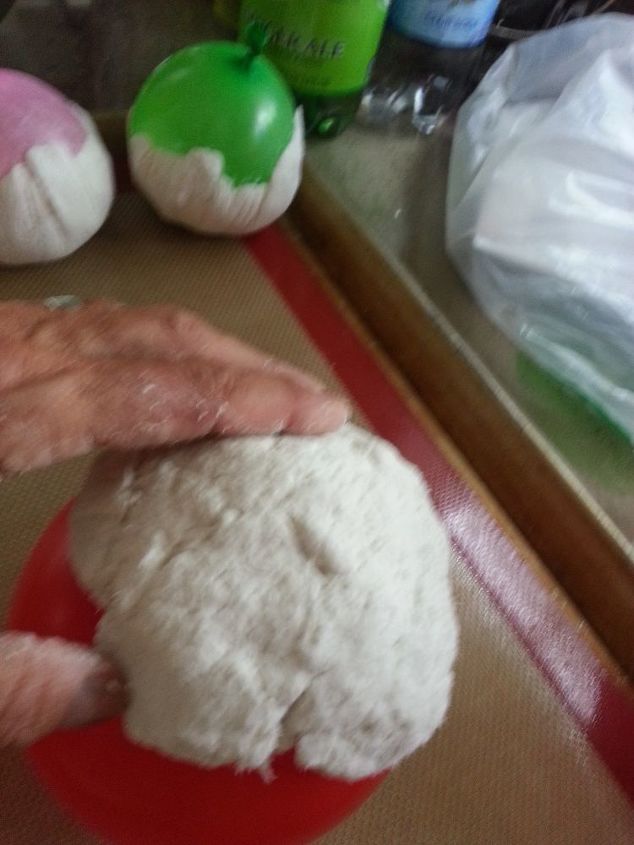
After painting it all an off white, I painted it again with Elmer’s glue and sprinkled it with sand for my coastal background. Next, I made my clay barnacles: Soak a roll of toilet paper in water until the paper is saturated and the inside cardboard roll loosens. Remove the cardboard roll and squeeze all the water out of the toilet paper. Tear the toilet paper into one-inch pieces (separate bigger pieces) and throw into your stand mixer or a bowl. Add ¾ cup Elmer’s glue, 1 cup of drywall joint compound (don’t use DAP brand), and ½ cup of flour. Mix it for about 3 or 4 minutes until it looks like cookie dough. Now for the fun part….
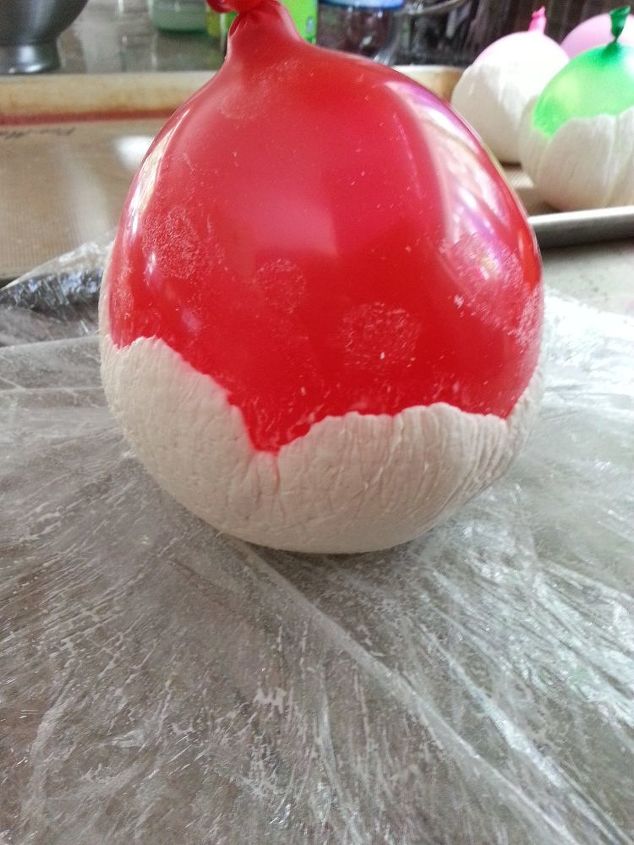
Blow up a few balloons—not too full, leave a little flexibility in them. Take a handful of the clay and pat it into a pancake shape about ¼ to ½ inch thick.
Then pat it onto the bottom of the balloon, making sure it sticks to the sides. I came up the balloon sides about ¾ of the way. (Sorry for the blurry picture--I was taking a picture one-handed!)

Next, set the balloon in the middle of a large piece of plastic wrap and pull the wrap up around the balloon, gathering it up around the tied end of the balloon. Twist the plastic wrap around tightly until the balloon smooths out and you see lines in the clay. Give it a good squeeze to round out the balloon or to shape it.
Carefully unwrap the plastic wrap from the balloon and set the balloon on the cookie sheet (cover with parchment paper or a Silpat first). Make as many of these balloon barnacles as you need to fill your wood piece.
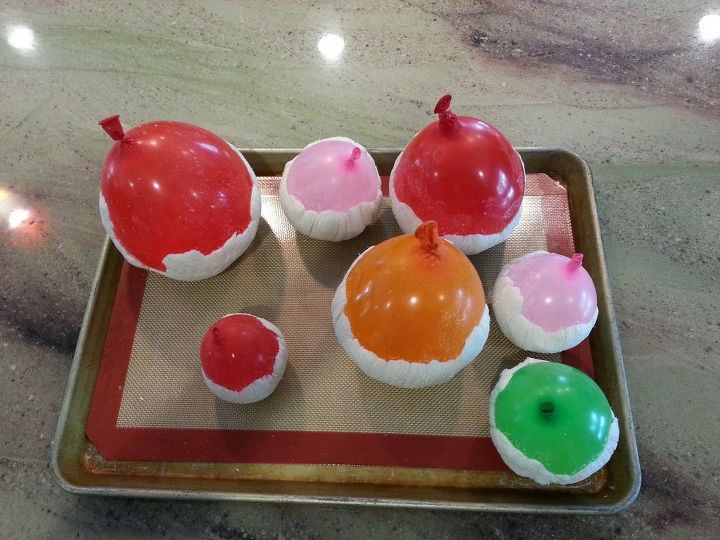
Set the completed balloons in a sunny spot and wait a day for them to dry. Up to this point, the project has taken only about 45 minutes–long enough to make the clay and cover the balloons.
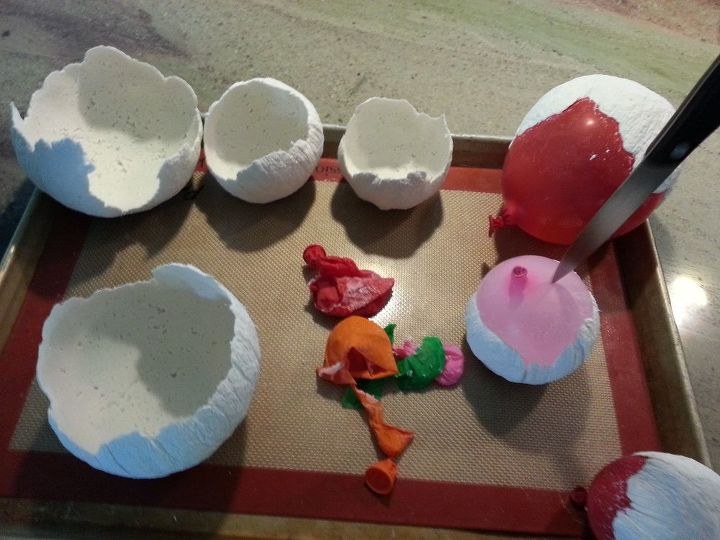
After one day, you can pop the balloons (this is the best part) to make it easier for them to dry out. They will still be moist and you’ll have to patiently wait about three days for them to become dry and hard. Once they are hard, you can hot glue some together or use them individually as decorative cups or holders. They can be painted or decorated in any way that you’d like.
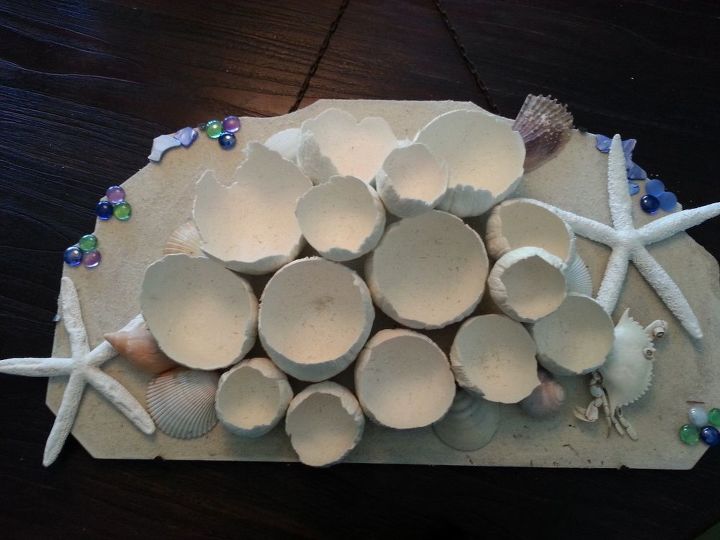
This is the point where I took my barnacles and glued and stacked them onto my mirror backing and then placed shells and sponges around the barnacles to hide the openings between “barnacles” and make them look more realistic. The barnacles look really cool from the side because you can see the striations in the clay.
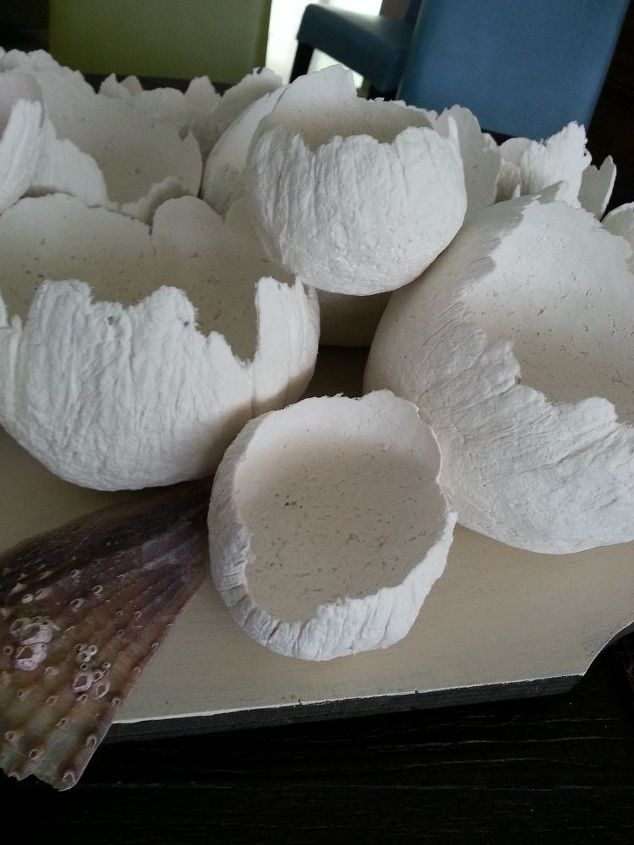
Close up of the barnacles from the side.
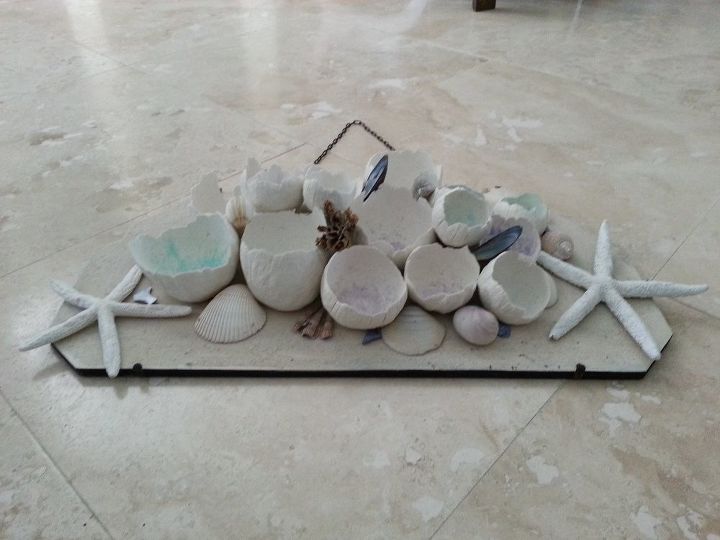
The finished product. They were quite plain looking straight on so I painted some of them for a pop of color but I don't like how they turned out and will be re-painting them white. This would be a great, messy project to make with kids!
Comments
Join the conversation
2 of 27 comments
-
I love this. I wonder if they’d hold up to resin?
-
I'm sure they would. They are stiff like concrete when cured.


Frequently asked questions
Have a question about this project?
A t the point of putting the wet balloon in the plastic bag, could one hold the bag shut and try rolling the paper mache side against a hard surface, just to get a smooth effect or to even out and compress the paper layer? Thanks- this is giving me some very inspirational ideas...
This is a such a neat project! Do you know if they can be sealed with anything to maybe make a hanging planter? Thanks for sharing!
You said you can shape them once you have the plastic wrap tight. Do you know if you can push the bottom flat (like barnacles) and have it stay, or would cutting off the round base work once they're dry? Thanks for the great idea! So many possibilities.....