


Personalized Mugs - 3 Ways!

5 Materials
$15
1 Hour
Easy
I've been wanting to do this project for a long time and finally made it happen! Each of these ideas are SO simple. I'm already looking forward to making more. Check 'em out below! And I'd love to hear your feedback.
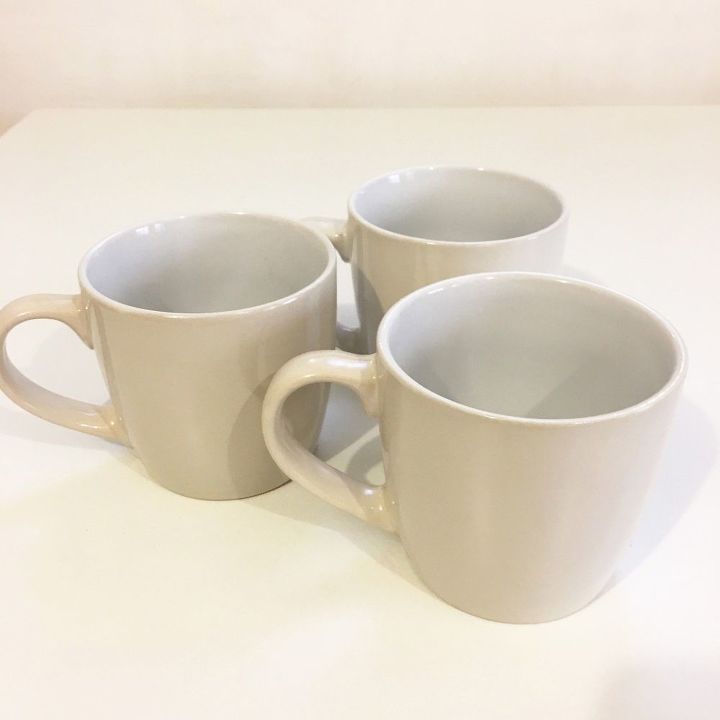
Supplies: Mugs! These were the closest to white I could find at the store. I'd definitely recommend choosing a light, neutral color so you can give yourself lots of room to add color and personalization.
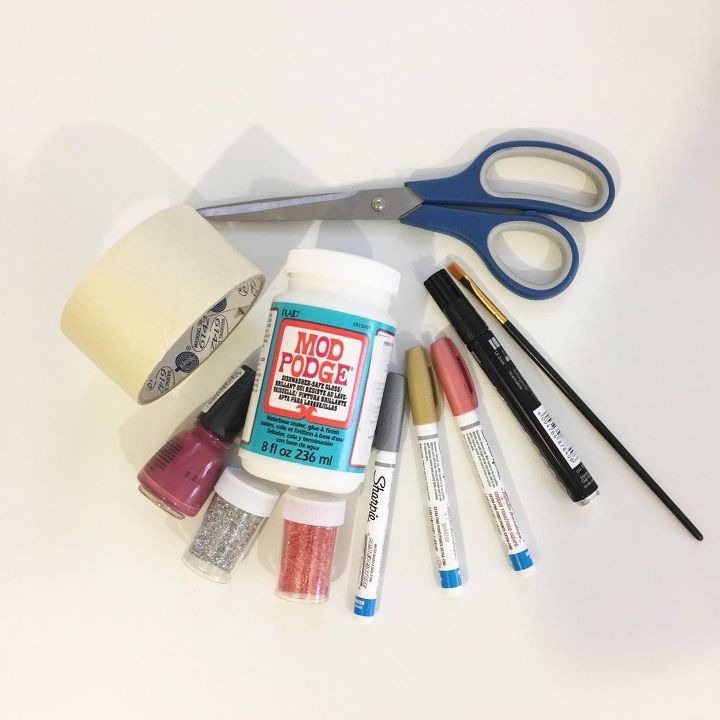
More supplies: Masking tape, scissors, Mod Podge, paint brush, nailpolish & permanent markers. (I didn't end up using the metallic Sharpie markers but they're a great option to have!)
Mug 1: Glittered Mug
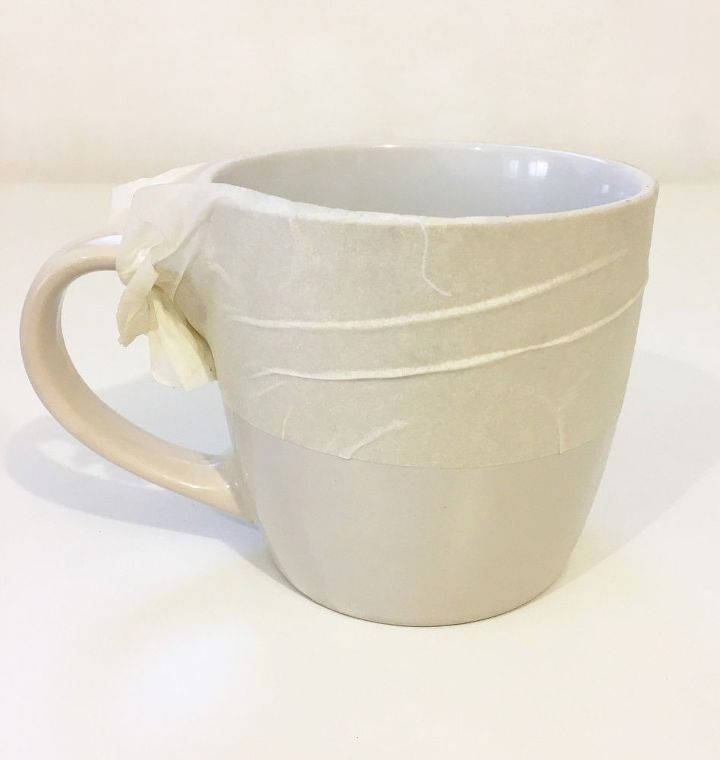
All I did was tape off the top section of the mug (trying my best to keep a straight, even line all the way around).
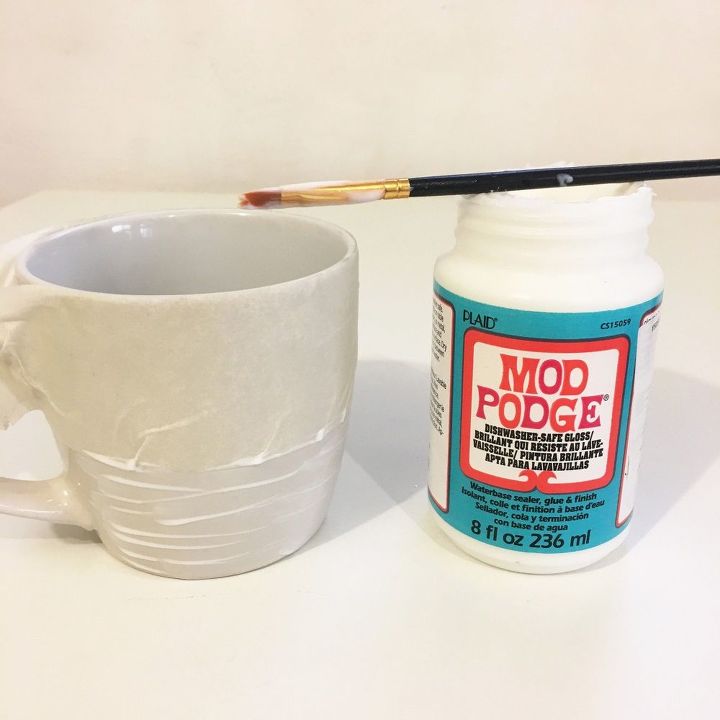
I then painted over the bottom half of the mug with a thin layer of Mod Podge.
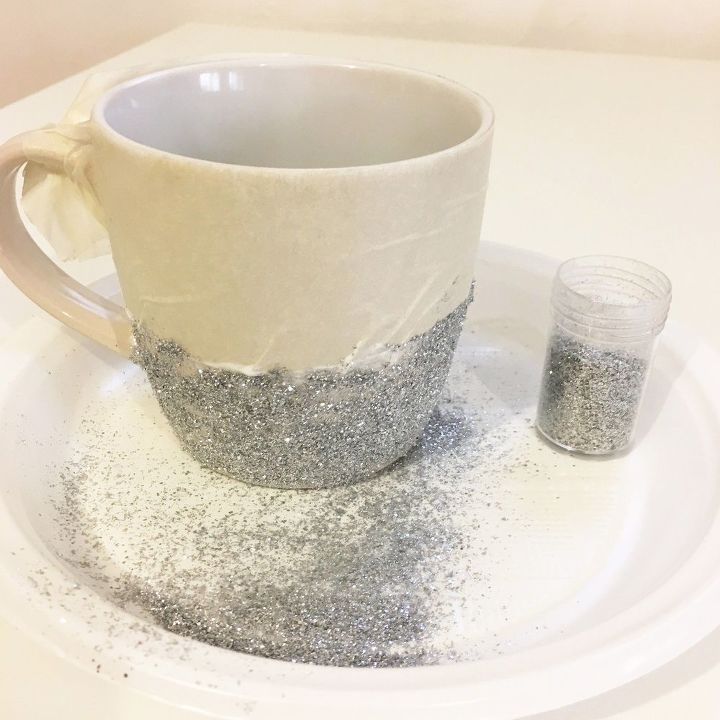
Next - glitterize! I held the mug over the plate and while rotating it, poured the glitter overtop. Any spots that I had missed, I just went back over (sometimes with a little extra Mod Podge, and patted down some glitter in place). NOTE: Be sure to wait until the next day to seal it with another layer of Mod Podge!
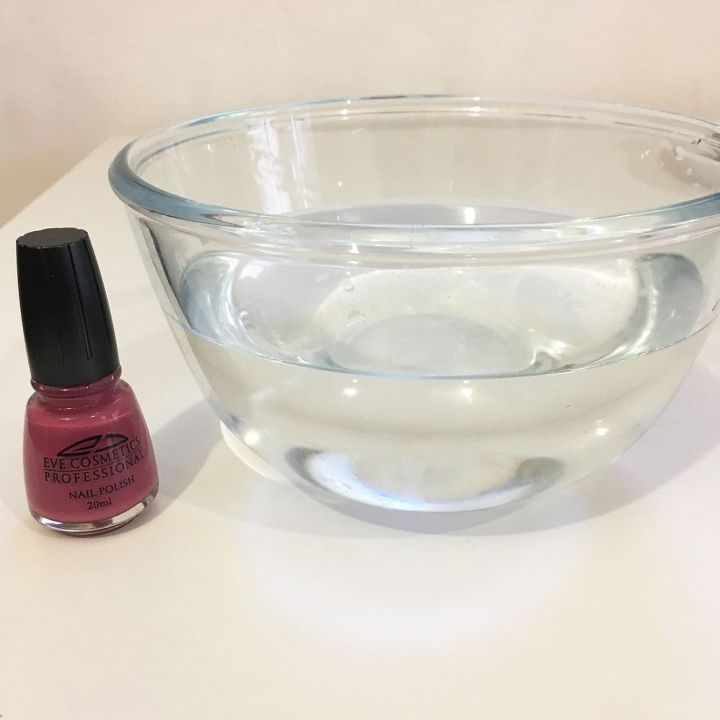
Mug 2: Nail Polish Marble Mug
You will not believe how simple, yet beautiful this one is! All you need is a bowl of water and the nail polish color(s) of your choice. NOTE: You can also tape off sections of the mug for this one but I decided to go for more of natural dipped look.
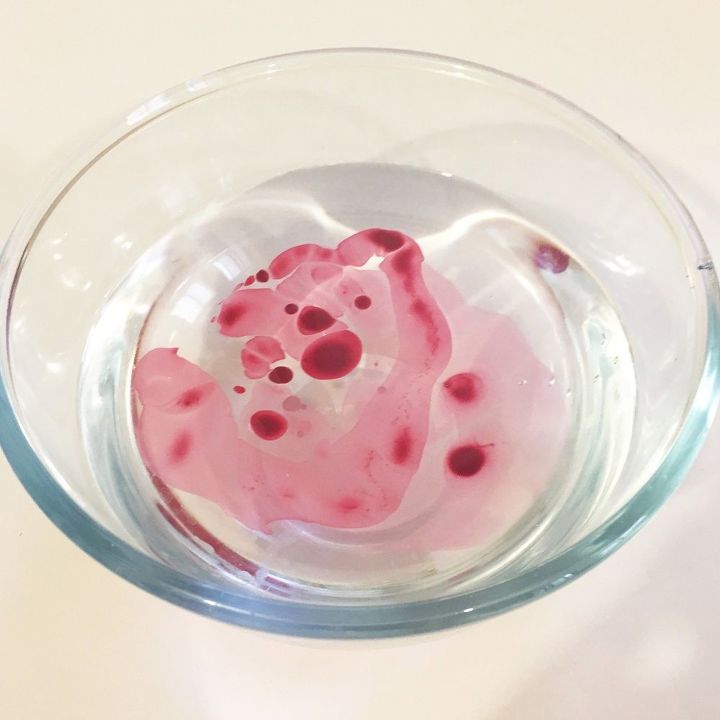
Drop in about about 5-10 drops of polish.
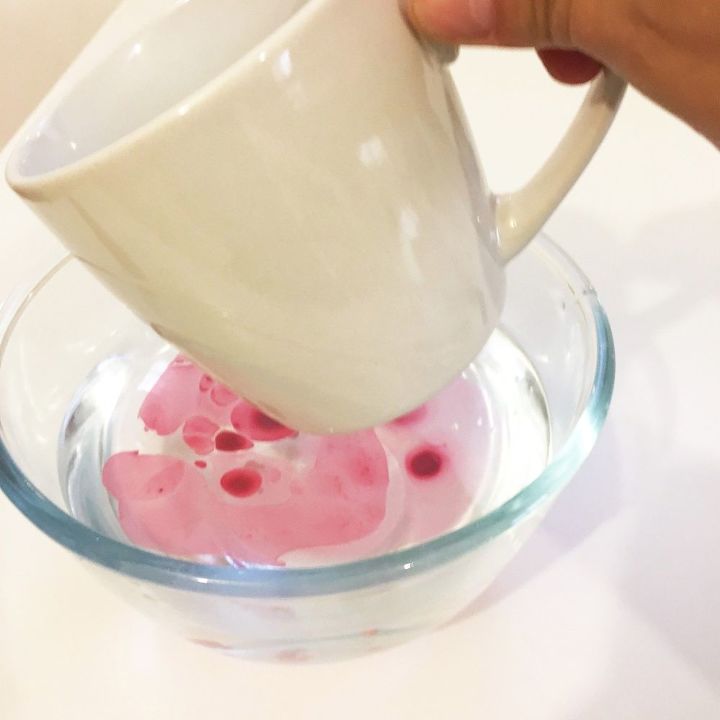
Go ahead and dip the mug in! (Rotate it slightly to cover the mug to your liking.)
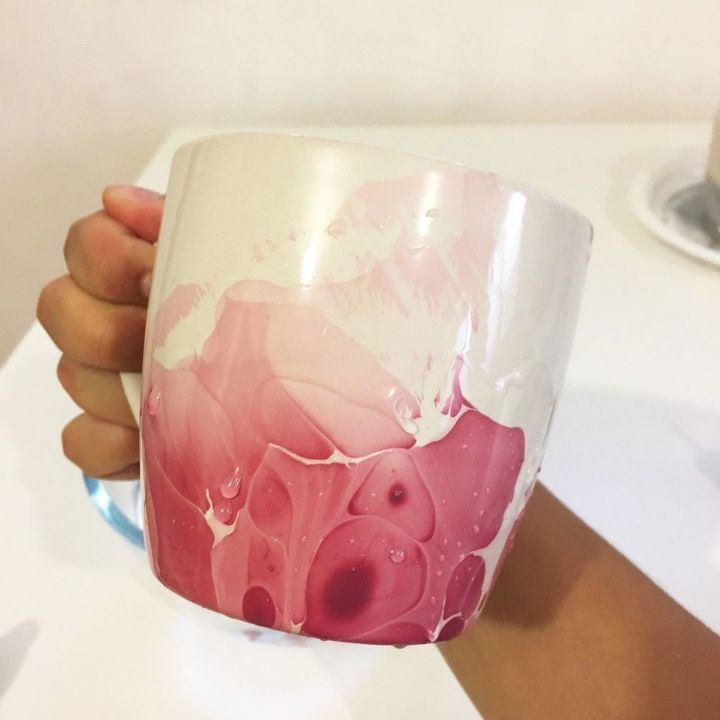
Voila!!
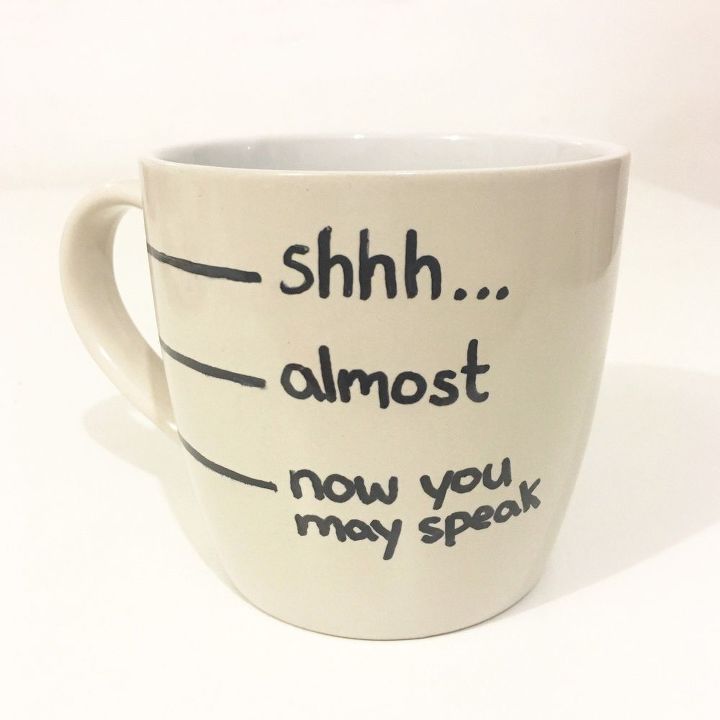
Mug 3: Morning Coffee Mug
This one was what really inspired me to decorate mugs in the first place. I saw this idea on a few sites and immediately knew I needed to make myself one! Have fun with whatever quotes make you laugh or inspire you in the morning!
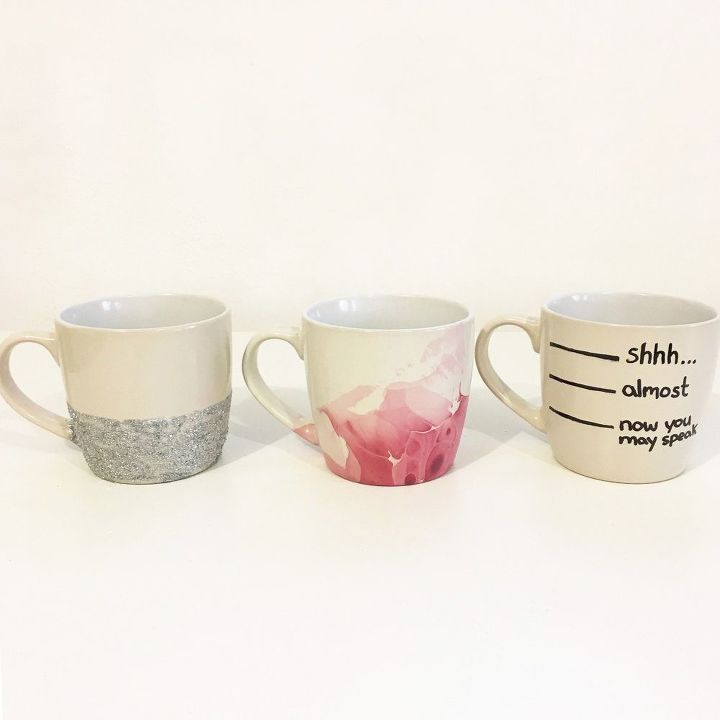
And here they are! I originally planned to give them away as presents but I love them so much I may keep them for myself. ;) And then make some more, of course!
Comments
Join the conversation
3 of 7 comments
-
We just did this project on tiles for coffee cups & some mugs. We haven't done the finger nail polish because it is a fire hazard when you cook them? in the oven. We made them for the Multiple Sclerosis Society Calgary to sell at our Christmas lunch so we can afford more supplies for other crafts. We didn't use Modge Podge on them. We used a liquid of some kind so we could swirl or blow the colouring around to make it different. Saw them today at our meeting & they are fancy looking.
-
I painted mugs before with permanent paint, but I was told to clean them with alcohol first, then when done decorating bake them in the oven to set the paint. will go through dishwasher.


Frequently asked questions
Have a question about this project?
Are any of the 3 dishwasher safe?
I don’t understand stand how the market and the glitter will even stay on if washed.
What do you use to write on mug mine came off