


Recycled Frame With Feathers and Fringes

I rarely turn my back on an old picture frame, there's always one that is tattered but not completely broken that just needs a little lift up. This frame intended to be a message board but as I found it without letters that idea wasn't an option anymore.
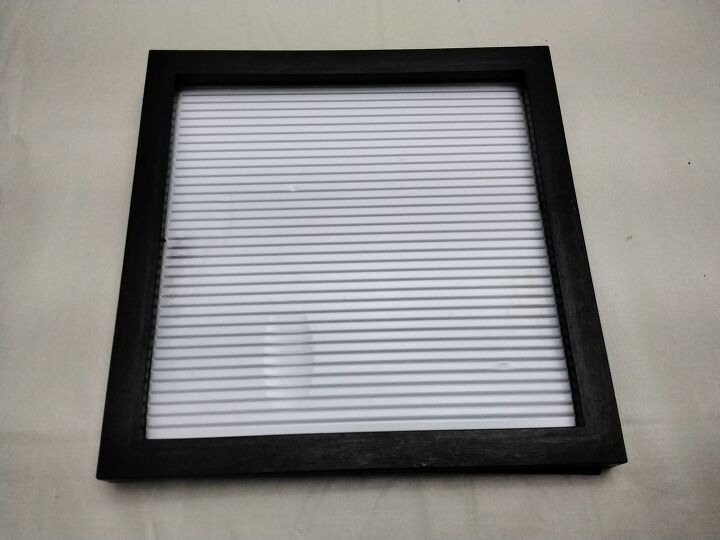
I took the frame apart and discarded the white, corrugated plastic part because it was damaged as well.
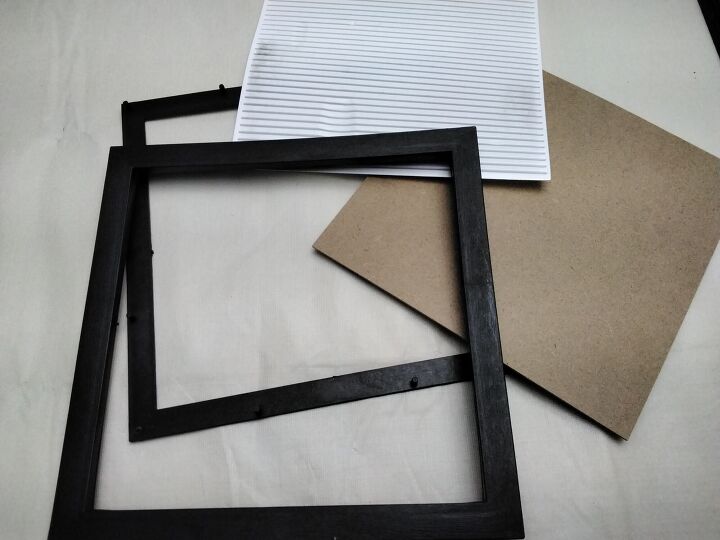
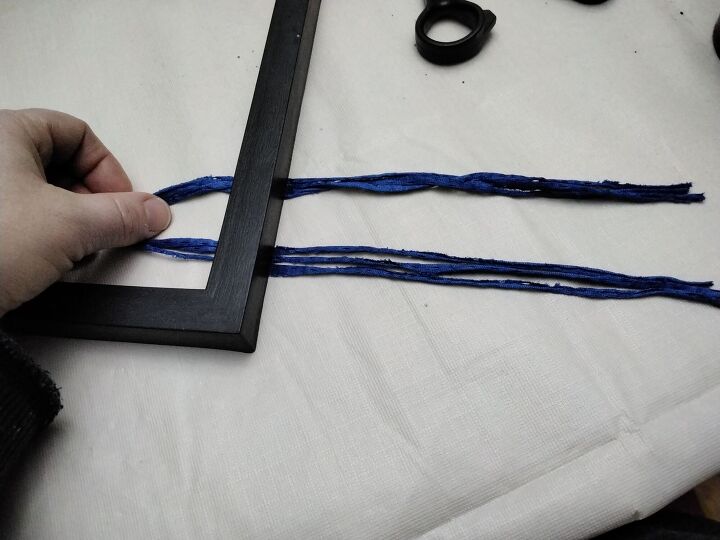
I just recently started macrame crafts and some of my inspiration projects used frames to hang the strings from so that's the route I began to take. The cord I chose was a blue stretchy material almost like spandex cut into a string, I don't know the brand since it was a scrap piece. To make fast, even string lengths I wrapped the string around the frame many times
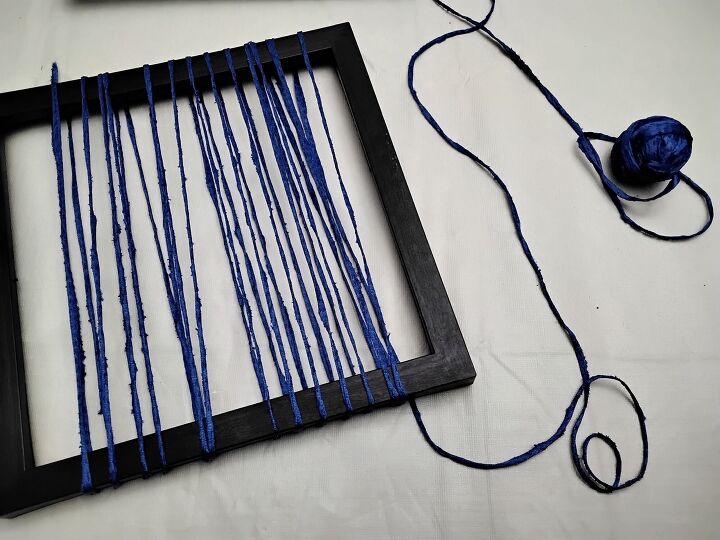
Once I had measured off what I needed I cut along just the bottom edge of the what I had wound around the frame.
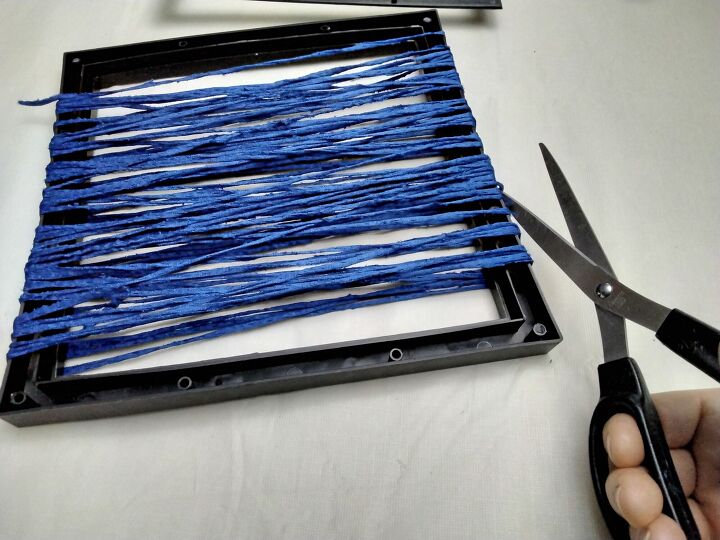
Next, I flipped the frame right side up and took 3 pieces of string together to create my first tie along the bottom edge. I used 3 at one time to give it more fullness as the strings weren't substantial on their own. The next series of photos shows how they were attached and secured in place.
Take all of the the tail ends and pull up and around the frame and aim them through the loop created by the string fold.
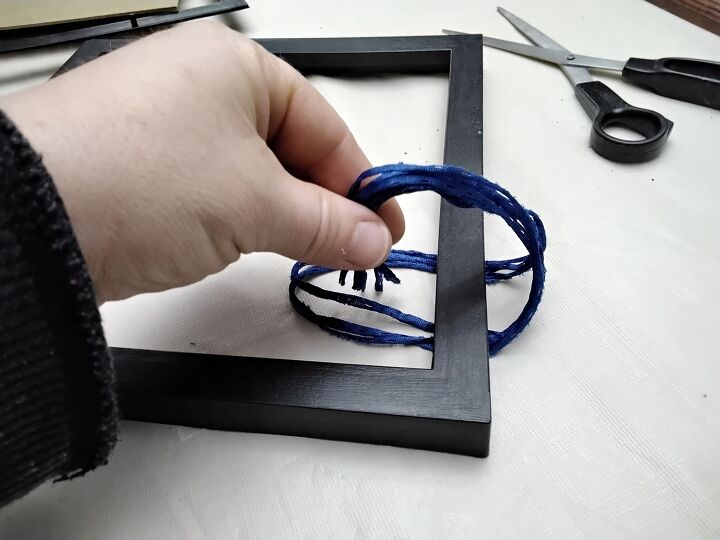
Feed all of the rails through the loop and pull snug
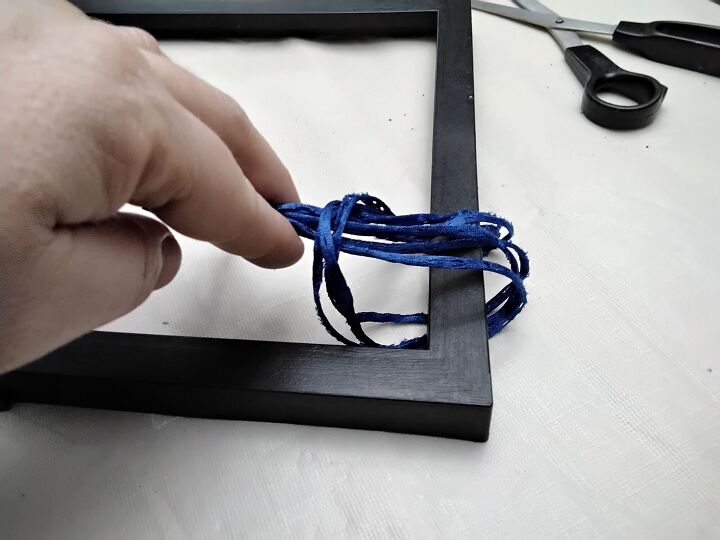
Still holding all of the tail ends pull them around the frame and downward so the fringe will be hanging along that bottom edge.

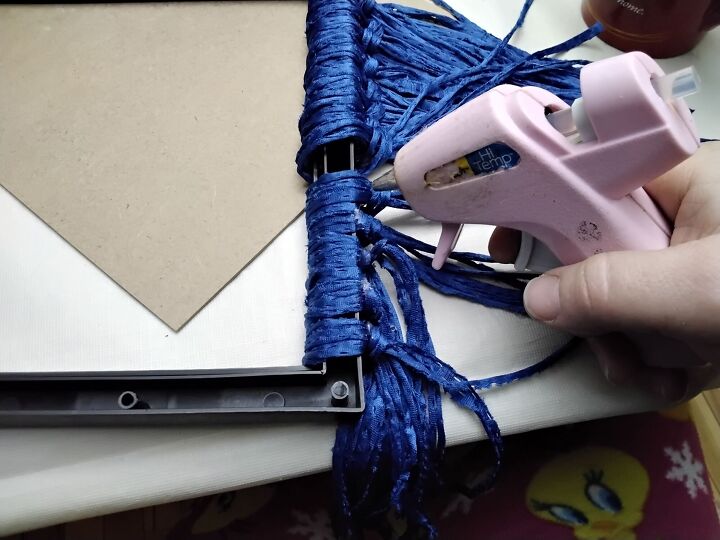
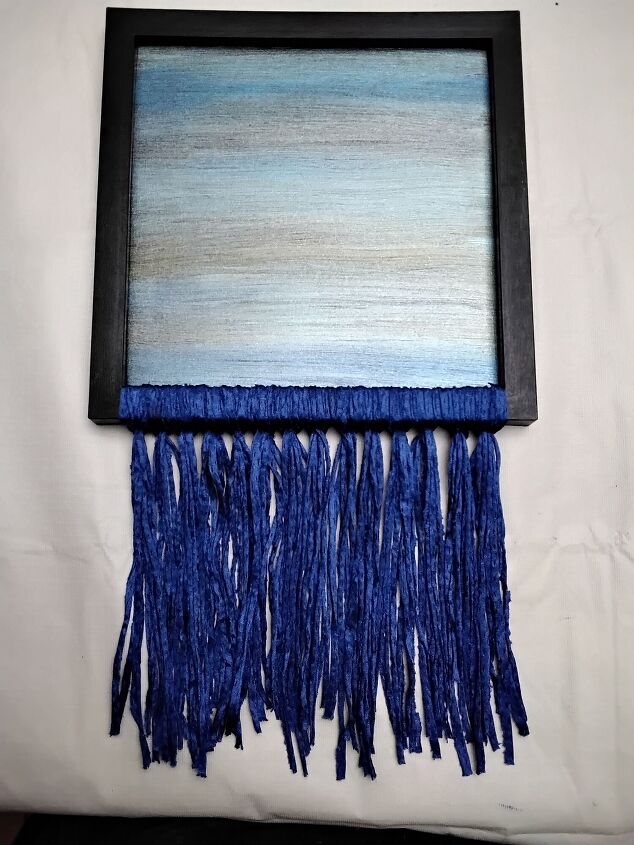
I continued that same application method all the way along until it covered the bottom edge of the frame. Since it was a slippery string fabric I chose to pull the loops tight and secure the strings in place on the back with a tiny drop of hot glue.
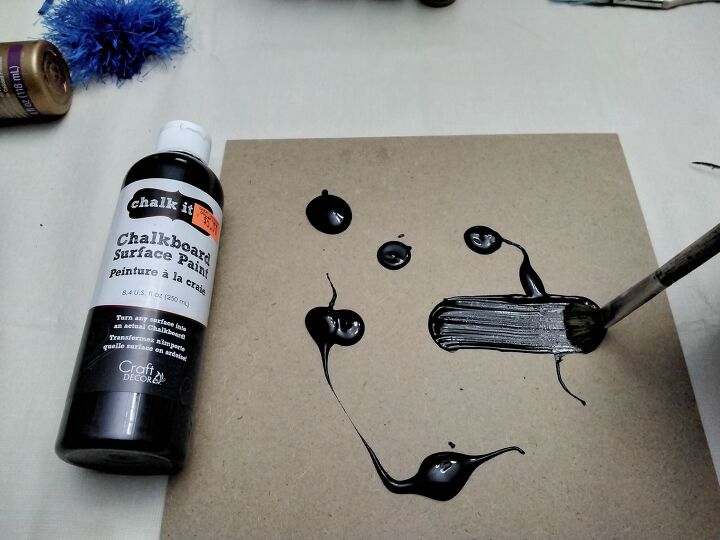
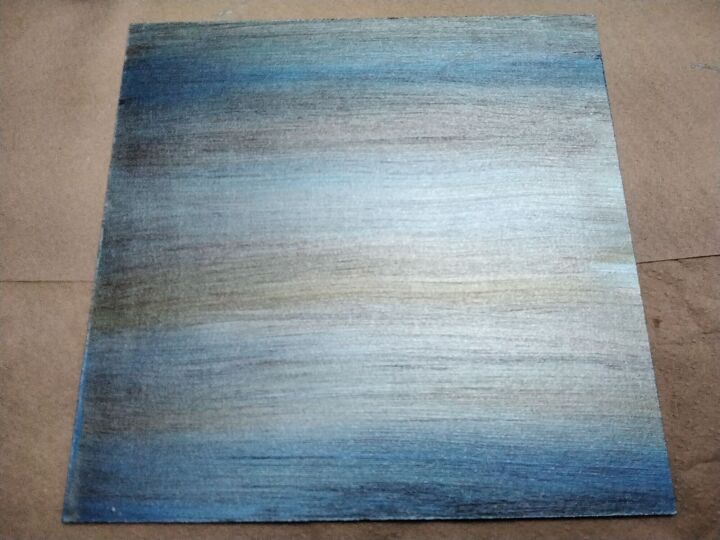
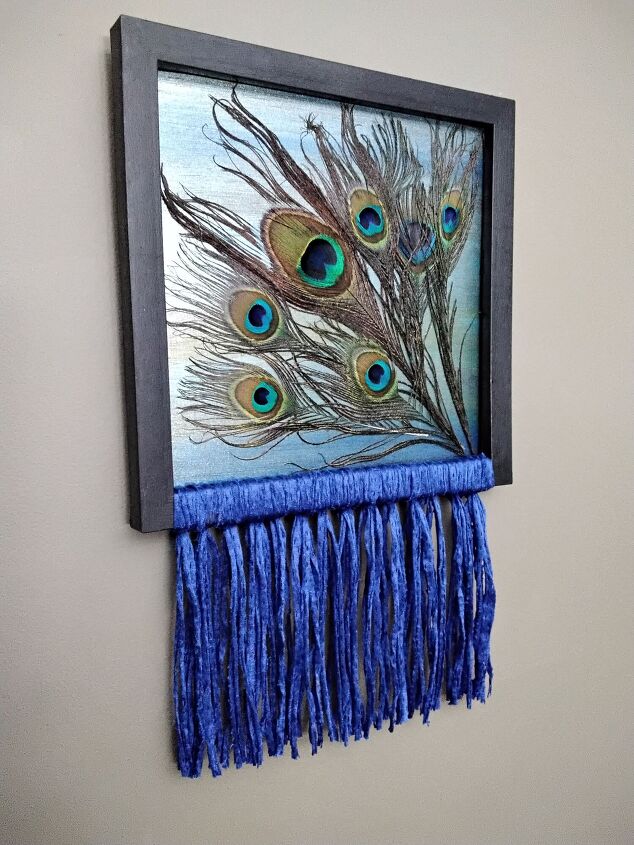
Moving along, the cardboard insert I gave it a base coat of my good, old, reliable chalkboard paint.
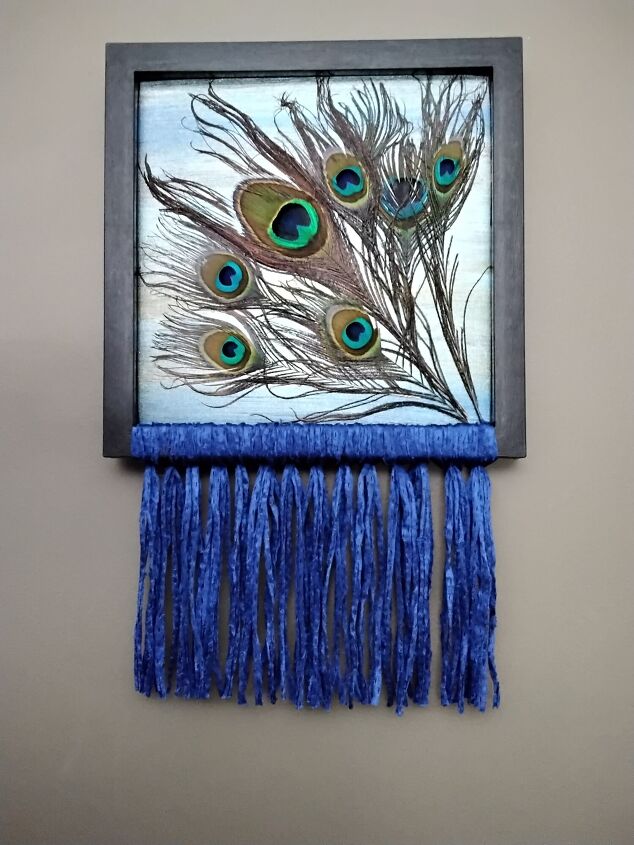
OK so as a crafter there isn't always a set path, there's twists and turn arounds until you see a destination starting to appear off in the horizon. I recently came across these peacock feathers at the goodwill, they were donated bridal decorations maybe? Anyhow...my brain saw beautiful colors to highlight and luckily I had the perfect metallic paints!
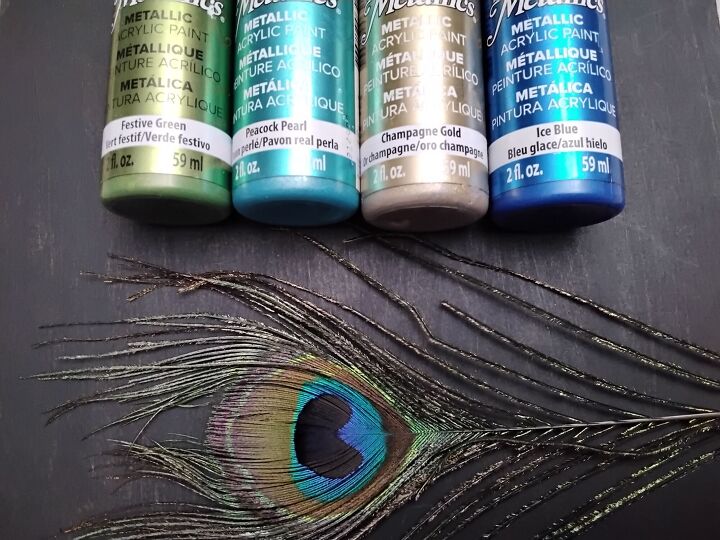
The same as with my cooking...I added a dribble of this, a dash of that and a drop of this one and that one and hope for the best once stirred!
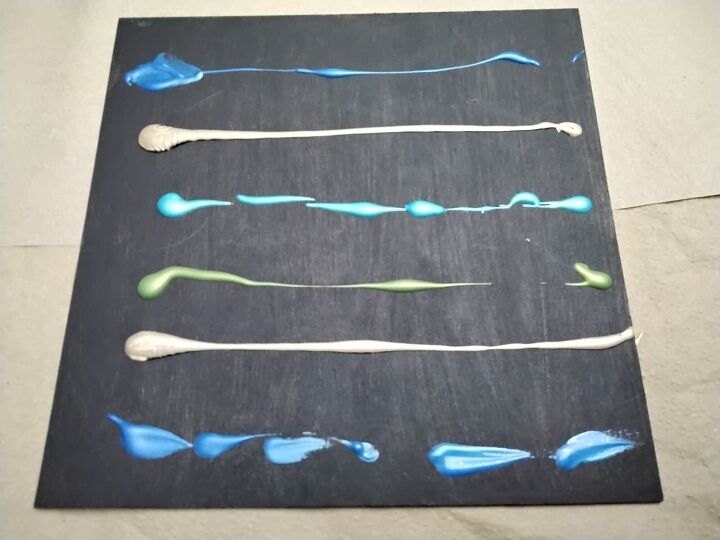
The secret to painting this multi colored background is to merge the paint together with less strokes, not more. I swiped back and forth with the same brush until the black base was lightly covered.
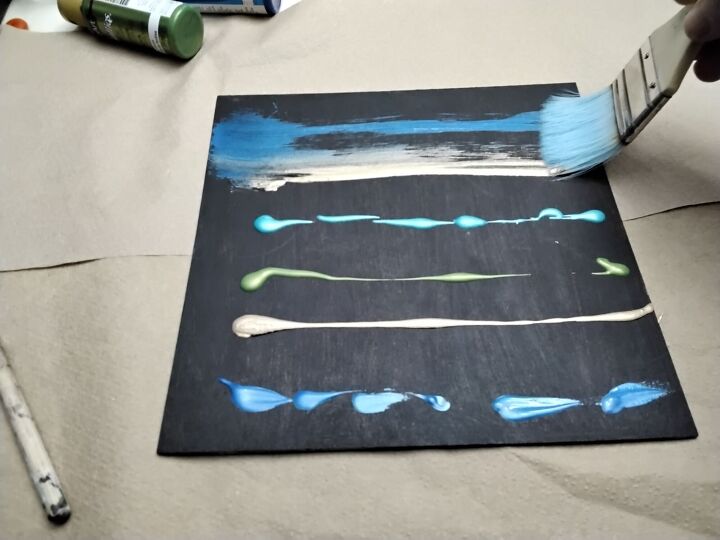
Once completed the bands of color are still visible in their own tone, it's just a feathered blend into the other colors.
Once it was dry I snapped the insert back into the frame.
Next I wanted to add the icing onto the cake, the peacock feathers were going to be the highlight! I placed each feathers upside down on a scrap piece of cardboard and lightly sprayed the back with Aleene's Tacky spray glue.
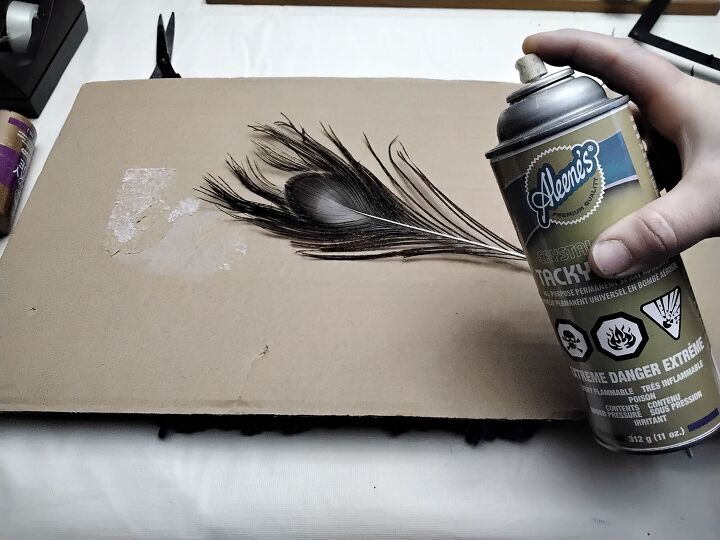
Then I picked it up by the stem and gently placed it onto the frame insert, smoothing it in place with a dry cloth.
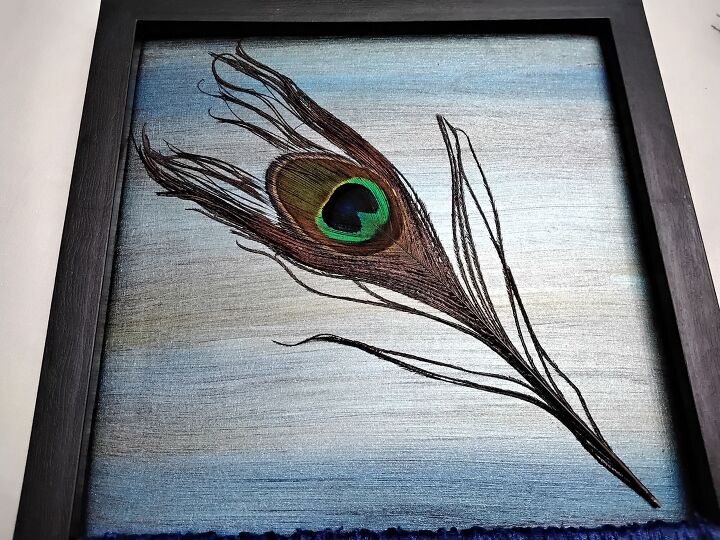
It was much like the Lay's chips slogan, "you can't just have one!"
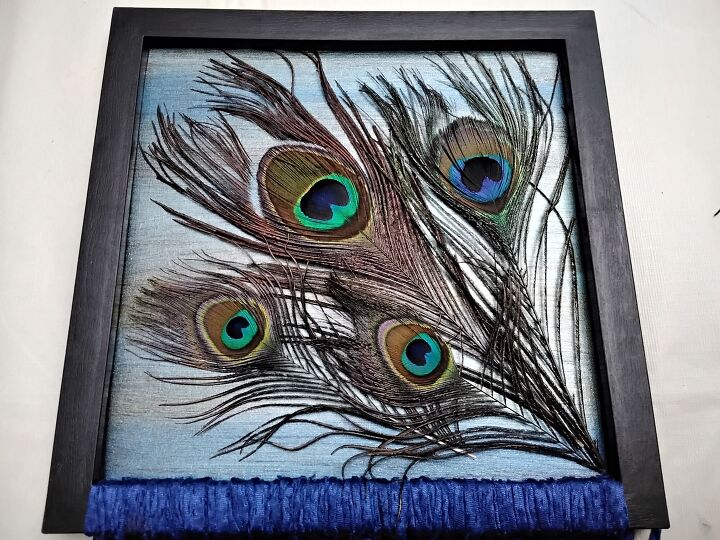
Aren't they amazing? Beautiful, intricate works of art in each single feather! I kept adding feathers until it pleased my eye once I stood off from it at inspection intervals.
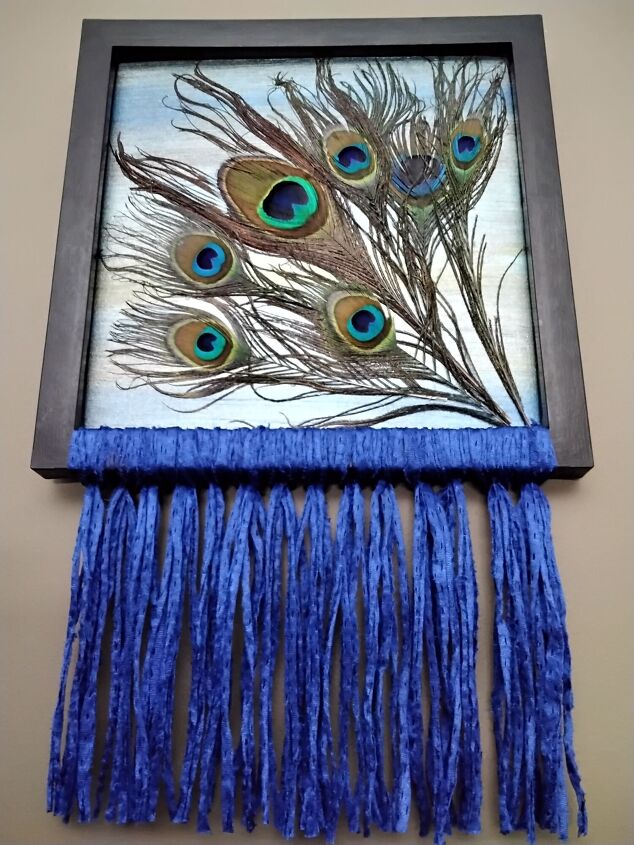
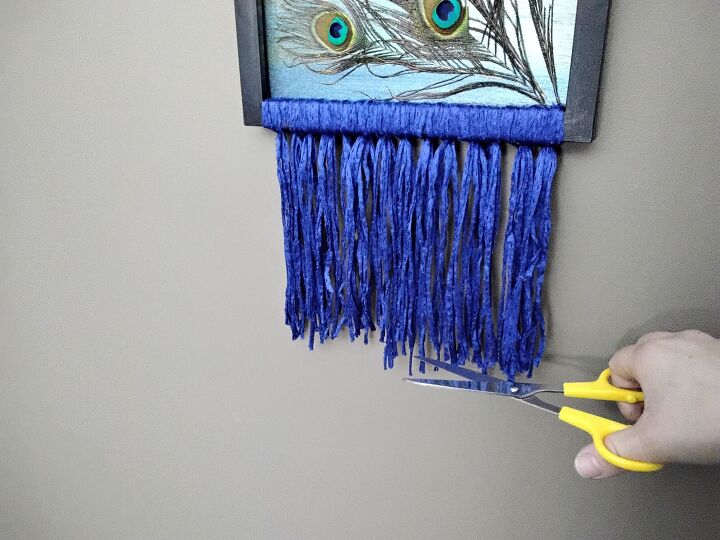
I chose to cut my fringes to give them an even length but that's optional.
It's a great upcycle project and you can take a totally different path with different color schemes, strings or wool and feathers to make it your own.
I want to thank you for checking out my lastest creativity and I sincerely hope it has uplifted, inspired or just entertained you for a few moments of today.


Frequently asked questions
Have a question about this project?