


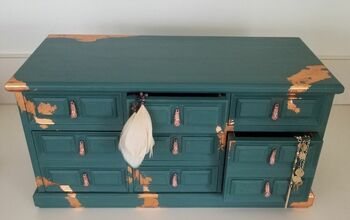
Refurbished Jewelry Box
Makeover an old jewelry box and give it a fresh new look with paint, scrapbook paper, and some creativity. This easy DIY Refurbished Jewelry Box tutorial will give you awesome ideas on how to turn a small wood armoire into a memorable keepsake.
As far back as I remember I have always loved crafting but it wasn’t until the birth of my second son that I decided to take time to pursue anything crafting related. I opened an online shop in which I showcased and sold my crafts. The shop was mainly comprised of my different styles of wooden refurbished jewelry box collection that I would customize. That venture did not last long due to me having to tend to my other responsibilities like work, school, my husband and kids.
Recently, while on one of my many thrift store trips, I found an old wooden jewelry box that immediately sparked my creative side. The jewelry armoire made me think of a dear friend from Navy Bootcamp that I recently reconnect with.
She is a special soul that considers herself a low key fashionista. Her birthday was around the corner and she had tons and I mean tons of jewelry that she could store in this jewelry box. So I embarked on the joyful task of refurbishing the vintage jewelry box.
Whether you find an old jewelry box for yourself or a friend like I did, taking the time to transform something old into something new and personalized brings a lot of joy. This would make a great gift for any occasion, especially with the gift-giving season around the corner.
This is how I did this Jewelry box makeover and you can too!
Supplies:
- 150 grit sandpaper
- Paintbrush
- Blue paint
- Painters tape
- Mod podge
- Hardware
- Scrapbook paper
- Mirror
- Wood glue
- Plywood
- Plexiglass
- Wood glue
- Fabric disinfectant
- Fabric deodorizer
Tools:
- Small screw Driver
- Precision knife
- Miter saw
Refurbished Jewelry Box STEP 1:
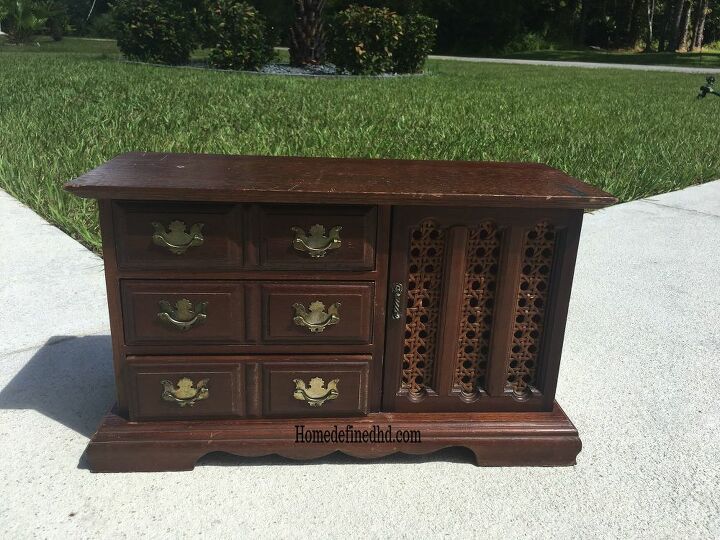
Remove all the hardware.
- Using a small screwdriver, remove all the hardware. Store the hardware in a safe place for later use. I used a small ziplock bag and kept the handles and screws all in one place.
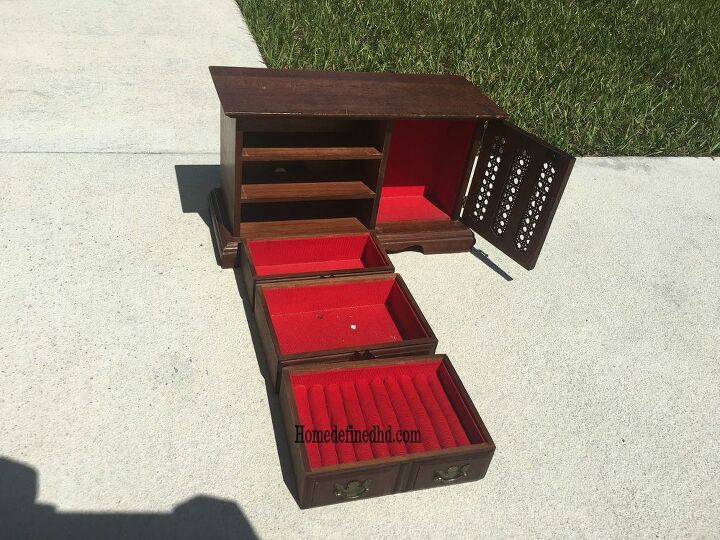
- Remove drawers and doors as well.
Refurbished Jewelry Box STEP 2:
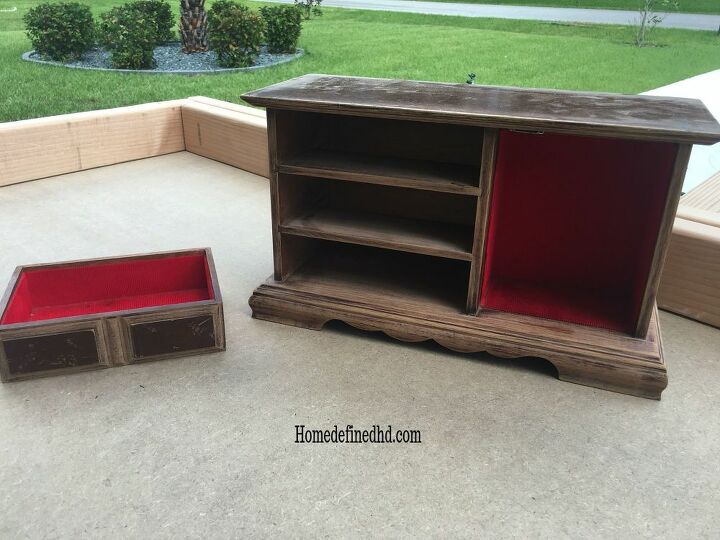
Sand.
- Give the entire box a light sanding using 150 grit sandpaper- this will remove any surface imperfections and will allow for a smoother finish when painting.
- Wipe down the entire box with a damp cloth to remove dust and debris.
Refurbished Jewelry Box STEP 3:
Disinfect and deodorize.
- Clean the existing fabric with a damp cloth. The wooden armoire was lined with a nice red velvet fabric that I wanted to keep.
- Spray the fabric with a disinfectant. Since it is a thrift store find, I found it necessary to spray it with a fabric disinfectant. I let it dry overnight.
- Then spray the fabric with a fabric deodorizer and let it completely dry.
Refurbished Jewelry Box STEP 4:
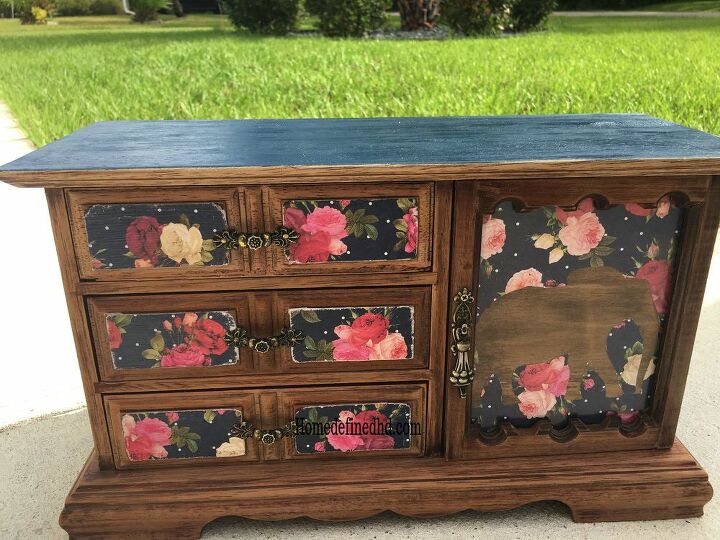
Paint the jewelry box.
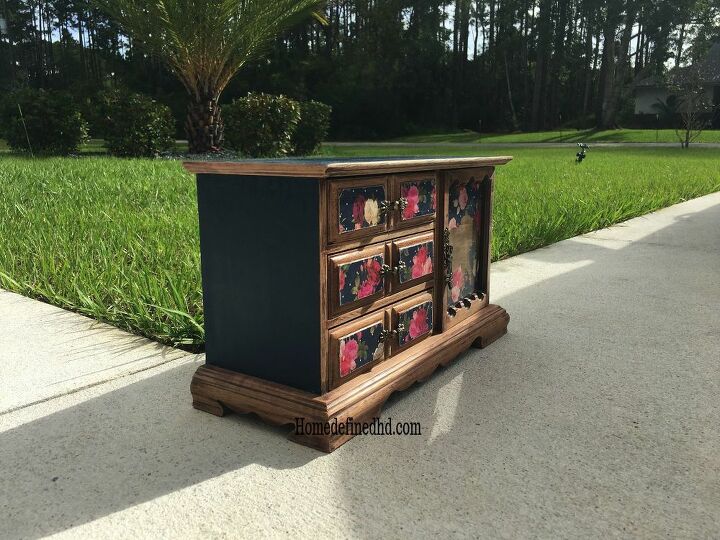
Paint using the color of your choice. I used some dark blue paint that I had and I knew my friend would like it. You can use any color that would match your theme. Use a brush to paint the top, sides, and back- making sure to leave the wood trim exposed.
Refurbished Jewelry Box STEP 5:
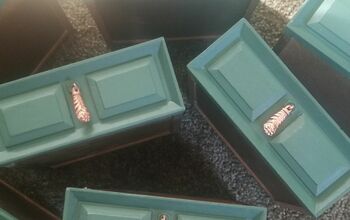
Decoupage the front of the drawer.
- Cut out the scrapbook paper you want to use. I used a floral print scrapbook paper. Cut it slightly bigger than the area you want to cover.
- Apply mod podge to the front of the drawer.
- Followed by applying the previously cut small pieces of scrapbook paper, press them down slightly smoothing out any air bubbles.
- After the mod podge has dried use the 150grit sandpaper to remove the excess scrapbook paper. Sanding away from the paper on all four sides.
- Wipe off the dust.
- Then apply 3 coats of matte mod podge allowing the coats to dry in between.
Refurbished Jewelry Box STEP 6:
Door makeover (Optional).
- You can just sand and leave the door as is. I decided to go the extra mile to make this Jewelry Box makeover as personalized as possible.
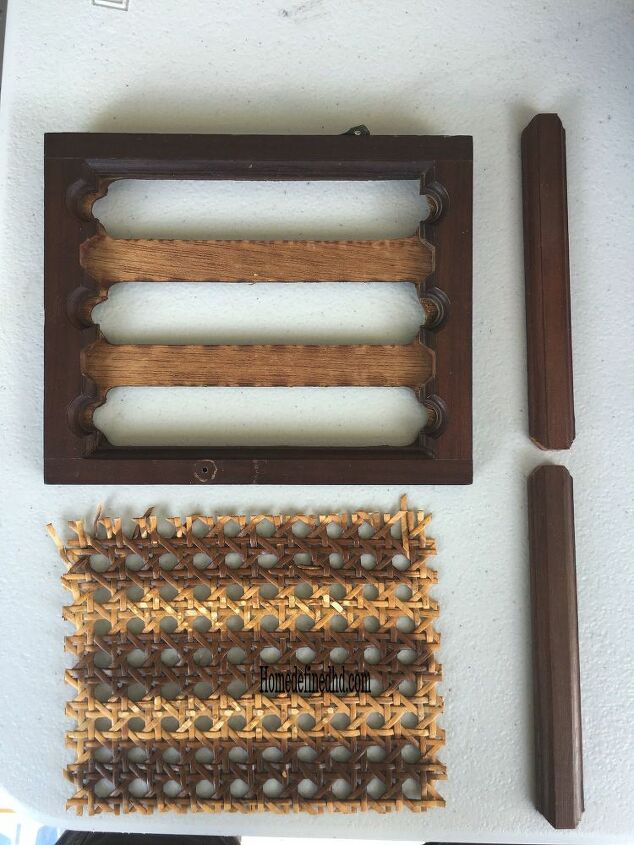
- Remove the basketweave from the back of the door along with the 2 stiles in the middle of the door.
- Then proceed to add a piece of plexiglass. cut to size using a sharp blade on a precision knife.
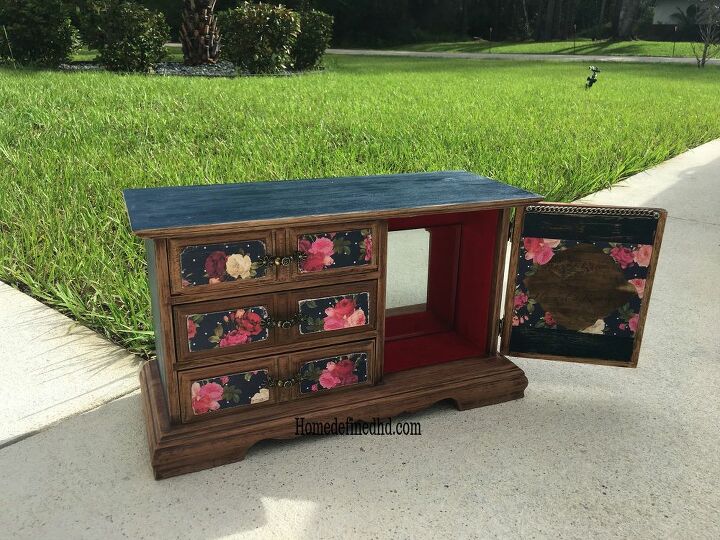
- Next cut a piece of plywood to place in the back. My friend has a profound love for elephants so I cut out an elephant silhouette on the same scrapbook paper I used on the drawer front using a precision knife then decoupaged it to the front of the plywood.
- Then in the back Of the plywood added the quote “ She is a Queen, her soul is Royalty” framed by the same scrapbook paper.
- The best thing about this Jewelry Box Makeover is that you can add as much detail as you want to make it special.
- I then placed the plexiglass in the door and the plywood and attached them to the door using wood glue.
Refurbished Jewelry Box STEP 7:
Replace the hardware.
After everything is dry you can go ahead and put on all the preexisting hardware or replace them as I did. I used the hardware I had in my box of treasures- I have a box in which I hoard things that I think can be used on something else at a later time.
Refurbished Jewelry Box STEP 8:
Enjoy!!!
Now is the time you take a step back and take in the amazing job you have done by salvaging a lifeless Wooden jewelry box. Then you proceed to use or gift it like I did and hope that the person who receives it enjoys using it as much as you enjoy making it!
Resources for this project:
See all materials


Frequently asked questions
Have a question about this project?