


Reversible Picnic Blanket From Old Jeans
I finally made my own picnic blanket by upcycling and repurposing all my old jeans! It's been on my DIY list for some time now but I'm not an experienced sewer so I only built up the confidence to attempt it recently!
I used 10 pairs of Jeans in total plus more scraps and old clothing. Below are my top tips for how to make your own!
First up if you are unsure exactly what a quilt is I've gone through all the basics on that over on my longer blog about this project here.
If you are already a quilter just read on!
Also here is my tutorial about the best way to cut up your old jeans for projects like this - it'll make sure you get the most fabric out of them before you start!
Starch
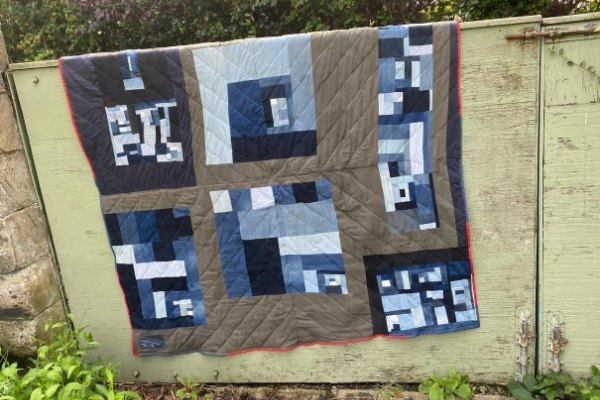
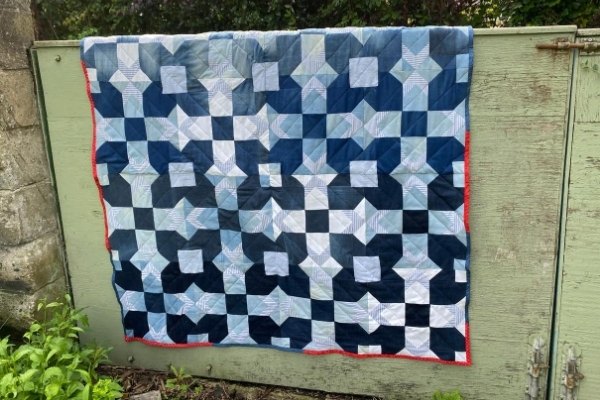
I followed a quilt pattern from Patchwork & Poodles for the front. It's called the Inkling Quilt and you can get it here.
For the back I made a scrappy improv pattern of my own which I'll detail below. The scrappy side could also be used as a quilt top as the whole thing is completely reversible.
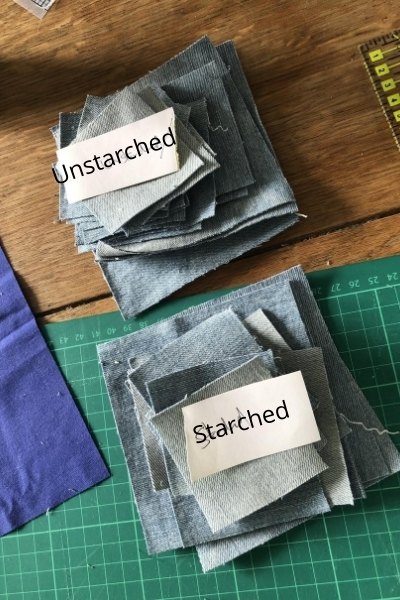
For all of the denim I used I starched it before cutting it into the pieces for the quilt. This made it much more stable to work with considering it had a good deal of stretch to it.
Another option is interfacing but I couldn't face cutting out all the quilt pieces AND a whole load of matching interfacing pieces too!
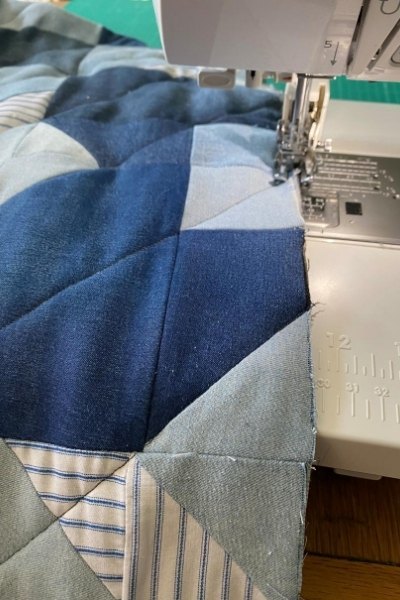
Denim Needle
The major thing I did differently for this quilt was to use a denim needle in my machine. I didn't have any problems even though I was sewing through two layers of denim (the quilt top and backing both had denim blocks with multiple seams) and a thin layer of polyester batting.
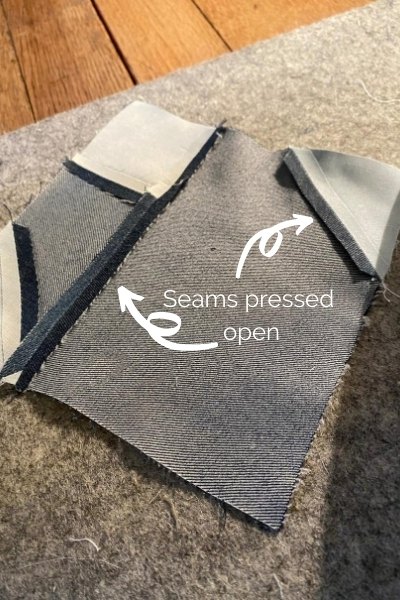
Press your seams open
Whether you are using a quilt pattern or a scrappy improv technique you'll want to press your seams open instead of to the side like you normally would in quilting.
When you are sewing with denim it's all about keeping the bulk down as much as possible -pressing your seams open will make it all much easier to quilt when you get to that stage.

Light Loft Batting
A lot of posts I read before making this quilt said if you are using denim you shouldn't use batting at all.
But I wanted my picnic blanket quilt to be soft and cushy so I went ahead and tried a light loft polyester batting. It was so thin when it came out of the package I thought it was too thin!
But actually my quilt is nice and comfy to sit on on the ground and this batting was super easy to sew with so I think I made the right choice!
Improv Quilt Technique
The front of my quilt as I mentioned was from someone else's pattern, but the reverse side was my own scrappy creation and to be honest I can't decide which side I like best!
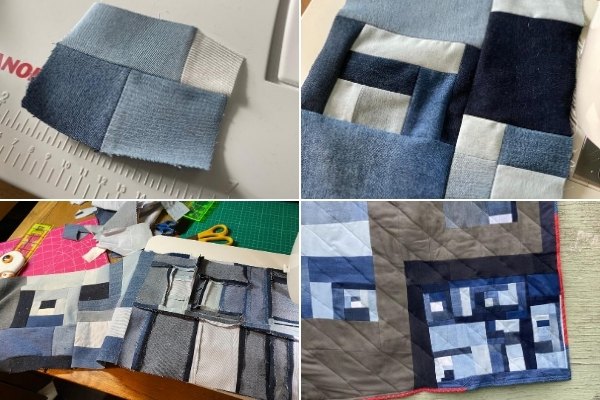
To make the scrappy side I started with the left over pieces from the patterned side and started to 'improv piece' them together.
Improv sewing, or improv quilt piecing is when you just start sewing pieces together without a plan, which is pretty much what I did.
But what you do do as you go along that makes it work out is to match evenly sized pieces to start off with. Sew them right sides together and then trim any excess.
You then iron open your seams and use that piece to match with another piece with that is the same length on one of the sides.
Then you just continue in the same way until you run out of scraps!
You can chain piece this as well just like I did with my patterned pieces.
I ended up with several scrappy denim blocks – with lots of seams on the under side! – that followed a rough log cabin style design.
You’ll also see some bits of my husband’s old shirts in there too.
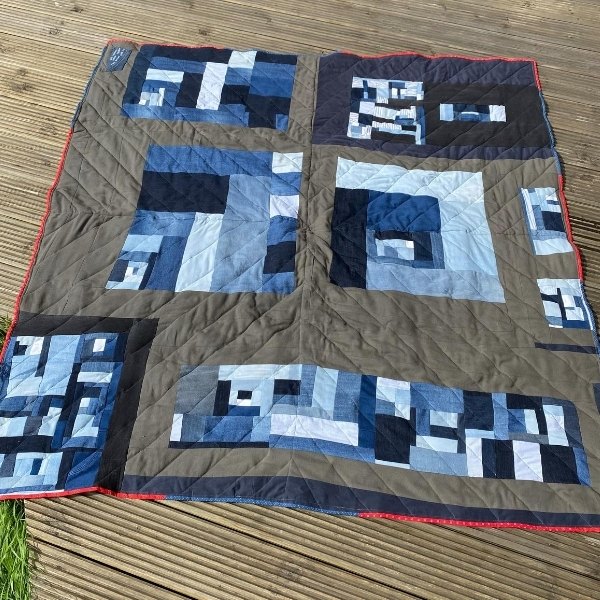
Extra Fabric for Framing/Borders
My improv blocks weren’t going to be enough to cover the back of the quilt though.
The front side of the quilt was 64" by 64" so that was what I was trying to match for the reverse side.
I rooted around in my house and found a thick piece of mud coloured fabric that I had bought used on eBay thinking it was going to be thinner (so it didn’t get used as curtains as I had intended) as well as an old pair of blue khaki style trousers that didn’t fit and a pair of black denim jeggings that didn’t make it into the quilt top.
I cut them all up into strips and used them to frame my scrappy denim blocks. I just kept framing my blocks until it was big enough for the size I needed.
You could use the same technique to make a smaller or larger quilt.
Quilting
For the actual quilting - the stitching that holds the 3 layers (the quilt top, back and batting) together I went for an X shape.
I used a walking foot and my denim needle.
I started by stitching one line straight down the middle of the quilt from top to bottom and then straight down the middle from side to side.
I then used the edges of the blocks to stitch from one edge to the middle and back to the edge again every 2.5″ or so.
I was essentially making two sided triangles getting smaller and smaller going from the centre to the edge on each side.
I did this for every side and when I was finished the quilting looked a bit X like.
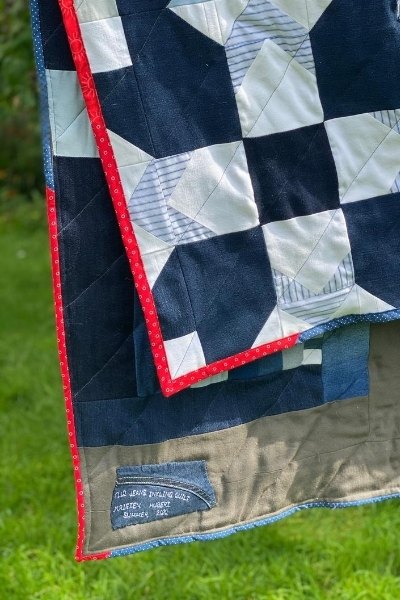
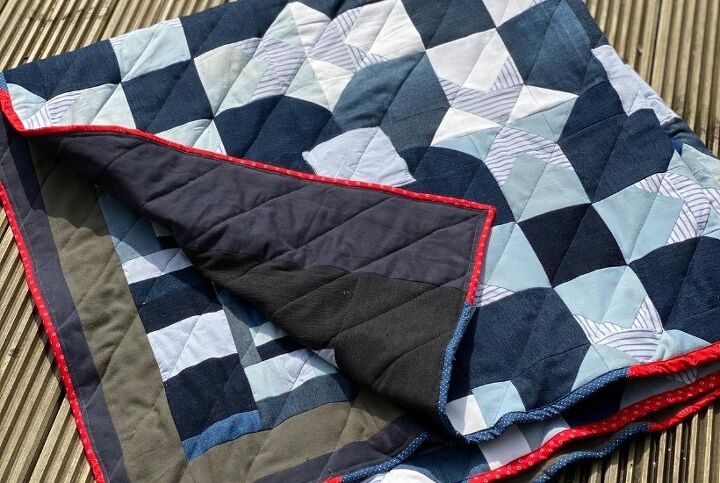
Binding
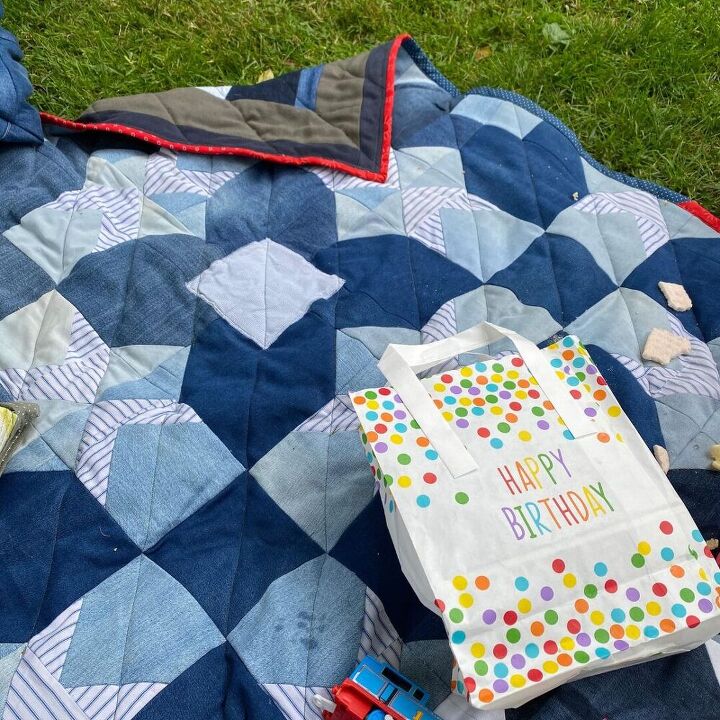
I chose not to use denim for the binding itself. I wanted a pop of colour so I used some leftover jelly roll strips in different patterns of red as well as some navy blue polka dot fabric to make a 'scrappy binding'.
I really like how it turned out!
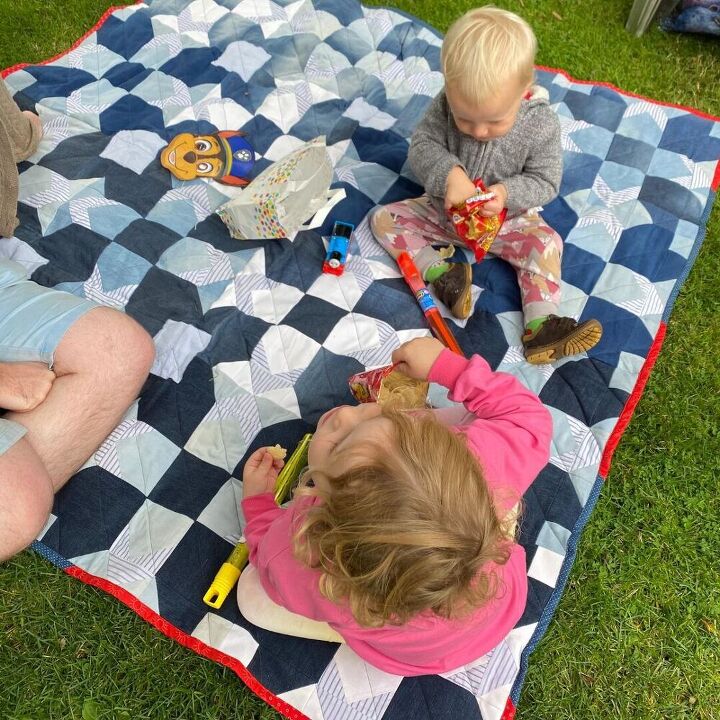
Here are my kiddos enjoying a picnic on their new (well newly made into a quilt even if the jeans aren't new!) reversible denim picnic blanket.
This is the front.
I have lots more denim upcycling projects on my blog so do come for a visit some time!
Resources for this project:
See all materials


Comments
Join the conversation
-
I love this in denim with the stripe. It is a wonderful quilt and looks much different than the original. I think I like your version the best.
-
Love the jeans quilt! So cute.💕


Frequently asked questions
Have a question about this project?