


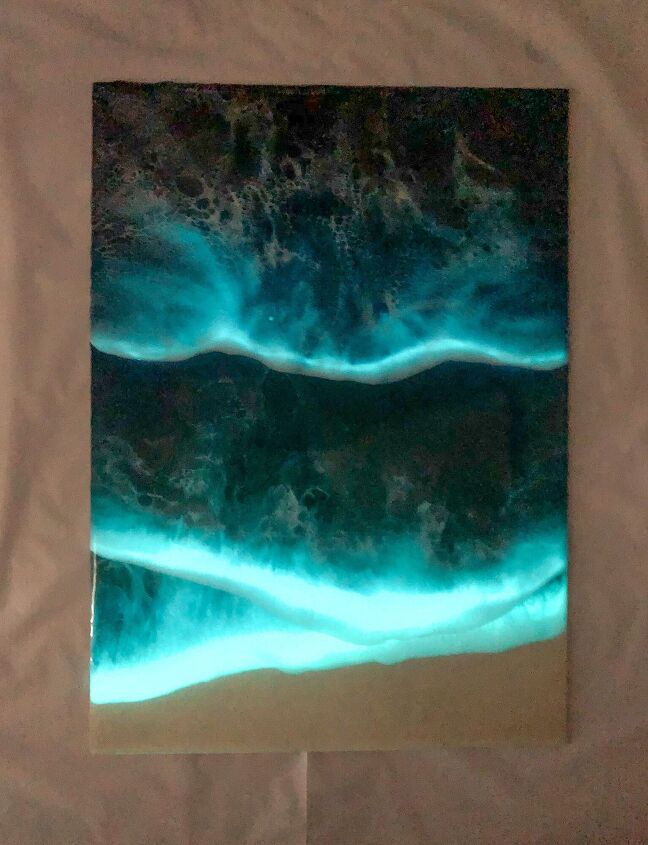
Secret Luminous Resin Waves - Glow In The Dark

Hello all, thanks very much for stopping by and taking a gander at this project!
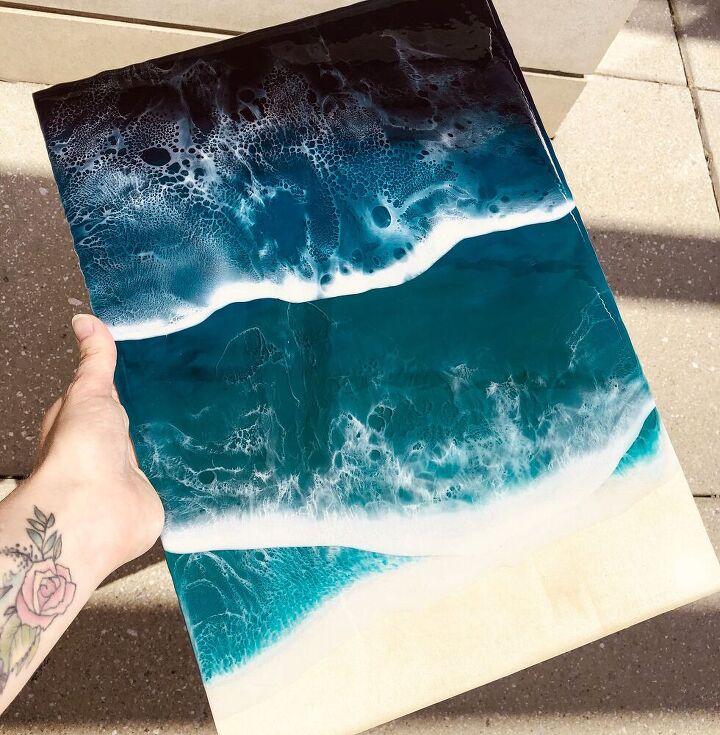
Yes it's October and summer is long gone....but here's some beachy goodness for you!
If there's one thing I reckon I've learnt whilst being here in America it's that you all seem to love ocean stuff no matter the time of year...🤞🏻
I also have a YouTube video of this exact project up on my channel now so I'll add the details and link for that below 👍🏻
WHAT YOU'LL NEED
- Resin - Use my code HANNAH and this link for 10% off with free shipping from Rockstar Resins
- Wooden board/canvas (mine is 15 x 10.5 inches)
- Glow in the dark pigment
- Tape
- Paints
- Heat gun
- Blow torch
- Mixing containers & sticks
- Sand paper
Use protective wear and follow safety guidelines when handling resin.
STEP 1 - WATCH MY YOUTUBE TUTORIAL
As I mentioned above, this project is up on my YouTube channel now! Simply click the video link above to watch.
I upload loads of crafty videos, many of which are my Hometalk projects, so please consider checking out my channel and subscribing too 👍🏻
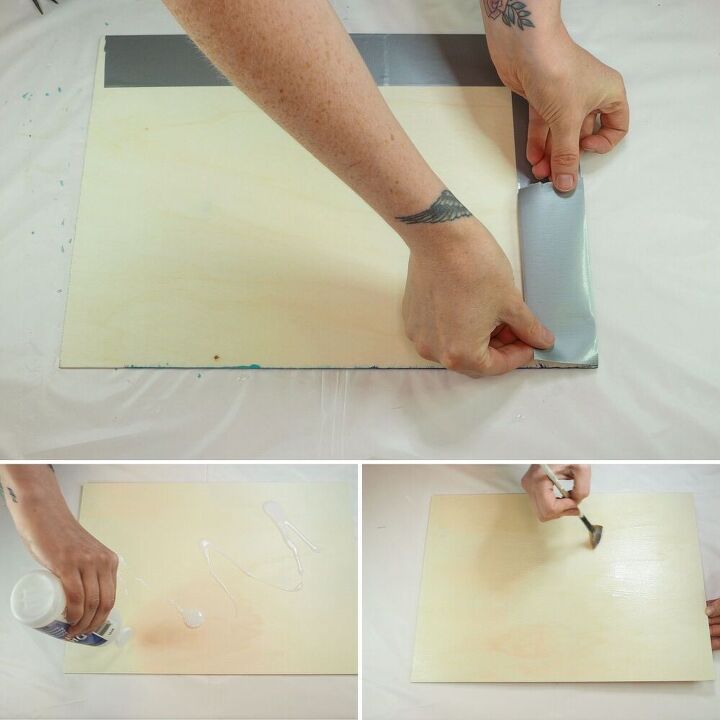
STEP 2 - PAINTING THE OCEAN
Protect the back of your board/canvas with some tape. This will allow for easy removal of resin drips later.
I add a satin varnish layer to the front side of my board but I don't think this will be necessary for everyone. My board was completely unfinished and very porous so I wanted to create a more resistant surface on which to start painting.

Using different shades of blue, paint on the ocean, covering approx 4/5ths of the board.
Use darker shades of blue at the back and gradually blend into lighter blues the closer you get to your manufactured shoreline.
Then allow the paint to dry out fully.
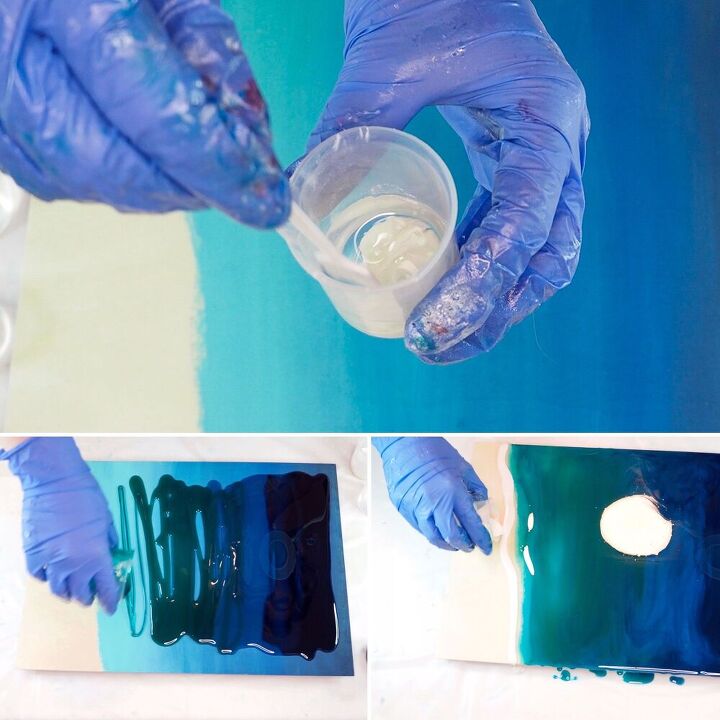
STEP 3 - FIRST RESIN LAYER
Mix approx 200mls of resin and divide this into 5 smaller containers.
Colour 3 slightly larger portions in complimentary shades of blue to go with your painted ocean. You can use acrylic paints if you do not have resin liquid pigments.
Leave 1 small portion of resin clear.
Colour the last (small) portion of resin using white liquid pigment (or acrylic paint) and add in a generous amount of the glow pigment powder. The packet says to mix a 4:1 ratio of resin to powder.
Mix the powder in thoroughly until smooth.
Pour the blues onto the painted section of the board and blend them together with a gloved finger or craft stick.
Add a thin line of the clear resin along the border of the bare board and in front of the blue resin.
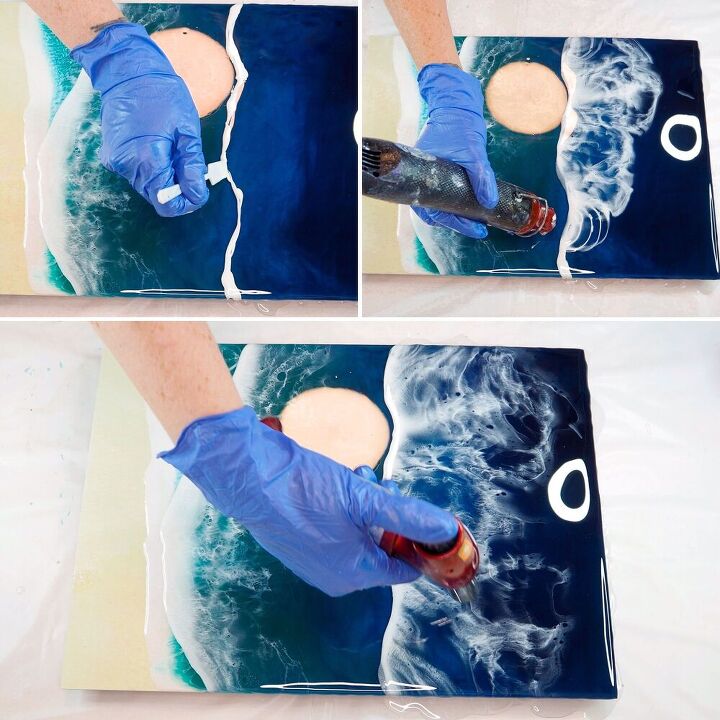
Give the white, glow pigment one last mix before adding this to the board in a line in front of the clear resin.
Your board should now have a rainbow of resin colours on it in this order - bare board, white glow pigment, clear, lightest blue, medium blue, darkest blue, with an ombre effect throughout the blues.
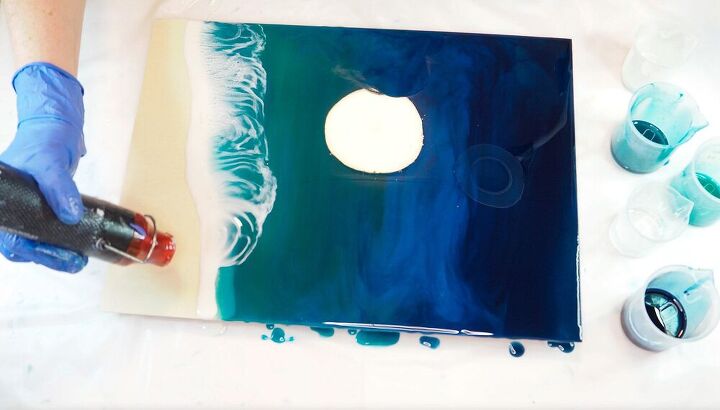
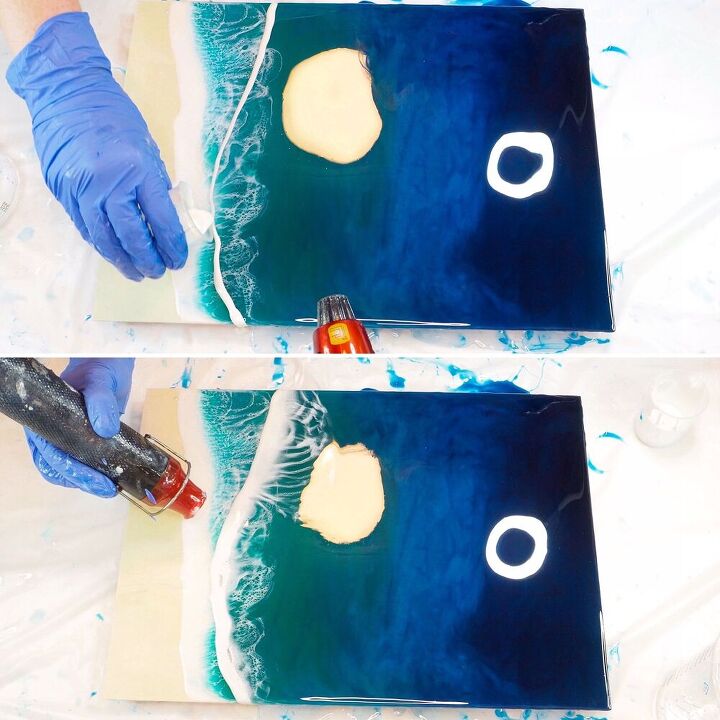
With a heat gun, blow the white glow pigment up the board through the other resins.
This will create ripples in the resin and leave behind billows of white that look like waves.
Little cells will form in the resin when it gets very hot. This can happen in a few different ways:
- Blowing continuous defused heat over the waves with a heat gun (my preferred method)
- Applying a few quick blasts of more intense heat over the waves with a blow torch (works great, just be careful not to burn the resin)
- Allowing non-celled waves to cure on their own - the curing process itself can sometimes create the cells we try to manufacture due to the temperature that the resin reaches whilst curing (less foolproof though)
I like to use a combination of 1 and 2 and then hope that 3 gives me some extra little cells that I wasn't expecting.
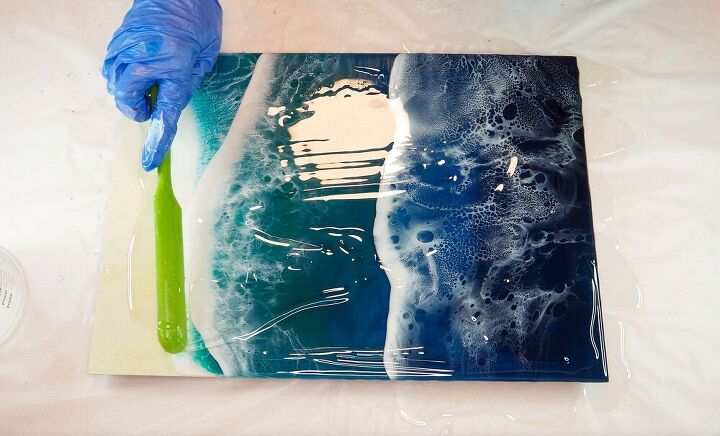
Once you're happy with how your first wave looks, allow the resin to cure.
STEP 4 - SECOND & 3RD RESIN LAYER
For multiple waves going up the board, simply repeat step 3 as many times as you like.
Reduce the amount of resin you mix the further up the board you go as you will of course be covering a smaller surface area each time.
I add 3 waves in total so that my board is fully covered in frothy cells, but I can suggest a couple of ways of achieving a similar look that doesn't require 3 separate layers to cure individually:
- You could do one big wave for your first wave (a little like how my 3rd one looks) and cover most of the board in one go, or
- You could add multiple waves on the same layer in one go. I often do this with other ocean pieces that I make, just do one wave at a time starting with the closest to the shore line and work your way back
I did mine all separately as I wanted my first 2 waves to slightly overlap which isn't really possible with one cure.
STEP 5 - FINISHING TOUCHES
Add a final coat to the entire piece to get a shiny finish on the unpainted part of the board too. This step is of course not necessary as you may prefer to leave that part of the board unfinished.
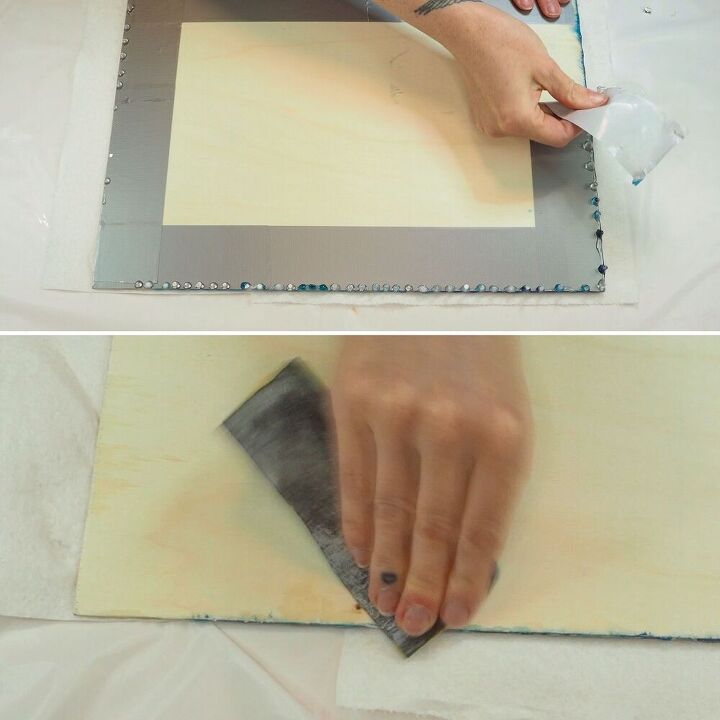
Once everything has cured, removed the tape from the back and sand off any rough edges.
Some resin may have seeped through depending on how porous your board is. I had to sand off a thin layer of my board to remove some blue bits.
And that's about it.
All that's left to do is to charge your waves in the sunlight (or under uv light for a very speedy charge) and watch the waves glow.
My camera is so rubbish (or maybe I just don't know how to take a photo in the dark) so unfortunately I couldn't get a picture that did this piece justice, but in person, it looked so amazing! Even better than I thought it would!
I hope you enjoyed this post.
Please remember to check out my YouTube channel as well as the video of this project. Please also consider subscribing 🙏🏻
I have an Etsy Store too where I sell lots of my handmade goodies. Please check that out if you get the chance.
Thanks again for joining me today,
Happy crafting x

Resources for this project:
See all materials


Comments
Join the conversation
-
Such a beautiful piece.
-
The "night-view" of it looks like true ocean phosphoresence...very cool! :)


Frequently asked questions
Have a question about this project?
Hi. I do the same but when i blow the white the resin retracts back and i lose any cells that may have formed. What do u think might be the issue