


Sharpie Mug Tutorial
4 Materials
$5.00
4 Days
Easy
Make a custom coffee mug using a sharpie paint pen, an inexpensive mug and alphabet stickers. This is an easy DIY project for beginners!
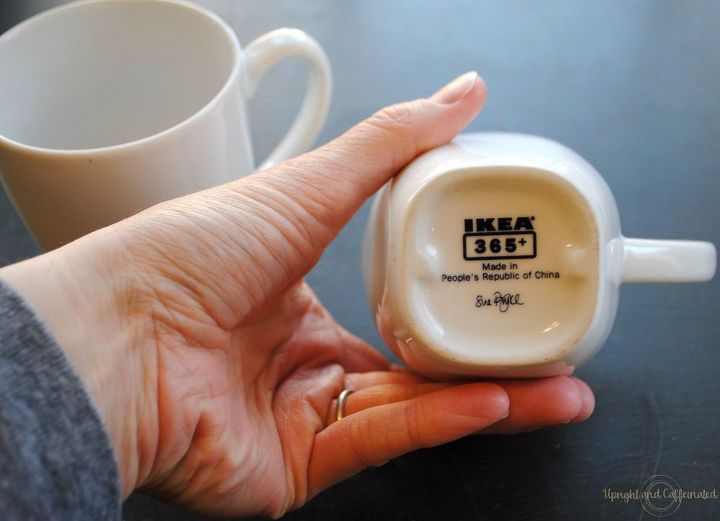
Grab an inexpensive mug. I used these IKEA white mugs. Start by cleaning your mug with alcohol. Simply put a little rubbing alcohol on a cotton swab or a paper towel and wipe the mug where you plan to “paint” your design. Make sure the alcohol is completely dry before you start designing.

Place alphabet stickers on the mug.
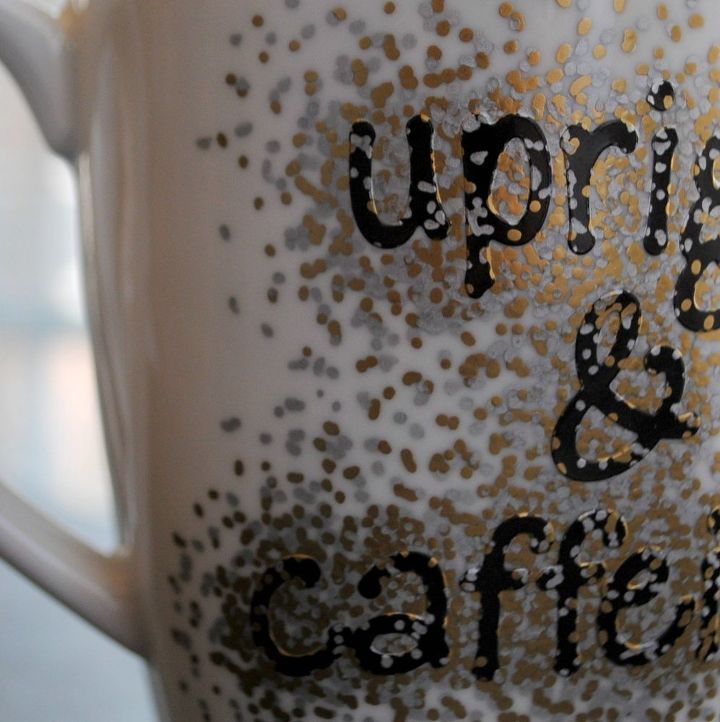
Begin dotting! Use (affiliate link) fine point Sharpie Paint Pens. Make sure to use the oil-based Sharpie Paint Pens. Do not use regular Sharpie markers for this project. Dot all around the stickers and on top of the stickers. You can use a single color or multiple colors.
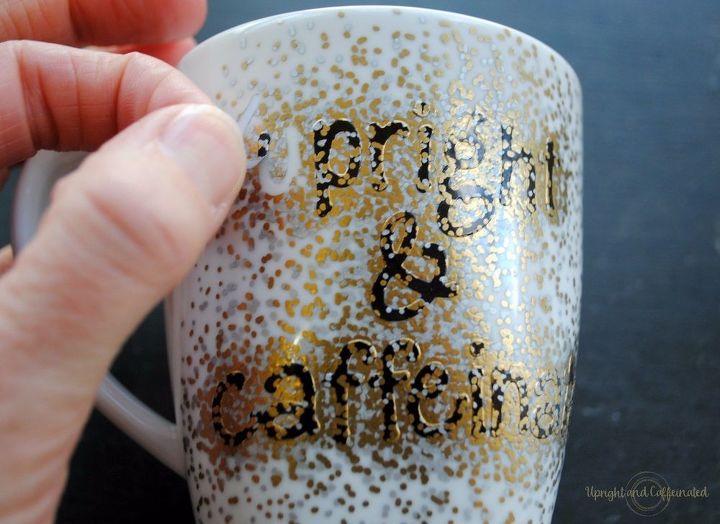
Once your design is how you want it, let it sit for a couple of hours. Carefully peel off the stickers to reveal a lovely negative image! Let the mug dry for three days and then bake it. To bake the mug, put it on a cookie sheet and pop it in a cold oven. Close the oven door, set the temperature to 400 degrees and set a timer for one hour. After one hour, turn the oven off and don’t open the oven door. Allow the mug to completely cool in the oven (leaving it in overnight is a common practice). You want the mug to heat slowly and cool slowly.

And there you have it! A completely custom coffee mug. These make great gifts for friends, family and teachers!

Want more details about this and other DIY projects? Check out my blog post!


Frequently asked questions
Have a question about this project?