


Slat Wall Electrical Panel Cover

There are two choices when faced with an eyesore that is NOT part of the decor plan.
1. Hide it so it just blends in and you forget about it.
2. Turn it into a statement feature.
In order to deal with the electrical panel in our basement family room, we opted for a little of both!
Best wood dowels!
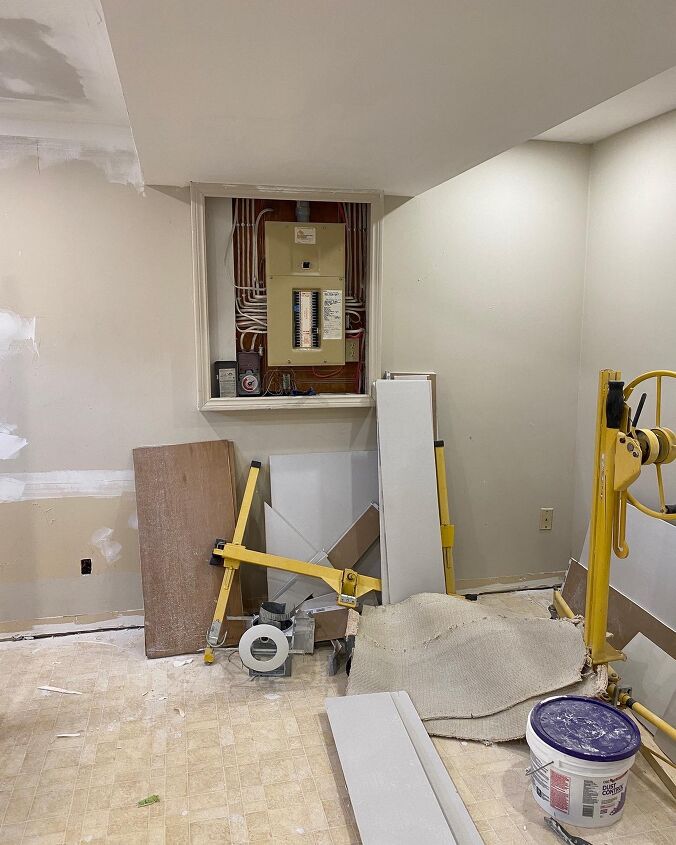
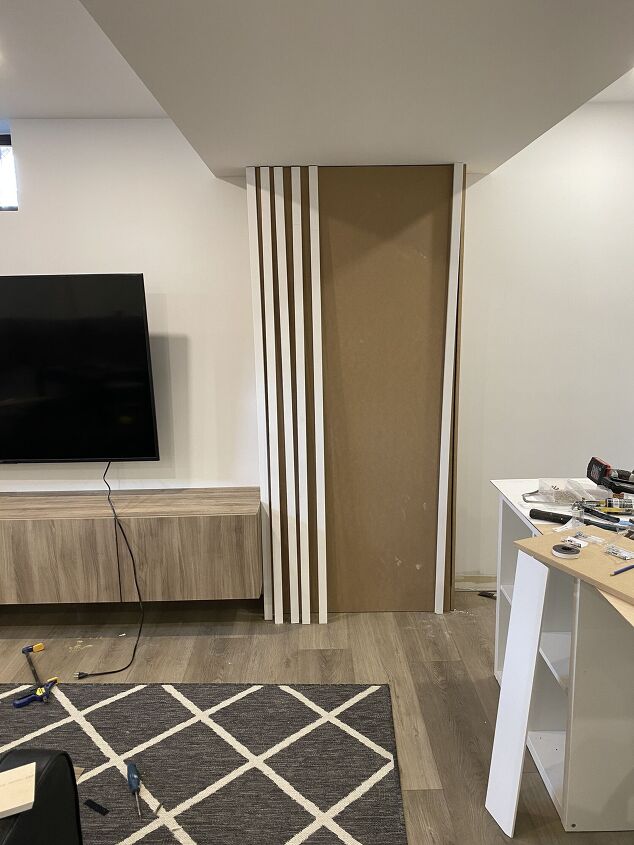
The starting point. An electrical panel on the main focal wall of the family room. Nice. Every girl's dream. But, it's a basement! The panel has to live somewhere and I am quite fond of having electricity so being disappointed about its existence seems to be off the table.
The original owners had boxed it in with little sliding doors for access and it did a good job of just camouflaging its existence in this 1980s basement.
I had bigger and better (and more stylish) plans!
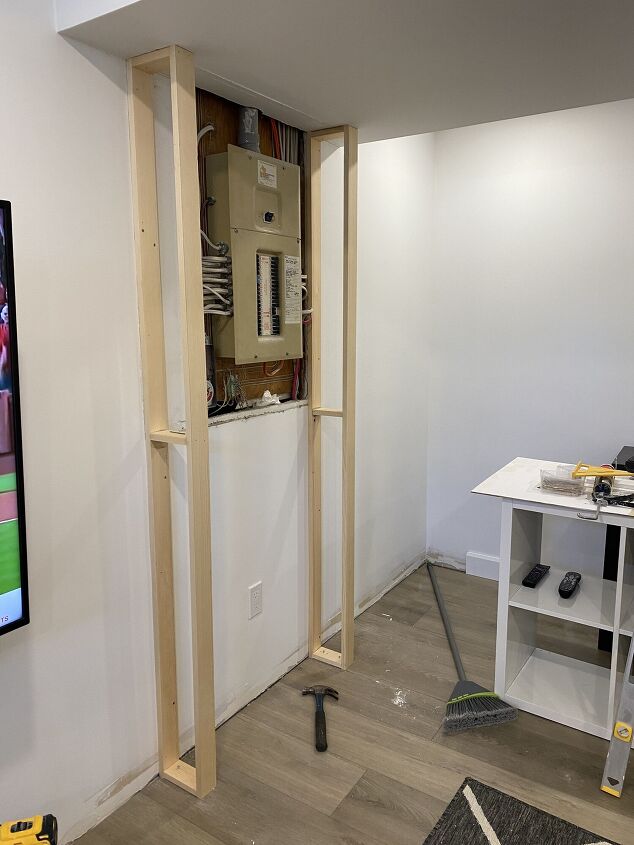
I decided that we (ok, I decided that Dave) would build a floor to ceiling box with a full height door. Almost like a very shallow closet. The first step was creating a frame for this little "closet". It needed to come out about 6 inches from the wall to clear the panel.
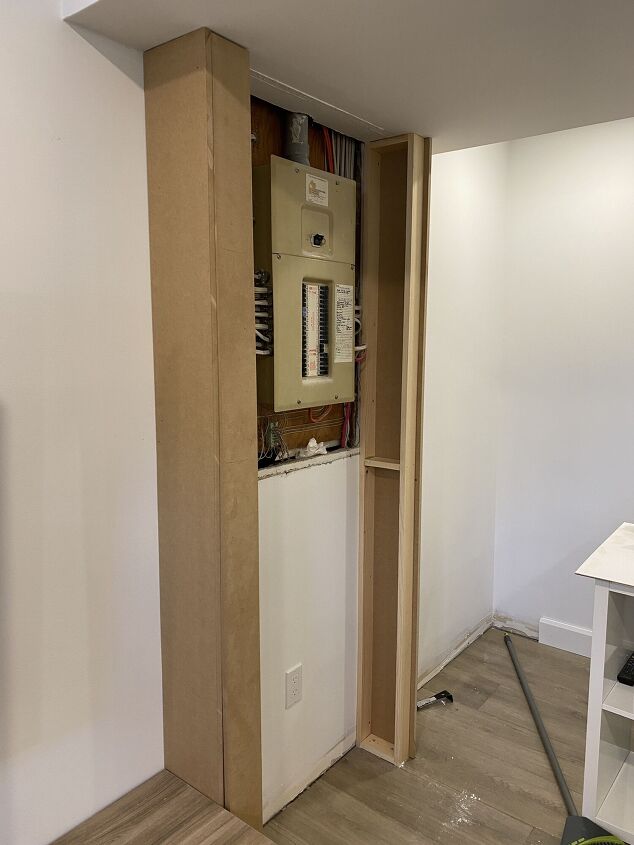
We decided to go with MDF to cover the framing because we planned to add a slat wall detail to the entire project after it was fully constructed.
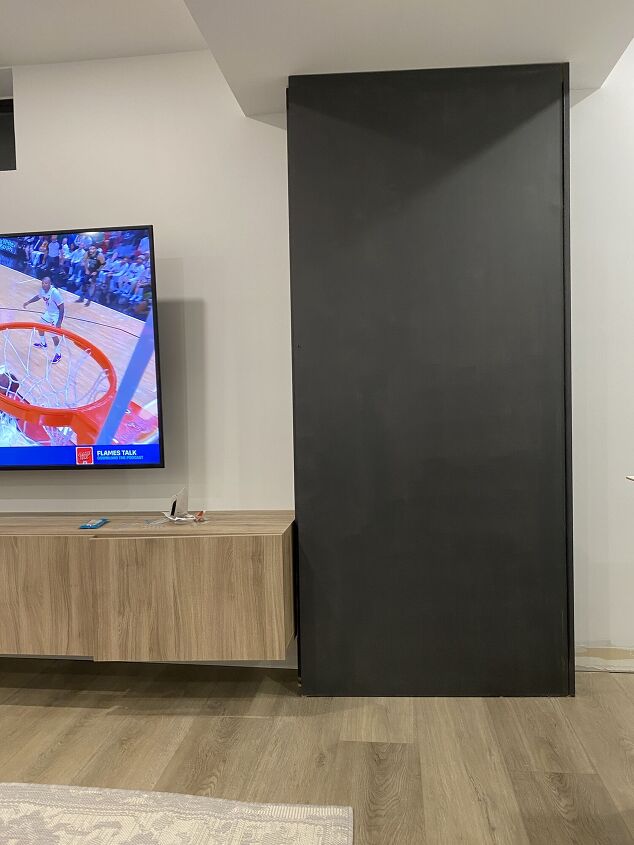
The door was attached using a piano hinge. This type of hinge had two main benefits for this project:
- the profile is so slim that you barely see it
- there are points of attachment along the entire length of the hinge (i.e. the full height of the door) which helps keep the door level and distributes the weight evenly
After the closet was fully framed and covered in the MDF, we played around with the spacing for our slat wall feature. We used primed MDF 5/8in x 1.5in boards. In the end we decided on a 1/2 in space between slats and used 24 pieces of trim to complete all sides of the feature.
I always paint moulding feature walls before adding the trim detail. These boards got one coat of primer followed by a coat of Benjamin Moore Wrought Iron in eggshell (one of my all time favourite colours!).
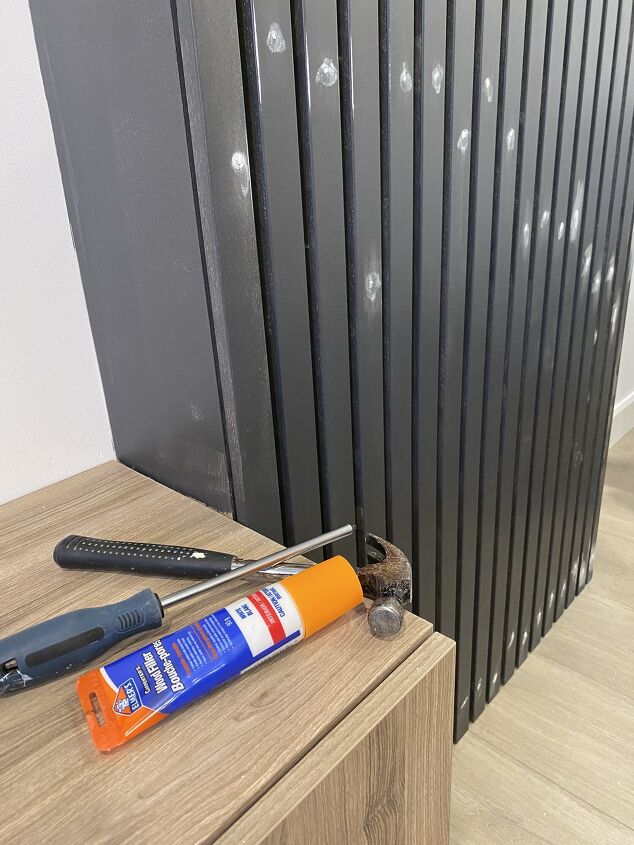
The slats were attached with a nail gun followed by the tedious task of insetting any of the nails that were not flush. I just used a Robertson screw driver and a hammer. I have to admit, it took me a minute to get the hang of it but it worked like a charm! I filled in the holes with wood filler and then sanded uses a palm sander.
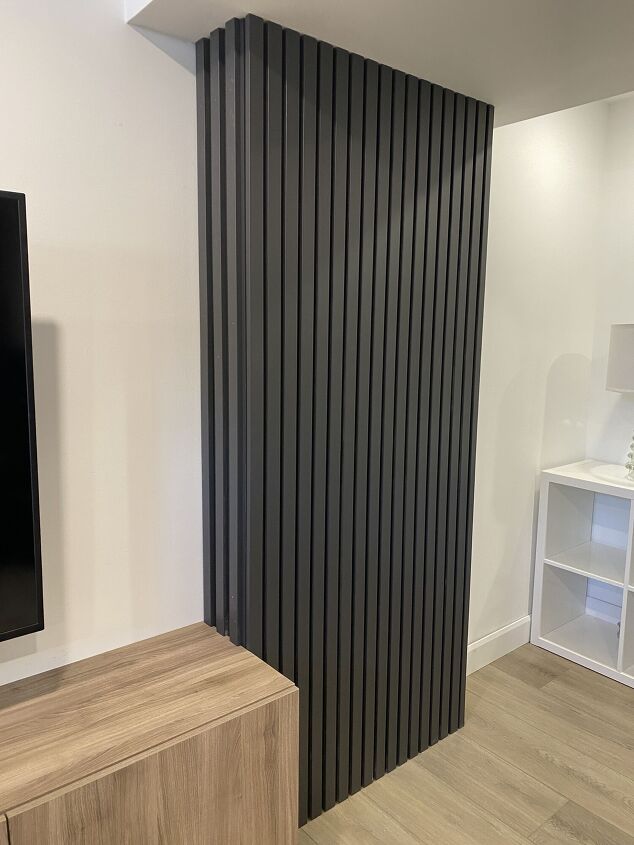
Two more coats of paint to finish it off and she's a thing of beauty!
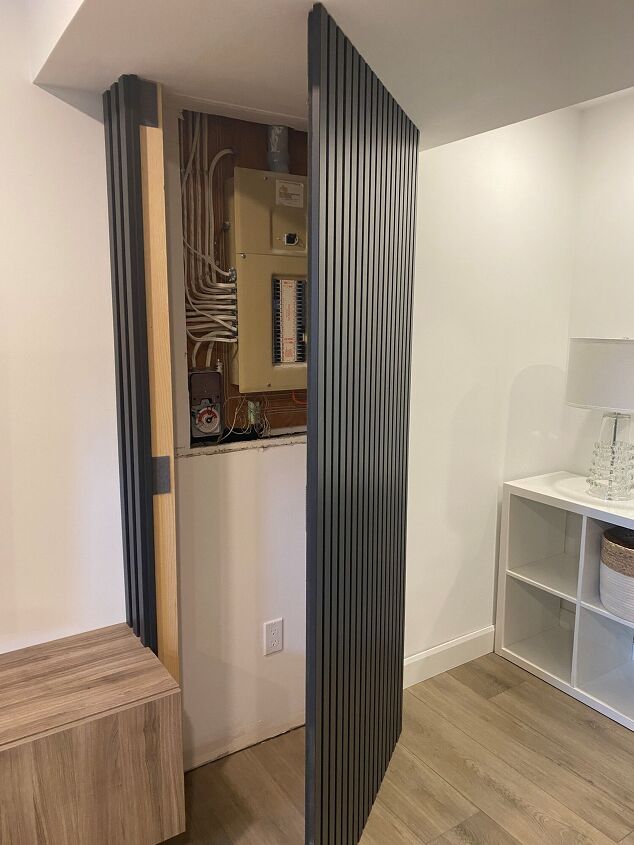
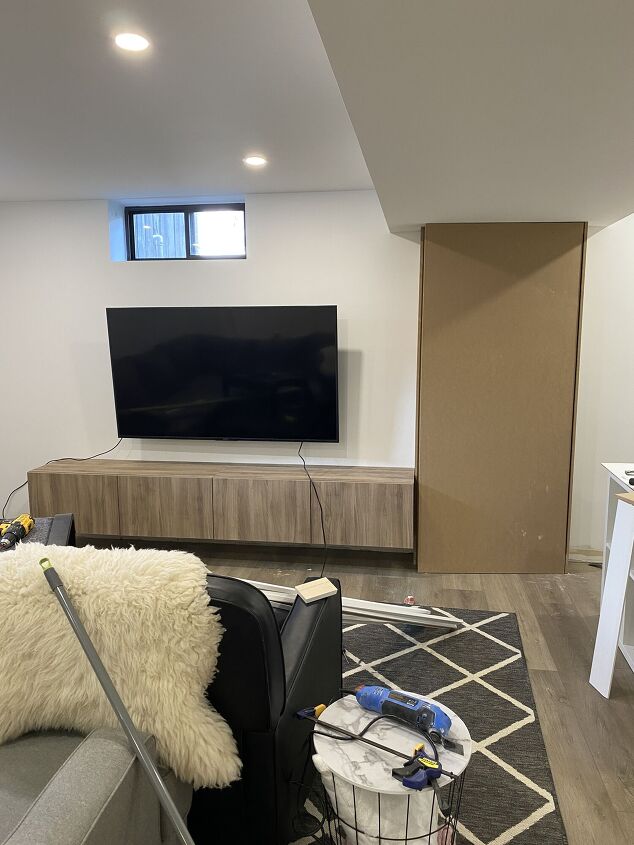
Full access to the panel with a floor to ceiling door and it looks good too!
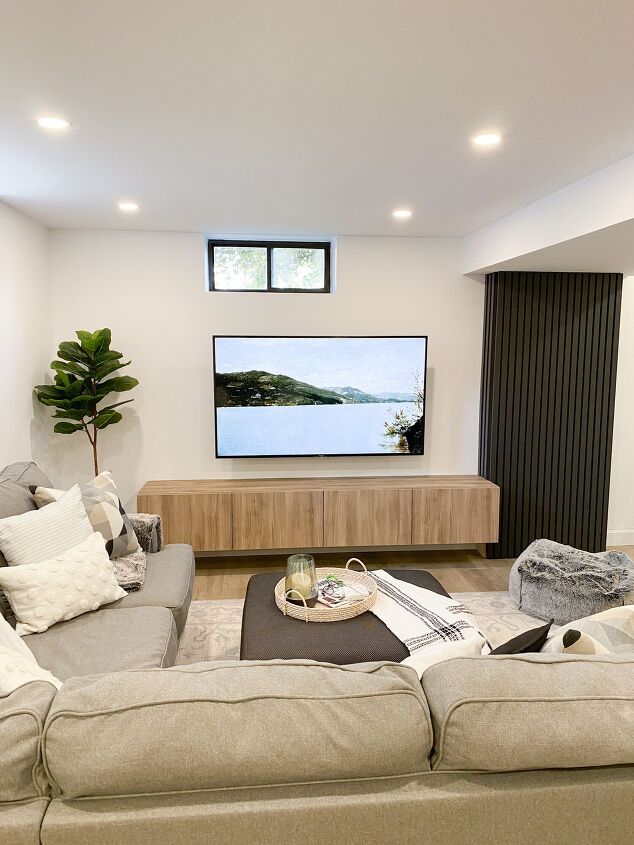
The finished product! Now the panel is part of the whole design plan for this wall instead of being something I just had to figure out how to hide and ignore. It's both functional and pretty!
Next time you have something that feels like it's getting in the way of your design plan, try thinking outside the box and creating something unexpected!
Resources for this project:
See all materials


Comments
Join the conversation
-
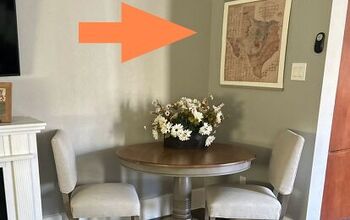
The door does add architectural interest and a design element to the room, but it takes up floor space and that was a lot of work!! My electric panel in is my formal living room 😛 So I hung a lightweight print in a magnetic frame over the box- simple, decorative & easy to move for access!
-
Hey! We are about to do this with our panel board, thank you so much for this idea. I had a question for you, in one of the first pictures it looks like you used a small piece on the face where the door ended up being, did you use a full panel for the door in the end? Also, what width did you use for the MDF sheets? Hoping to not use too thin so it won't sag. Excited to give it a go!


Frequently asked questions
Have a question about this project?
What happens when you need to access the panel? Looks nice.
You are able to open this if a breaker trips?? Is this able to pass house codes in your area, where I live you are unable to cover/impede access to your breaker box in any fashion
it looks beautiful but just concerned about quick access