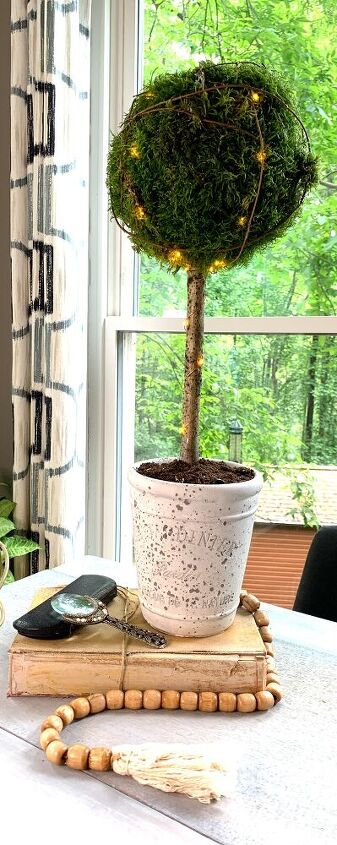
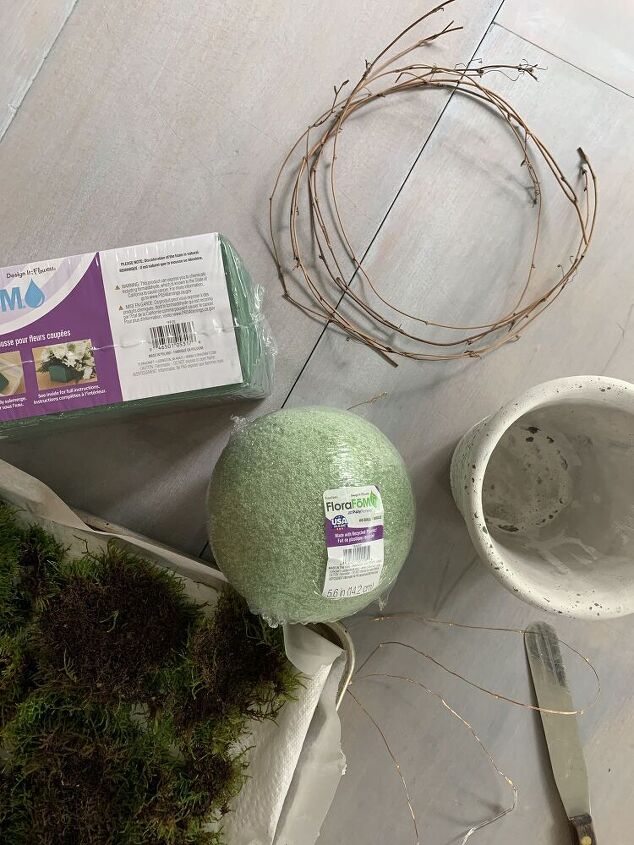
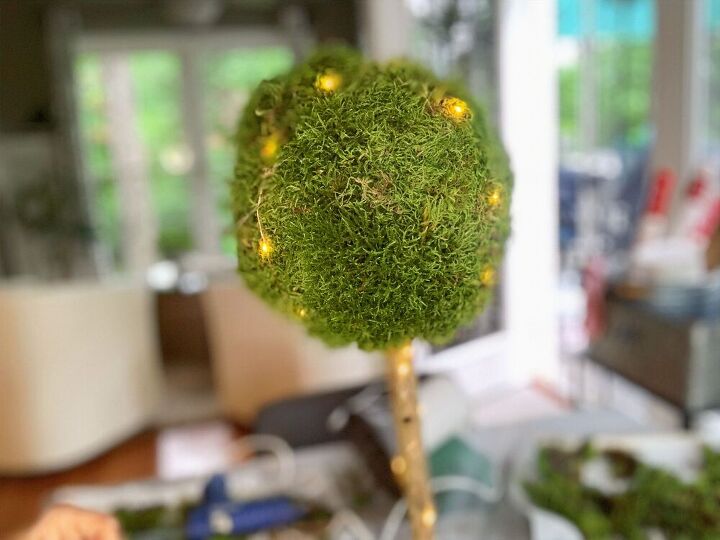
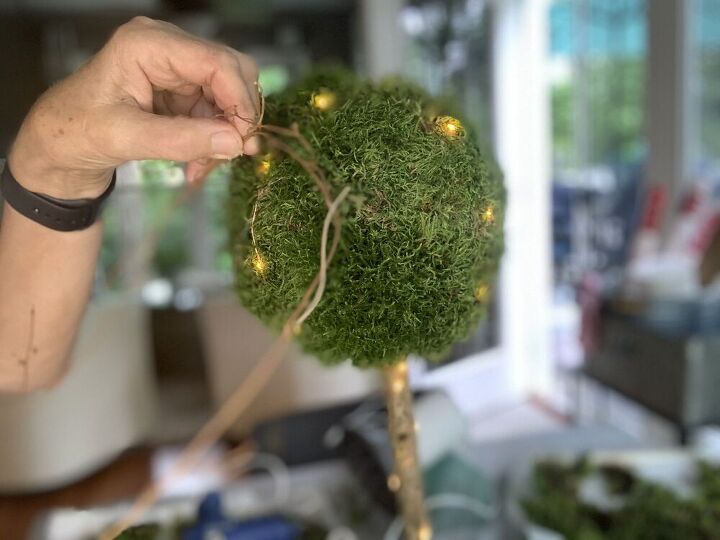
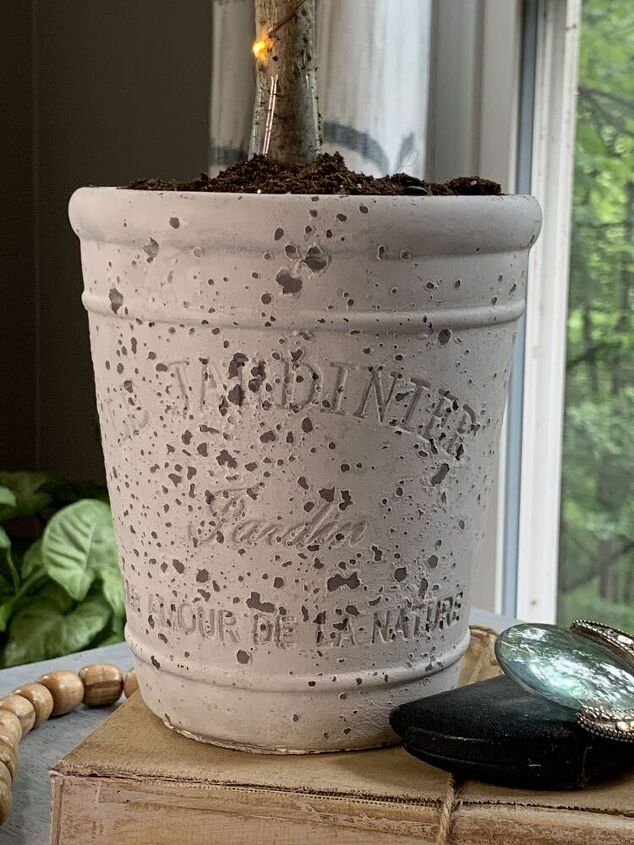
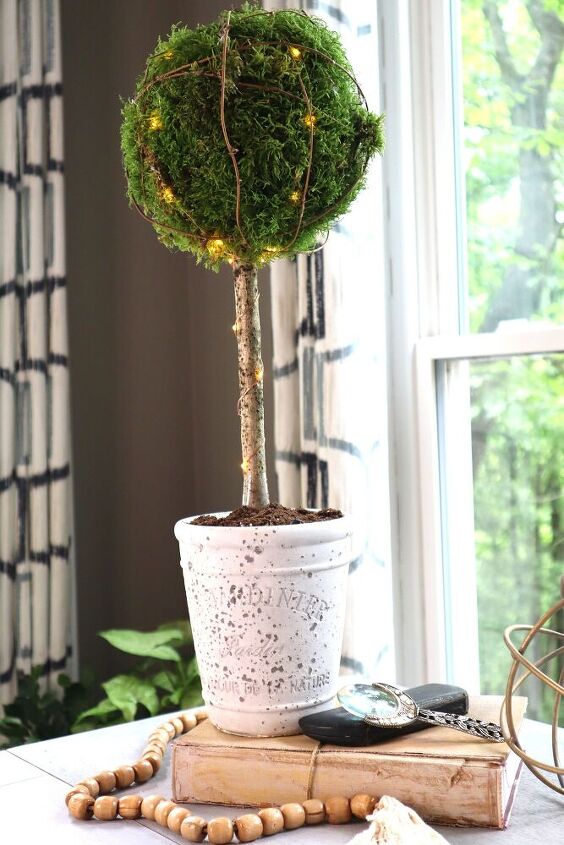
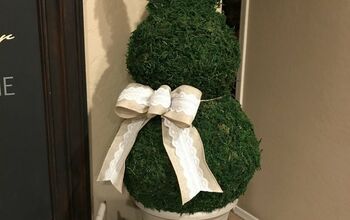
TOPIARY TIME

$20
2 Hours
Medium

Are you a topiary fan? I am. I've never had one, I am always looking in the stores and the ones that fit my budget don't appeal to me. I love preserved boxwood but not faux boxwood. Moss ones? Yes.

So I decided on this rainy Saturday to make my own. I had taken a trip to Michael's earlier this week to get some supplies, I bought this adorable distressed "French" pot that was 50% off and a pack of 2 foam bricks for flower arranging and a styrofoam ball.
The rest I had on hand, the twinkle lights, pieces of grapevine wreath and where we live there is endless moss and sticks!


I have seen beautiful moss covered balls so that's the look I was going for. We headed out for our dog walk this morning with an old kitchen tool of my moms. It's what we used to ice cakes growing up. I hope she didn't mind that I scraped moss off of rocks with it....
My first tip is don't gather your moss in the rain. Second tip is when you ask someone to take a picture, make sure you tell them not to cut off your head.Per Carmine "I'm not a blog photographer." Fair enough. Honestly I think he was surprised with my shorts, rain boots and hair up that I even wanted a picture.
Back to tip one. It was super easy to gather plenty of moss but it was wet and heavier than normal because of the rain. I spread some out on a cookie sheet with paper towels under it and kept my hair dryer diffuser on it forever and the other I put in the oven on a tray at 250 degrees.


I think that's when the house began to smell like dirt. I recommend the dryer, but honestly the tray in the oven turned out the same.For most moss topiaries and for moss you purchase in the store, it's preserved. I am going to try that but it would have not been ready for today. I looked up how to do it and it looks easy to do using glycerin available in drugstores. I'll let you know.


Apparently it stays soft but turns brown. What you see in the stores is dyed. After you preserve it, you dye it in fabric dye. I think it's easier to go get fresh moss when it turns brown...


First I cut my foam block to fit into the pot. Then I cut out a spot for the battery pack for my twinkle lights.Next I sawed the stick that I had to fight Dempsey for, so it was long enough to go to the bottom of the pot. I put that in and added the scraps from cutting into the sides.


I added the twinkle lights in and then taped the wire to the bottom of the stick so the plastic part of the cord didn't show.I wrapped the lights around the stick and let the rest dangle until I was ready to wrap them around the ball.


Next I cut out a hole in the styrofoam ball. I used the piece of stick I had cut off so I had the correct size. Now it was time to glue the (dried) moss onto the ball. That was easy and straightforward. I used my glue gun and it worked perfectly.


I did pick up some moss that was fluffier than others so I've got a little lump on one side where the moss is higher, when you try, pay better attention to spreading it evenly.
Next I wrapped the lights around and then took the excess wire and wrapped it around the base of the ball on the stick.


It would have been better with a longer strand of lights but after I wrapped it up and around I decided to leave it be.
Now I used some small pieces of grapevine wreath that I had and glued them around the ball as well. I was going to buy some Spanish or Reindeer moss for the top of the pot but decided to cover the top with foil and cover with potting soil. Next I will glue the dirt to cardboard so I can pick it up easily to turn the lights on. They are on a timer.,
I'm so happy with how it turned out. It looks alive...at least for now. I'll preserve the remainder of the moss I have and when this one turns brown I'll change the moss on the ball and keep the rest intact.
I often see topiaries flanking a picture or on a mantel in pairs. I love this pot so I will probably go back and get another so I can have a matching pair.


The total cost of this project was:


Floral Pot - $3.99 on sale @ Michael'sThe foam ball and brick were from Michael's also. I put the links for them from Amazon below for your convenience. Floral Foam - $6.99 (2 pc - 2.8 inch x 3.8 inch x 8.8 inch) Styrofoam Ball - $10.49 (5.6 inch)I had the twinkle lights, and obviously the stick, dirt and moss were free :)


I hope you enjoyed this little rainy day project. I sure did. Just so you know, no worms were harmed in the making of this topiary.


Thanks so much for stopping by. If you enjoyed this post, please leave me a comment! XO, Regina
  • DIY
  • Tablescapes
  • Lake Life
Regina @ Saved From Salvage
Want more details about this and other DIY projects? Check out my blog post!
Go
Frequently asked questions
Have a question about this project?
  1 question
Comments
Join the conversation
2 of 4 comments
  • Jen Jen on Jun 15, 2021

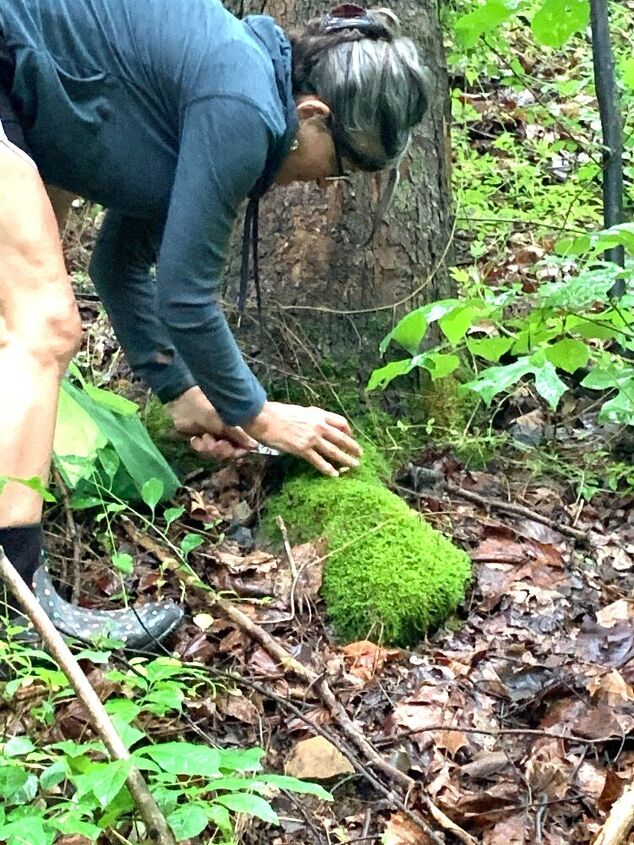
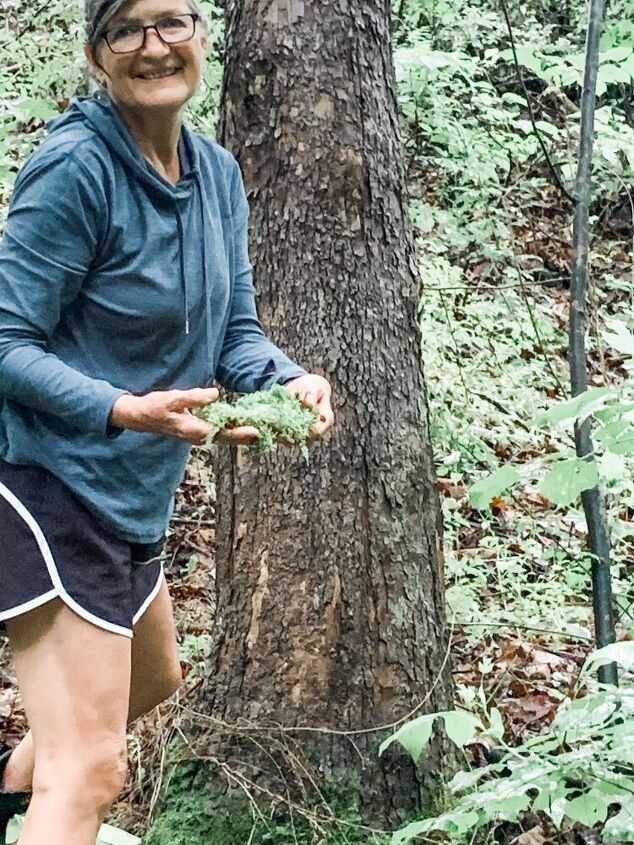
    I collect moss from the woods in back of my property, I like to transplant it into my fairy gardens. Moss grows and spreads quickly in nature. Collecting a little doesn't hurt the ecosystem, it is a great way to thank God and show him you appreciate his work.

  • LaLa LaLa on Jun 15, 2021

    I also have moss growing in my back yard . I have dug some of it up and it grows back. I agree you shouldn’t mess with the eco system, and l think there are tons of more things that we should be aware of that we do to hurt our eco system. I think Jen’s comment says it all! Regina thanks for sharing your idea.

Next