


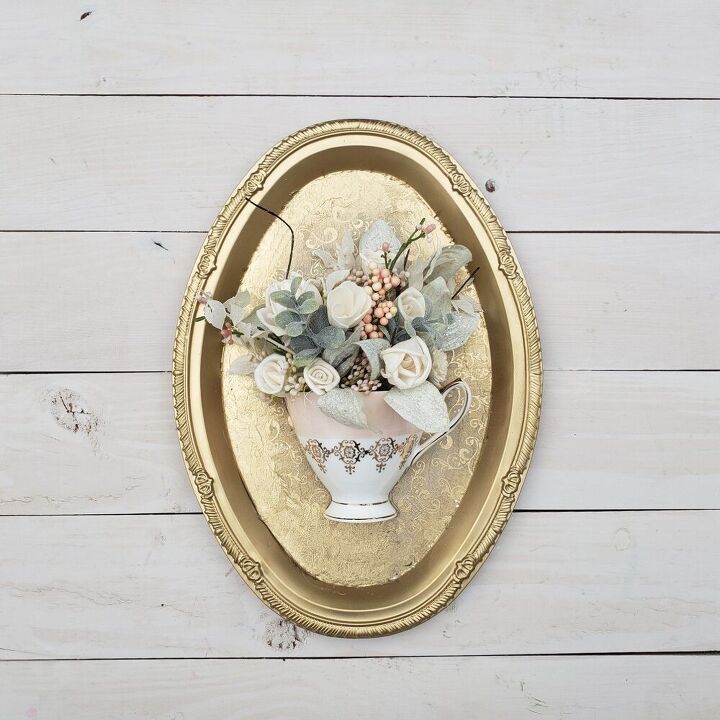
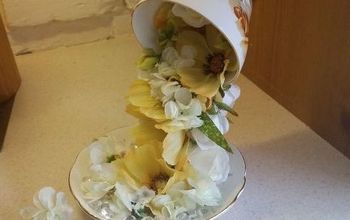
Turn Old Tea Cups Into New Treasures!
I love unique decor and most especially, turning ordinary or discarded items into new treasures!
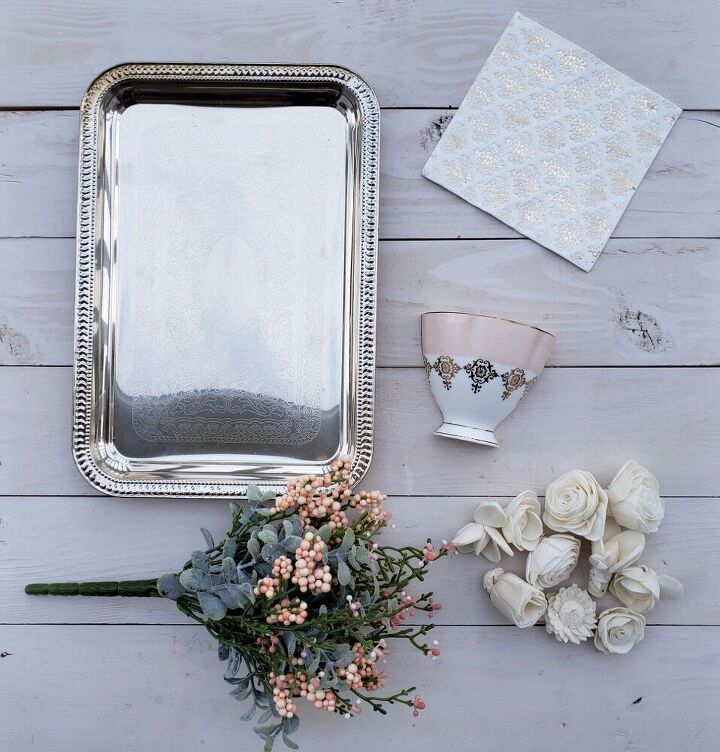
What You'll Need:
Here is what I used for this project:
- A ceramic teacup sawed in half (I cut it using a dremel with a diamond blade!)
- A metal serving tray from the Dollar Tree
- Spray paint
- Starch glue
- Decorative napkins or tissue paper
- Sola wood flowers from Oh You're Lovely (I used minis and munchkins)
- Greenery
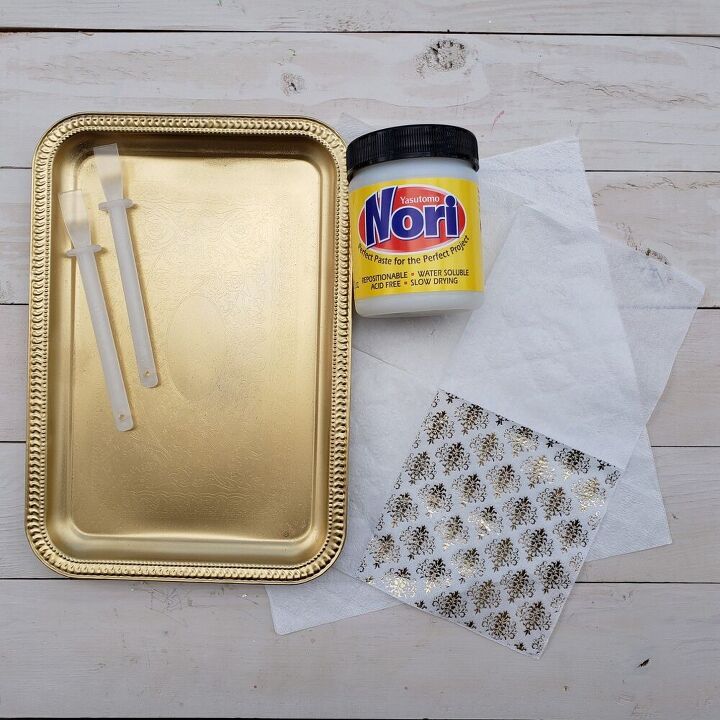
Paint Your Tray and Ready Your Napkins!
My teacup has some gold detailing so I wanted to make sure the serving tray from the Dollar Tree would be a matching base. I spray painted it gold and selected decorative napkins with a gold foil design. Napkins are usually 2 or 3 ply so I made sure to pull the extra pieces off, leaving only a single layer of napkin (the one with the design on it will be used!).

Use Starch Glue to Add Decorative Napkin!
In another Hometalk blog, I talked about how to use rice glue instead of mod podge to decoupage different surfaces. For this project, I wanted to experiment with Nori, another starch glue (spoiler alert - it worked  ).
).
Using a glue spreader, apply a thin layer of the starch glue to the metal serving tray. Carefully place your napkin or tissue paper onto the glued surface and use a clean glue spreader to make sure the entire napkin is pressed down and air bubbles are removed.
Once the glue and napkin have dried, use a box cutter or razor blade to cut the extra napkin pieces off.
Optional - to help make the piece feel more vintage, you will want the napkin detailing to look faded in spots. To do this, I added a thin layer of the Nori to a few small spots, OVER the napkin before the next step.
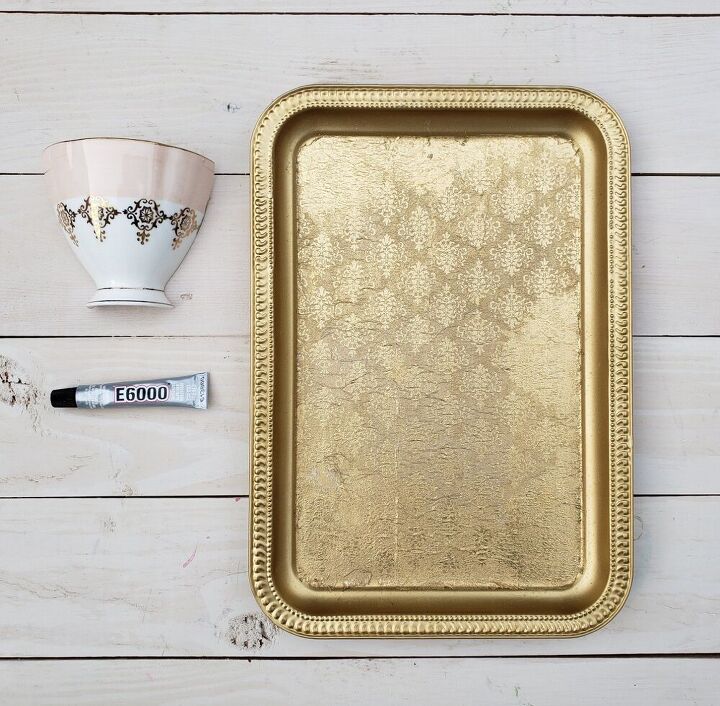
More Spray Paint!
I wanted the tray to have a vintage vibe so after the starch glue and napkins dried, I used the same gold spray paint that I used for the serving tray and sprayed over the entire piece. In the spots where we added the starch glue over the napkin, the pattern fades away making it look like an antiqued metal piece!
Once the spray paint is dry, spread a thin layer of e6000 around the edge of your teacup and place onto the tray. Let fully cure (this takes 24 hours).
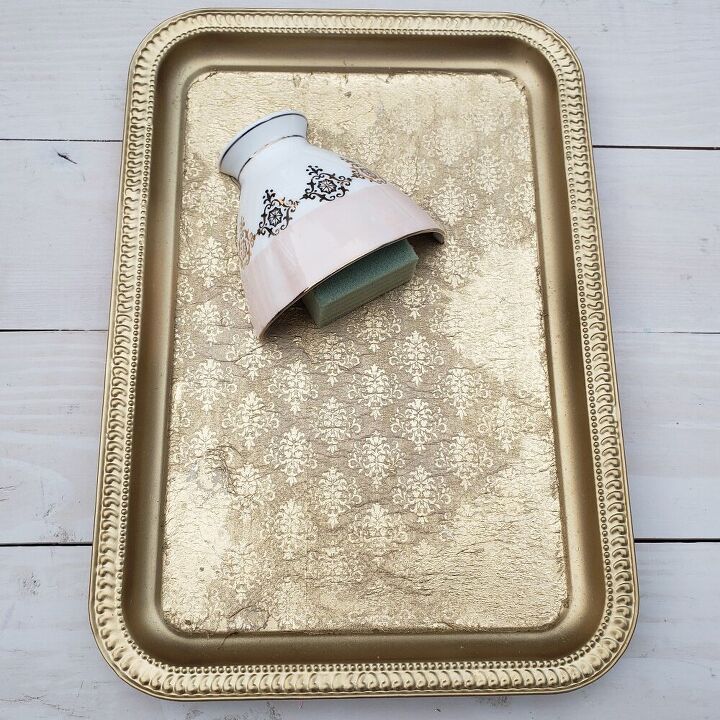
Cut a Small Piece of Foam!
You only need a small piece of craft foam to be able to add in all of the greenery and flowers. Cut the foam down to size and hot glue directly to the tray!

Add Your Greenery, Filler and Wood Flowers!
Since this piece will be mounted on a wall, I wanted to make sure everything was glued in. Add a dab of hot glue to your greenery stems and then place into the craft foam. Create a beautiful greenery base and then you can glue the sola wood flowers directly onto the greenery. Keep going until you have an amazing piece!
The Other Half!
We had a second half to our teacup and the Dollar Tree also has oval metal serving trays so...I had to make a complementary teacup piece using the same process!
How cute would this set be in a kiddo's bedroom or dining room?!
Resources for this project:
See all materials


Comments
Join the conversation
-
Hi Stafanie, thank you for sharing your project. Thank you also for sharing the info on the NORI. I love to learn about different products. I also want to warn people about the teacups they use especially old or antique ones. Check the makers mark on the bottom and then do some research before cutting.
-
Beautiful, love victorian style decor! I've pinned it to two of my boards on Pinterest: Home Decorating and Artsy Craftsy. https://www.pinterest.com/thebridalconn/
Thank you for sharing this idea!


Frequently asked questions
Have a question about this project?
How did u cut the tea cup
Very pretty but what did you use and how did you apply a picture hanger to the back sides of your project? Love these and think they are sooo beautiful!
Is the tray plastic and made to look metal? I don’t think our dollar tree has metal trays. Also, is there a type of mod podge that would work on this surface instead of Nori? I’ve never seen it in the store here.