


Unique, Beautiful Tabletop on a Budget, or Just Because It's Stunning

by
Pippenings
9 Materials
$50
3 Days
Easy
How to make a creative, unique table top with only a few bucks. Using broken or cut up CDs with the bottom side upright makes a gorgeous, reflective, bright table top that dances in the sunlight.
Watch this project on my Pippenings YouTube channel.
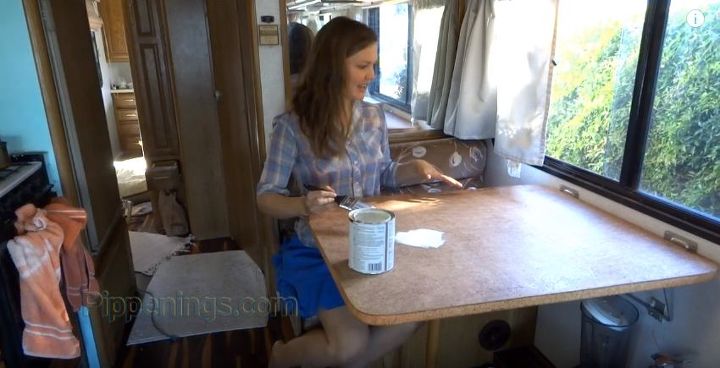
I applied a coat of primer to the table so that all the paint won't seep in to the wood fibers. I let it dry overnight.

Now that the table is primed it's time to put the base color on! Since the CD's are a bit bright I wanted to have a dark contrast on the bottom. It turns out though, that the CD's have a darker color, despite being reflective, so I decided on a light blue which I had used to paint the walls of the kitchen. After mixing in some of the darker blue the table is the perfect color!
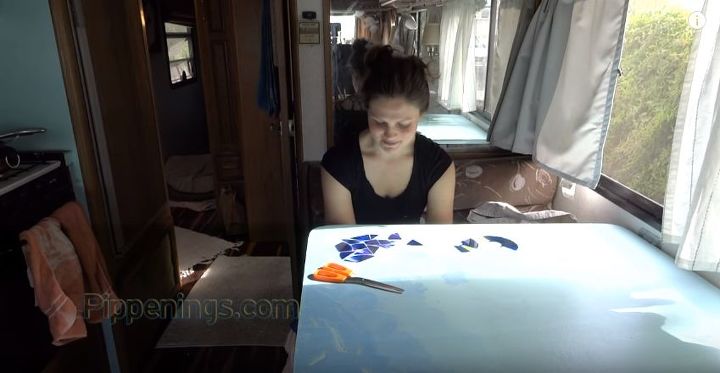
It's time to cut and glue the CD pieces. Since the pieces are light it's important to glue them down so that they won't float to the top of the epoxy.
Finally after a few days, I was able to cut up the pack of 50 CD's! I taped up the entire side with rigid duct tape (which you can find at your local hardware store in the paint section or HVAC department) and polished the CD's to remove all finger prints before we apply the epoxy. Make sure your table is level before pouring on the epoxy.

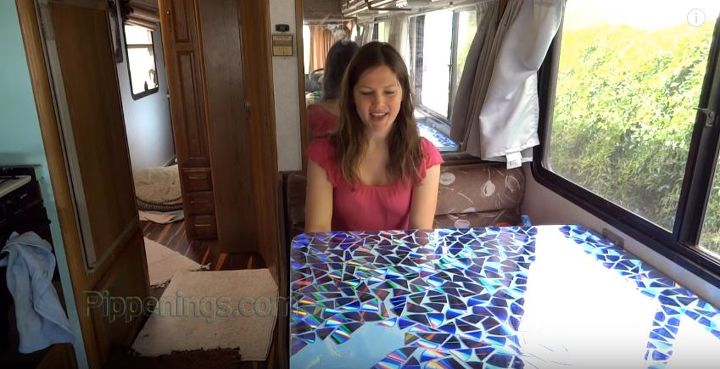
Time to mix the resin in the buckets and finally apply the epoxy, which you can find in the paint section of Lowes, Home Depot, or your local hardware store.

Be sure to read the directions very carefully and maybe twice before mixing the resin and the epoxy (which comes as a boxed pair).
Use a squeegy to move the wet epoxy around to cover all areas. Now is when you'll be happy you glued the pieces down.
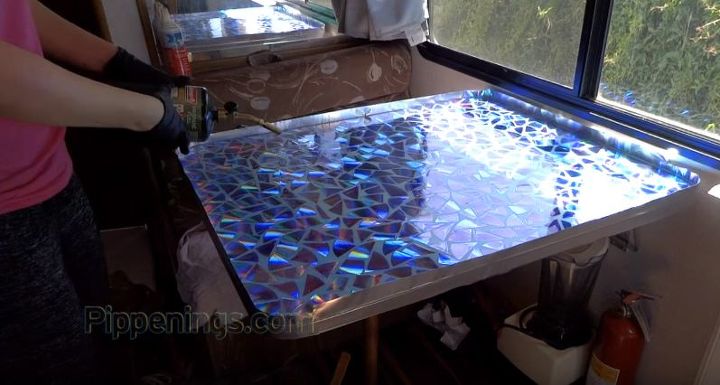
Use a heat gun, hair dryer or blow torch to lightly heat the wet solution to remove air bubbles. There will be a lot of bubbles around the edges. Once poured, keep traffic in the area and air flow to a minimum to reduce the chance of dust and debris getting stuck in the resin. Allow it to dry for the time indicated on the box.
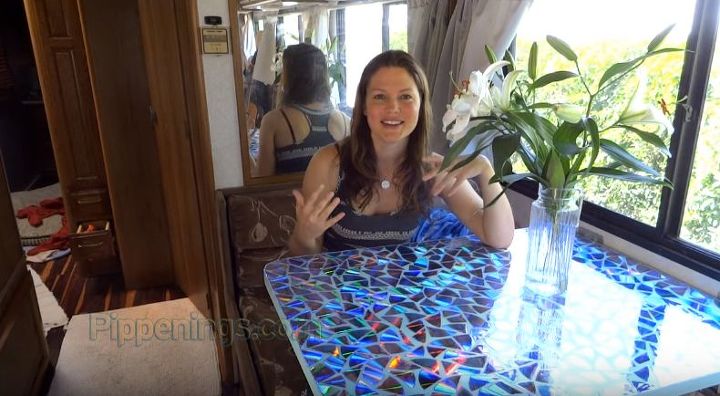
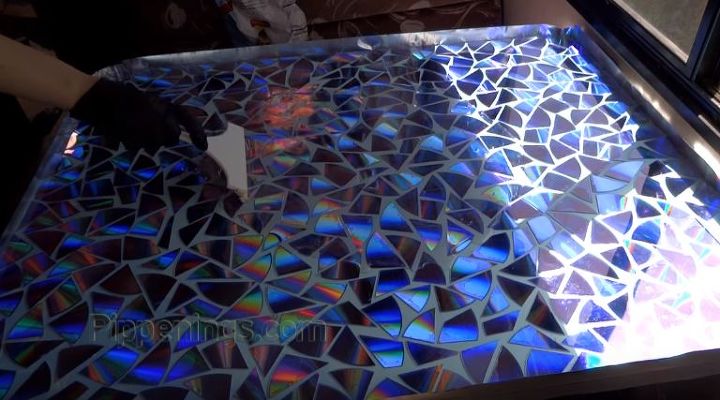
So excited about how it came out. I thankfully had just enough epoxy remaining from my penny counter top project and it has a really cool texture where you can feel the CD's slightly. For more videos and info on my RV renovation projects, please visit myYouTube channel under my name Pippi Peterson or my website at Pippenings.com. Good luck with your project and happy trails!
Want more details about this and other DIY projects? Check out my blog post!
Comments
Join the conversation
2 of 43 comments
-
I think this is amazing ,do you have to prepare the cds in any way beforehand
-
Amazingly beautiful!!


Frequently asked questions
Have a question about this project?
Can this be done on a glass table top?
can this be done on a glass table
Was this table in a motor home? It is really nice.
Can this be done on an outside table ?