


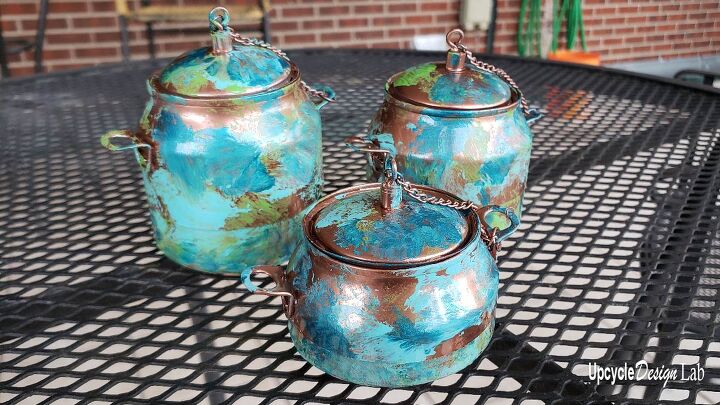
Upcycled Mini Copper Pots - (and the Risky Business of Crafting)
It may or may not surprise you, but I frequently get questions and sometimes criticism regarding the safety of my projects. There are also those rare occasions when people are even a little mean.
For example, I’m often asked if I get cut by the “razor sharp” aluminum cans. I can only say that I have cut hundreds of aluminum cans and rarely needed a bandaid. So I guess all I can say is be careful.
More recently, I received some criticism regarding this Crisco candle-making project. I mention it here because I am using these candles in today’s project. So if you are fire averse, beware.
For some reason, this post caused people to worry about my sleeping habits implying that I might drift off after lighting my candle or that upon waking, I would choose to throw water on it to put it out.
I was admonished not to do these things.
One person even went so far as to suggest I should “rethink the post” as if to say I should take it down because it is just too dangerous. My initial reaction is always guilt because that’s how people in my generation were taught to feel when someone scolded them. But then I think, “hey, wait a minute, I am not advocating blindfolded automobile navigation or even swimming within 30 minutes of eating a sandwich. I’m just making a candle here, people.” You know candles. We humans have been using them for hundreds of years, and so far, they have not caused our extinction.
In what can only be considered an amusing side note, the Crisco candle post also garnered some unsolicited hatred towards microwaves. Yes, the poor microwave ended up as collateral damage of the-all-to-risky-Crisco-candle-experiment . As one reader put it, “microwaves should be banned,” and then it just got worse from there.
This just makes me wonder who are these people and what are they doing with their lives.
Anyway, due to my passive-aggressive nature, I did consider writing this post with every conceivable warning. But then I reminded myself that you, dear reader are an intelligent being capable of deciding for yourself what chances you are willing to take with your life. And besides, I am also way too lazy to warn you of every possible way in which you might injure yourself if you dare to take on this project. So let’s just go with a few general safety precautions.
- Hammers hurt if you hit yourself with them. Try not to do that.
- Flames can turn into bigger flames if you let them have more fuel. You should avoid letting that “fuel” be anything you don’t want to be turned into ash.
- Most craft projects should not be set on fire. But the really entertaining ones can be.
- Scissors and knives cut things. Please don’t use them on things you don’t want cut.
- Metal can edges can be sharp, but I wouldn’t recommend cutting a steak with them or using them for self-defense. Plan accordingly.
Here are a few other things you should know about me.
- I don’t believe Mcdonald’s should have to tell you their coffee is hot.
- I like to experiment hence the word lab in the name of my blog and YouTube channel.
- I believe my readers are NOT idiots. Well, most of them anyway. The ones that put sticks of dynamite in their microwaves, I’m not so sure about.
- Very few, if any, of my projects are original creations. Most are ideas from someone else with my own twist added. That’s my wheezily way of saying blame someone else for the danger.
- I believe paper cuts are survivable, and living is hazardous, but you should get out of bed anyway.
So you reckless daredevils with no regard for your safety, consider yourselves duly warned. This crafting stuff is treacherous business!
Go ahead, read on. I double dog dare you. 😁
.
Step 1 – Collect and Clean
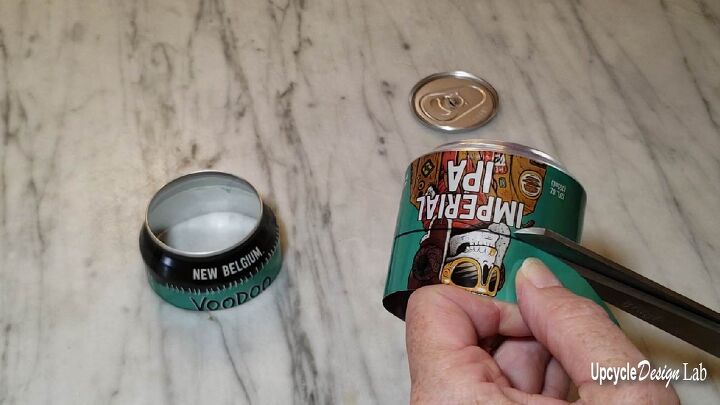
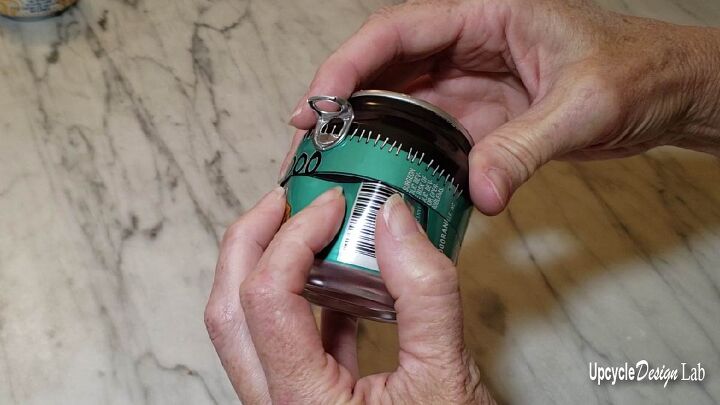
You will need two cans to make this project, but you may want to make more than one. Rinse both cans, and remove and save both pull tabs.
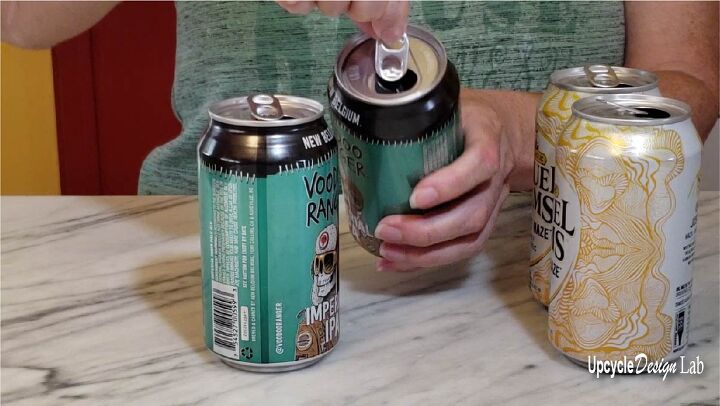
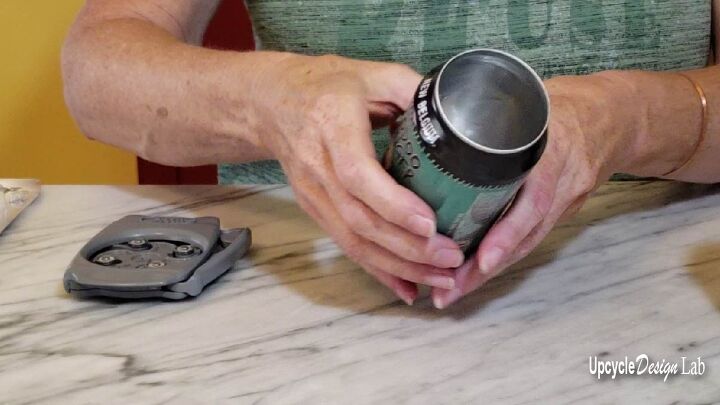
Step 2 – Remove Top Can # 1
I use a tool called Draft Top to remove my can tops. You can find them for around 20 dollars, and there are also less expensive brands.

Your can should look like this once the top is removed.
If you would rather not buy a special tool, you can try this method, but I can not vouch for it as I have not personally tried it.
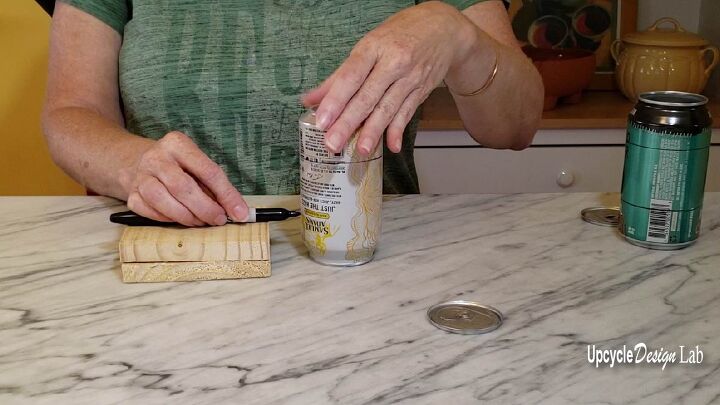
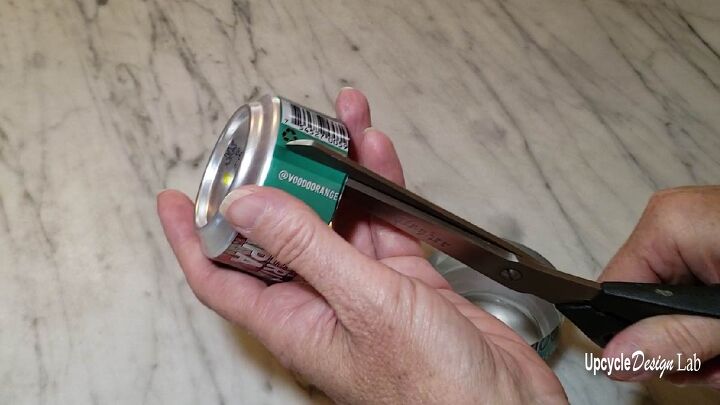
Step 3 – Mark and Cut Can # 1
To mark my cans, I used a sharpie marker and some wood blocks to draw a line around the top and the bottom of the can. The part in the middle is the waste material.
To cut the can, I punched a hole with a knife in the center of the waste area and then cut the can in half with scissors. Once I had the two pieces cut, I used scissors to trim off the excess can to make a clean edge on both pieces along the sharpie line.
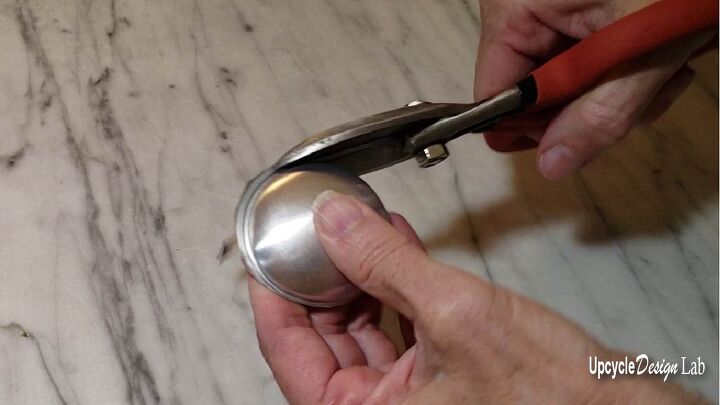
Step 4 – Cut Can # 2
You will only use the pull tab and the bottom of the second can. But I like to save the rest of the can for other projects like making beads, garden markers, and even faux plants. To do this, I remove the can top and bottom with my knife and scissors and trim down the bottom with a pair of tin snips.
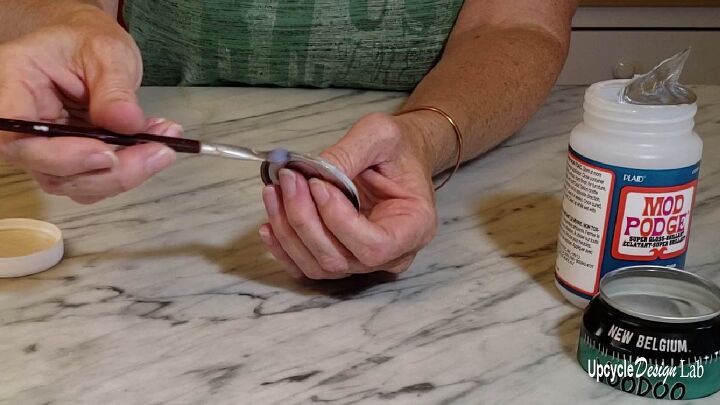
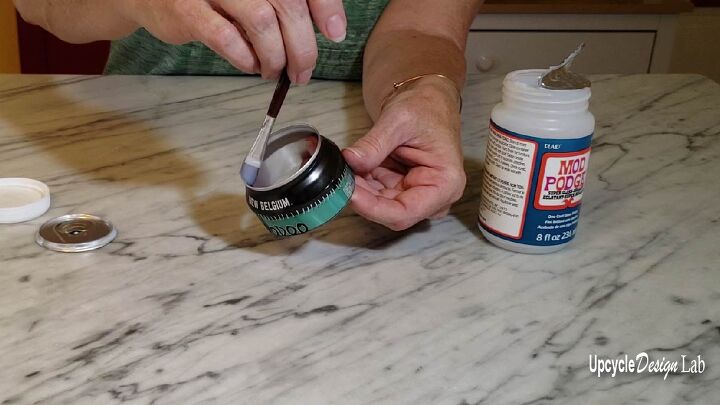
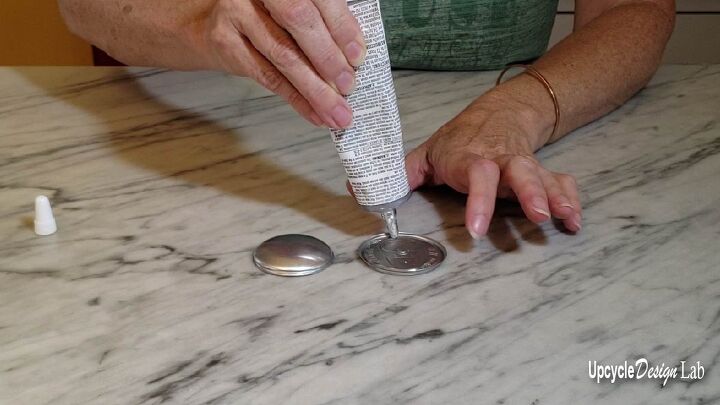
Step 5 – Gluing
To make the top fit a little more tightly, I added a coat of mod podge to the outside lip of the lid and the inside edge of the top piece allowing them to dry before fitting them together.
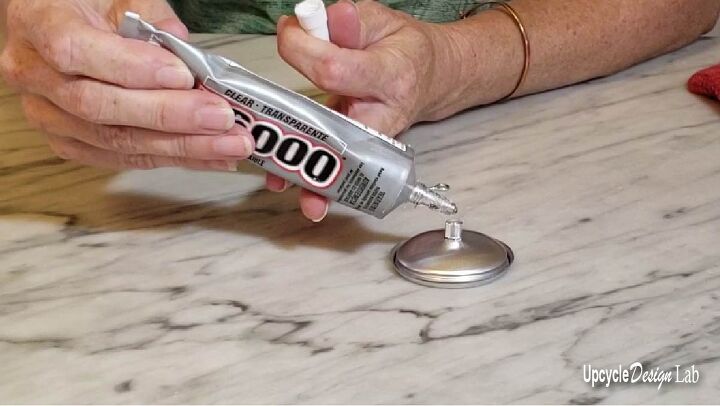
Once the mod podge was dry, I glued the domed bottom piece and the lid together with E6000 glue and added a “handle” to the top.
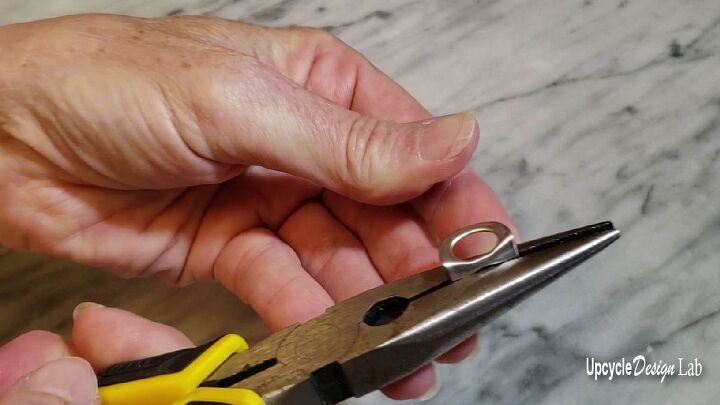
Then I used needle-nosed pliers to bend the pull tabs to a 45-degree angle and attached them to the top piece of the can with the E6000 glue.
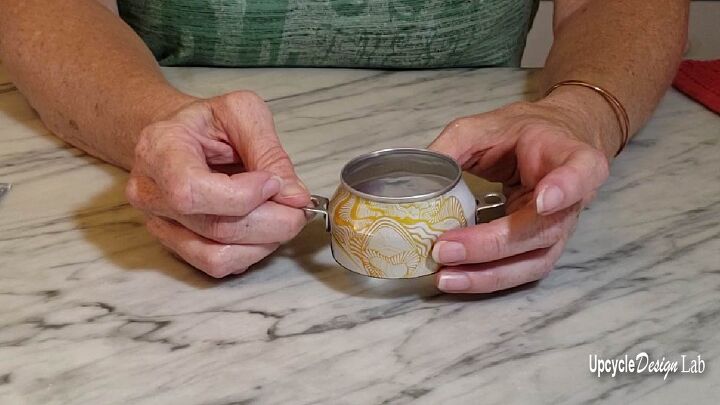
Step 6 – Assembly
You can assemble the piece by cutting a slit in the top or bottom piece. Cutting the bottom piece will hide the slit but cutting the top piece leave the bottom intact for uses that require no leaking, as with the questionable Crisco candle example.
Step 7 – Finishing
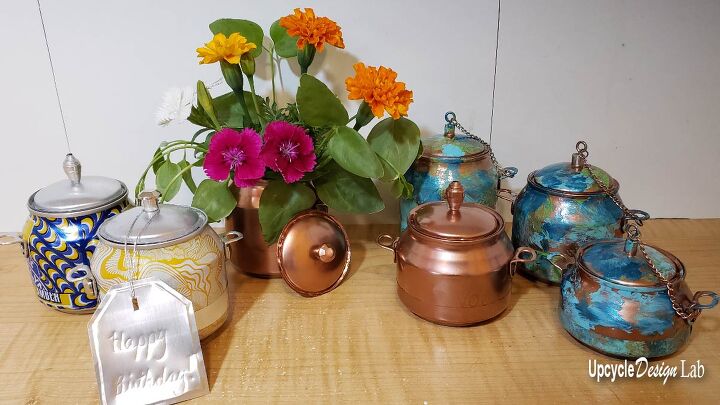
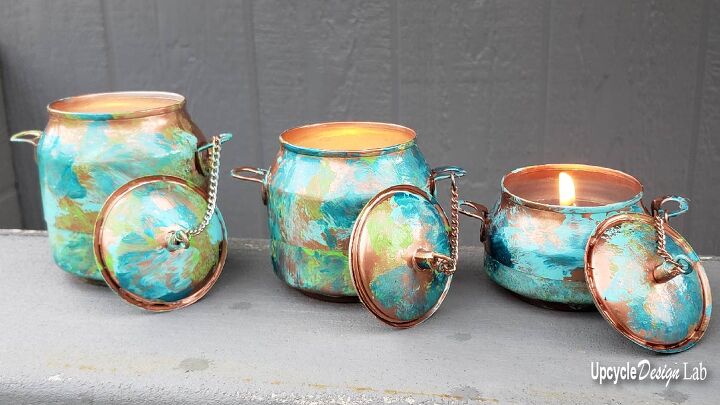
You can leave the tins unfinished or decorate them with beads and kabobbles, spray paint them, and, my personal favorite, is to add the faux oxidized copper finish. You can check out this video for the tutorial.
Since some of my pieces will be outside, I also added a coat of DecoArt DuraClear Gloss Varnish.
Step 8 – Uses
I am sure you can think of more, but here are some possible uses.
Small jewelry box
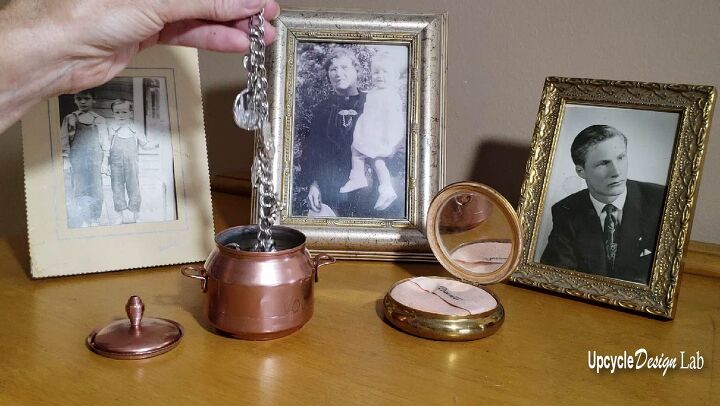
Small gift box
Tiny Vase

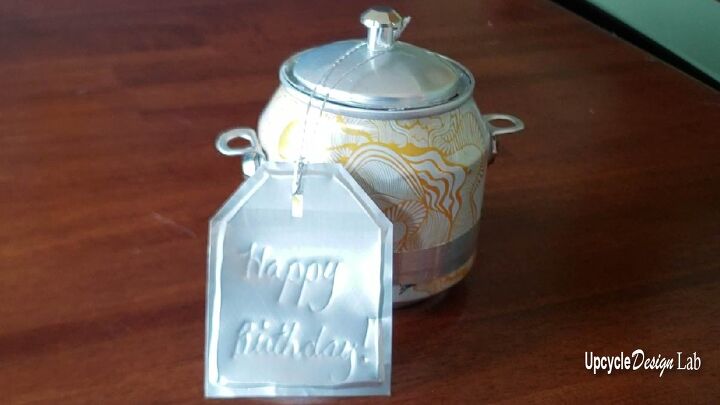
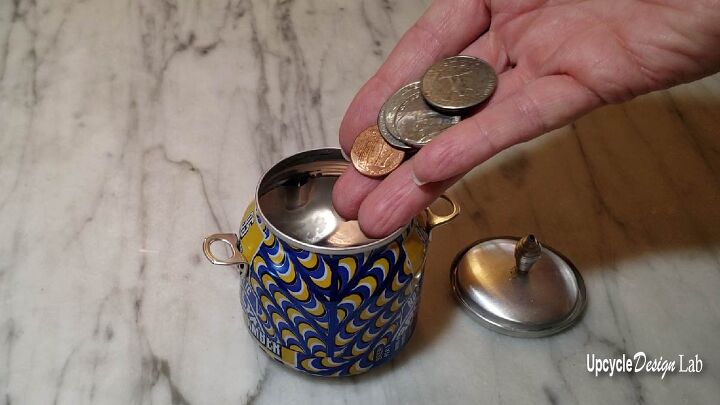
Piggy Bank
Citronella Candles
Cheers and Happy Upcycling,
Cindy
Resources for this project:
See all materials


Comments
Join the conversation
-
Your list of dos and don't s was fun, serious and FUNNY!!! You have a way with humor and words I Love! ❤️ lol!
These cans are Simply Adorable!!! Love this idea! I am definitely gonna try this!!! When I first saw the post I thought they were little pots you bought and decorated! Talk about Trash to Treasure!!! Love Them!!!
-
How Cute are those ?...gorgeously cute !! ,,,I love those and I have lots of can's to make me a few of these ...thank you for sharing this with us that aren't afraid to DIY with what we have and as always be careful in our task to take something old and make it new again....Your way of telling people to be careful on how to do things is the best way that you could have told them ....some people I suppose must have two left hands like those that say they have two left feet ...they can't dance with two left feet...lol...so two left hands can't do what a right and left hand together can do ...just my opinion !!


Frequently asked questions
Have a question about this project?
Wouldn't the mod podge & glue provide protection on the cut edges? Great warnings
Please don't be upset by my question but how snug are these when assembled? I didn't see a step where you glued the 2 pieces together and I was just wondering if you put heavier things like coins and then move it, if the pieces are snug enough to stay together. Very interested in doing this project, I especially love the patina ones, they're beautiful!
I love the tutorial! What did you use to create the look on the change jar? I promise not to injure myself intentionally while attempting to recreate these awesome containers!