


Upgrade An Old Planter Using Redesign With Prima Decor Moulds And Clay

Spring is finally upon us!
And I absolutely LOVE to make spring decor
So many flowers 🌺🏵️🌷🌹🌻🪷🌸🌼
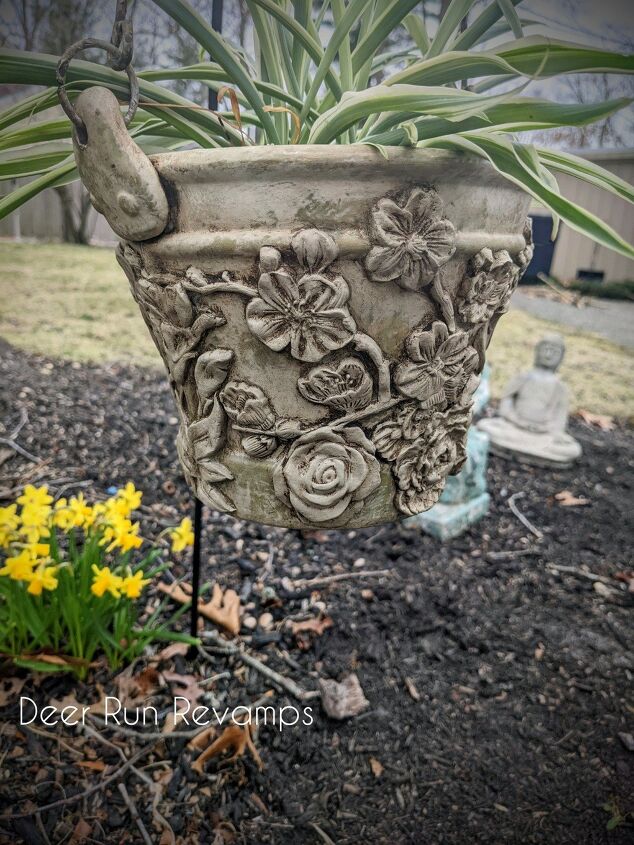
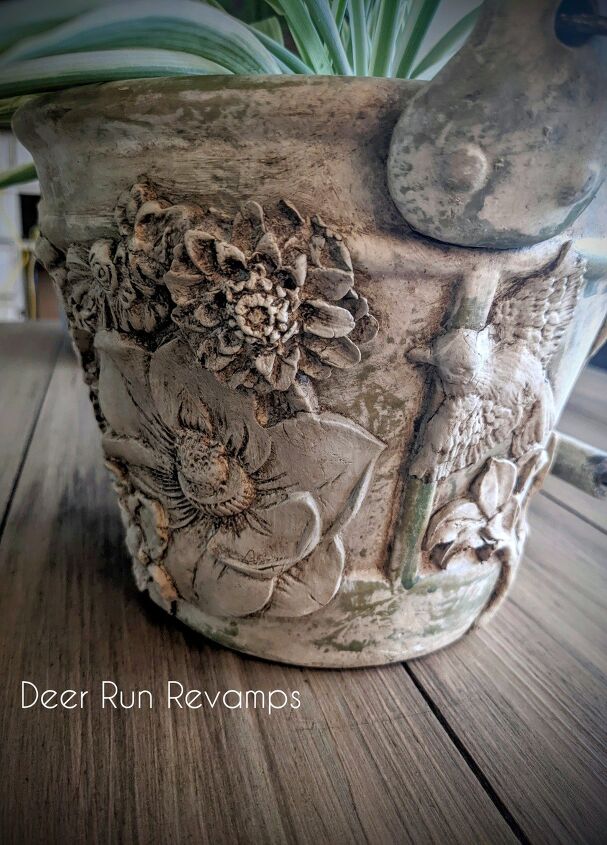
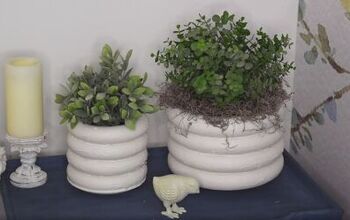
I found an old planter/pail at a garage sale and just had to have it! It was already painted in an old world, aged type style, so all I had to do was dress it up!
For a highly detailed step by step visual tutorial, we've included the video below
*Time listed is based on work time only, does not include dry times
*Price is based on the amount of product used. You will have plenty of product leftover for numerous projects, and Decor Moulds last forever


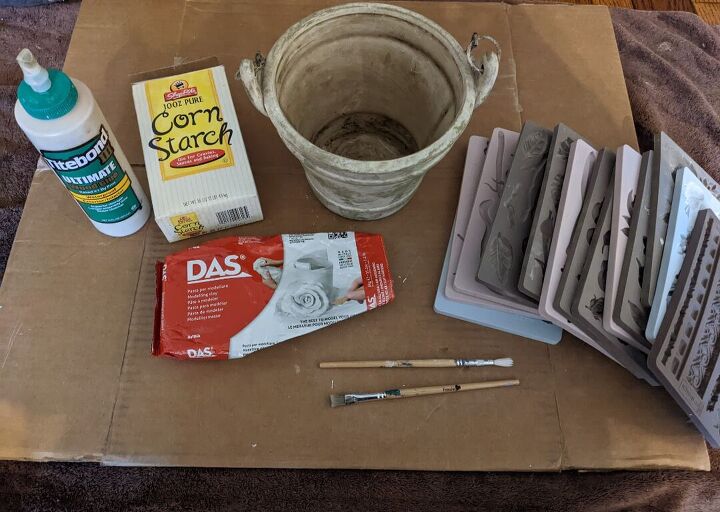
First, gather your supplies....
*Planter/pot/pail
*Corn starch
*Wood glue
*2 small artist brushes
*Renaissance Chalk Paint In Ivory Tower and French Beige
*Wax brush (optional)
*Clear wax (optional)
*Brown Wax (also known as antiquing wax) (optional)
*Air dry clay (DAS, Creative Paper Clay, or Prima Modeling Material all work great)
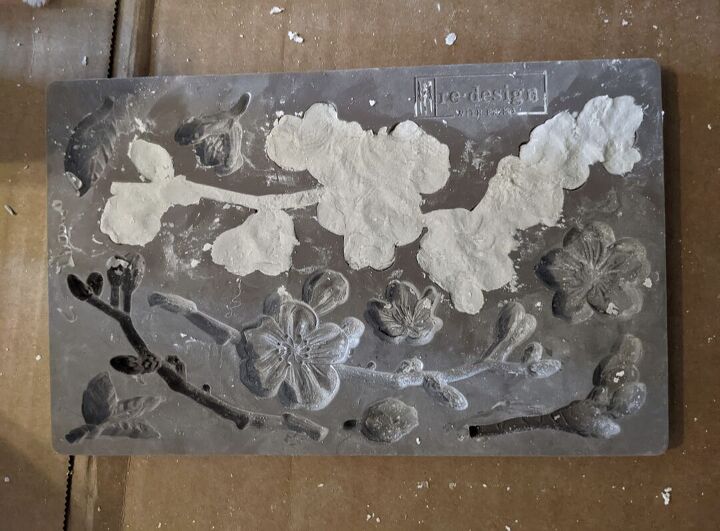
*Redesign With Prima Decor Moulds of your choice
(I used Cherry Blossoms, Winter Blooms, Lily Flowers, Fragrant Roses and Aviary Decor Moulds)
**I've been refinishing furniture and decor professionally for about 4 years now and as a hobby for about 6 years before that, so my collection of products and designs is quite large 😆
To make a fun and unique design, you really only need 1 or 2 Decor Moulds. I used 5, mainly just to show what these designs look like 😊 Plus, they last forever, so it's well worth the investment if you enjoy adding appliques to things
These products are available in our Etsy shop. We've included a link at the bottom of the tutorial
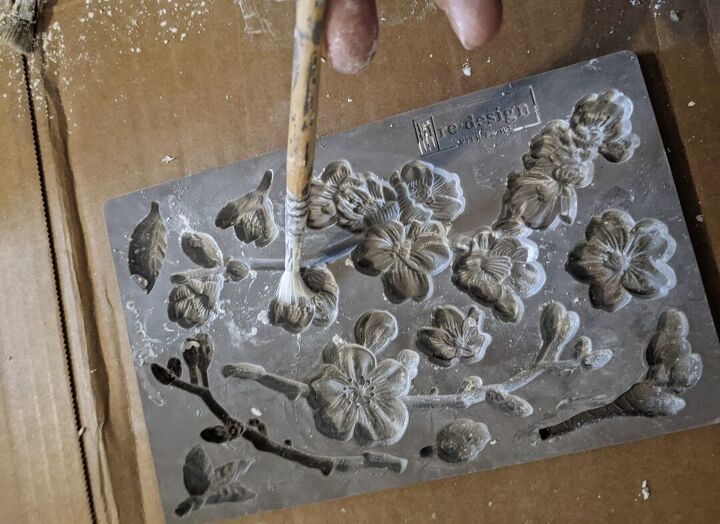
Dust the silicone mould with corn starch. Make sure you get the corn starch into all the little details. Then flip the mould over and tap out the excess corn starch
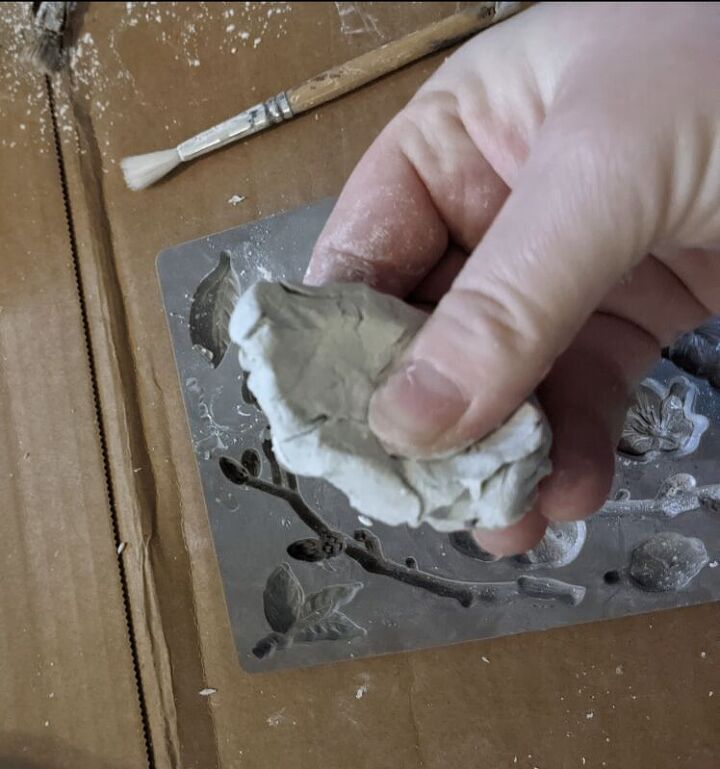
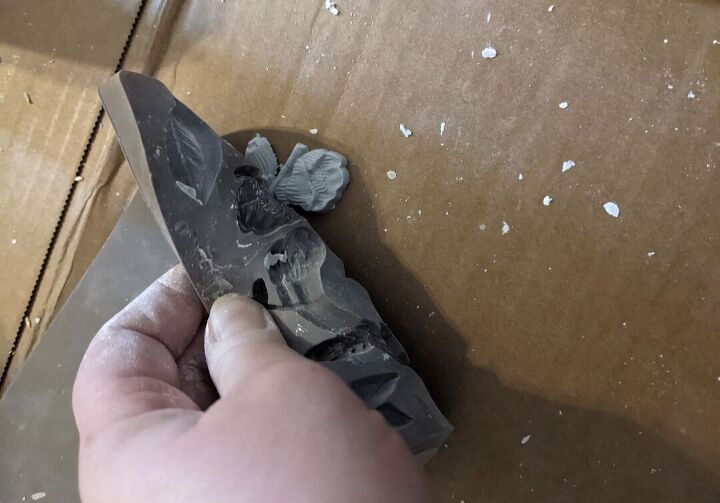
Take a clump of air dry clay and squeeze it in your hands for about 15-20 seconds to warm it up.
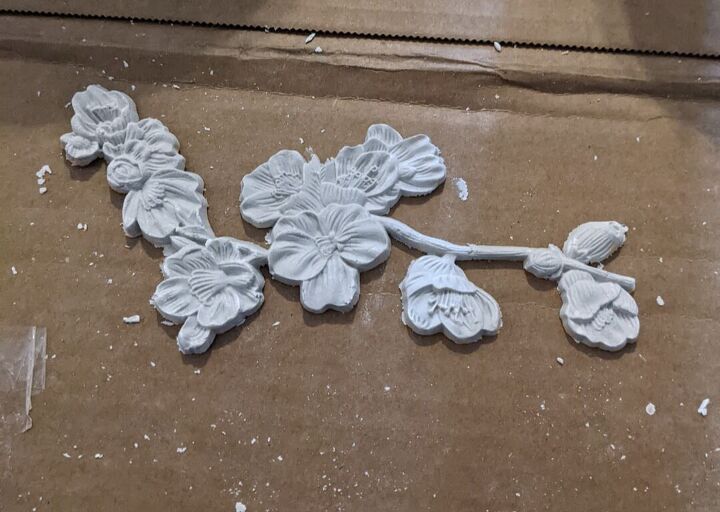
Air dry clay is a great choice for curved surfaces since it is pliable. You can also overlap the clay appliques.
Air dry clay does tend to crack a little bit when it dries (I show you how to fix this in the video tutorial), so it's also a great choice for a more aged look.
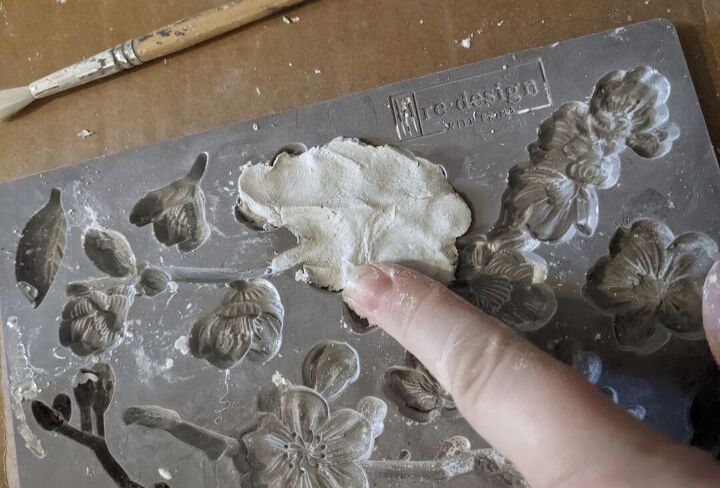
Then press the clay into the design
Make sure there is no clay hanging over the edges of the design
Then flip the mould over and slowly start to peel it back
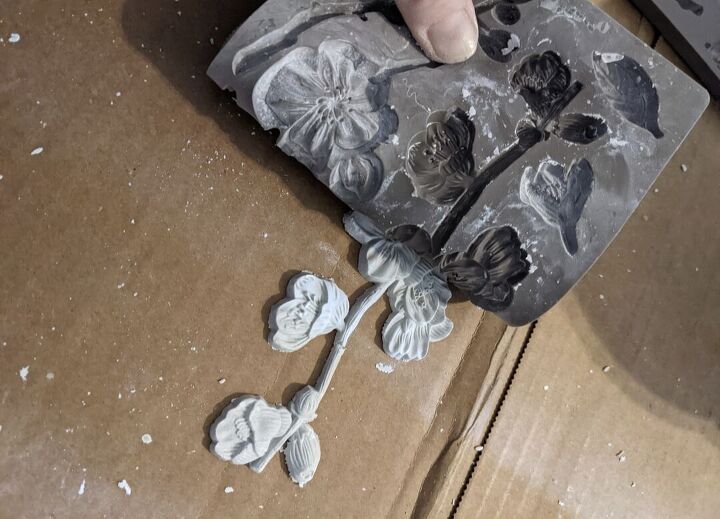
If the clay is having a hard time releasing from the silicone mould, use your finger to gently help it along
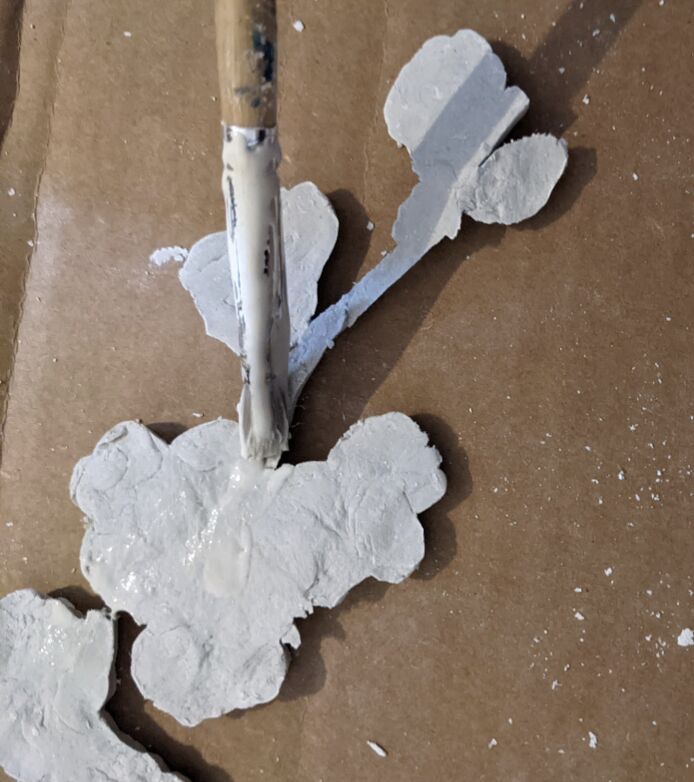
Flip the clay applique over and apply a thin coat of wood glue to the back
Then gently press it onto the planter.
If any glue oozes out along the edges, take a small paintbrush and brush it away
Continue this process until you have the desired look
And remember, you can never have too many floral appliques 😆
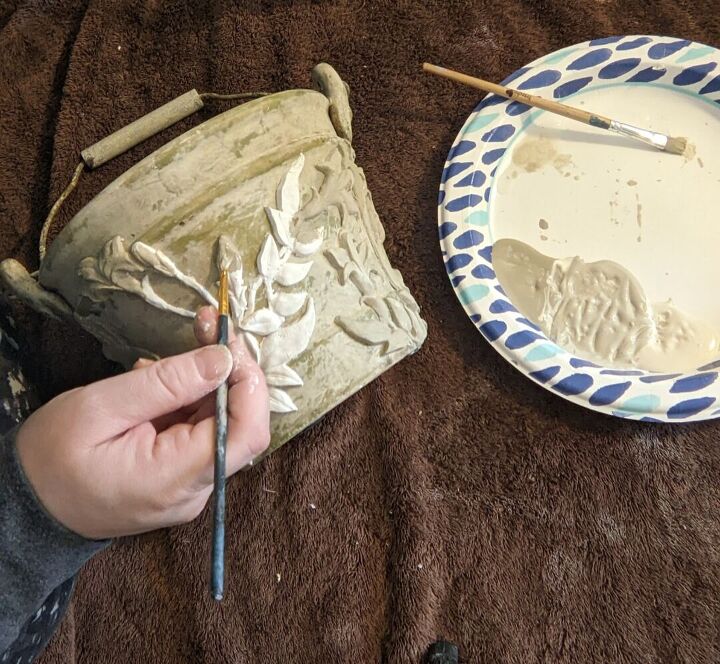
Allow the clay to dry overnight or until hardened, and then paint
I wanted to match the color(s) of the planter, so I used multiple colors -
Renaissance Chalk Paint in Ivory Tower and French Beige and by mixing the two, I made a third color
I then applied a thin coat of paint to the clay making sure I covered the entire design. I used all three colors in random areas to match the background
This step is optional -
I then applied clear wax to the entire outside of the planter using a wax brush
Then I applied brown wax over just the appliques using an artist brush, making sure to get into all of the details, crevices, and along the edges. Then wipe off the excess using a paper towel or dry rag.
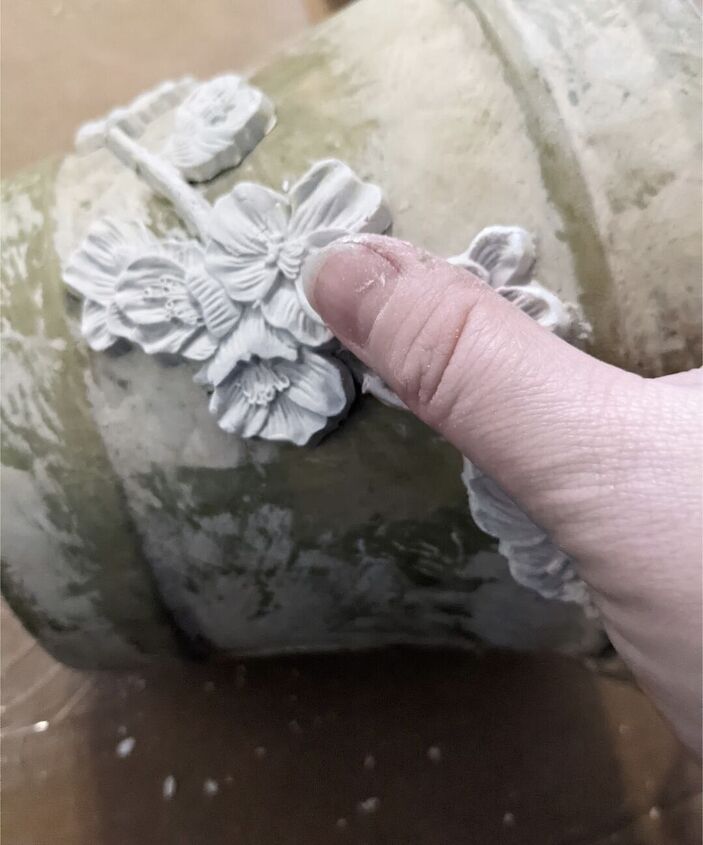
You can see how it really brings out the details in the designs
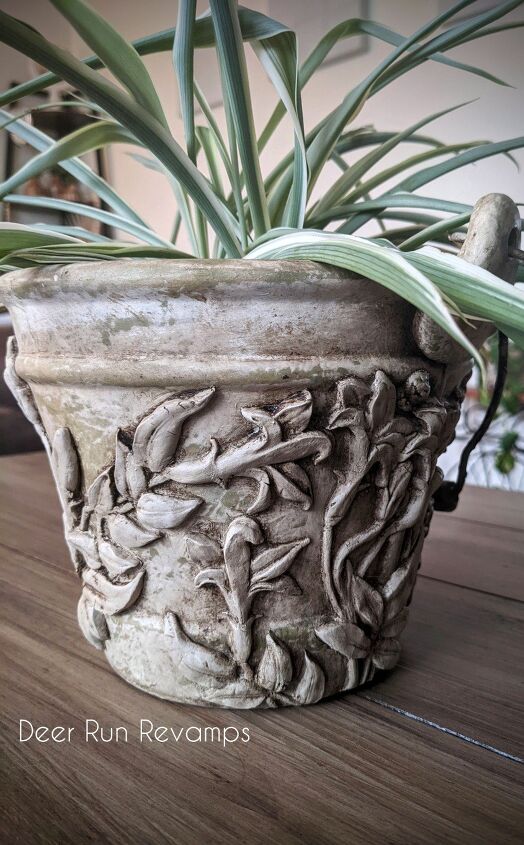
Look At Those Details 😍😍😍
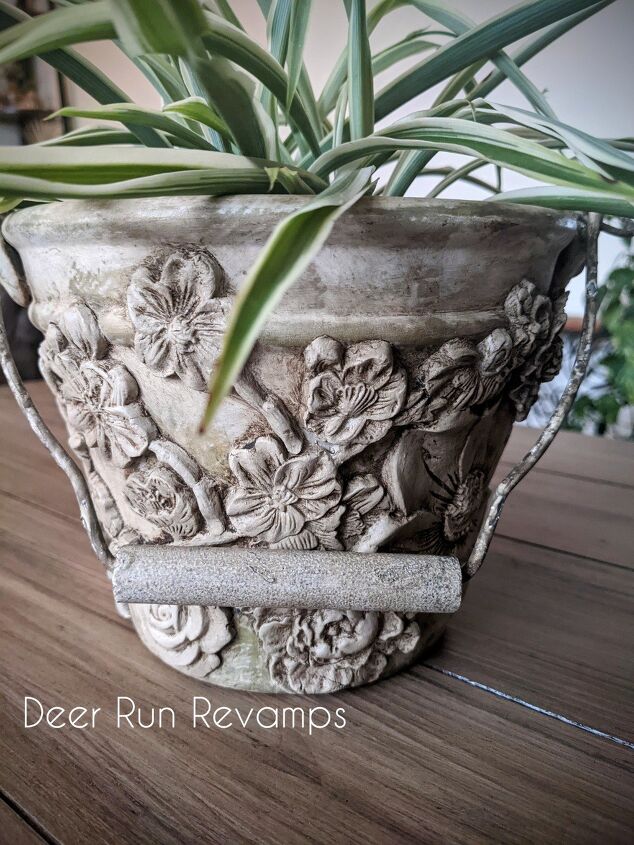
I love the aged look that the flowers have
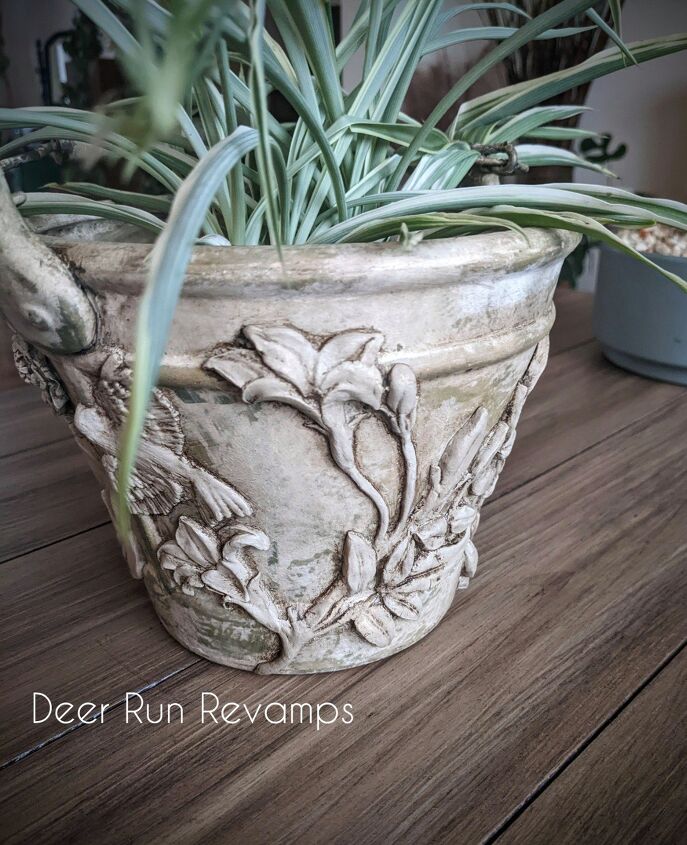
Lily Flowers 💜
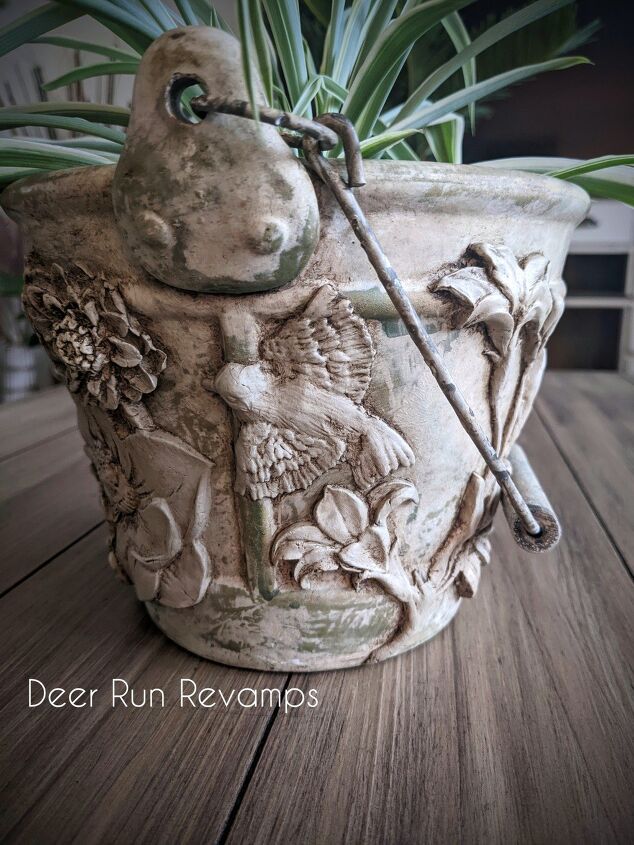
This little bird is my favorite applique on this planter 🤩 It came out just perfect
The Redesign With Prima Decor Mould that it's from is called Aviary
If you'd like to follow our journey and see more of our refinished furniture and decor, check us out on Facebook
Thank you so much for reading! We how you've enjoyed this tutorial 🌺🌻🌺
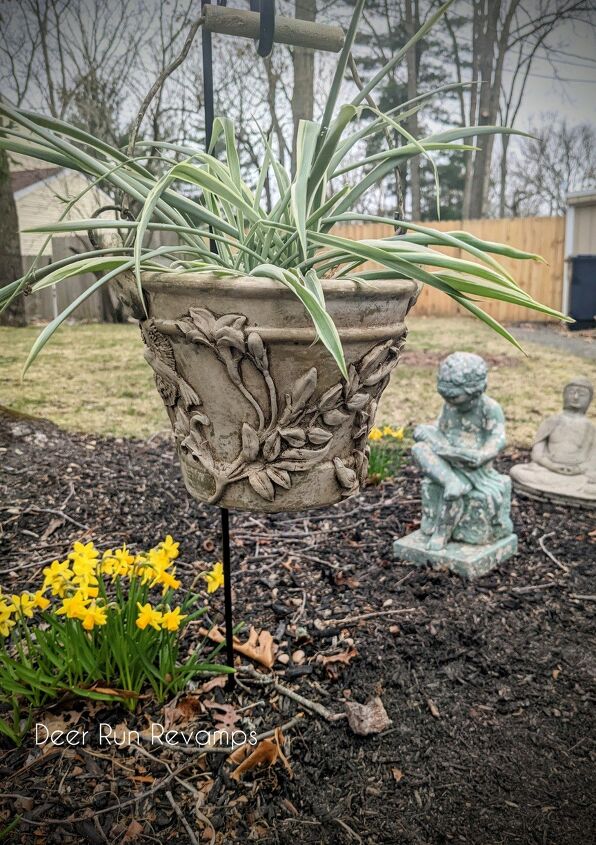
And Happy Spring! 💐
You can find these products as well as over 600 other products, designs and colors in our Etsy shop
https://www.etsy.com/shop/DeerRunRevamps
If you have any questions, feel free to reach out 😊
Resources for this project:
See all materials


Comments
Join the conversation
-
Very pretty. Thanks for all of your tips.


Frequently asked questions
Have a question about this project?
What material is the pail that up was used in this project? Will the clay adhere and glue onto most materials or only specific types?
Is there a way to protect this to be used outside ?
Can this be put outside?