


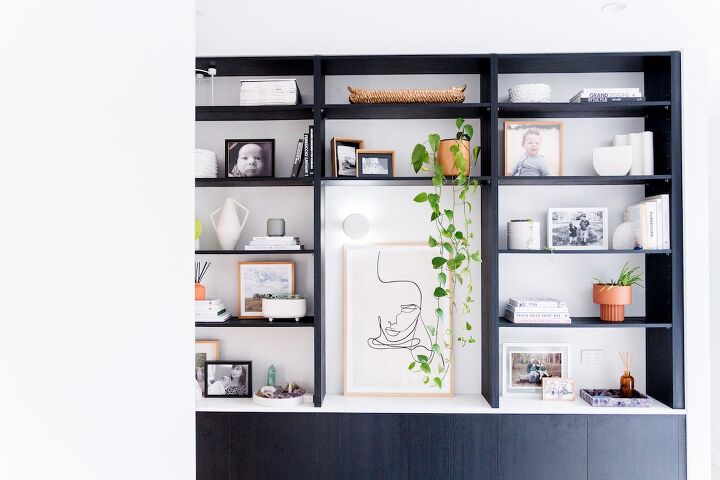
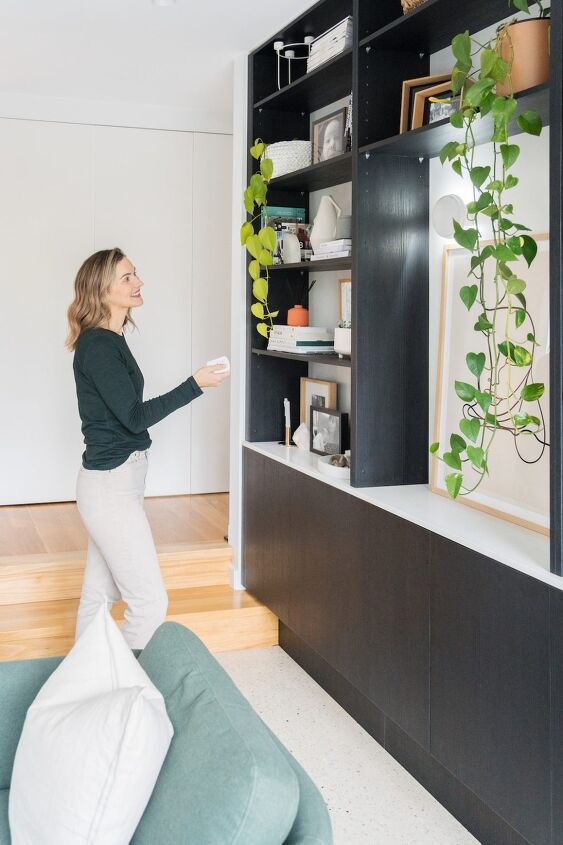
Use a Salad Bowl to Make an On-trend Wall Light
Round wall lights sure are trending at the moment but they can cost several hundred dollars. After struggling to find the perfect wall light for my bookshelf, I decided to DIY my own and truth be told, I'm so glad I did.
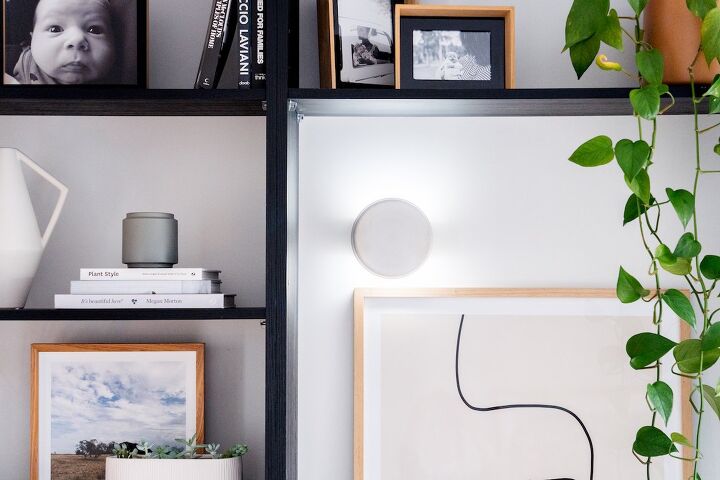
Along with being an easy and affordable option, the best thing about this project is the lack of damage to my walls. This makes it perfect for a long term lighting solution or temporary fix (for renters or those not wanting to commit).
So read on to see how I created this easy round wall light with a salad bowl.
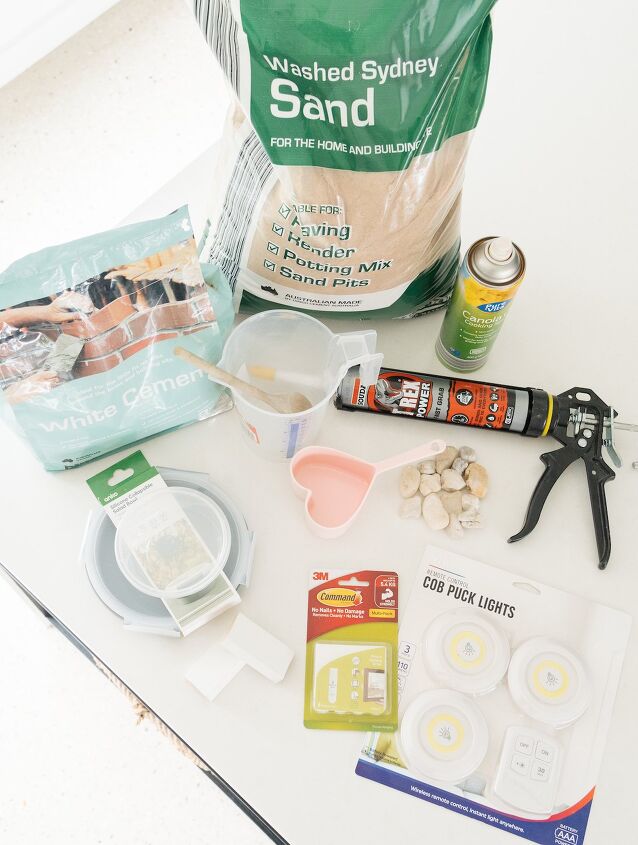
Items you will need:
- Cement (I used white cement)
- Sand
- Silicone bowl or other round mould (available at Kmart)
- Small plastic container (to create an indent behind the light)
- Puck lights (available at Bunnings)
- 3M Command picture hanging strips (also available at Bunnings or Kmart)
- 2 x small pieces of timber
- Handful of pebbles (to weigh down the plastic container)
- Glue
- Measuring cup
- Mixing bowl
- Stirrer
Steps:
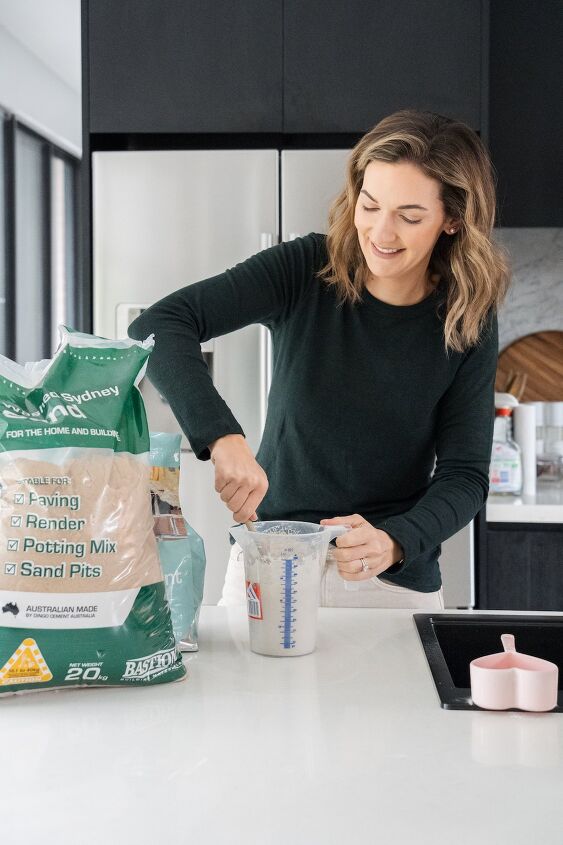
1. Mix up a small batch of cement following the instructions on the packet. I used 1 cup of white cement, 2 1/2 cups of sand and 1 cup of water. Stir until it’s the consistency of cake batter.
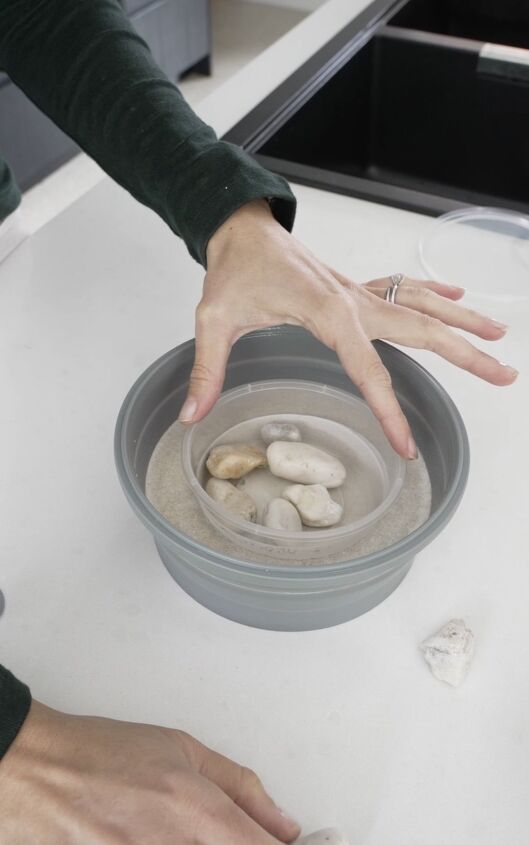
2. Pour cement into your silicone mould until it is 3cm deep. Tip: you may like to lightly spray your mould with oil to make it easier to remove once dry.
3. Gently press your plastic container into the centre until it is approximately 2cm deep. The idea is to create an indent for your puck light to wash light behind. Weigh it down using a handful of pebbles and set aside to dry for 24 hours.
4. Once dry, gently remove the cement light shade from the moulds.
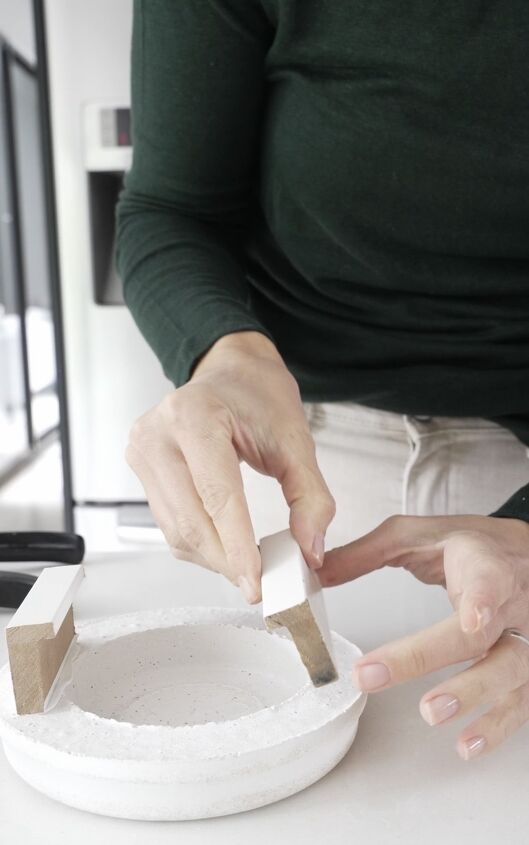
5. Glue two strips of timber onto the back of the light. This will sit the light off the wall so the light can illuminate behind. And it’s also how you will adhere the light shade to the wall using the 3M Command picture hanging strips. You could use any small piece of timber that will fit. I had a broken picture frame that I cut down to size. Ideally, the timber strips would be 1.5cm wide and approximately 5cm long.
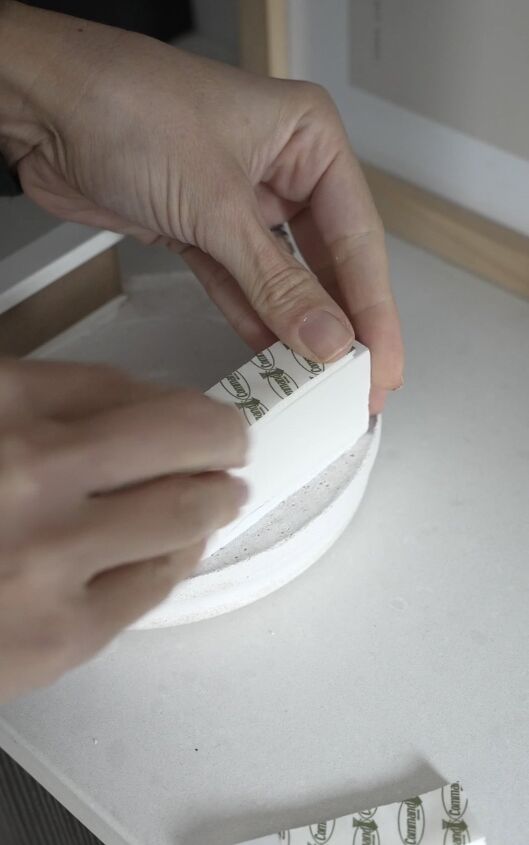
6. Finally, once the glue has dried, attach the 3M Command picture hanging strips to the timber pieces.
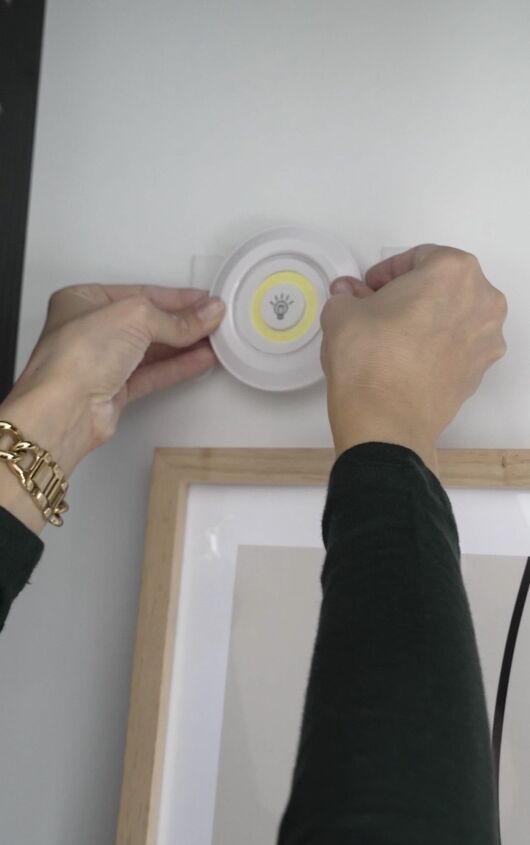
7. Press the light onto the wall for 30 seconds. Then remove the light cover and press the strips down for another 30 seconds.
Wait 1 hour for the adhesive to bond and then you can attach your puck light and re-attach your light cover.
Done! There’s so much scope to personalise this hack to make it your own.
For example, you could add oxide to tint the cement a different colour. Or you could use a different material altogether such as timber or marble.
Find me on Instagram or pop over to stylecurator.com.au for more easy DIY ideas!


Frequently asked questions
Have a question about this project?
Why not set the wood bits in the cement, too?