


What To Do With Old Rolling Pins-Turn A Rolling Pin Into Unique Decor

Everyone has a couple rolling pins in their kitchen, and if you have too many, you can turn them into adorable decor!
This simple transformation is a quick and easy way to add a little unique farmhouse touch to your kitchen 😁
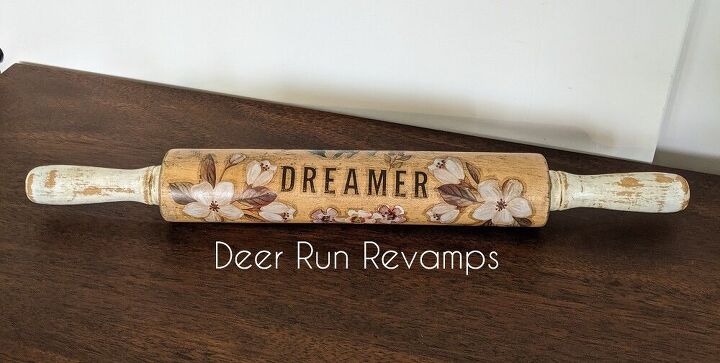
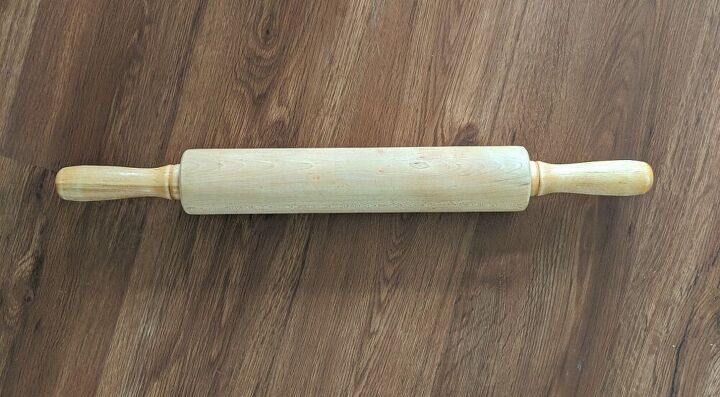
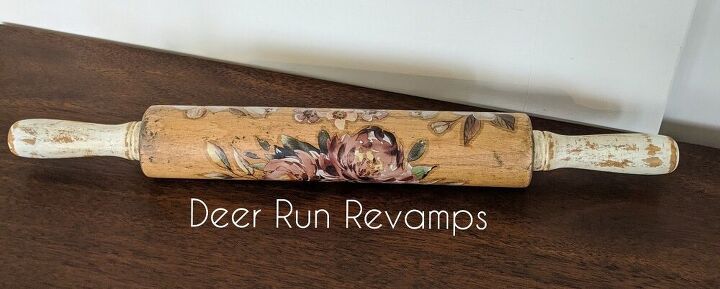
I used a 17" hard wood rolling pin. You could use any size, and you could even use a silicone pin. Just paint it! 😉
First, you need to make sure the rolling pin is clean. I just washed mine well with soap and hot water.
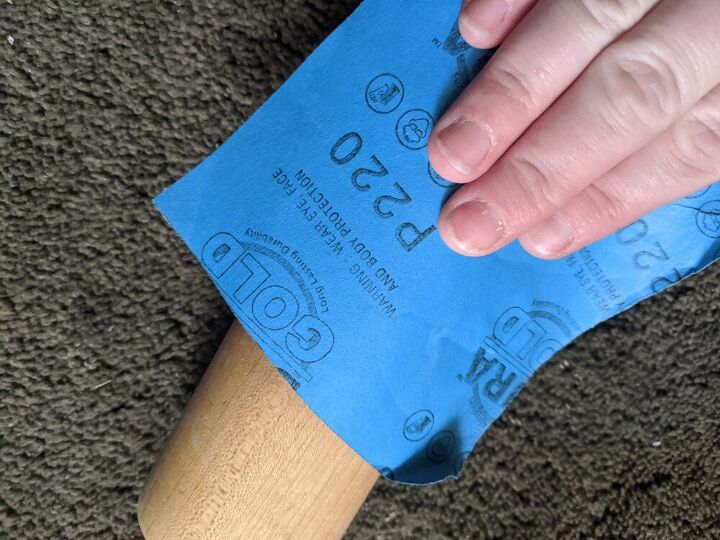
Once it was dry, I sanded it using 220 grit sandpaper. This removes any residue.
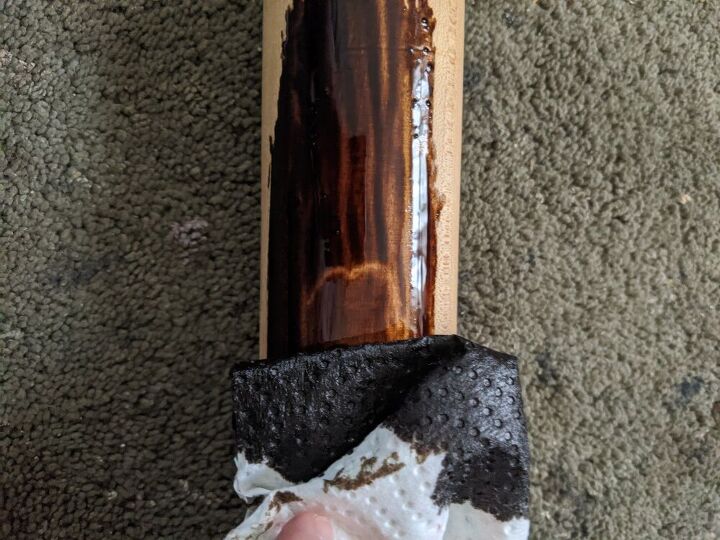

I used Minwax penetrating wood stain in dark walnut. Since it's hard wood, it won't really soak up a lot of stain. This just makes it a shade or two darker and accentuates all of the "flaws" like scratches, divets, and marks. This makes it look old and really gives it character.
Put on a pair of disposable gloves, and grab a clean rag or paper towel. Dip the paper towel into the stain and rub it onto the pin. Then, using a clean paper towel, wipe off any excess stain.
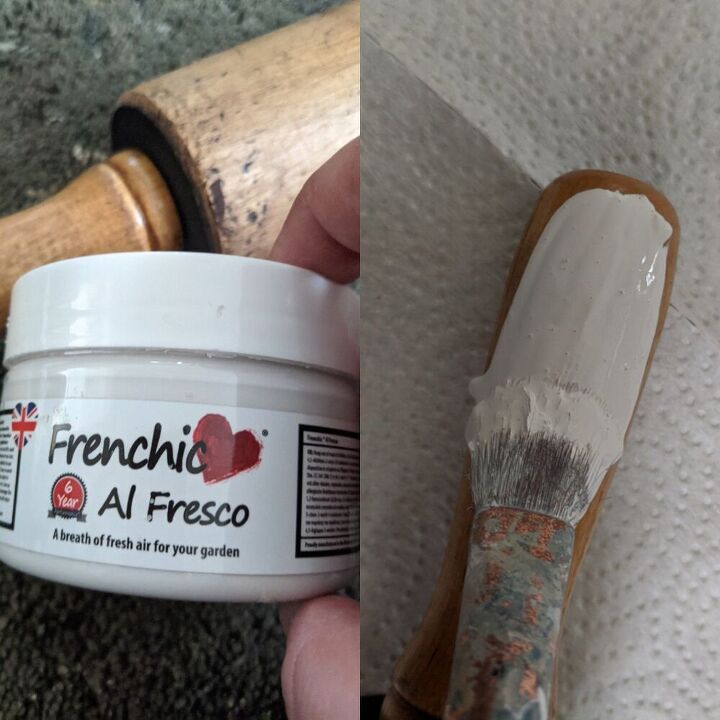
Frenchic Furniture Paint makes a great range of paints! It's called the Al Fresco Range and this paint is extremely durable, it can even be used outdoors! It has a built-in topcoat, self levels, virtually odorless, and is certified child safe. The coverage is great too, I only needed 2 coats of "Dazzle Me", the pure white. You could get dozens of rolling pins done with a single sample pot.
Apply your 2 coats, allowing to dry for at least 2 hours in between coats
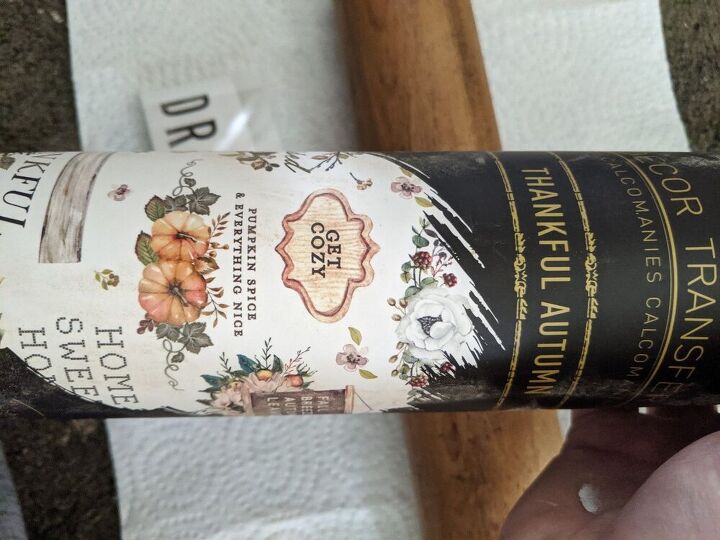

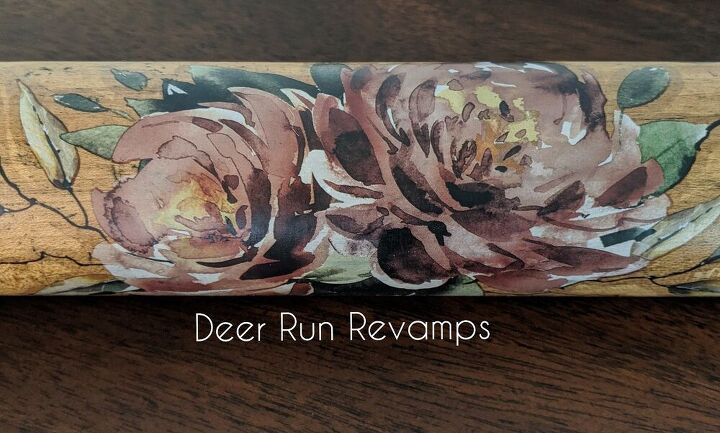
After the stain has dried for an hour, we can apply the transfer(s). I took pieces from the "Thankful Autumn" Decor Transfer, but you could use any transfer that you'd like. I have dozens of choices available in my Etsy shop, linked below in the materials section.
Cut the piece(s) to fit. Remove the white backing sheet, and position it where you'd like it to be.
Once any part of the transfer touches the pin, you won't be able to move it. So as you're positioning it, hover it above the pin, not actually touching it.
Also, be careful not to touch the transfer with your fingers. It is extremely sticky and may stick to your fingers, possibly ruining the transfer.
Once you have it positioned correctly, lay it onto the pin and press down firmly over the entire transfer. Using the tool provided with your transfer, press down firmly over every part of the transfer, getting the edges really well.
Pick an edge of the clear plastic film and slowly lift up. As you lift, rock back and fourth. If at any moment, the transfer isn't sticking to the pin, lay the plastic back down and go over it again with the tool, pressing firmly. Then, continue lifting the plastic film.
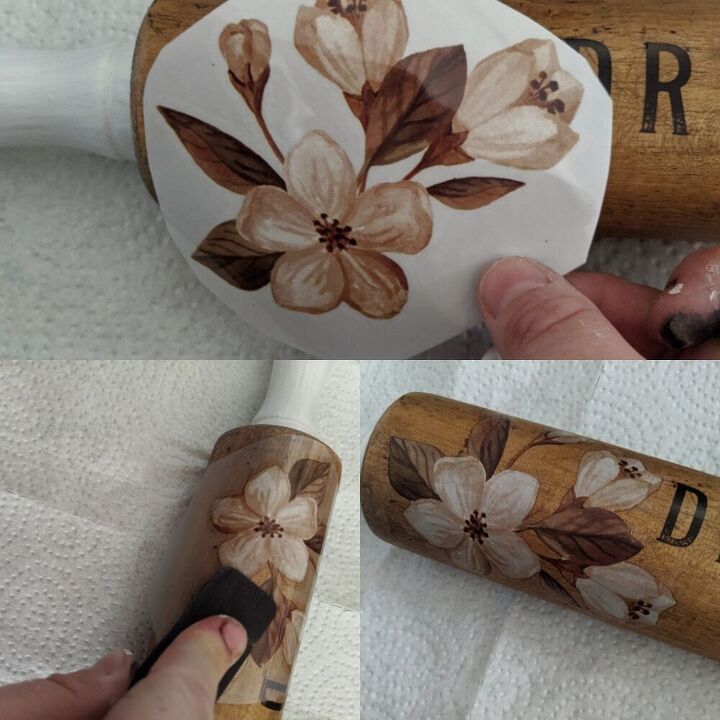
I like to gauge the size and position while the white backing is still on. This way, I know I won't accidentally stick the transfer in the wrong spot.
Follow these steps for each transfer you want to apply
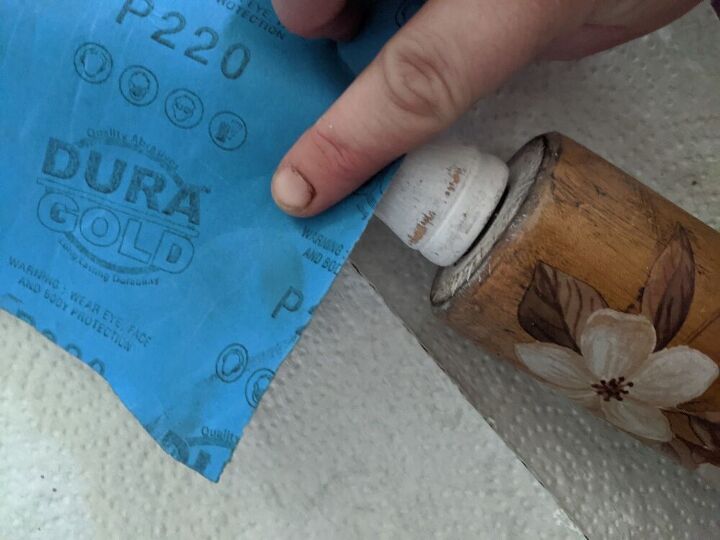
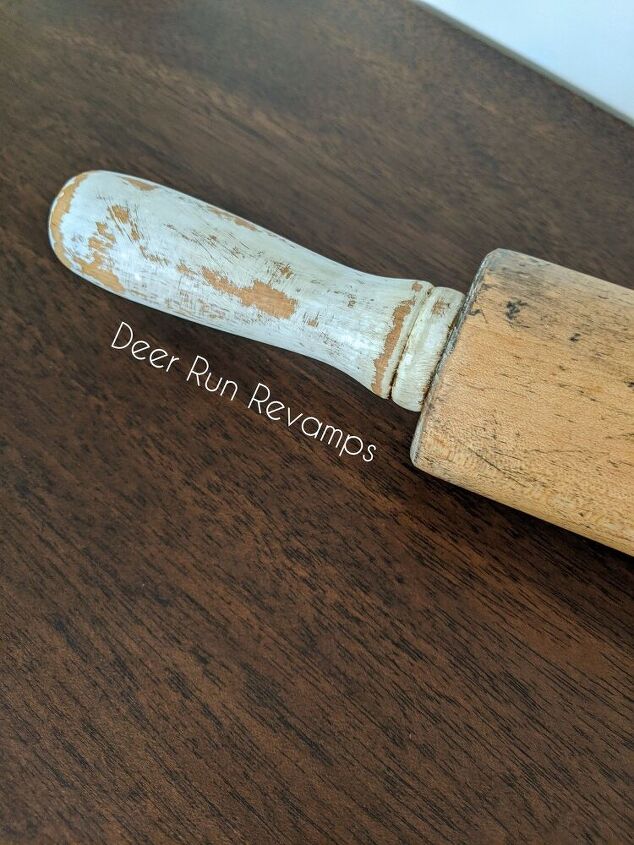
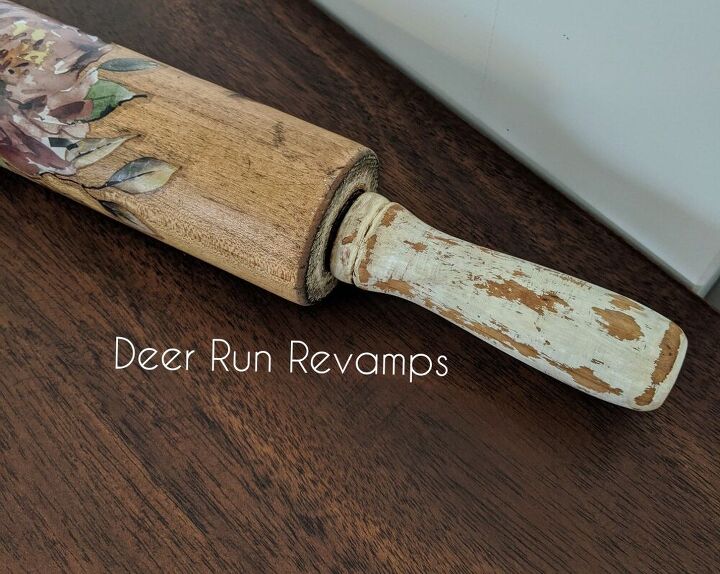
Once the paint dried for 2 hours, I was able to add the finishing touches. I wanted the handles to look old, rustic, and very used. So I took 220 grit sandpaper and distressed the handles. Since I used Frenchic Furniture Paint's Al Fresco Range, the paint that is made to last outdoors in the elements, it was not easy to sand and distress. It did take me awhile to get the look that I wanted. But, once I got there, I was extremely happy!
If you don't want it to be so difficult to distress, you could use Frenchic Furniture Paint's Lazy Range which also has a built in topcoat, or the Original Range which would be the easiest to distress
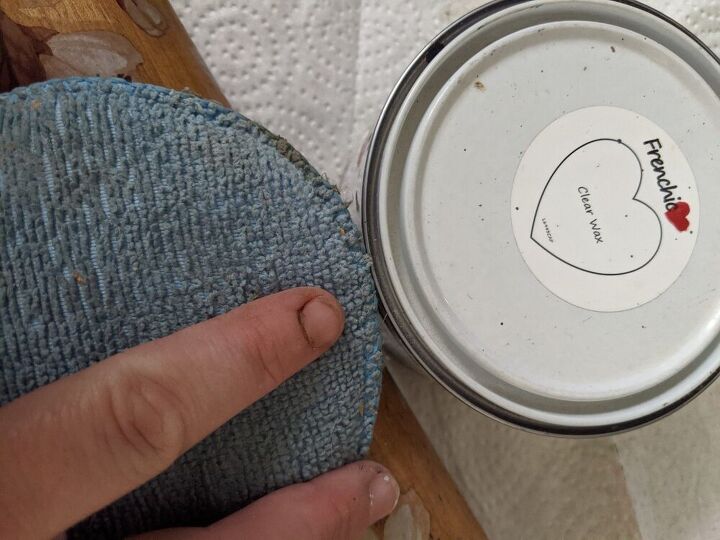
I'm a wax girl. I love the look and feel of a waxed piece. Frenchic's waxes are so creamy, and they don't even have to be buffed if you're not after a shiny finish.
I like to use microfiber sponges that are made for waxing your car. They are washable and work great for applying wax to furniture and decor.
I put a small amount of clear wax onto the sponge and then rubbed into the pin. A little goes a long way! Let it dry for a couple of minutes and then move on. I didn't buff
You could use White Wax to give it a soft finish, or Browning Wax to age the entire pin

I then applied a very small amount of Frenchic's Browning Wax to the handles to age them even more. I used a small detail brush to get into the grooves, then rubbed it in and wiped off the excess with a paper towel. This adds a subtle antiqued look
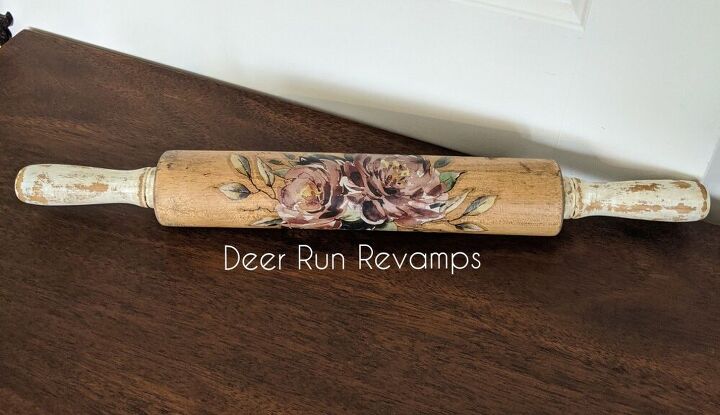
Now, decorate your kitchen with your new/old rolling pins!
You can put a few in a basket, and use it as a center piece on your kitchen island or kitchen table. Or lean one against the coffee maker.
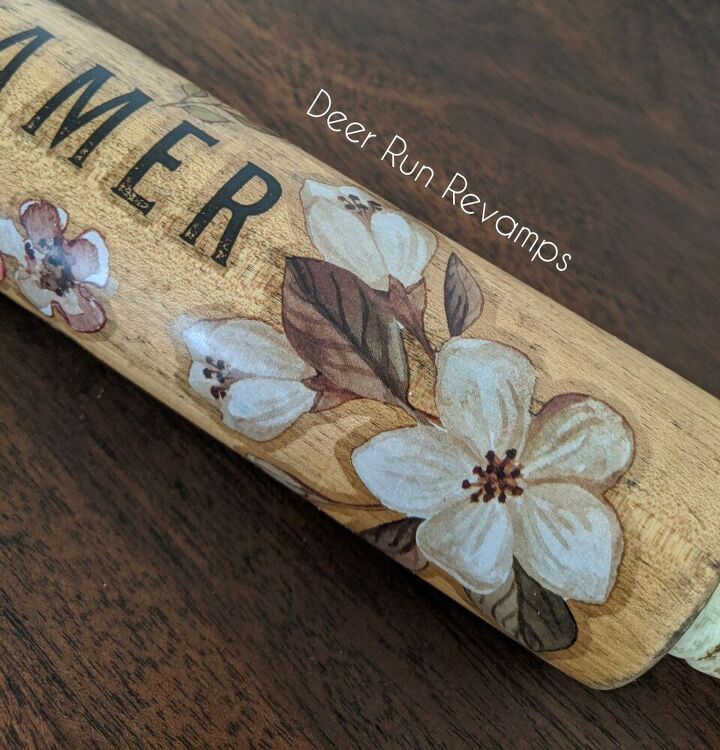
You could get numerous smaller projects done with a single transfer. They are quite large.

I hope this tutorial has inspired you to create something beautiful
You can see more transformations by Deer Run Revamps on Facebook (linked below in the "to see more" section)
The price listed will finish multiple projects. The time does not include dry time
Thank you for reading!
If you have any questions, feel free to comment below or reach out to us 😉
Resources for this project:
See all materials


Comments
Join the conversation
-
So beautiful!
-
Love this idea an it is beautiful done! I do have a old rolling pin I just love this I may just give this a try on mine.


Frequently asked questions
Have a question about this project?