


Wicker Basket Update

This (top) basket has a new purpose. And it was super simple! I’m not kidding.

Yard sale vs thrift store vs consignment shop. Where to find the best buys?
This is what I’ve learned over the years. My most successful finds are at yard sales. I sell my makeovers so I need to find quality items that are cheap cheaper cheapest. That allows me to put a reasonable price on the item and make a decent profit. Most yard sale hosts are willing to sell items at low prices. I found a large heavyweight mirror complete with a self and hooks marked for $5 and asked what is the best you can do. I got it for $3, worked my magic on it and sold it for $54 at a consignment shop!
Thrift stores that raise $ for a good cause are next in line. Their items are all donated so they can price them really reasonable. And the money goes to a good nonprofit.
Consignment shop... not so much. Both the consigner and the shop needs to make a profit. However they are a good place to find great buys for your own home.
And that’s my two cents.
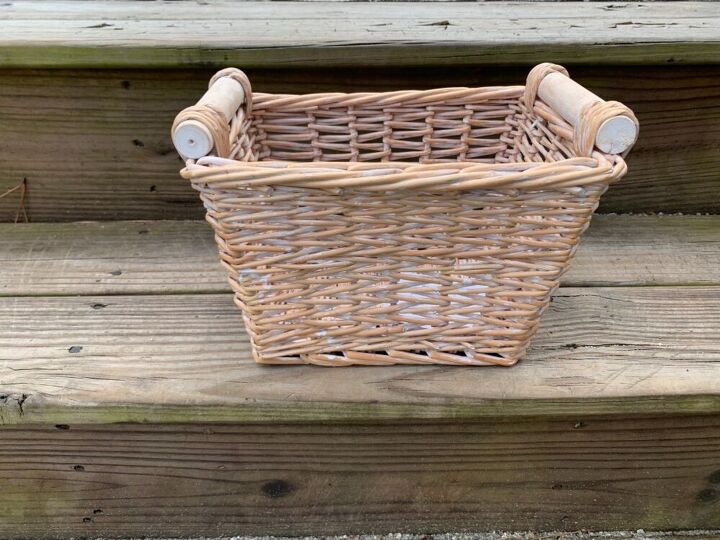
This is the basket that I’m going to makeover. The flat front shape is perfect because I am going to add a sign.
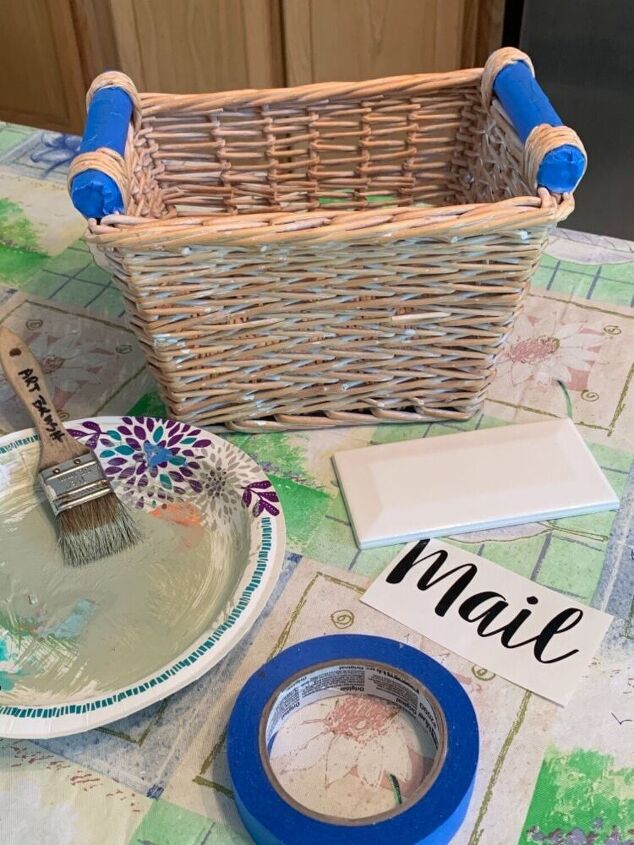
-nice shade of green chalk paint
-chip brush
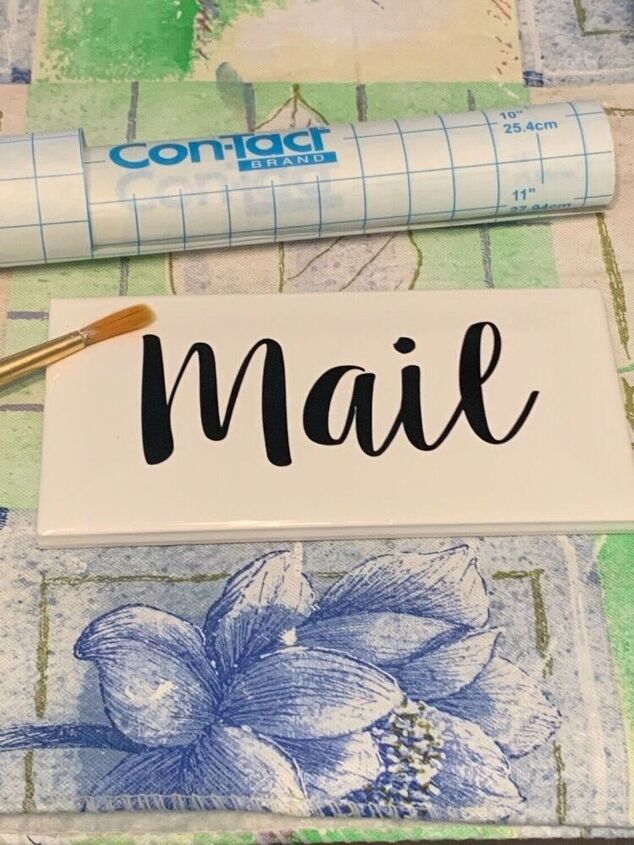
-ceramic tile
-vinyl lettering
-clear contact paper
-glue
Typically I’ll paint the entire basket but with this one being in such good shape I decided to just do a light dry brushing to add some color. I taped off the handles expecting a two toned effect with white and green paint. But then I changed my mind and painted the entire top rim all white including the handles.
I thought this would make a really neat basket to hold your mail. I don’t know about you but in our house the mail may sit around for a day or two until it makes it into it’s final resting place.
I use my Silhouette Cameo to design and cut the vinyl. Clear contact paper is an inexpensive way to transfer the lettering onto the tile. (I had put off buying a cutting machine for years. Then about four years ago I finally bought one. I can’t tell you how much it increased my abilities to create unique projects.)
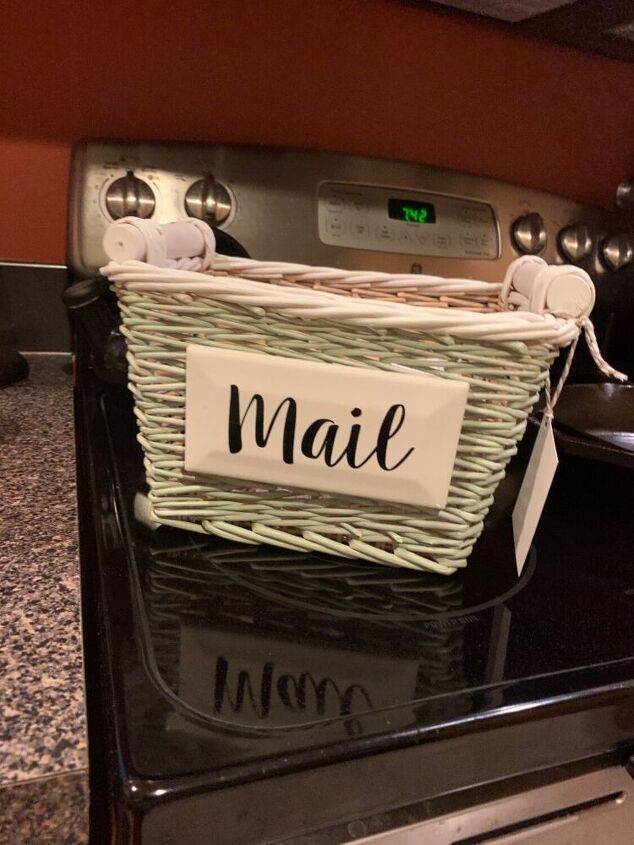
I didn’t paint the inside of the basket but I did need to add a clear top coat to preserve the durability of the paint on the outside. My go to adhesive for this kind of project is E6000. I turned the basket on it’s side to glue on the tile sign. After about an hour it was dry.
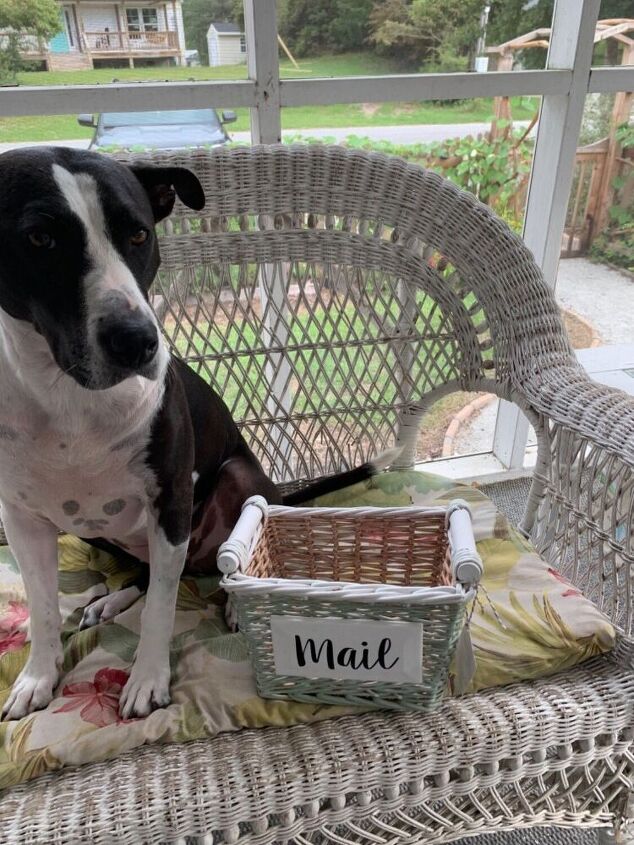
Abby thought I did a good job. And I guess I did! This one sold quickly at one of my favorite beach consignment shops.


Frequently asked questions
Have a question about this project?