


Wood Box Pendant Chandelier

We have an odd spot next to our refrigerator where I'd previously built a convertible folding table/breakfast bar. We were looking to make the space look more intentional. The goal was to add a chandelier-style light fixture, but we didn't have an existing electrical box - so our solution was to buy plug-in light pendants and build a box to hang them.
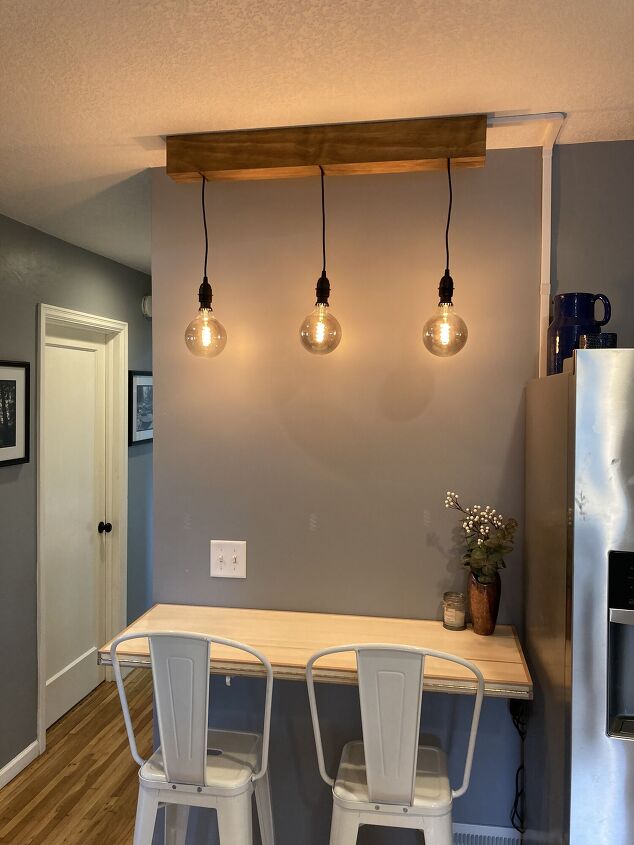
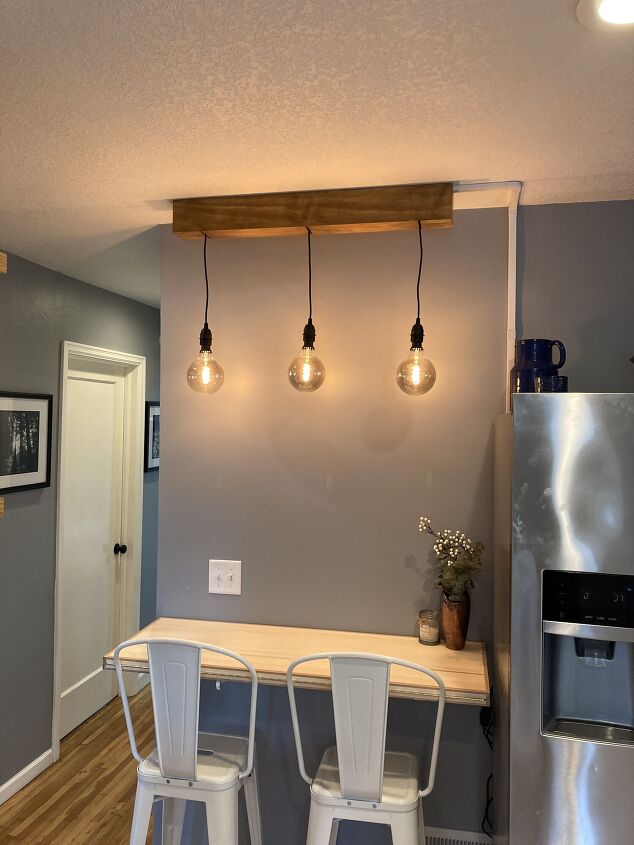
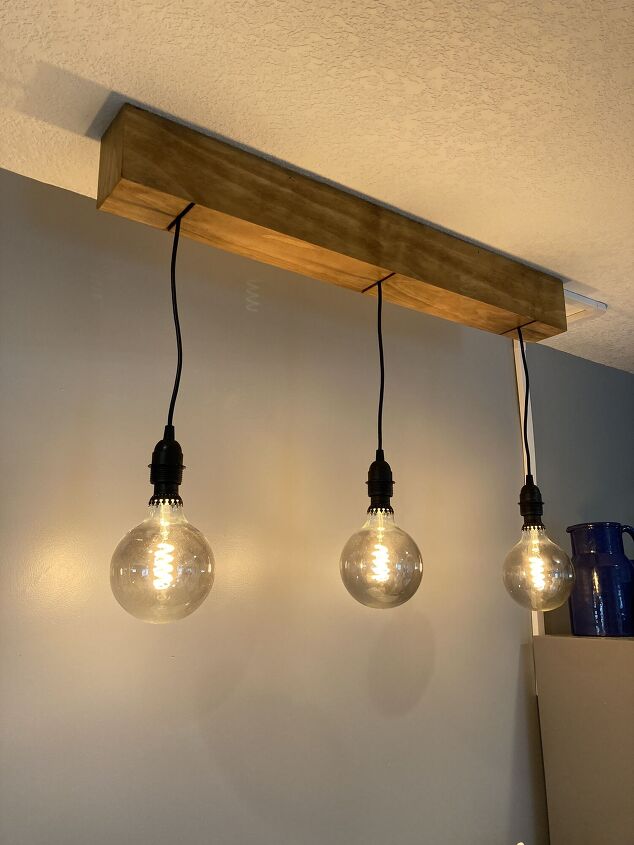
This is the finished product. It should look even better when we add cabinetry around the refrigerator which will hide the white strip containing the cords.
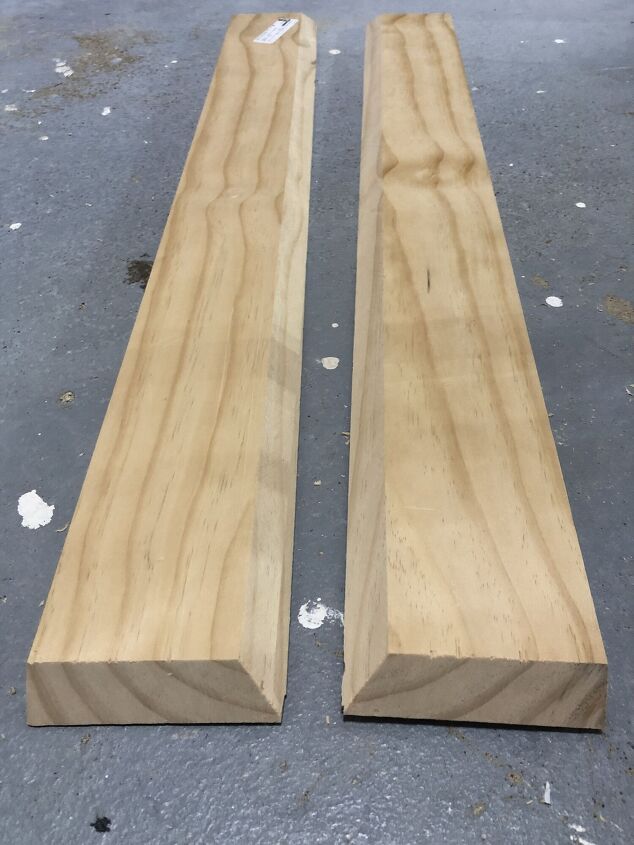
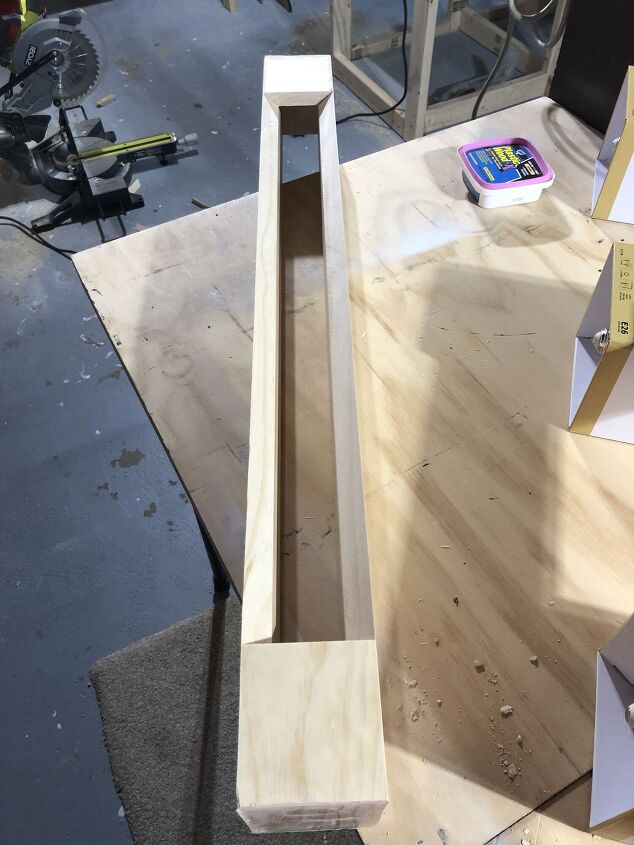
I used 1" thick boards to build the box. The long side pieces are 4 1/4" tall x 36" long. I cut 45-degree miters on one of the long edges and both ends of each board.
The side pieces of the box are 3 1/2" wide x 4 1/4" tall. Once again, I cut 45-degree miters on the bottom and both sides.
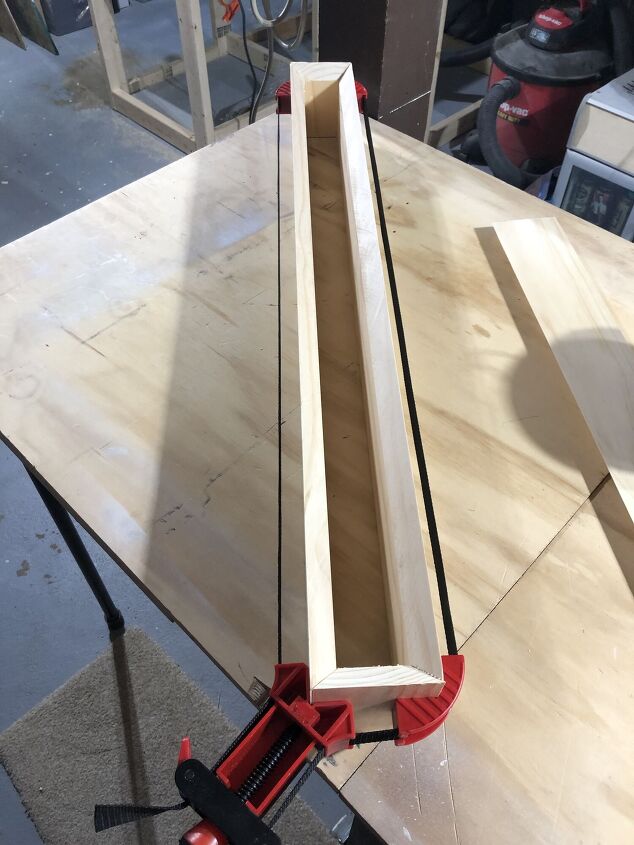
Next, glue up the box. If you don't have this type of picture frame clamp, you can use painter's tape to hold the corners together.
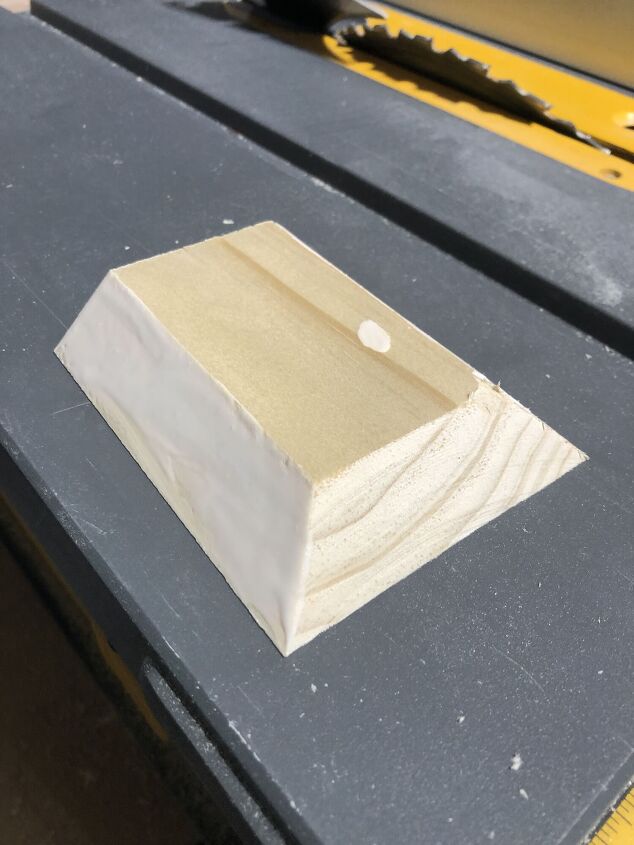
Once the box is dry, it's time to add the bottom pieces. On each end I used a 3 3/4" long piece, mitered at each side and secured with wood glue.
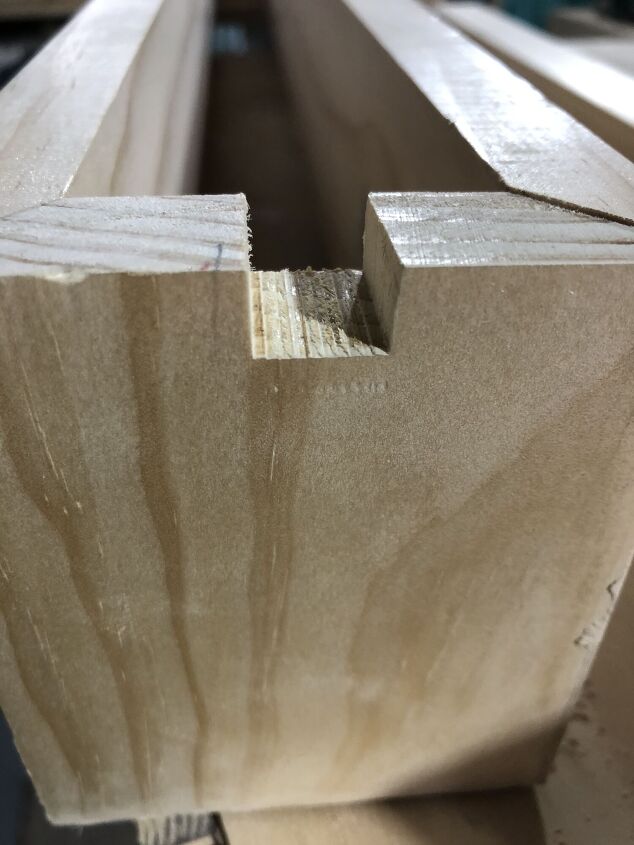
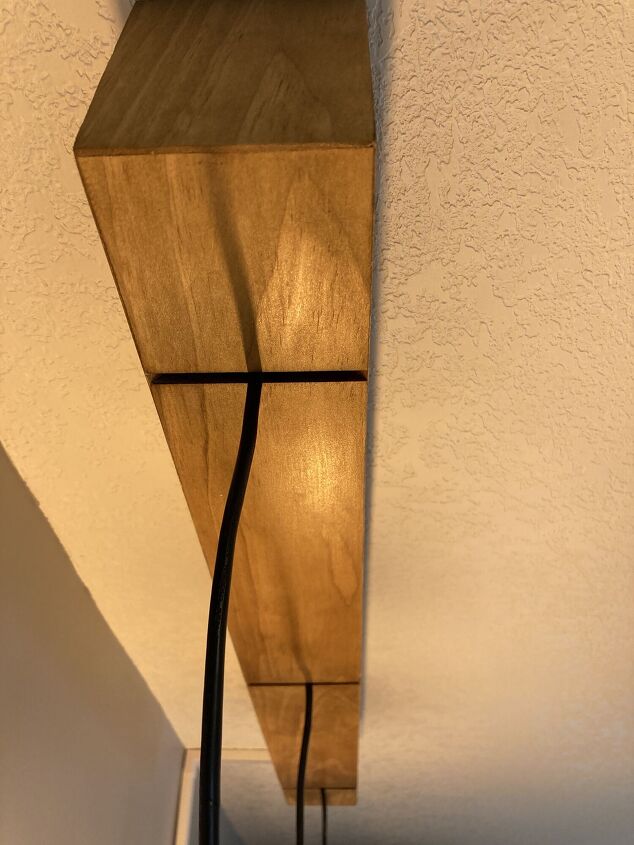
Then, I cut out a notch on the top of one side where I'll run eac of the three cords that need to run to an outlet to be plugged in.
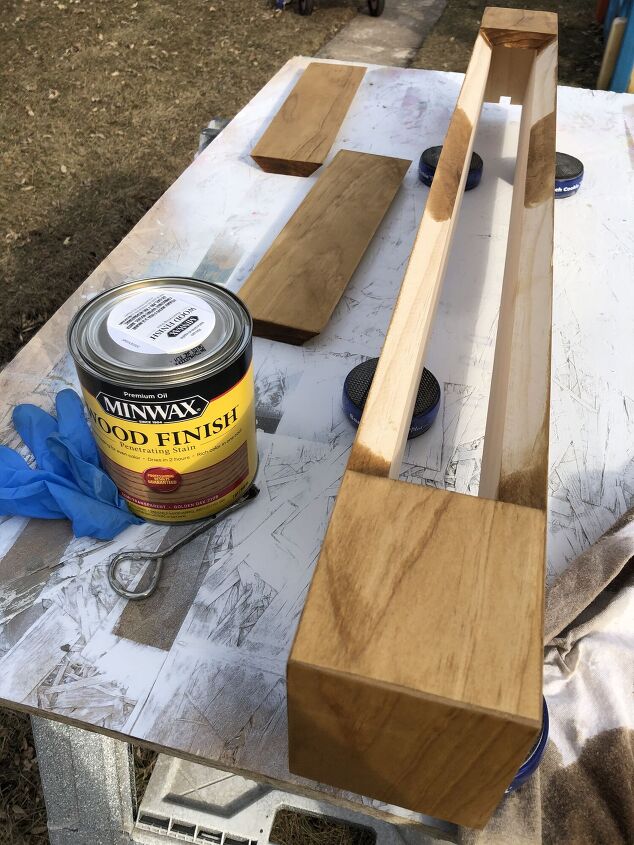
As you can see in this photo, I also cut the two longer pieces for the bottom. They're each 13 3/4" long and mitered on all 4 sides. Before gluing them on, stain them and the rest of the box.
It's a good idea to use polyurethane or another sealer as well before gluing the rest of the box up.
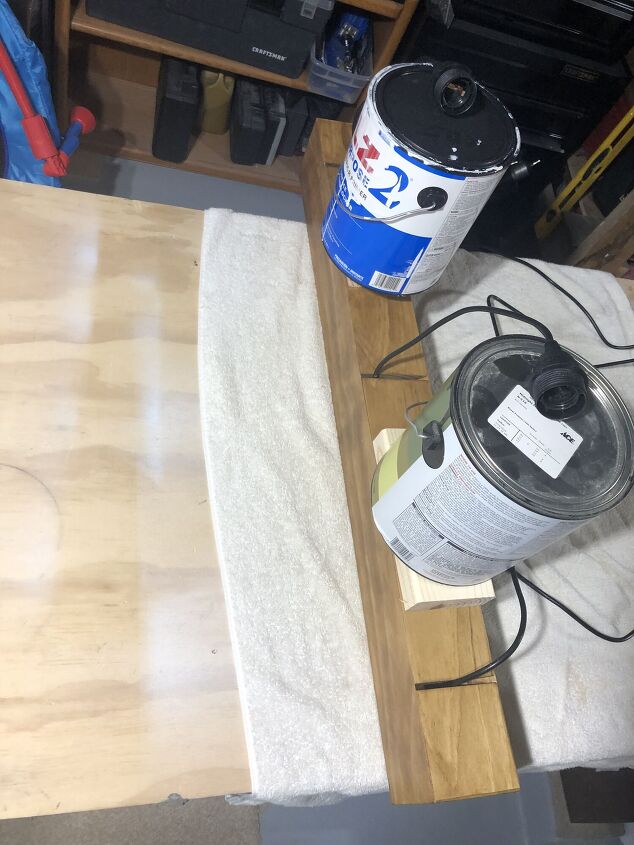
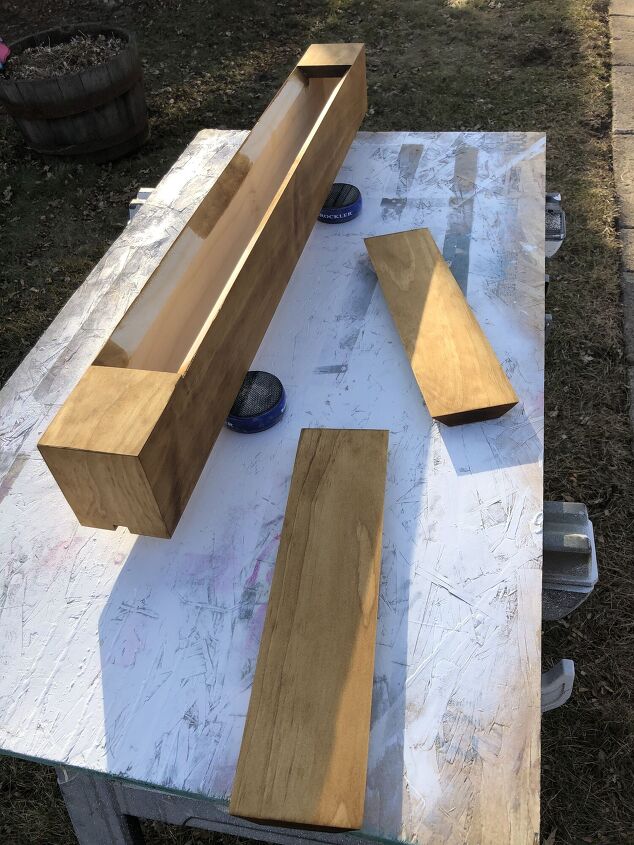
After the stain dries, insert the cords for the pendants and those final long pieces for the bottom of the box. Secure the pieces with wood glue. I set full paint cans on top to apply some pressure while the glue was drying.
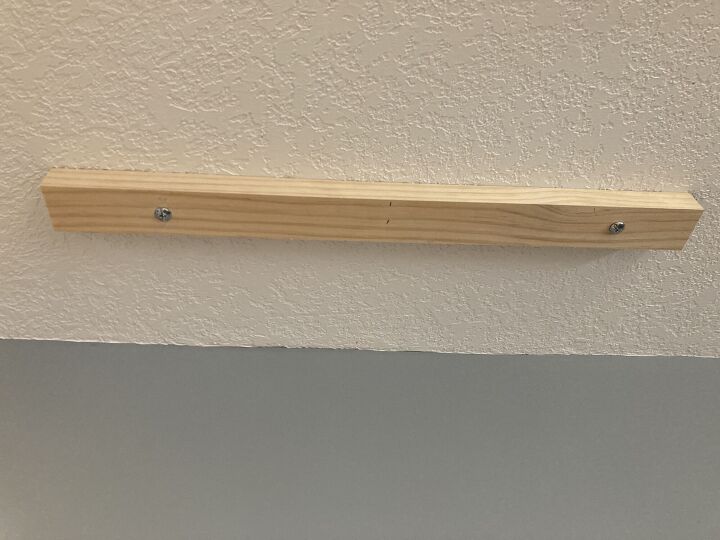
While the glue on the box was drying, I put the cleat on the ceiling. I used the same 1" thick board for the cleat and cut it so it would fit inside the box - roughly 1 1/2" wide x 32" long.
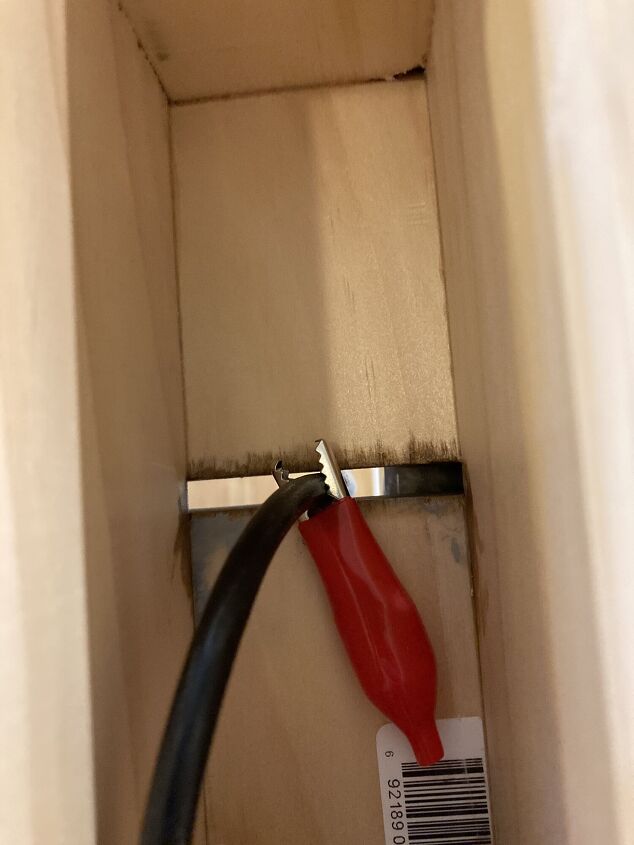
Before securing the box to the ceiling, I made sure the pendent cords each hung the same distance from the box. I just used some electrical clips I had around the house to secure the cords and make sure they would not pull further out of the box.

Finally, pull the other end of the pendent cords out of the slot on the top of the box and slide it onto the cleat. I secured the box to the cleat with a few trim head screws.
In this photo, you can see the white cable raceway I used to hide the three cords between the box and the outlet.
The pendant lights simply hang right through the 3 cracks in the bottom of the box. So, it would be easy to use this same idea to make a longer box or a shorter one - customize it to the size you need.
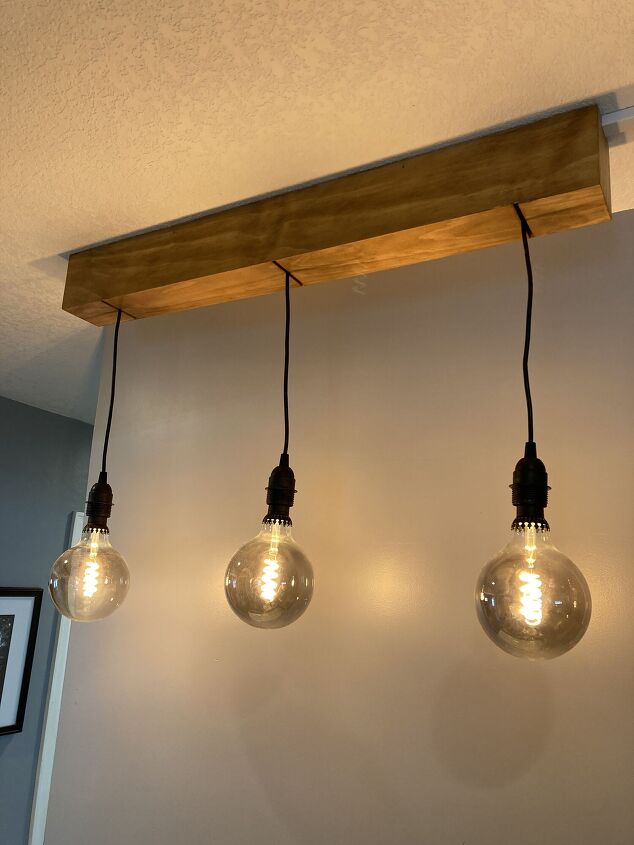
Here is the finished product! You can find pendants and bulbs of all lengths and sizes pretty easily, but we got both at Ikea.
Follow me on Instagram at @woodyworking for more woodworking DIY or home improvement projects. Happy building!
Resources for this project:
See all materials


Comments
Join the conversation
-
Such a sweet, intimate spot❤️
-
Looks very nice and it's a great use of the space (with your table).


Frequently asked questions
Have a question about this project?
I have been collecting lollipop sticks what can I make with them ??