


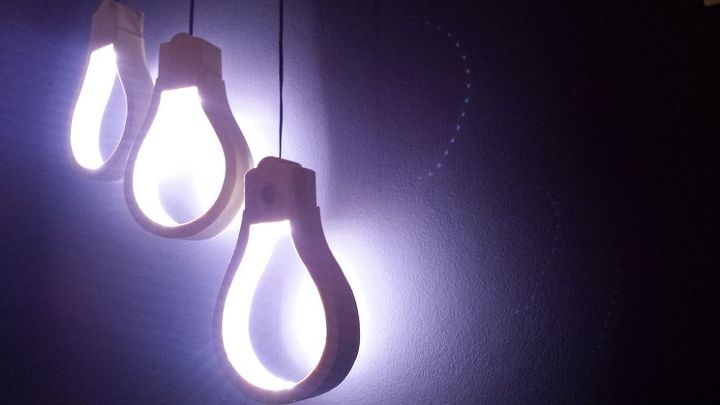
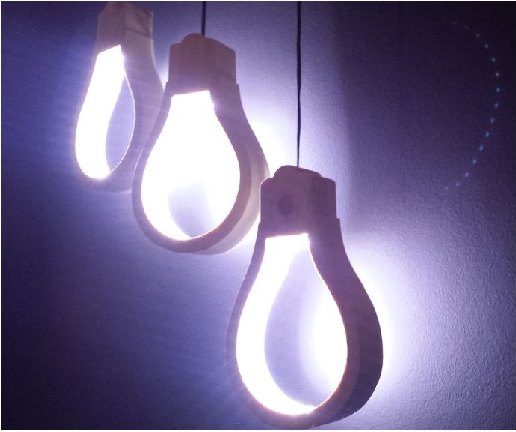
Wooden Light Bulb Shaped Lamp

8 Materials
$50
3 Hours
Advanced
I've been always fascinated with the warmth of wood and the brightness of light. The combination of those two can give only a beautiful effect.
So I thought I'd start an guide explaining how I made my light bulb shaped lamps for my nephews room. It was a really easy build, no fancy tools were needed and it was a really fun process.
Hope you enjoy!
So I thought I'd start an guide explaining how I made my light bulb shaped lamps for my nephews room. It was a really easy build, no fancy tools were needed and it was a really fun process.
Hope you enjoy!
A project can be made in many ways. Some people feel more confident using power tools while others prefer the traditional way. Here is a list of the tools and materials that I have used for this project. That does not mean that if someone does not have the tools that I demonstrate here will not be able to complete the project. I will also try and give some alternative solutions for those who have some basic power tools or hand tools! Tools are just a matter of taste! Have fun and always be careful when working with sharp tools and power tools!
{
"id": "3637115",
"alt": "Project Video!",
"title": "Project Video!",
"video_link": "https://www.youtube.com/embed/bAY7P_Ba9Fg",
"youtube_video_id": "bAY7P_Ba9Fg"
}
{
"width": 634,
"height": 357,
"showRelated": true
}
Please check in the videos description box for the free PDF plans
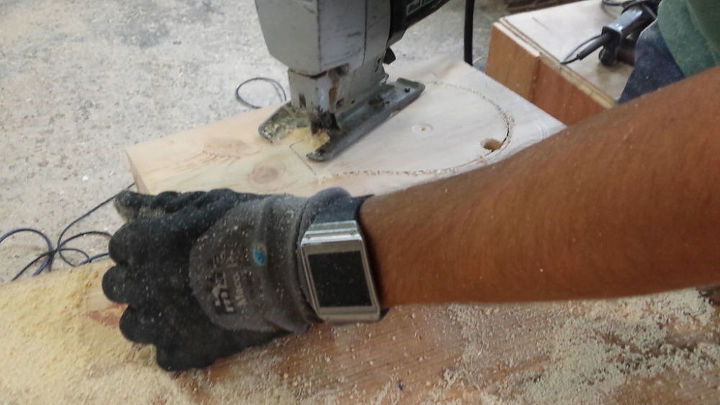
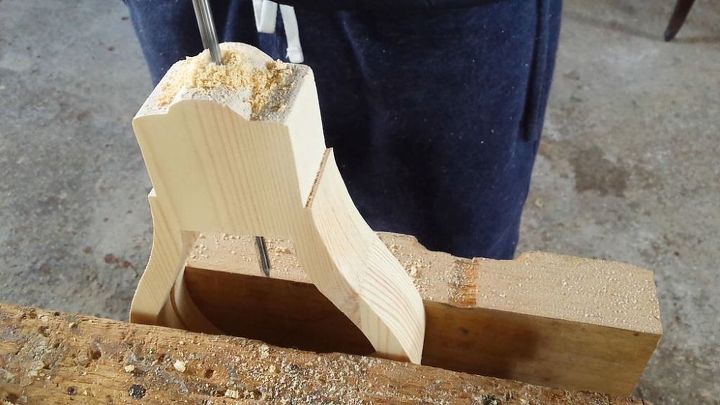
Making The Bulbs
Before You begin please check out the embedded video for more details.
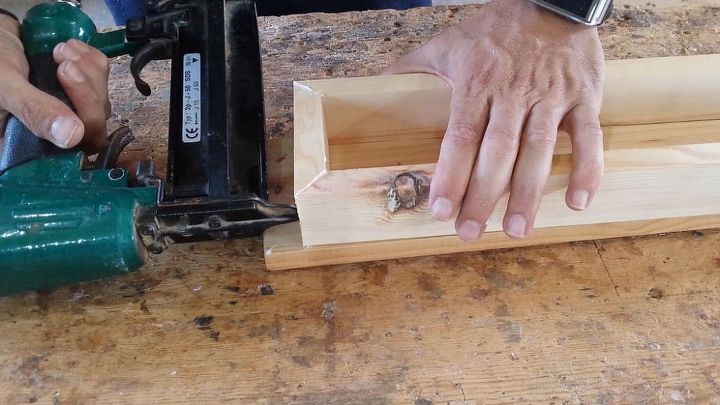
The Base
You need to make a base from which you will hang the lamps. This is a base which can be mounted on the wall or on the roof.
Preparing The Bulbs For Wiring
On each bulb drill a 6mm hole all the way through the bottom of the bulb to feed the wire. Then from the inside drill a 16mm hole, just 3cm deep. We are going to hide the wire knot in this hole.
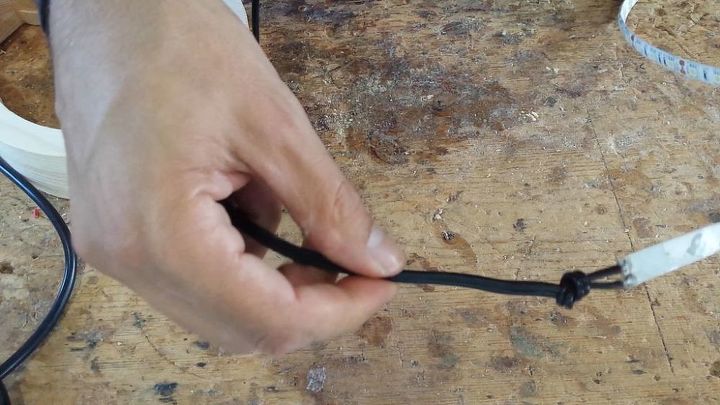
Soldering
Cut a piece of led strip to fit inside the bulb. Then cut a long piece of cable (around 1m) and solder the cable on the led strip.
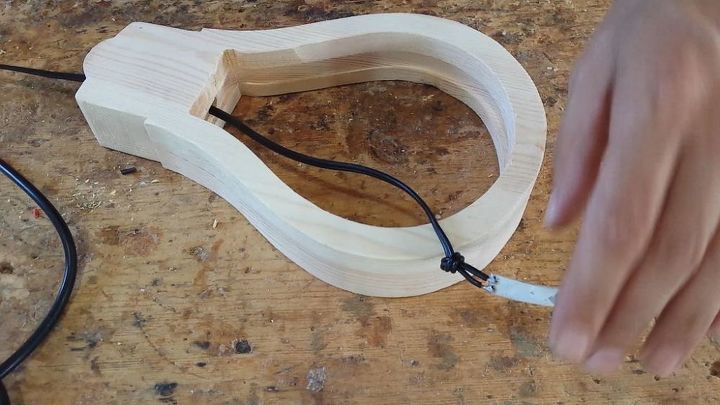
Feed The Wire Through The Holes
Feed the cable through the hole on the bulb and stick the led strip in the narrow channel you made with the router.
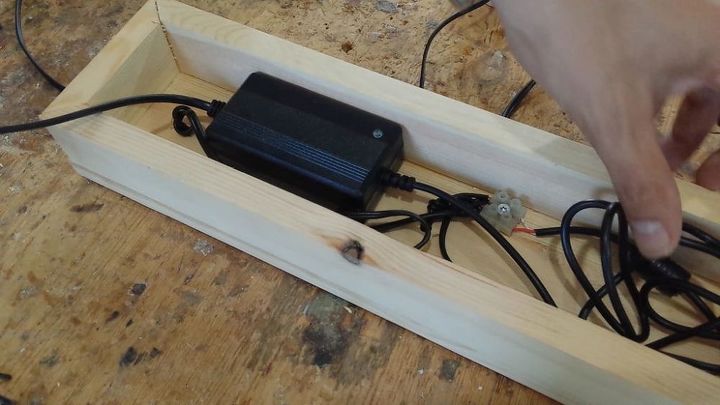
Power Supply Inside The Base
Use a connector strip to connect all the positive wires to the positive end of your power supply, and all the negative wires to the negative end.
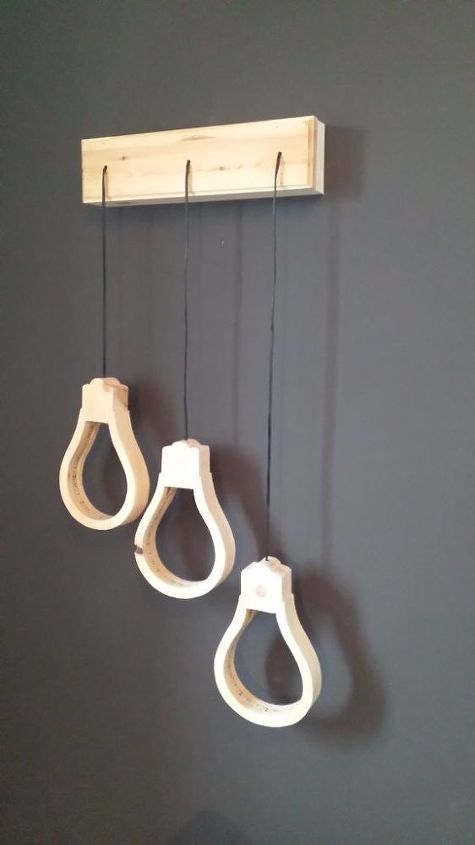
Hang Your Lights On The Wall
Now you can hang your lamps on the wall and turn them on!
Comments
Join the conversation
2 of 43 comments
-
I really like them and they look like they would be a great find for the type of decor a lot of people like. Never know it might be your way to success, I've heard of stranger things happening! Wish you the best
-
Can you hang them outside


Frequently asked questions
Have a question about this project?
This is so nice! Could you CNC the parts and use full RGB lights (possibly smart LED strip lights?)
I really want to try this if I do anything like this over the summer this would definitely be my top pick! Can you tell us where you got the lights you used? Someone else had ask if you could use the small strip lights ?