


Vintage Metal Tray Tiered Stand
Vintage metal trays are so fun to pick up at secondhand sales. Their designs of flowers and seasonal patterns are so cheery. To increase their enjoyment and function, create a tiered stand with old crib spindles. Here's how.
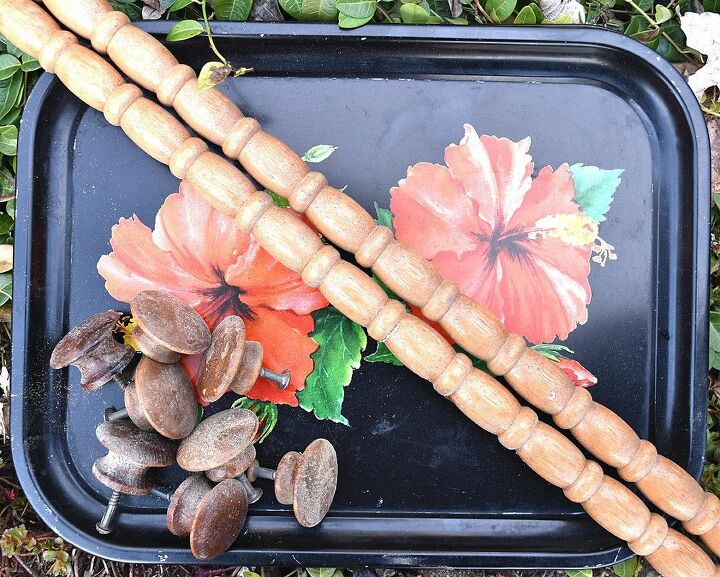
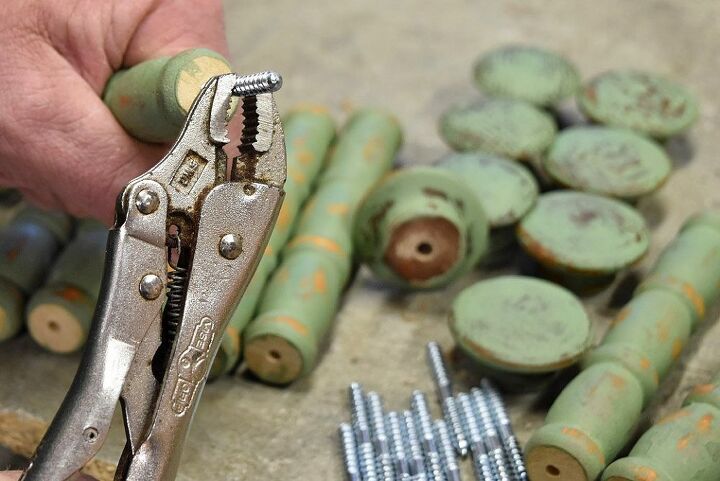
You'll need 3 vintage metal serving trays, a couple old crib spindles (I used a Jenny Lind spool type) 8 old wooden knobs and 12- 3/16" x 2" dowel screws (the ones with the double ends).
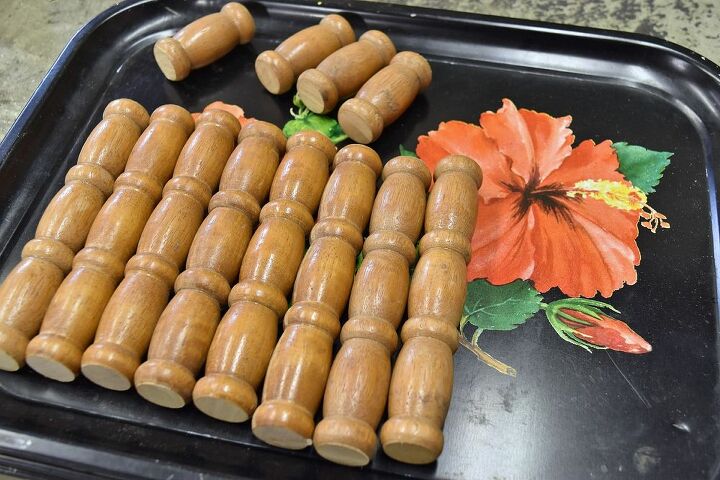
First cut the spindle pieces into 8 -5" sections and 4-2" sections (or whatever looks good with your spindle style). If desired, paint these and the wood knobs to coordinate with your trays.
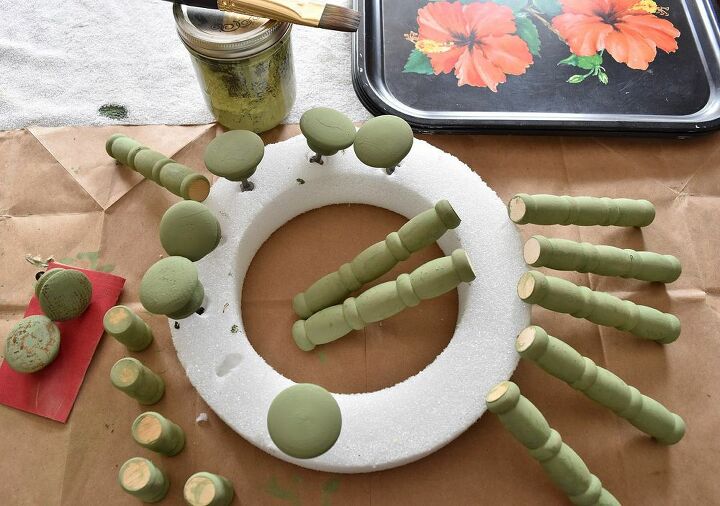
I painted my wood pieces with Miss Mustard Seed's milk paint in Luckett's Green and then distressed slightly and finished with hemp oil to seal.

Drill holes in all the wooden pieces (both ends) with a 5/16" bit. Some of my old knobs had larger holes, so needed to be glued with E6000.

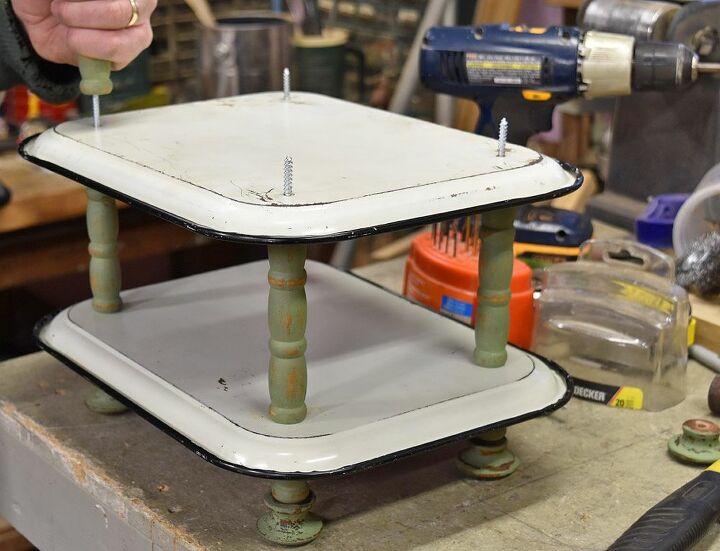
Drill holes in the 4 corners of all the trays also. Make sure they all line up together.
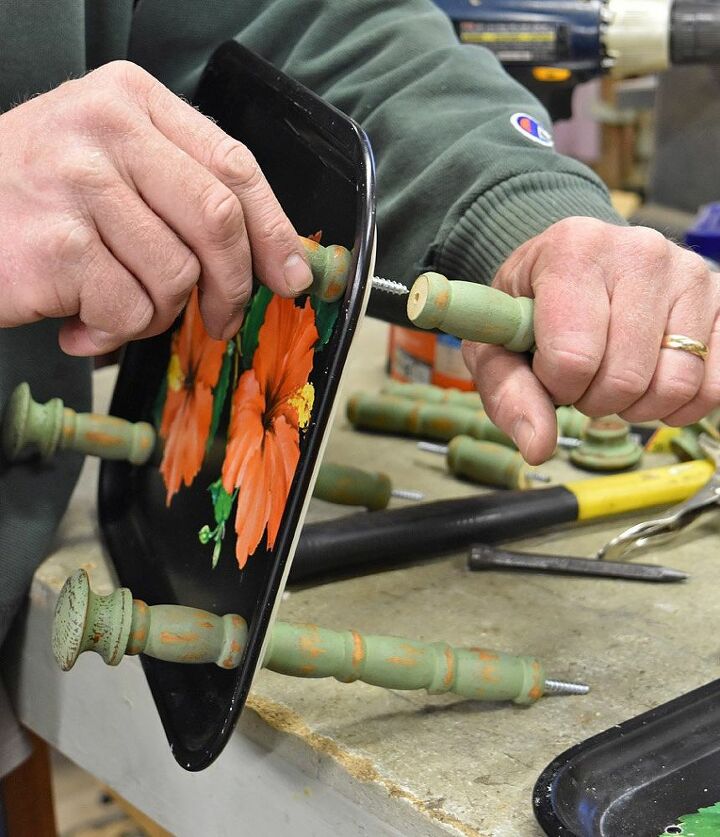
Use a vise grip pliers to hold the dowel screws and insert them into the dowels. Assemble the tiered stand in this order, starting at the top: knob, small section, tray, dowel, tray, dowel, tray, knob.
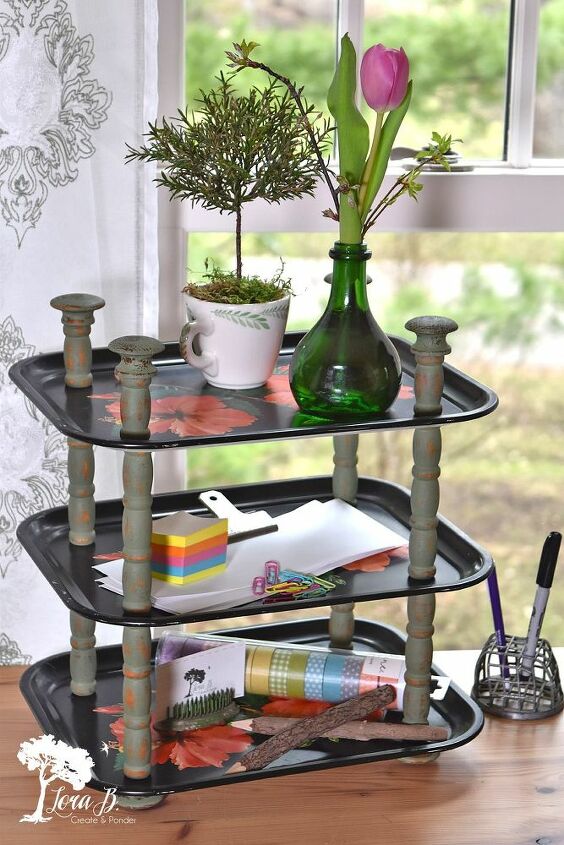
Now these cute old vintage trays can be enjoyed even more! It's always nice to have more levels to maximize one's desk space, too! If you'd like to see more of my repurposed junk projects, see HERE. If you'd like to see more of my vintage trays and how I decorated with them in my vintage-inspired kitchen for Spring, see HERE.
Resources for this project:
See all materials


Comments
Join the conversation
-
Been looking for those trays for over a year, difficult to find.
-
Cute cute cute! I have a set of small vintage trays. This would be perfect!


Frequently asked questions
Have a question about this project?