


Advice for Installing Flooring on Your Wall
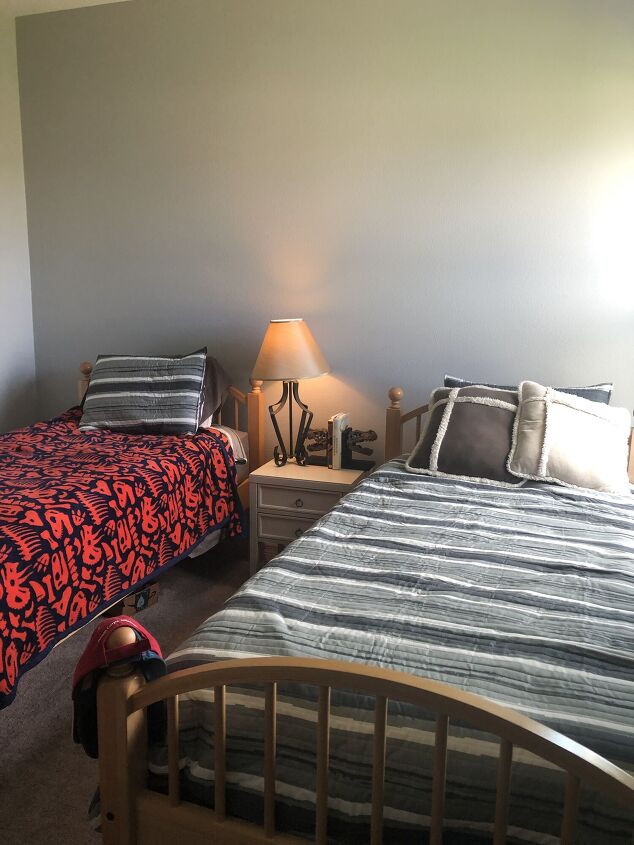
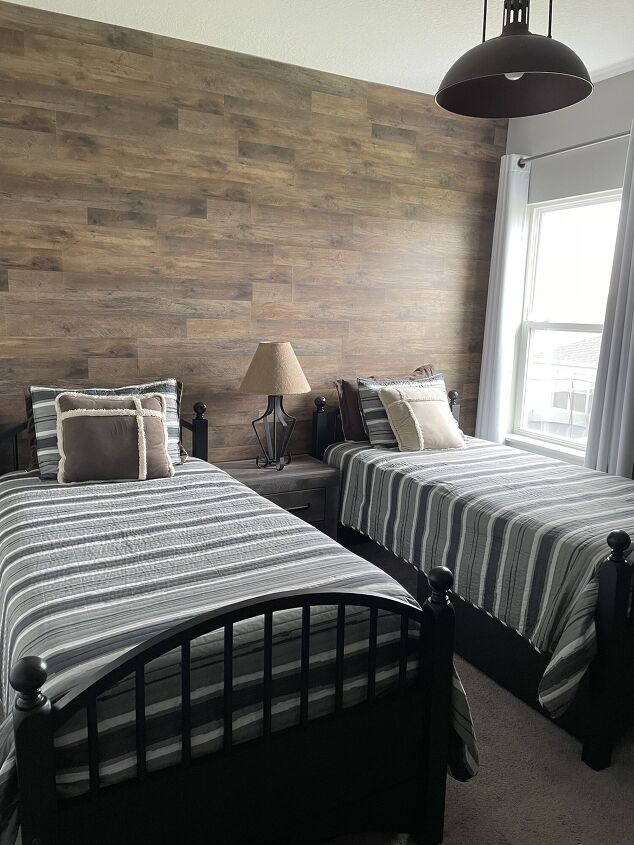
If you want to make a huge impact in a room, consider adding a wood feature wall. It's a great way to add texture and warmth to a room. Our son wanted a cozy bedroom with some type of wood paneling, and installing a wood feature wall helped turn it into a rustic retreat! It really made the room look fabulous! If you want to see what happened, keep reading and take our advice for installing flooring on your wall!!
Gather
Gather or purchase the following supplies needed for this project:
- tongue and groove wood boards
- stud finder
- pencil
- miter saw
- table saw
- tape measure
- level
- 18 GA 2 inch brad nailer
- air compressor
- nails
- hammer
- pull bar
- tapping block
- silicone
- ladder
Our Purchases for This Project
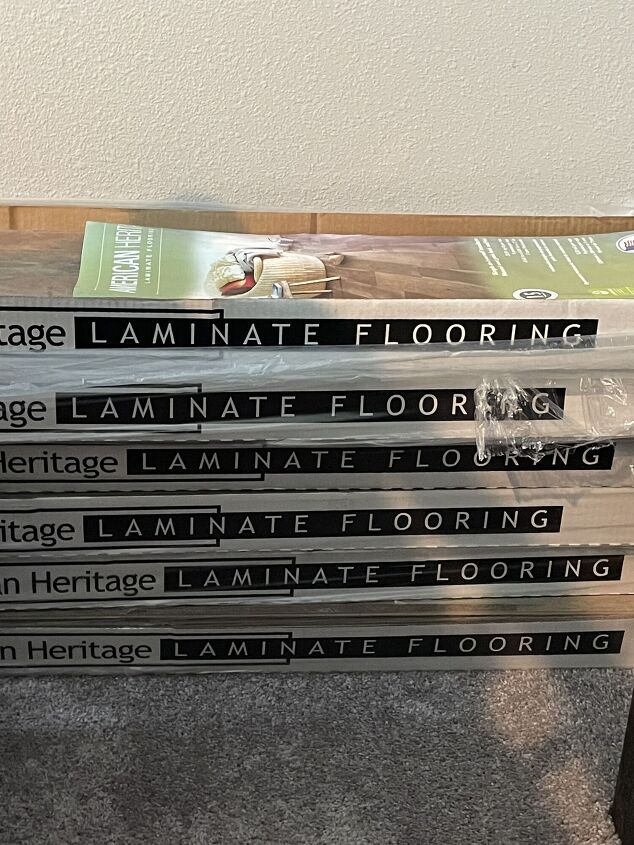
We purchased six boxes of American Heritage Laminate Flooring from Lowes.
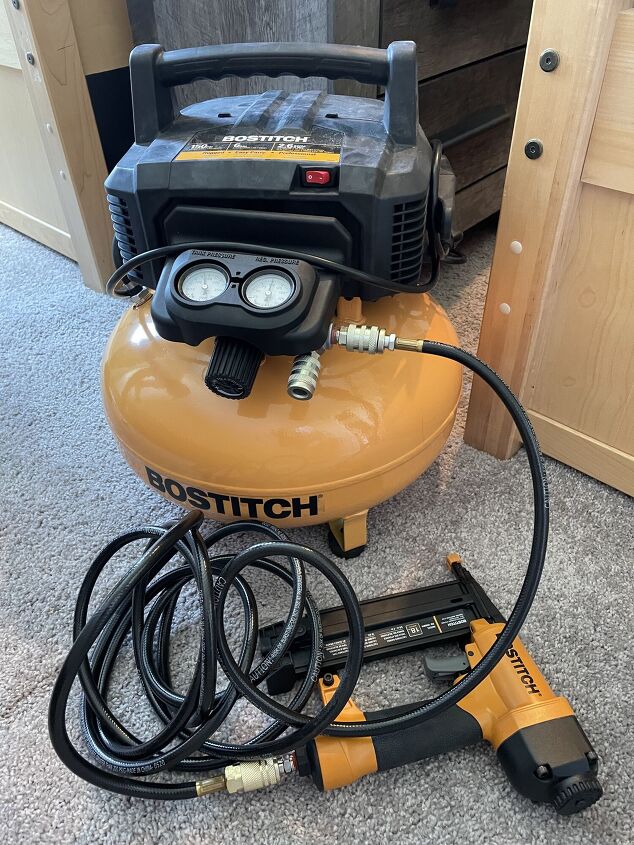
Rich also purchased a Bostitch Air Compressor Combo Kit. You can find a variety of these kits at Home Depot, Lowes, and Amazon. This was a major upgrade. We only had a small brad gun and a little hobby size air tank. You will need at least a brad nailer for this job. Using a hammer and small nails are not recommended. One misplaced hammer blow could ruin the laminate flooring.
Prep
Before you can hang the flooring, you must do some measuring and math to make sure the project goes smoothly. We made one mistake because we did not properly prep before installing. Keep reading so you don't make the same mistake we did!!
Locate and Mark the Studs
First, use a stud finder to locate all of the studs in the wall.
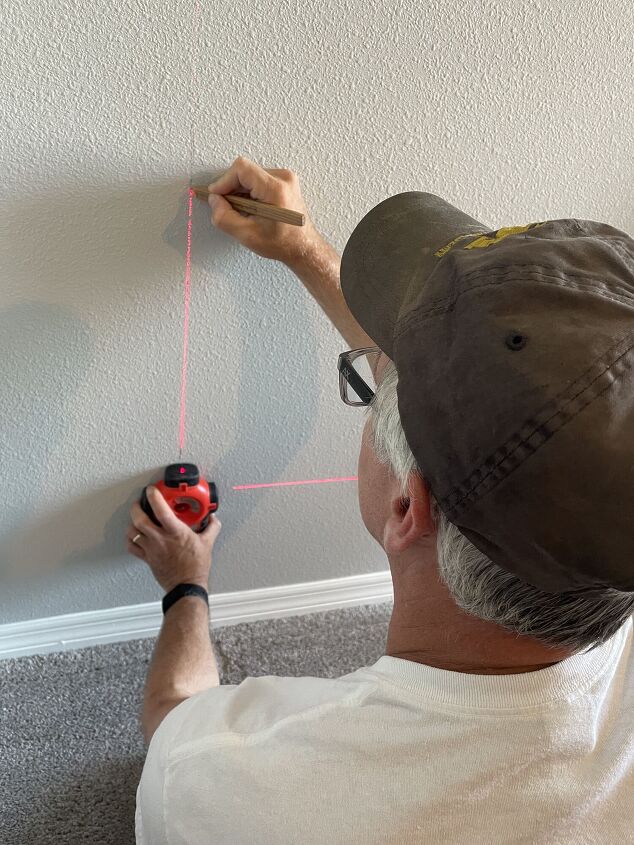
Then take a laser or bubble level to mark each stud location.
Next use a metal ruler to connect the marks from the top to the bottom of the wall.
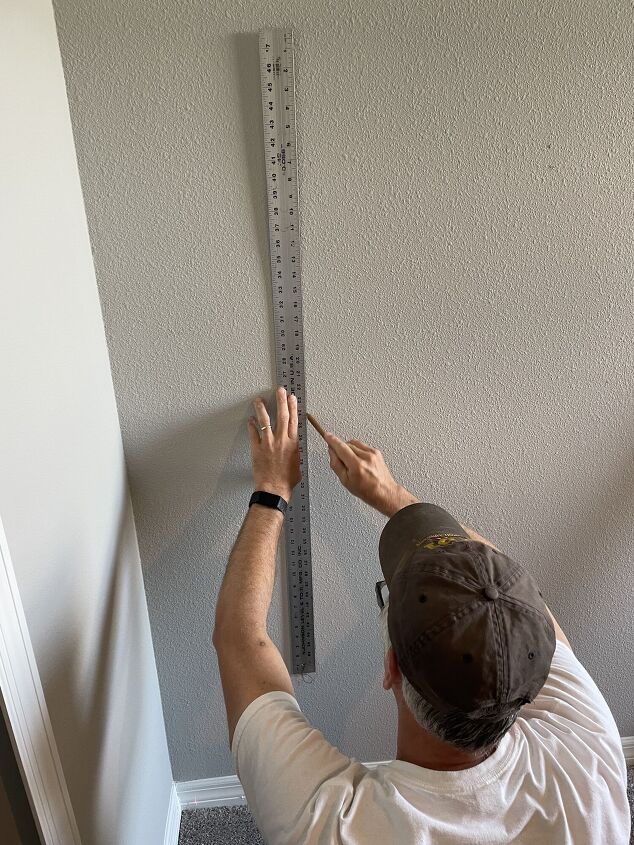
Measure Carefully
Step one
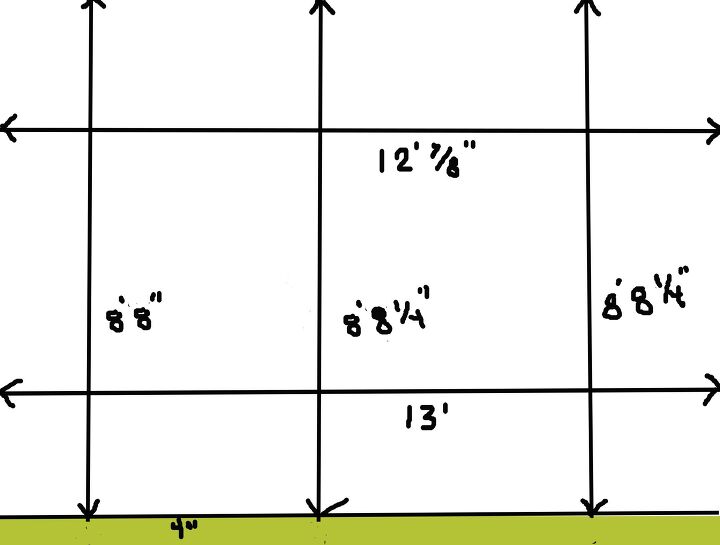
Measure the height and width of the wall at multiple locations. Next, measure the height and width of an individual flooring board. Record this on paper like shown above.
Step two
If the height measurements across the top of the wall are not the same, you will need to cut at least one of your boards with a table saw.
Step three
Now divide the height of the wall(largest value) by the height of an individual board. This will tell you the number of rows of full boards that can fit on the wall. See what the remainder is to determine if you will have a row of partial boards.
Example
- From example above, 8’ 8 ¼” = 104.25 inches / 8.25 inches = 12.63 boards
- The .63 means you will have almost 2/3 of a full height board at the top. Anything less than .25 or a ¼ of a board would not look good.
- So decide if you want the partial board to be at the top or bottom of your wall.
- If your result says it will be less than a quarter of a board, I suggest you start your first row with a partial height board tall enough so that you end up with a thicker board at the top of the wall for more even look.
Step four
Next you will use the measurement of the width of the wall and divide it by the length of an individual board. You will want to end up with at least 8 to 12 inches of the board to start or end a row. This looks better and is the manufacturer's recommendation also.
Our Mistake
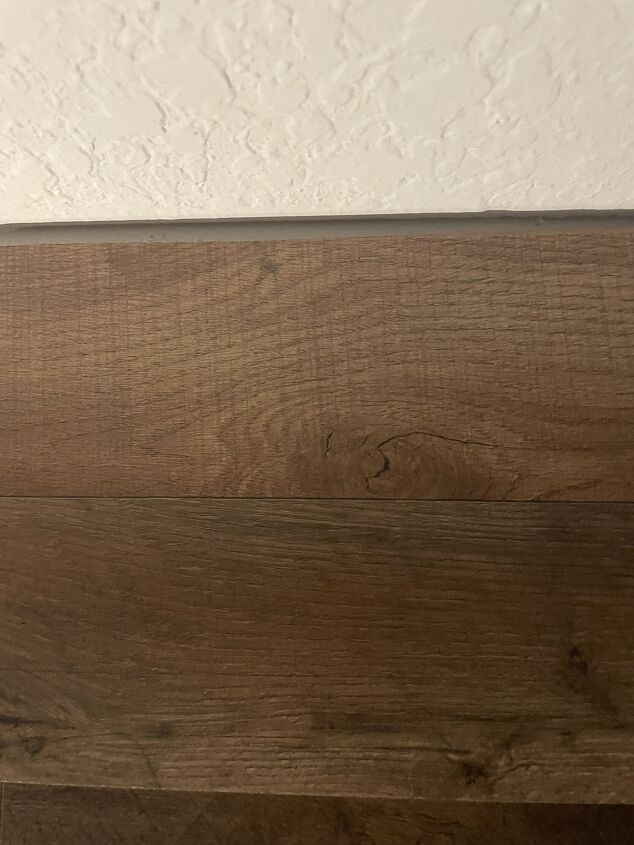
We measured only a couple spots on our wall for the height and thought it was going to actually end with a full board at the top. However, the height was less than the original measurements in a couple spots. Since we had installed the first couple to fit, the last couple boards left a little gap at the very top. Luckily, the flooring we used had a pattern that looked like multiple smaller boards and with ceiling height of 9 feet, you can’t see the small gap, so everything worked out.
Understand How Tongue and Groove Boards Work
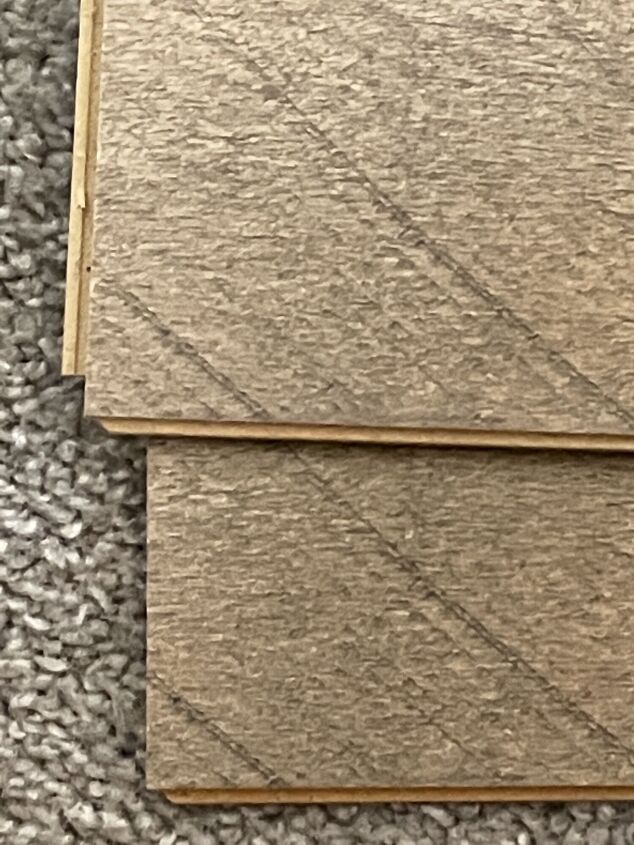
Tongue and groove boards fit together great to make a seamless wall. Each board has a groove or channel on one side and a slightly curved tongue on the other side. Usually, you have to slightly tilt one board to slide it into the other. The boards will interlock top and bottom and on each end. Refer to your flooring manufacturer's instructions to completely understand how your particular floor fits together. Test fit a couple of boards together. Each kind of floor can differ and the quality of flooring differs with the price. The flooring we found was only 78 cents a square foot but it wasn't as easy to fit it together as something that costs 2 dollars a square foot.
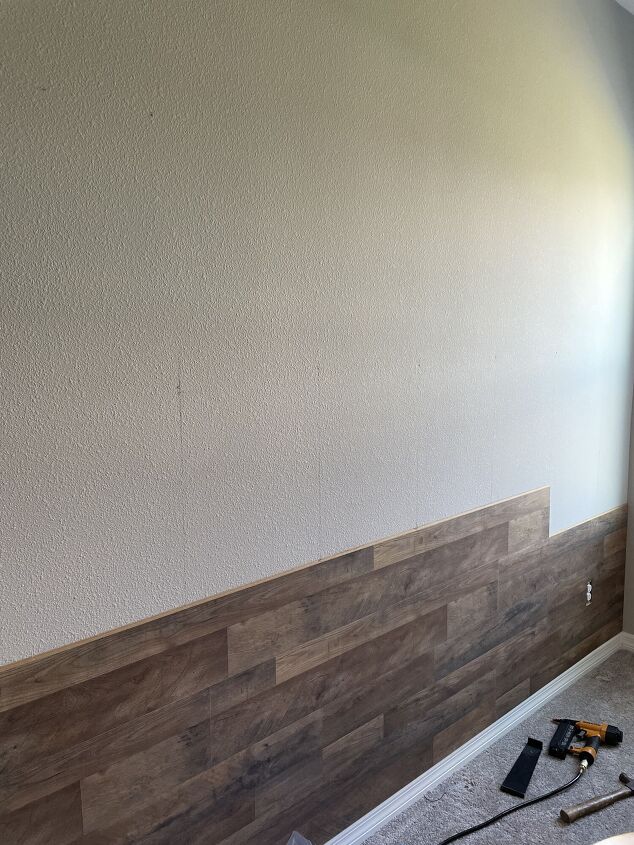
Install
Now it's time to get that flooring on the wall!! Here are our best tips and advice for installing wood flooring on your wall! Start from left to right at the bottom of the wall.
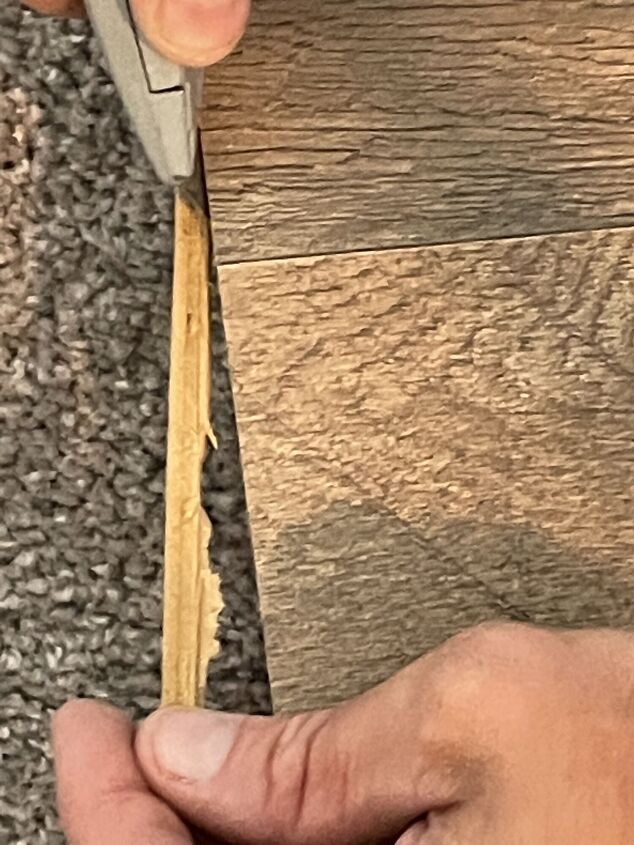
The first board will have a tongue on the left end. You will want your board to be flush to the corner so you must use an Exacto/razor knife to score and cut off the tongue.
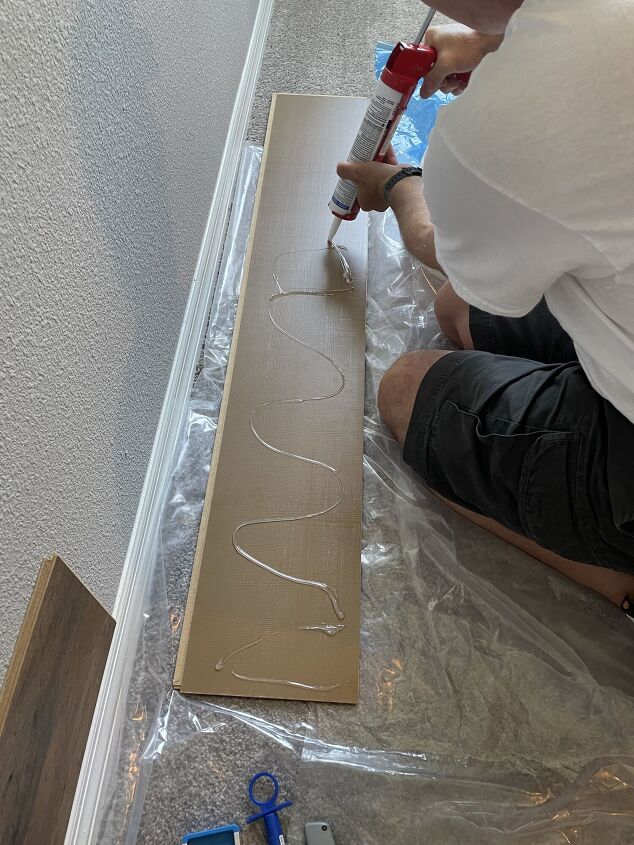
Apply 100% silicone adhesive in an S pattern onto the back of each panel before installing.
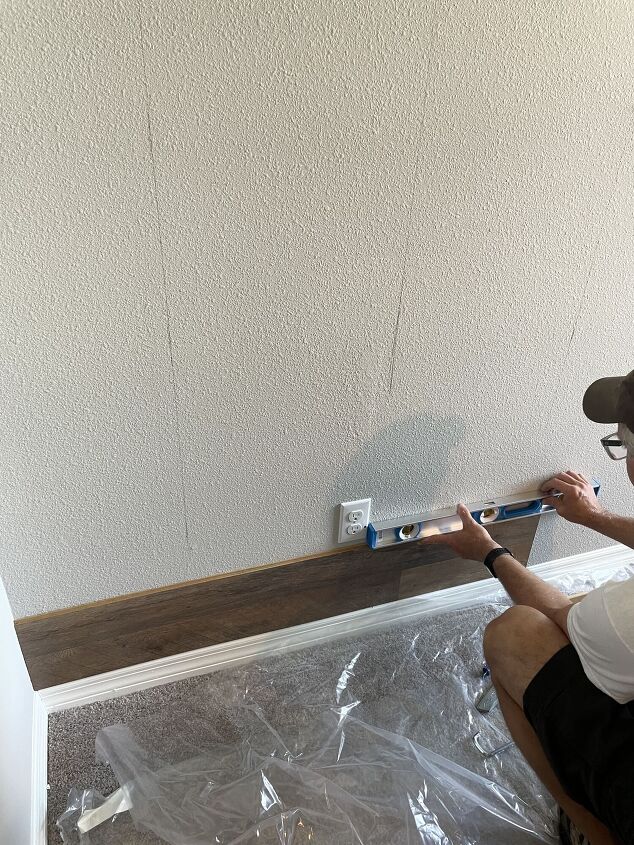
For the bottom row, we started with a full-length board. Be sure that the bottom row is interlocked and completely level. Make sure it is secure because if not, the rest of your wall will not line up.
How to Cut Around Outlets
The only tricky part is measuring and cutting around the outlets you have on your wall. Remove the outlet covers and test-fit the board to the wall and mark the location of the outlet. Cut out a rectangular hole just slightly larger than your outlet opening with a jigsaw. Test fit your board before applying the adhesive and installing.
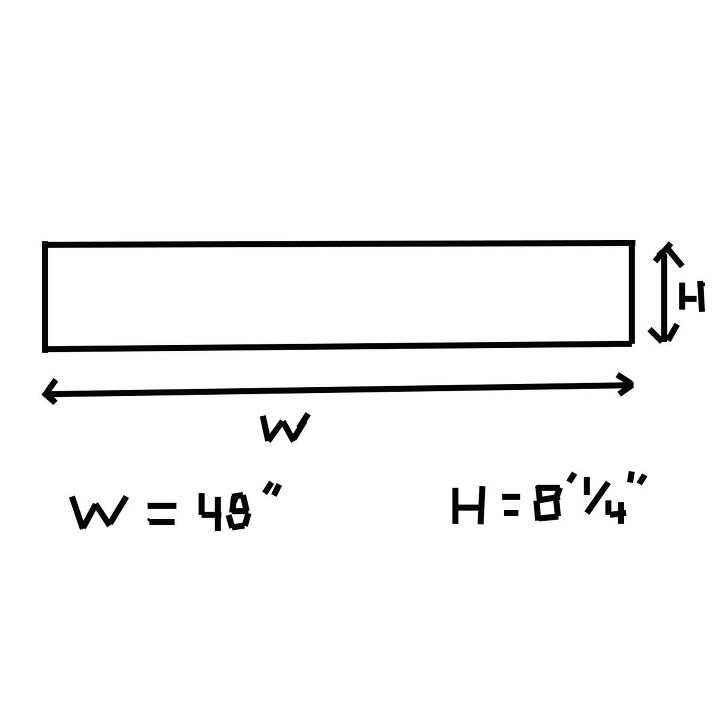
How to Stagger Vertical Seams
We used a sliding miter saw to cut the boards to length at the end of each row and start the next row to create a pattern where no vertical seams line up. The flooring we picked had 48 inches, long boards. Most rooms with 10 to 12 foot width walls work fine this length flooring. We started with 18, 24, or 30-inch boards to stagger the vertical seams for the next couple of rows. Cut the first board off on the left end to be flush with the wall but still leave the connector on the right end to interlock with the next board to the right. If you have to install a partial height board at the bottom or to finish your last row at the top, use a table saw to rip the boards to the proper fit.
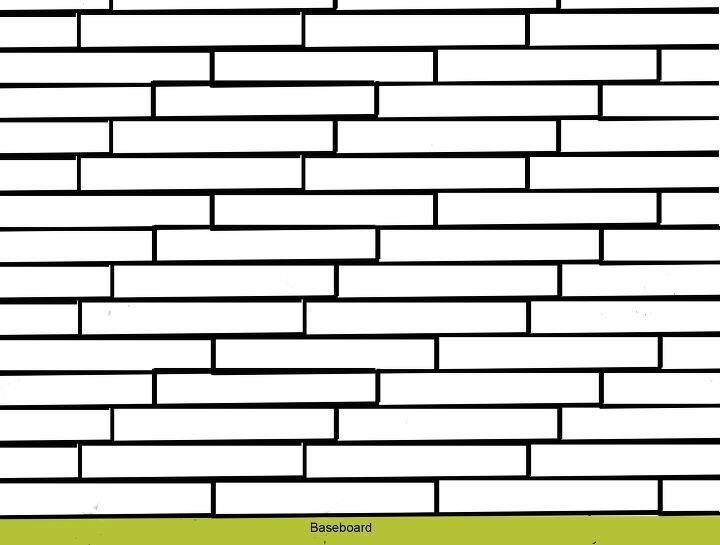
Full Height board starting First Row, Ending with thin Partial Board at Top. Vertical seams staggered with using 48", 18", 24" and 30" long boards to start rows..
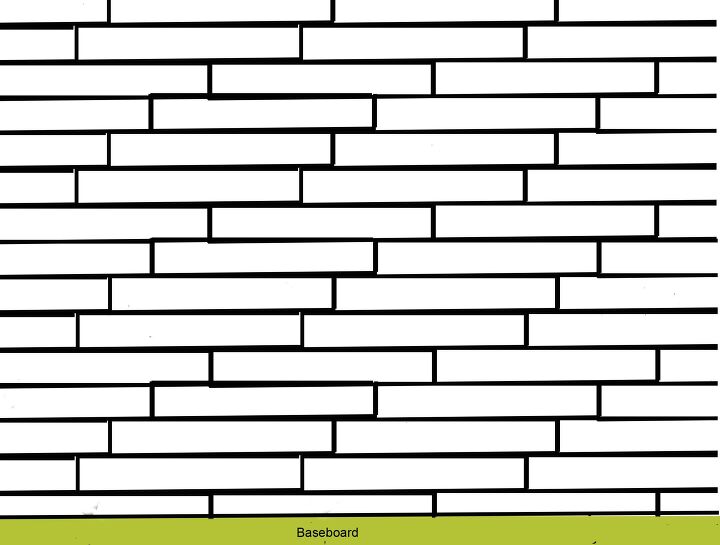
Partial Height Board starting First Row, Ending with similarly sized Partial Board at Top. Vertical seams staggered with using 48", 18", 24" and 30" long boards to start rows..
Use a Tapping Block
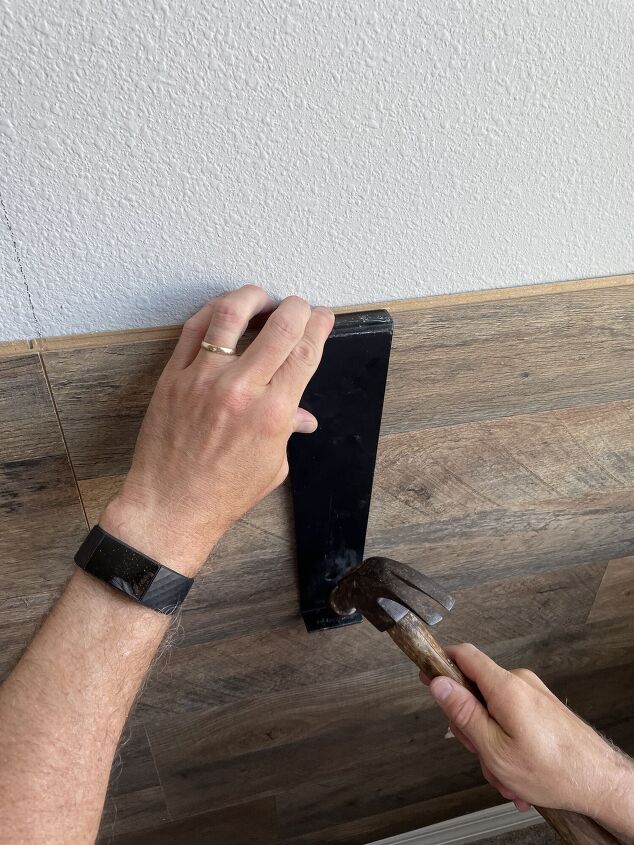
It is best to buy a laminate floor installation kit($20-$25) that comes with a pull bar and tapping block. Although some boards will snap right together, most will not quite click and interlock completely without a light tap from a hammer and tapping block or pull bar as shown above.
How to Secure the Boards
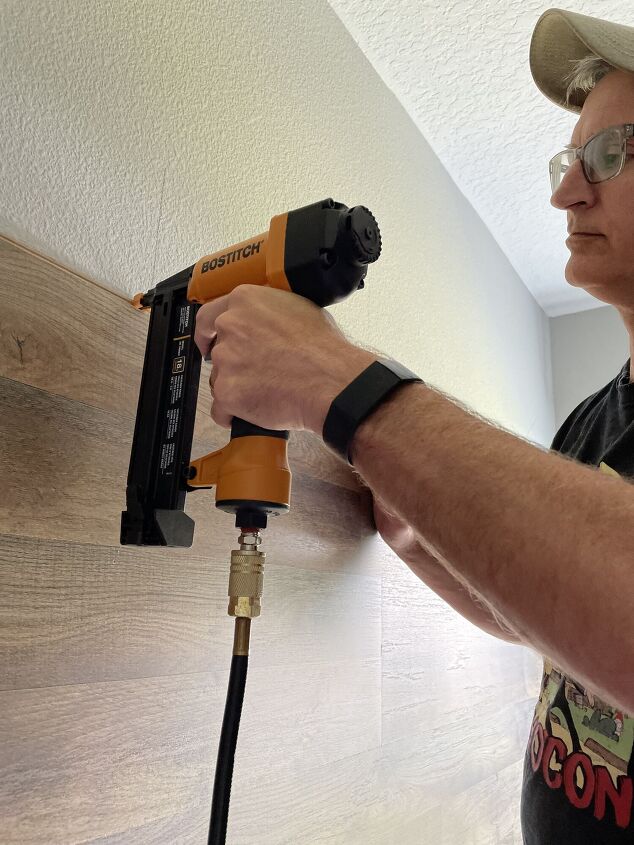
Use the brad nailer to secure each board to the wall. Put a brad into the board at each stud location you marked on the wall earlier. Be sure and put the brad through the tongue so it is hidden. Brads make very small holes so if necessary, you can occasionally use them through the mainboard to secure the board if the board is not flush to the wall. Our pattern was very busy so extra brads were easily hidden.
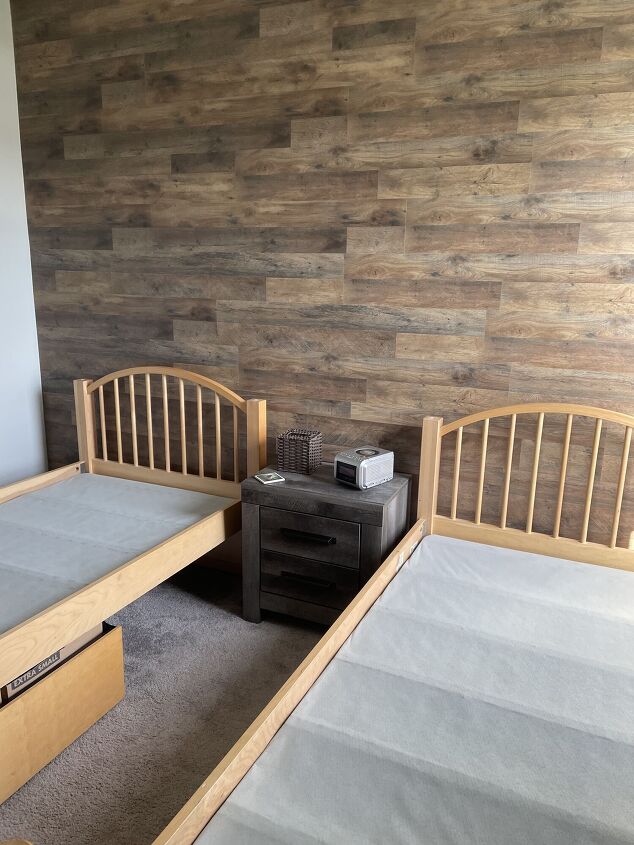
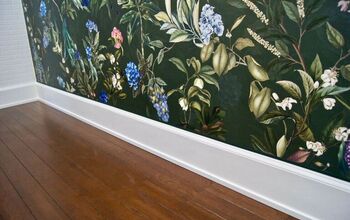
THE FINISHED PROJECT
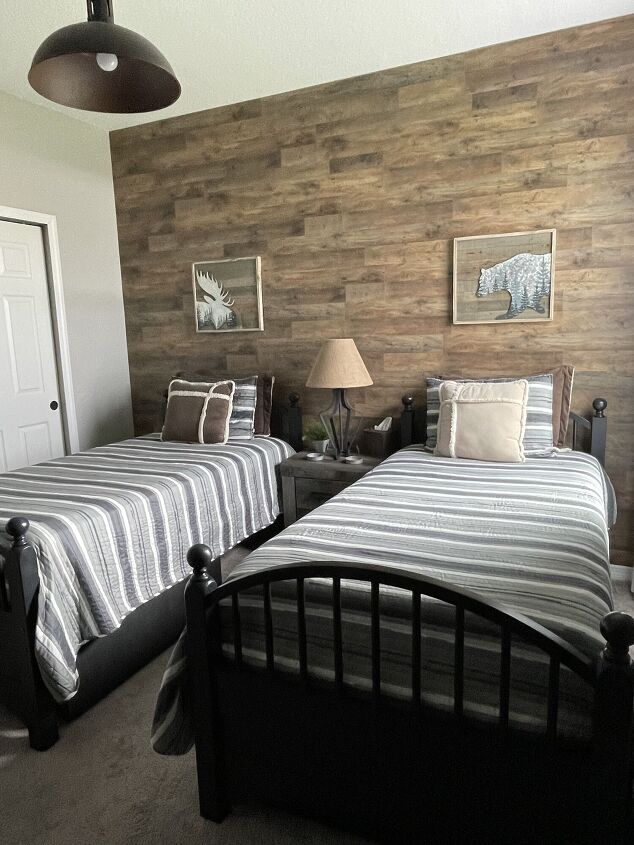
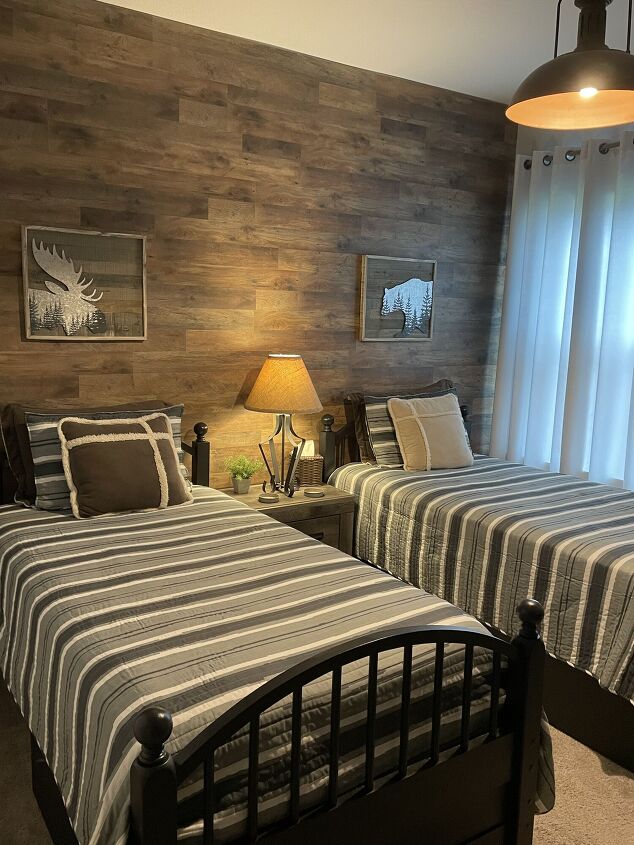
Well, what do you think of our advice for installing wood flooring on your wall?? Are you ready to try it at your house?? I hope we inspired you to do just that!! It was a fun project that made a huge difference in the overall look of the room!
If you love DIY projects visit our blog and signup for our AnOrganizedSeason email list here!
Blessings, Donna and Rich
Resources for this project:
See all materials


Comments
Join the conversation
-
Days of yore. Takes me back to the 60s when every house had at least one room with wooden paneling.
-
What a great idea! You did a wonderful job and have stated me thinking...thanks for the inspiration!


Frequently asked questions
Have a question about this project?
Wow! Amazing! Just wondering if vinyl plank would work? I don't have all the tools for a wood project but I think I could tackle vinyl panels.