


Shareathon Cutting Edge Stencil Challenge
The first of June I wrote an article for my blog entitled, "My Bathroom is Begging for a Change" (you can see it here, http://thechirpingfrog.blogspot.com/2015/06/my-bathroom-is-begging-for-change.html). About a week later I was contacted by Hometalk to participate in a challenge using Cutting Edge Stencils. Wow, it was just meant to be I guess.
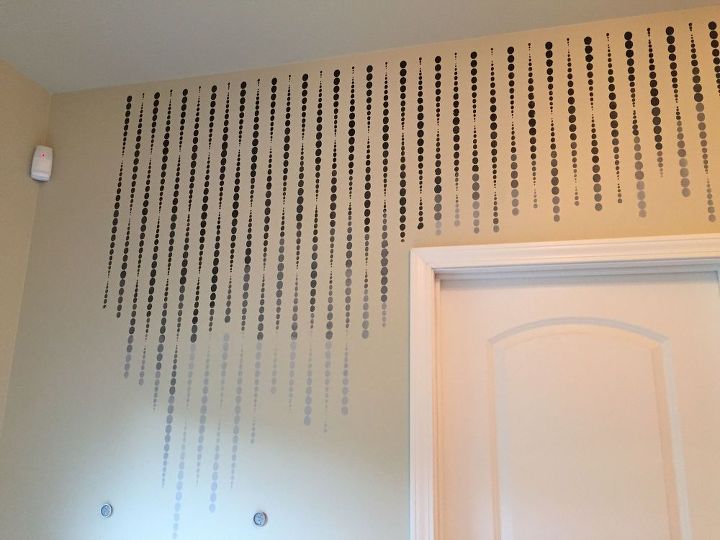
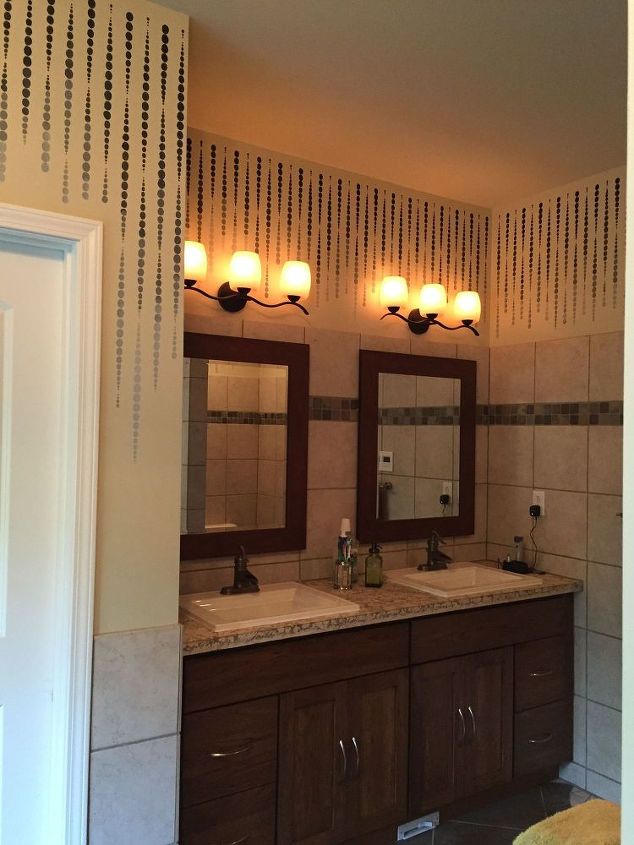
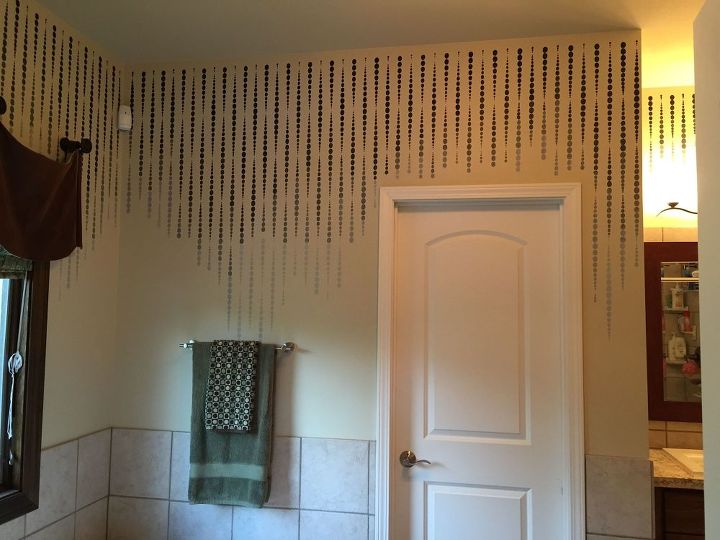
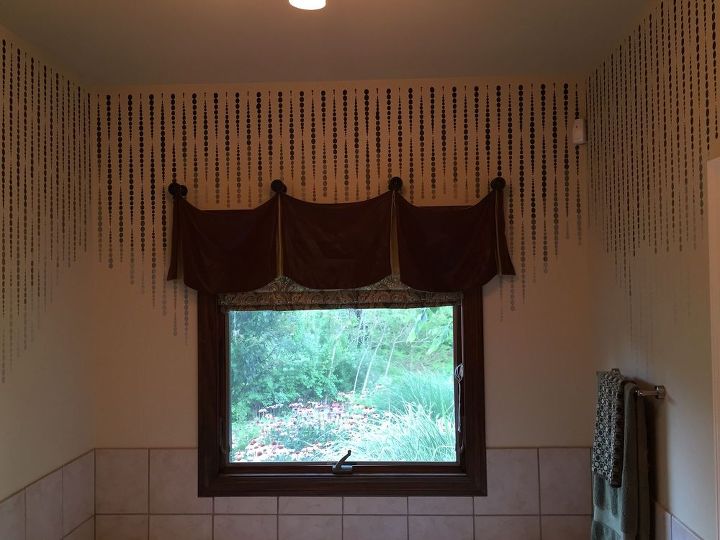
The selection of stencils was outstanding, picking just one was quite the challenge but I finally decided on "Beads Allover" and started thinking about my design.
The selection of stencils was outstanding, picking just one was quite the challenge but I finally decided on "Beads Allover" and started thinking about my design.
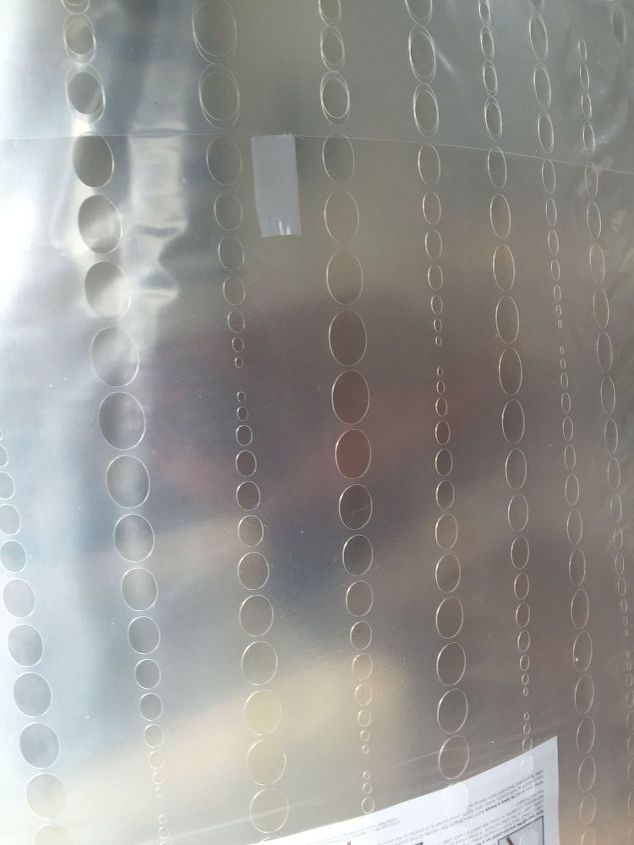
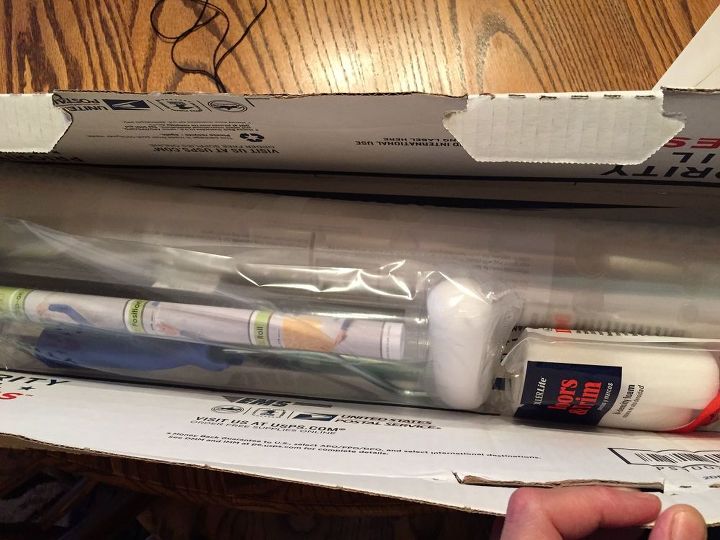
Here's my package from Cutting Edge, lots of goodies in there including the great stencil pictured above, another small butterfly stencil (2 actually), multiple brushes and rollers and a level for stencils that I've never seen before. Somebody was really thinking with that one, ingenious!
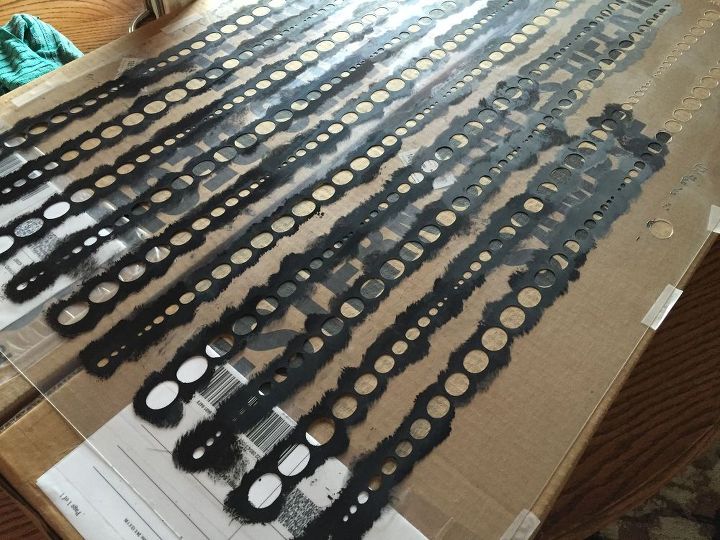
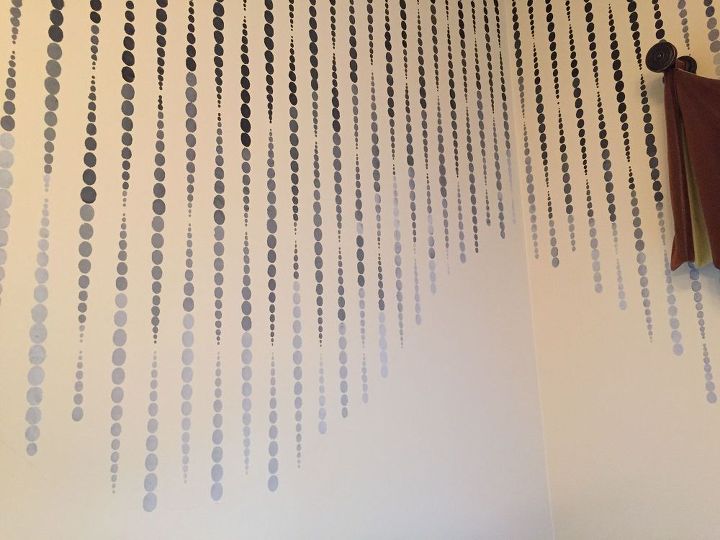
I decided to play around a little so I opted to ombre my colors going from black to pale gray. I am thinking of "dripping" it from the ceiling similar to icing drizzled down the side of a cake (sweets are always on my mind it seems). Here's my first application. Notice I am not going all the way down the wall.
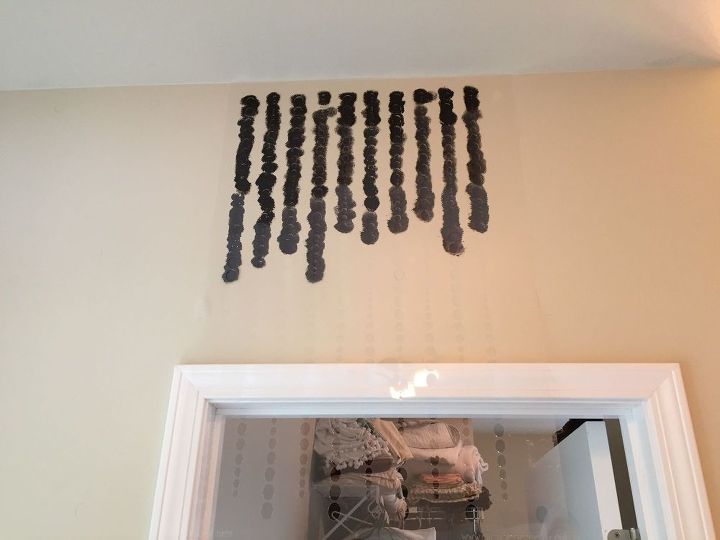
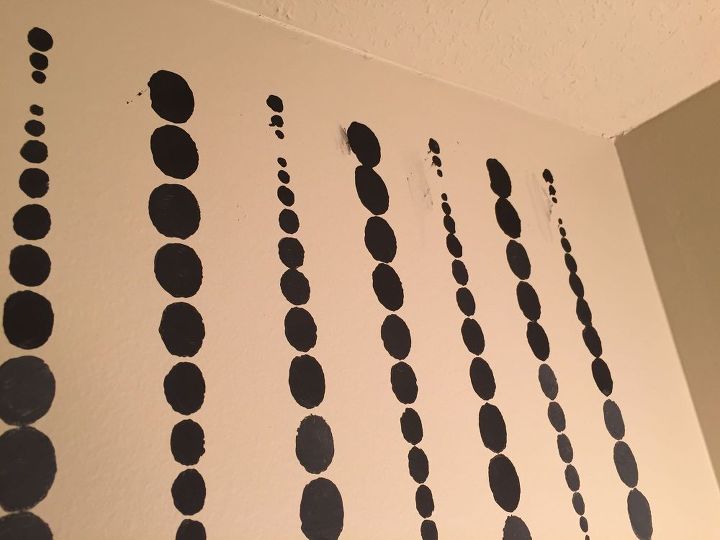
If you look closely you can see the pencil line I drew on the wall as a rough guideline. I haphazardly chose when to stop each line and when to graduate from one color to the next. I was not too concerned with the bleeding of my colors together. I used five different colors in every line, cleaning the brush (just with a paper towel) after the darkest three colors and then again after the lightest two before starting with black again. Yep, the colors aren't perfect, they bled together a little bit (a lot at times) but that's kind of the look I was going for.
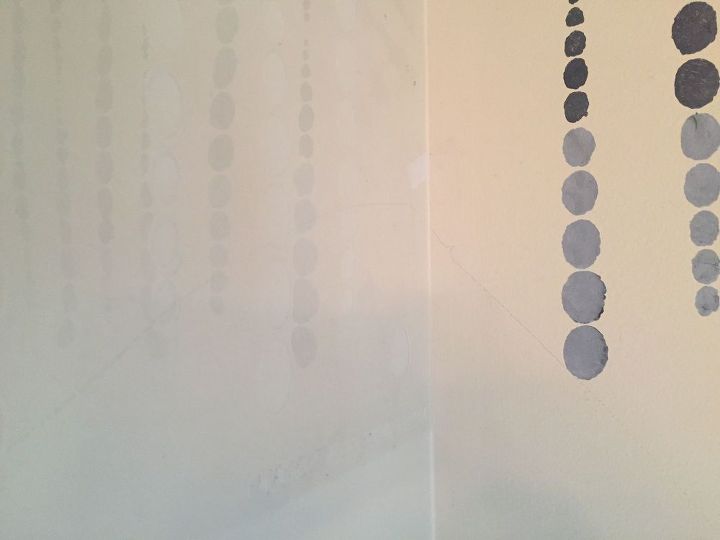
It is not perfect by any means, I have a few spots where I'll go back and do some touch-ups but the overall effect is exactly what I wanted. I'm completely in love with the results.
Here's a few of the problems I encountered: I've done some stenciling in the past but am no expert (if you go to cuttingedgestencils.com they have lots of tutorials to help with these problem areas).
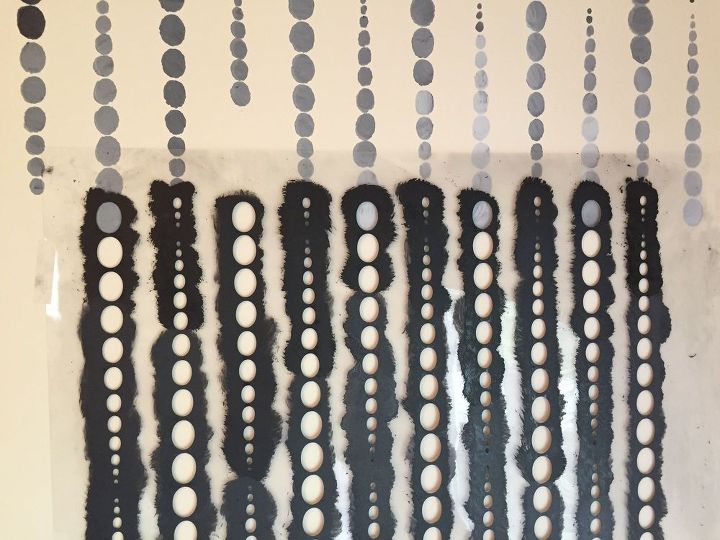
Second, see my smears on this one? This is the corner at the vanity light fixture. I managed to get it stenciled all around the lights without this happening and on my final pass to the side I didn't pull straight off the wall and voila, lots of touch ups needed right here! Moral of the story, don't pull sideways, it makes a mess.
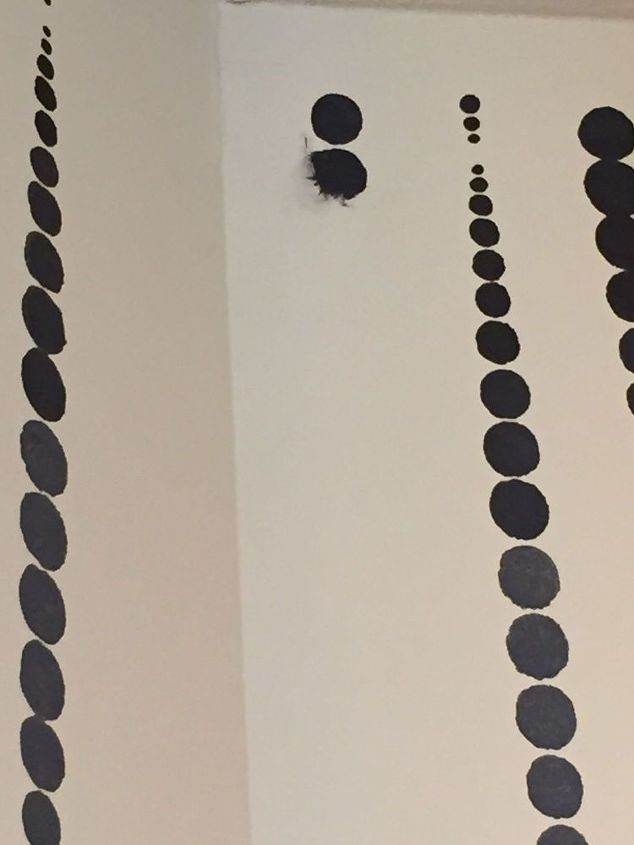
Lastly, corners are also pretty tricky. Last time I stenciled I used the tacky spray for the back of the stencil, that helped a lot when working in the corners. I didn't use it this time and let me tell you what, it's well worth the money and extra cleaning time to invest in some. I had to come back and redo this run. Live and learn!
After each pass with the stencil I would clean off the back but not the front. Every ten runs or so I'd take the stencil outside with a bucket of sudsy water and clean it off good.
I used a stenciling brush vs. a roller since I was changing out colors so often. Another quick tip, you don't need a ton of paint. The more paint you use the more chance of bleeding.
Thanks so much to Hometalk for including me in this challenge and Cutting Edge for the great stencil and supplies. If you're thinking about a stencil project, check them out at http://www.cuttingedgestencils.com/. They've got a great selection and a great product!

Want more details about this and other DIY projects? Check out my blog post!
Comments
Join the conversation
2 of 3 comments
-
This is amazing! We love the variation of color used for this stencil project. Great job!
-
I LOVE LOVE LOVE this! I've wanted to try to stencil for years and this project is the one that has inspired me enough to try it. Thanks so much for sharing this along with your mistakes and what you found works best. Fantastic job!


Frequently asked questions
Have a question about this project?