


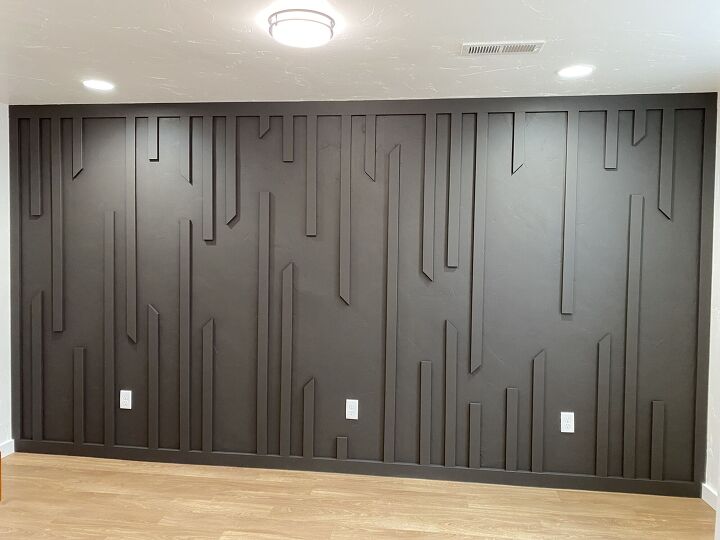
Board & Batten Walls - Mid Century Modern Twist

You guys! This is seriously my favorite thing to do to make a space completely transform! I’m talking affordable, customizable and I swear, just about anyone can do it! We have created board and batten walls in every single one of our bedrooms, most recently in our fourth bedroom that we just built from the ground up in our basement. I hope to be able to share our experience from all of our rooms to give you a great place to start.
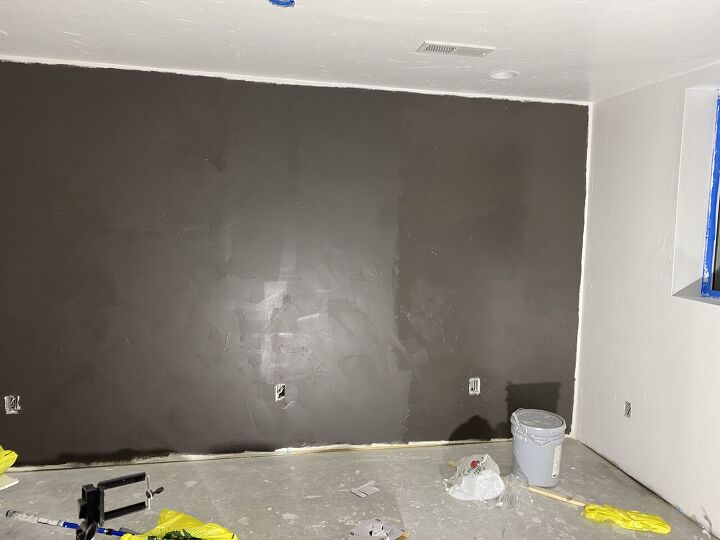
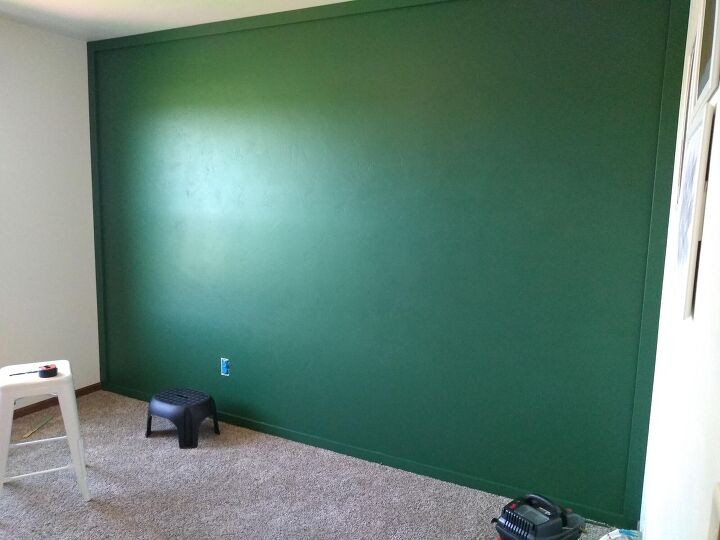
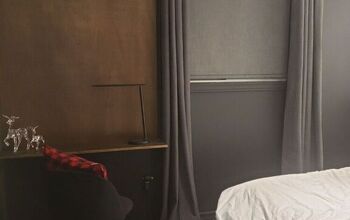
Before
(Paint the wall before the pattern - seriously, so much easier!)
Supplies:
Paint & Paint Supplies
MDF Boards
Caulk (optional)
Spackle
Sand Paper
Brad Nailer & Nails
Saw (to cut the MDF - we use our miter saw, but a circular or table saw could also work if that’s what you have!)
Step 1: Pick A Wall
This can be any wall. It could be an entire bedroom wall, the end of a hallway (or the actual hallway!), an entryway wall, an office wall backdrop for those virtual meetings or even an entire vaulted ceiling wall. The options are endless. Whatever wall you pick, I promise it will change the entire space.
Step 2: Pick Your Design
Any wall, any design - today we are going to go through a mid century modern vibe, but check out https://www.fiercelyblessed.com/blog/board-batten-walls to see all of the designs we have done!
Below is the sized boards we used for this design:
Mid Century Modern Pattern: 1x4 Border & baseboards, 1x3 for all other boards
Note: Don’t forget to take about a half inch off the actual board width when considering measurements. For example, a 1x4 board, is 1 inch thick by 3.5 inches in width, not 4.
Step 3: Pick Your Paint Color
This is pretty straight forward - if you are painting your wall a different color, now is the time to pick it. I’ve also always chosen to do flat paint for the board and batten walls. I’m typically an eggshell type of gal, but for these walls, I love the flat, almost matte paint. I think I read this a long time ago in a blog when I was first trying to figure out how to do these, and it has just worked for me. However, I don’t think you can go wrong with any finish.
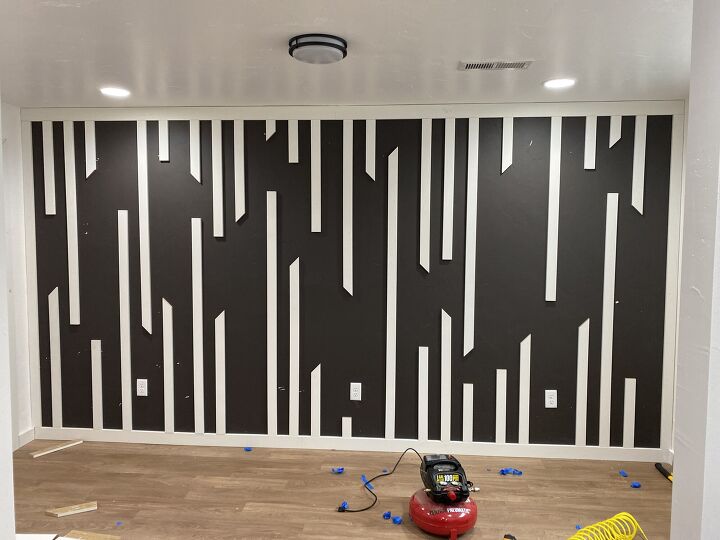
The playroom is called Ebony Sky - carrying the perfect brown and gray undertones so you can swing your decor either way!
Step 4: Paint the Wall
To make things easy, paint the wall before you start nailing your design on. Trust me - this is the easiest way to do this! Get the base coat on in the area you will be completing your board and batten.
Step 4a: Baseboards - Will They Stay, or Will They Go?
In our home, we have stained wood baseboards that are pretty wimpy in my opinion. Because we use MDF for our board and batten, they are pretty hefty pieces of wood and to butt them up against that trim would just look really silly. With that said, we decided to pull off the baseboards and replace just that wall with the MDF as the baseboard and paint them the same color as the wall. It looks that much more clean and doesn’t look strange to have different baseboards next to each other.
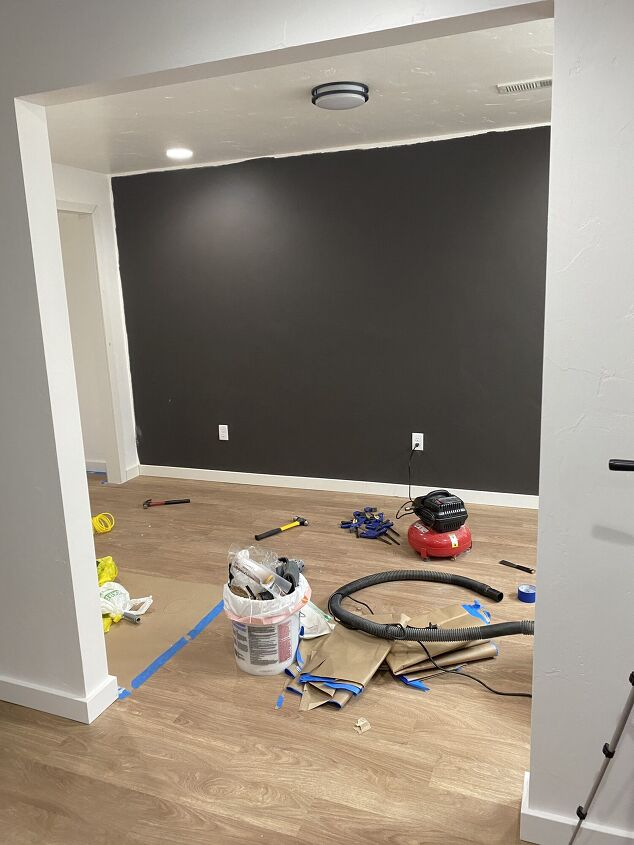
Step 5: Frame Out Your Space with MDF
In all of our spaces, we decided to “frame” out the designs with MDF like a picture frame (this is a picture from one of our other rooms). It’s nice because we can make sure the space is level and plumb (because typically even new builds aren’t perfect) to start creating our design from. If there is a gap between the corner wall and your board in order to make it straight, you can always caulk it in between so the eye doesn’t see it.
*This also isn’t a necessary step, just something we prefer to do! You definitely could choose not to do this step if you prefer!
PRO TIP: For our first few walls, we painted all the boards separate before placing them on. I don’t recommend this. It doesn’t finish as nicely after you have spackled and have to paint over it, and it is EXTREMELY time consuming. Learn from our mistakes and paint after the boards make it on the wall! :)
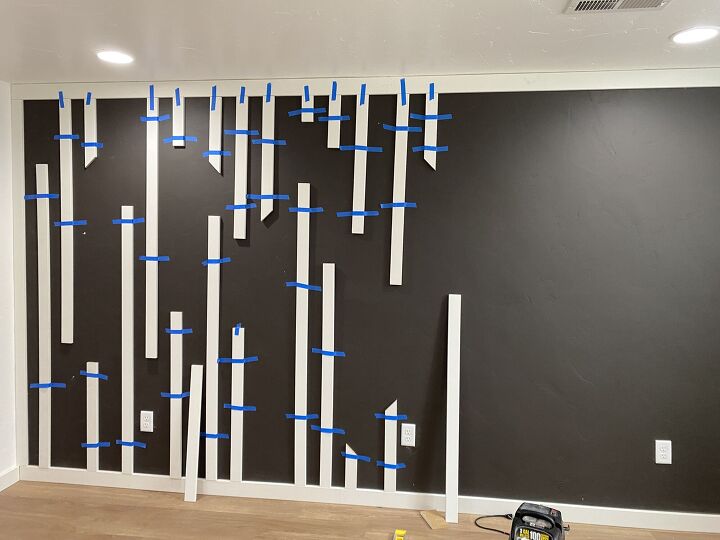
Step 6: Work your Design - Plan!
I have planned out our board and batten a few different ways depending upon the pattern, and I don’t think there is a wrong way. (I’ve also heard that there is a board and batten calculator out there somewhere online for those of you that prefer precise measurements made for you).
For this pattern specifically, we took a little different approach of literally randomness. I asked my husband to cut me random lengths of MDF, some longer, some shorter, some in the middle. He threw them on a stack for me, and we took painters tape and taped the boards on the wall.
For this design, it was truly taking random boards at random lengths, but the spacing was actually intentional. I took a short piece of 1x4 MDF that had been leftover from the trim in our basement and used that. Starting from one end of the wall, I placed that spacer piece vertically between two boards, two times in a row, and then flipped the spacer horizontally for the next one, creating a gap a few inches wider. I then repeated that pattern throughout the entire wall. So even though the boards on the wall were all different lengths and random, the spacing between each one actually had some method to the madness. In addition, this design sometimes had boards in line with each other coming from the top and the bottom, and sometimes it only had a board coming from the ceiling or floor. If there were two boards in the same “column” (Up and down), I would make sure that one of them had an angle cut at the end of it, and one had a straight cut so they weren’t the same.
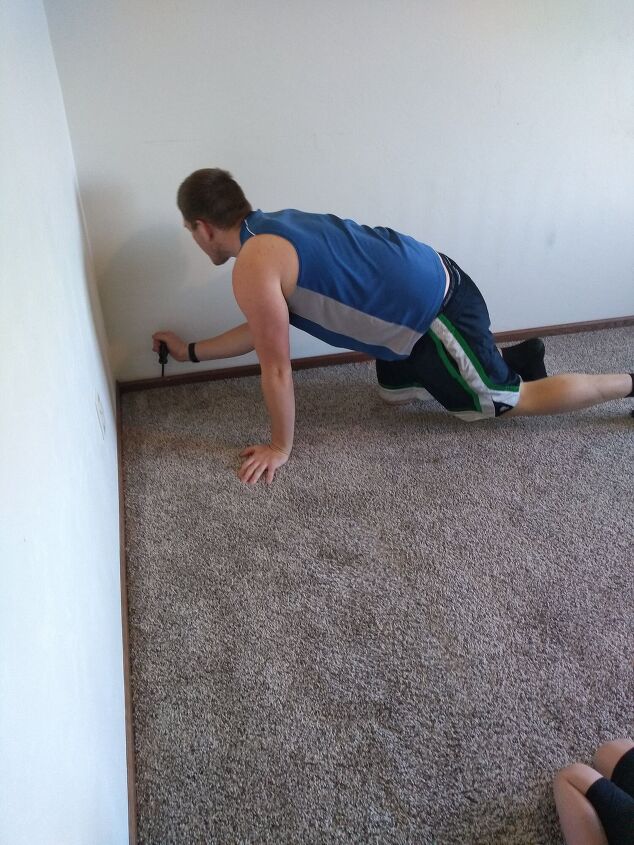
Step 7: Nail Them to the Wall!
Once you have your boards planned out, it’s go time! Some people also like to use caulk or liquid nails or something in addition to using their brad nailer to adhere to the wall, but I don’t think it’s necessary. I also think about what will make things easier in 20-40 years when this is no longer in style and people (or us) want to tear it off and start over - makes things so much easier and no one will be able to tell.
Make sure to put enough nails in the boards as well - we will be covering them up in a minute, so just make sure to get them on. I’ve never worried about hitting studs before either, so nail away!
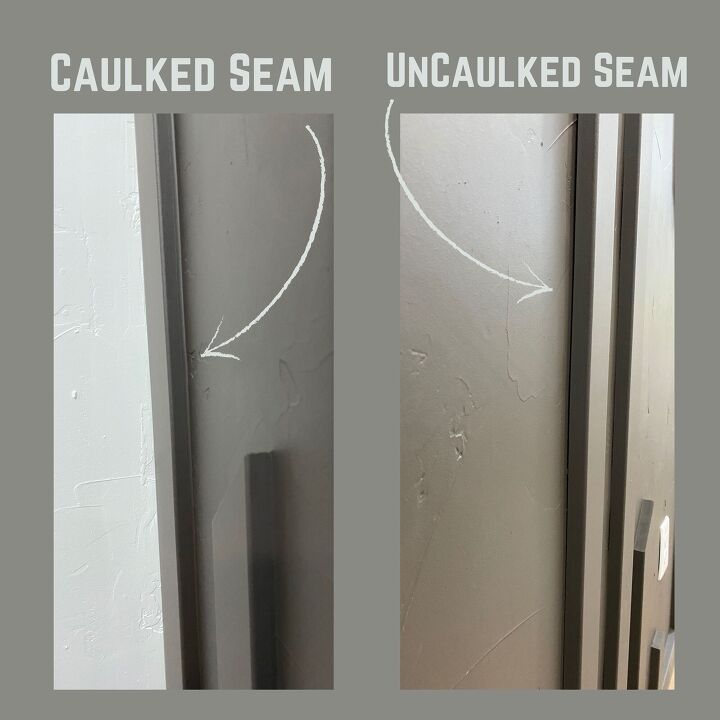
Step 8: Caulk
I want you to know that I have not done this step in all four rooms, but here are your options:
1. Caulk around your frame and the corners to hide any gaps
2. Caulk between your baseboards and the wall (This is what we did in the playroom because we caulked the rest of our baseboards)
3. Caulk around ALL boards and wall to create a seamless look. The perk with this is that you won’t see any gaps, you won’t get any paint drips between the board and the wall if your plaster/wall is not straight, etc.
Personally, I have never caulked all of the board seams because I don’t think it looks bad without and frankly, I just don’t have time for that. :D HOWEVER, I may someday go back to do this, so I wanted to give the option. (And honestly, if someone is going to judge me for not doing this step, they shouldn’t be coming over!)
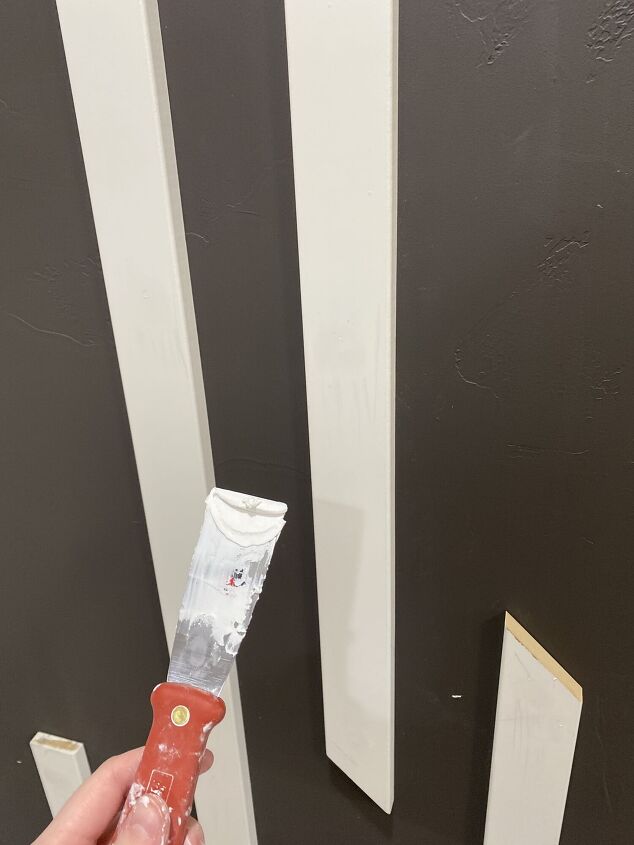
Step 9: Spackle
I use spackle to fill all of the nail holes (Trust me, it will seem like a lot if you have a big wall) AND I spackle over all of the seams where two boards meet each other. What I do is spackle over the seam and then run my finger down the middle to give it a smooth finish. This really cleans it up and provides a seamless look.
Step 10: Sand
After the spackle dries, sand it all smooth. MDF will show the spackle after you paint if you didn’t sand it all off, but I promise, if you do it right, you can’t even tell where those spots were at all. Sand until you feel happy with it, then wipe everything down to get rid of any dust/spots before you paint.
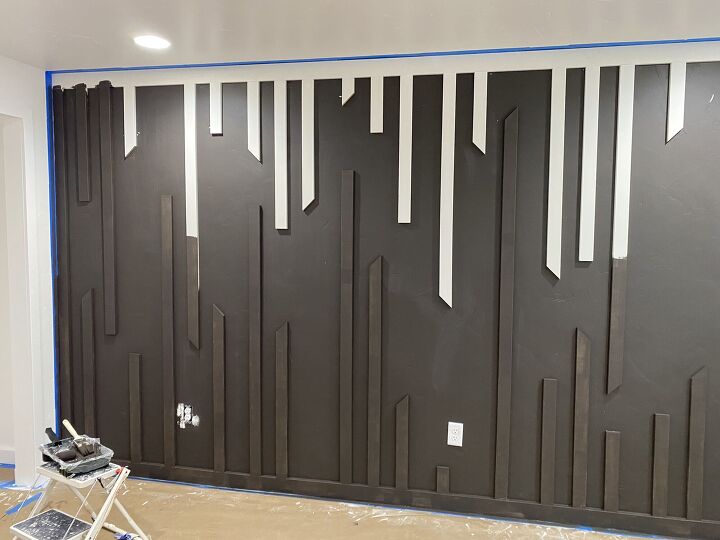
Step 11: Paint
You are almost there! Now it is simply time to paint - but don’t let this fool you - this can take time. Because you are painting the MDF boards, you will need a paint brush to get all of the corners/sides of the MDF boards, and then I suggest using a roller for the rest. On the first few walls, I used a normal paint roller, so it definitely works, but on the playroom wall, I used a small foam roller and I definitely liked that much better for applying paint to the MDF boards.
Even the dark paint only took me two layers to put on with the foam rollers, which I was grateful for, since it was a 15 foot wall and a lot of boards to paint around.

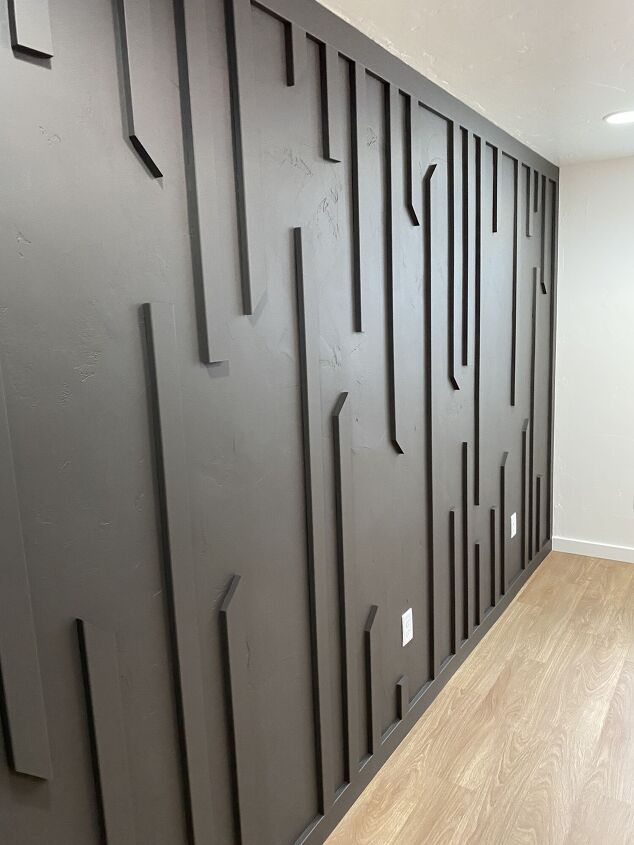
Step 12: Enjoy
Take a step back and enjoy! Decorate it! Take a picture of it. Sit and stare at it (That’s what I do) and take in how much you changed your space on a seriously small budget that looks way more expensive than it actually is. AND, it’s exactly what you wanted, because you got to pick everything about it.
I hope this process works for you - but if you do have any questions, make sure to reach out! The entire reason I write these blogs is to hopefully empower you to do the same if that’s what you want. I believe in you - you can totally do this!
If you want to see all four of our rooms, check out a full blog post here: https://www.fiercelyblessed.com/blog/board-batten-walls
Also, check us out on Facebook & Instagram - you can find us @fiercelyblessed! We share a lot of projects as they happen and we’d love for you to say hello!
Affordable Home Upgrades
Resources for this project:
See all materials


Comments
Join the conversation
-
I love the look! You decorate for you not the next homeowner, they will do their own decorating.
-
Amazing


Frequently asked questions
Have a question about this project?
As a suggestion. If you are not caulking the battens, why not paint all the edges before you put it up. I did a board ceiling and painted all the edges so that when it expands and contracts you don't see it. It seems that it would be less work. I love the look. Question - do you have a hard time dusting?