


Cedar Accent Wall

Create a cedar accent wall using leftover pickets from a fence project. Shop your barn or garage for fun elements to customize otherwise boring walls that get overlooked when decorating. This accent wall came together soo fast and easy, and gave this nook between our dining room and master bedroom an instant upgrade. The best part is we used materials we had from a previous project making it a practically free project!! ( I bought a small can of polyurethane to finish it) Head out to your barn and see what you can find to bring inside!! For me, the more rustic and distressed things are, the more I like them!!
I love how this project warmed this space right up. From Drab to Fab using fence pickets and a nail gun!!
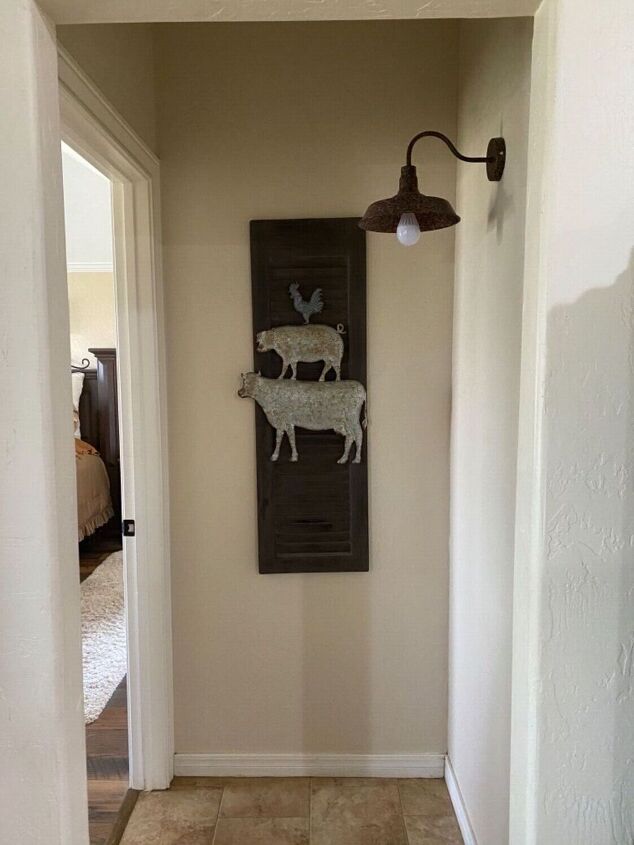
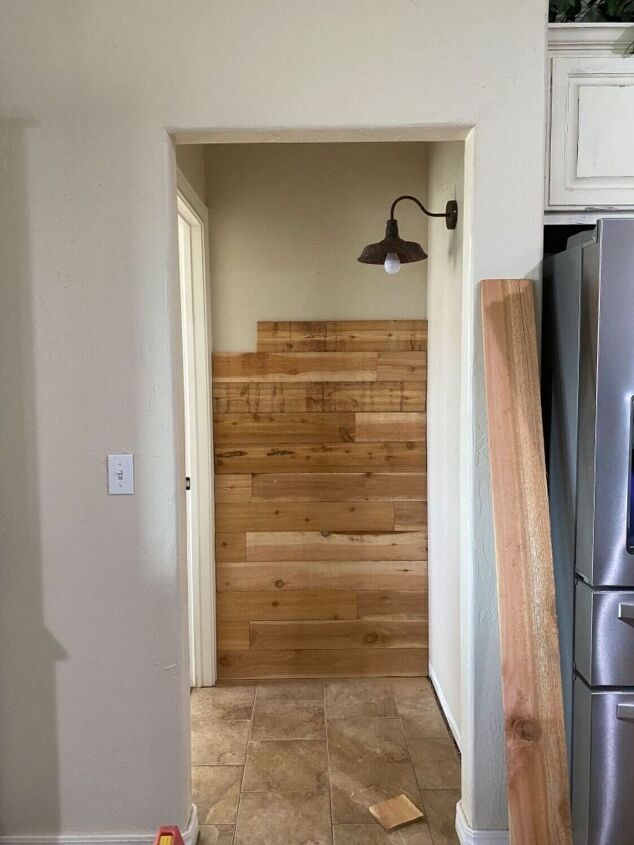
Before: The nook connecting our dining room and master bedroom. First we removed the white baseboards, saving one section for later.
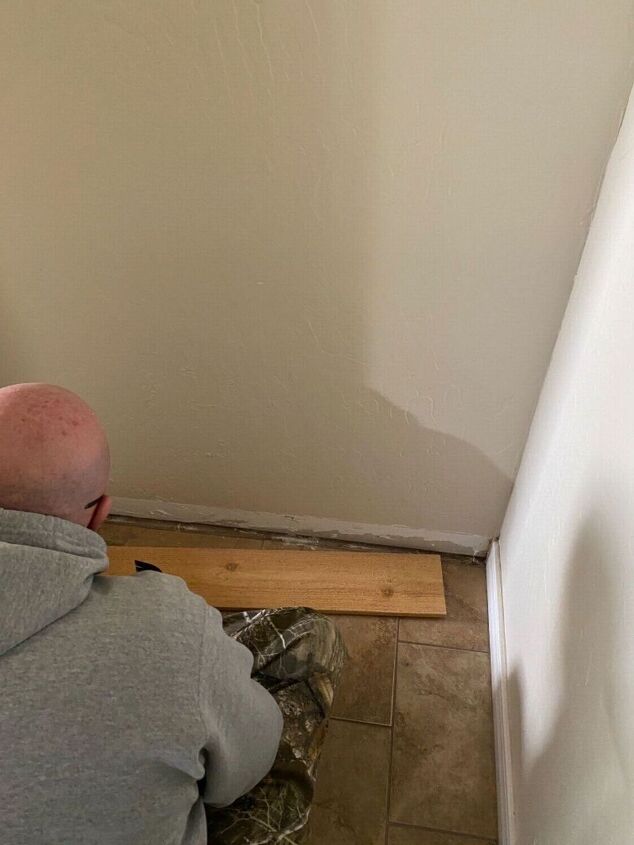
After cutting off the dog eared ends of all our leftover pickets, we started at the bottom with a full piece cutting it to fit. My husband used an electric nail gun with small finish nails to adhere the pickets to the wall.
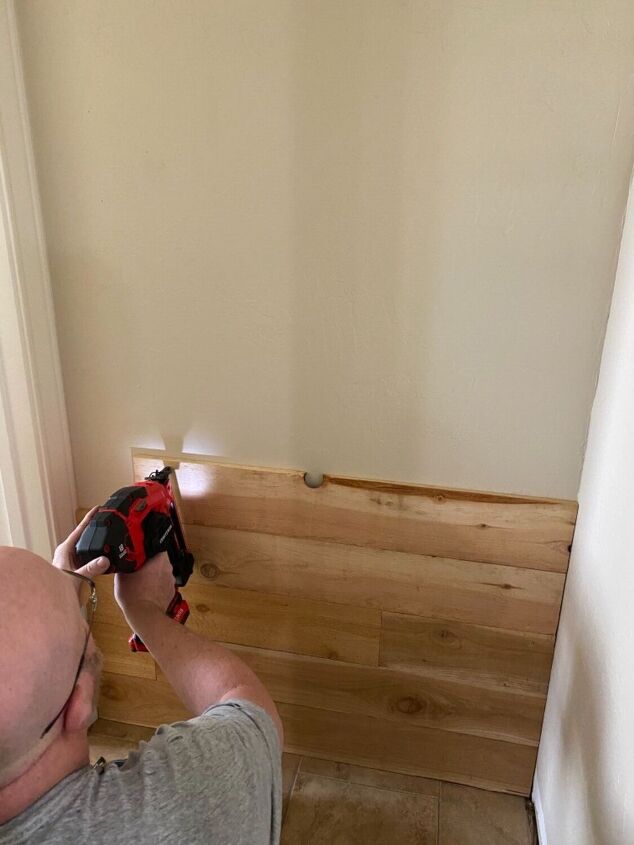
Then we started a basket weave pattern of sorts, layering long and short pieces with full sections to make the best use of our materials, alternating the seams. We worked around cracks in the wood, knot holes, and warped boards. It’s always fun to work with raw or distressed materials. I love a rustic look and things don’t have to always be perfect, but you have to get creative sometimes and think on your feet! I was looking for rustic and raw edges and knotholes that would add character and we inspected both sides of our pickets to find the “best” one before the nail gun was employed!
At this point we had to temporarily remove the light fixture as my husbands a big guy and that was a small space. 🤠🤠
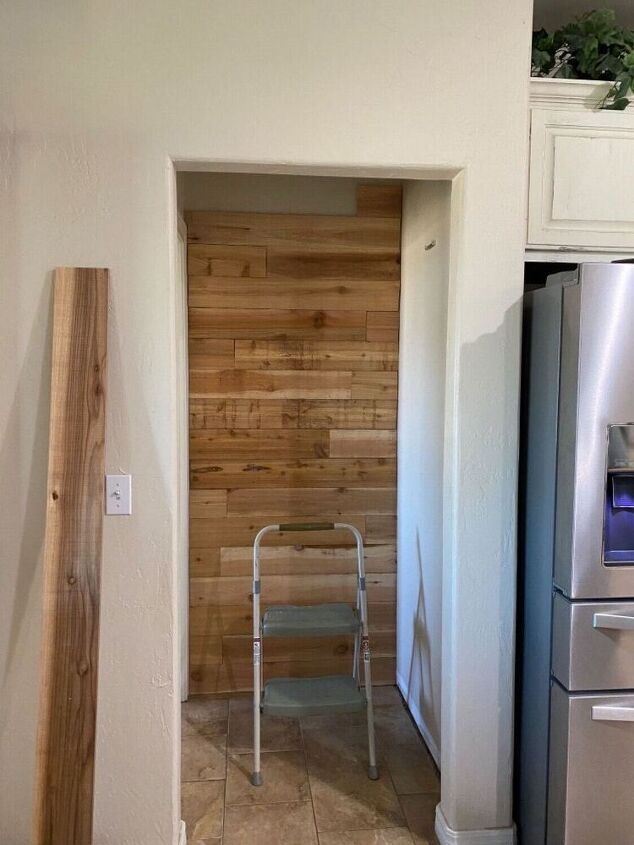
We continued layering the pickets. A long section then a short section measuring and cutting as we went. Our goal was to use all the materials we had without having to buy more so we made the fewest cuts we could.
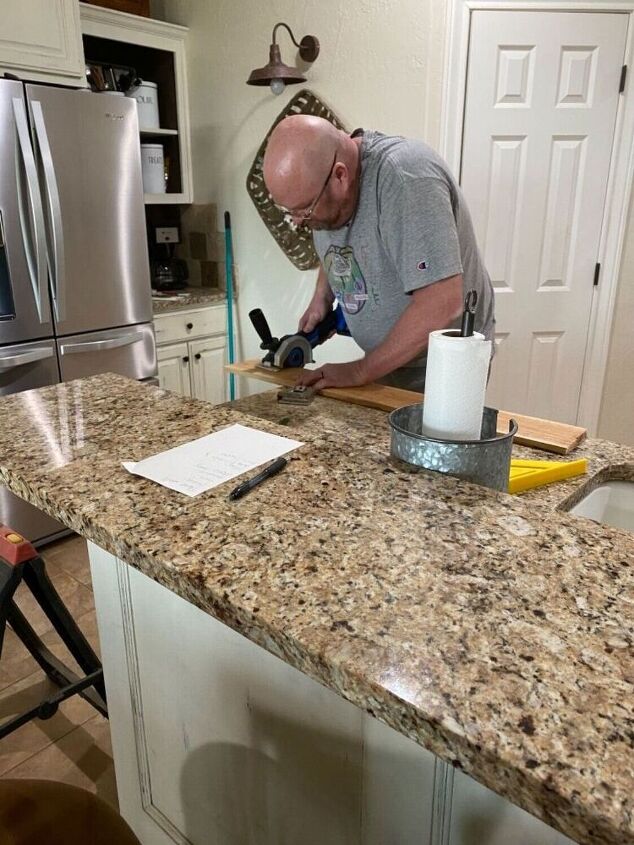
Don’t look but some of that cutting even happened in the house! 😬😬 Yep, I was right there with the shop vac!🙈 When the wall was covered we trimmed the four sides using pine trim strips.

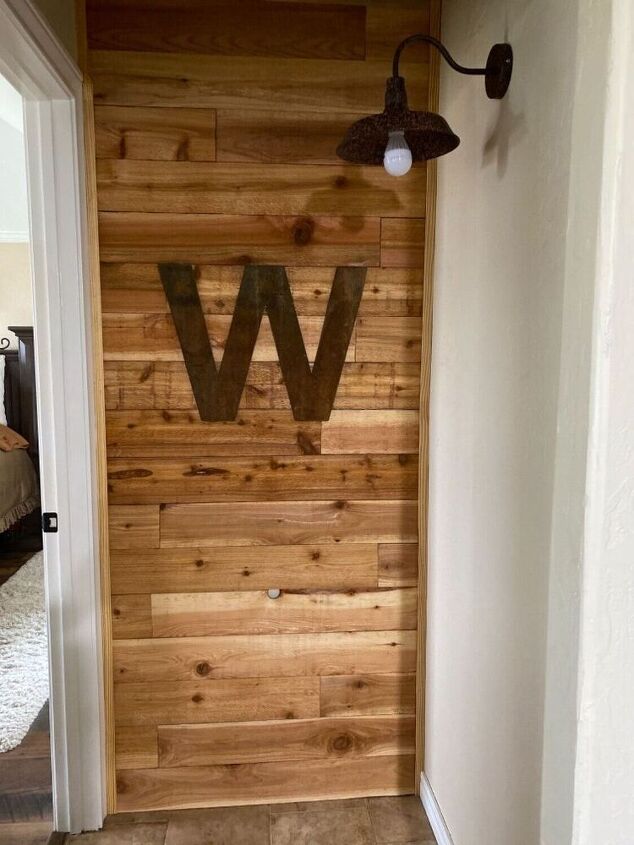
We went back and forth about sealing, staining etc.... Did we need to seal it? Would it dry out if we didn’t? I didn’t want to change the color or lose the gorgeous wood grain. Finally we settled on a quick coat of poly and it was done!! We trimmed the baseboard for the adjacent wall, re-attached it with the nail gun and touched up the paint. The light fixture went back up, and I hung my favorite rusty old W!!

Look at all that gorgeous wood grain!! So much character!! Talk about an instant upgrade!! What do you think?
Comments
Join the conversation
-
Gorgeous! Now i'm looking for a wall in my house to do the same.
-
I love this and I have the perfect wall. Now just to get husband to agree!


Frequently asked questions
Have a question about this project?