


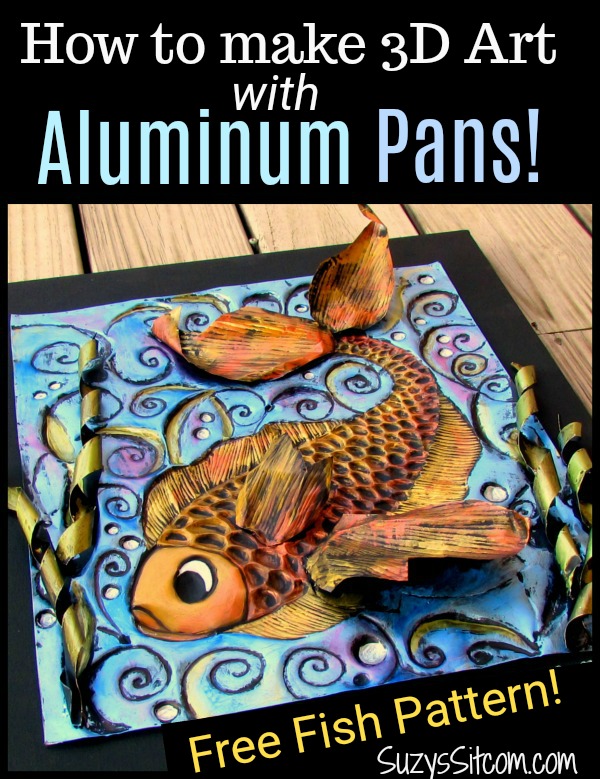
Create Art With Disposable Aluminum Pans!

by
Susan Myers
1 Material
$5
5 Hours
Medium
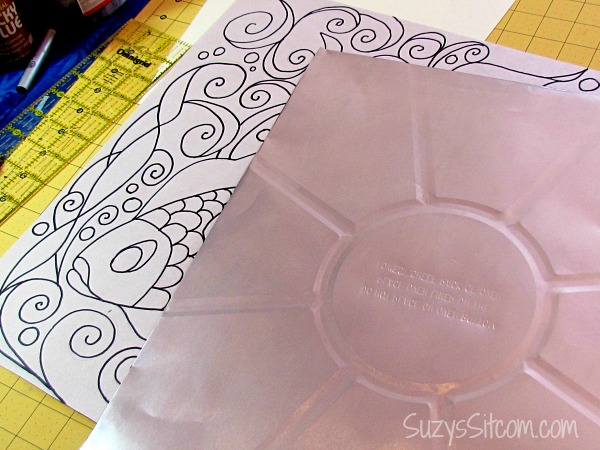
Create an Enchanted Fish using an embossing method on aluminum. You can find larger disposable cookie sheets without print on them at most party supply stores. This is a simple project and the end result is an eye catcher. The fun fish pattern can be found for free at the link at the bottom of this post!
Begin by cutting the raised edges off the cookie sheet so that you have one large flat piece. Use the knitting needle to score 1/4 inch around all four sides. Clip the corners, and fold the metal back along the score line (this will create a smooth even edge for your picture).
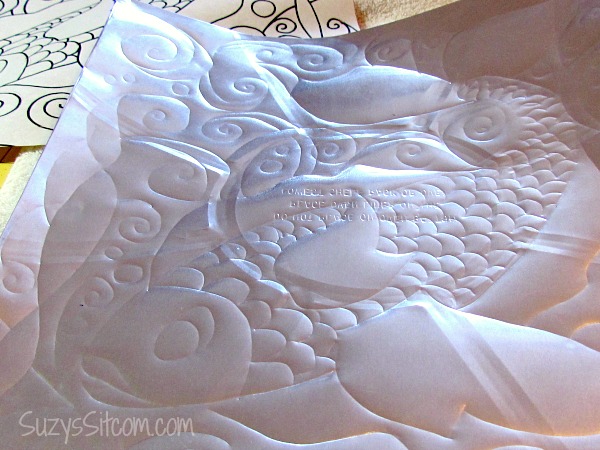
Enlarge your pattern to the size that you want it. Place a towel on your table and lay the sheet of aluminum over it. Cover with your pattern and use the knitting needle to lightly score the pattern into the metal.

Use the knitting needle and the blunt end of your paintbrush to rub the pattern into the metal.
The towel underneath gives you some play, but be careful not to push too hard.
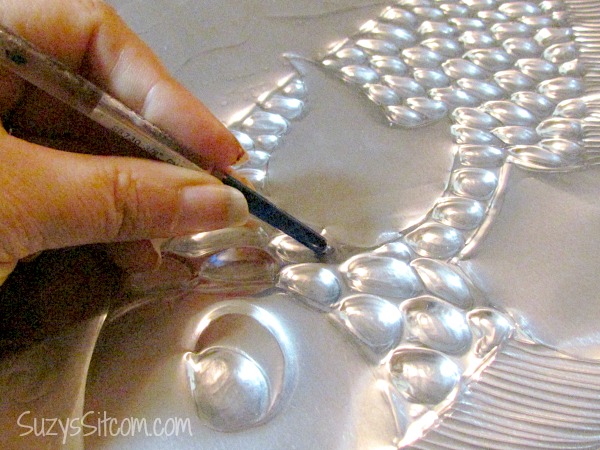
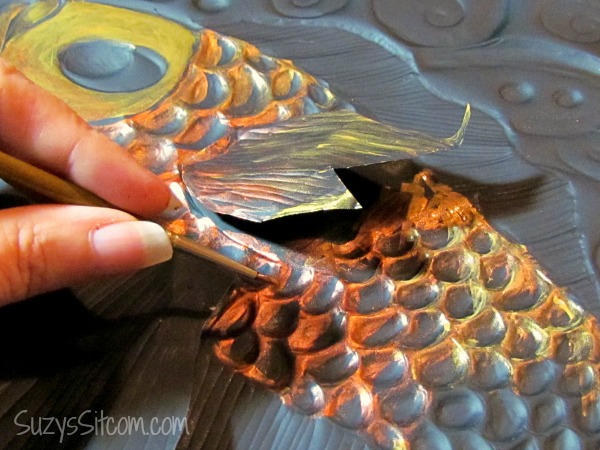
There is no right or wrong way to do this. Just emboss the design in the way that you would like. I have decided to make certain sections of the fish 3D, including the fins of the fish and a couple pieces of seaweed. For that reason, I did not emboss the fins of the fish.
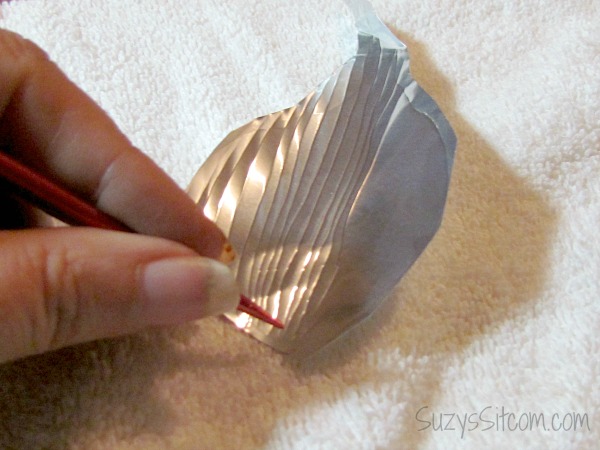
Use the pattern to trace out the fin sections. Cut them out and then score them how you would like them.
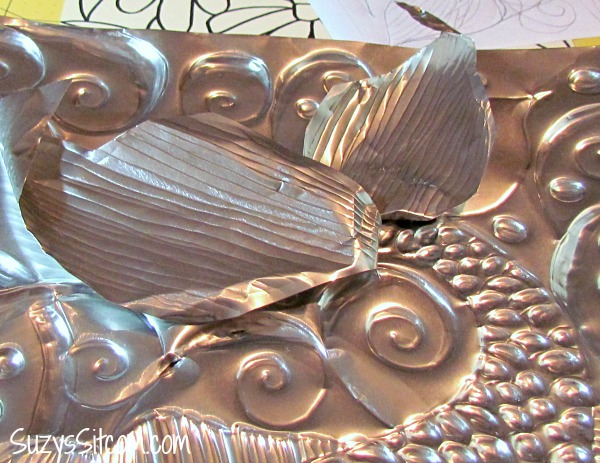
I also bent them a bit to make them stand out from the background.
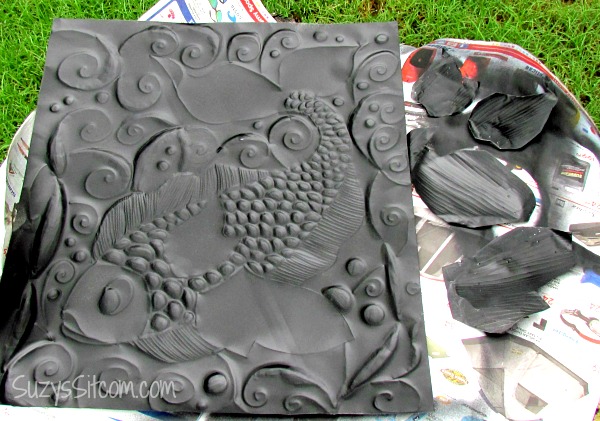
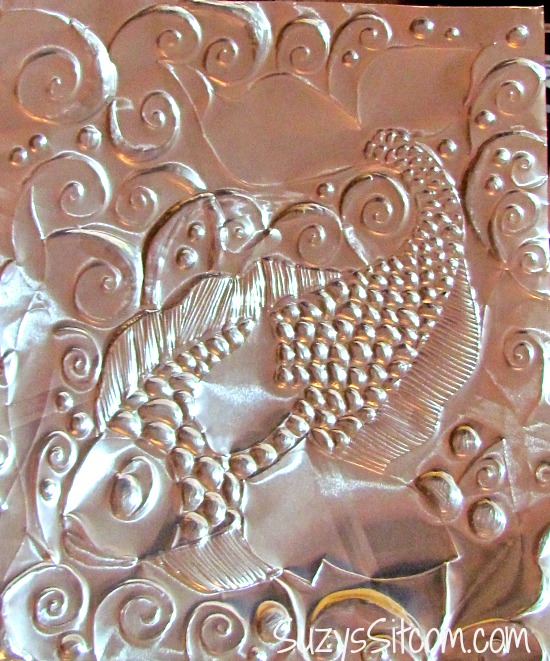
Spray everything down with black spray primer. I sprayed both sides of the fins. I also sprayed both sides of a separate pan to use for cutting out the seaweed strips.
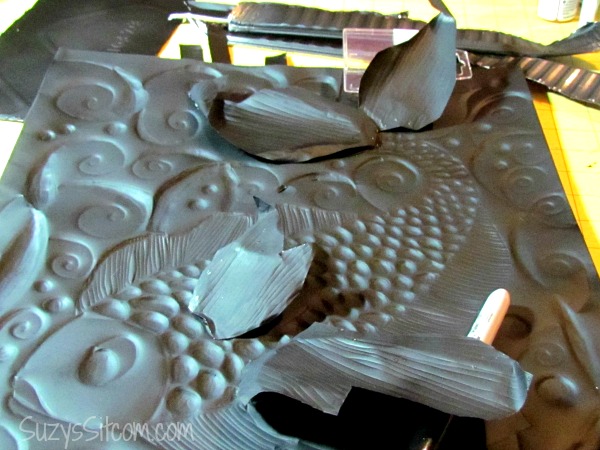
Use the E6000 glue to glue the fins in place. I used some supports to keep the fins raised until the glue dried. At this point, I also cut several 1 inch strips from the other cookie sheet, trimming them to a point at the top. I wrapped these strips around a pencil to create long curly strips, and glued them in place on the sides of the picture.
Using the copper and gold metallic paints, I brushed color along the raised edges of the picture, leaving the indented areas black.
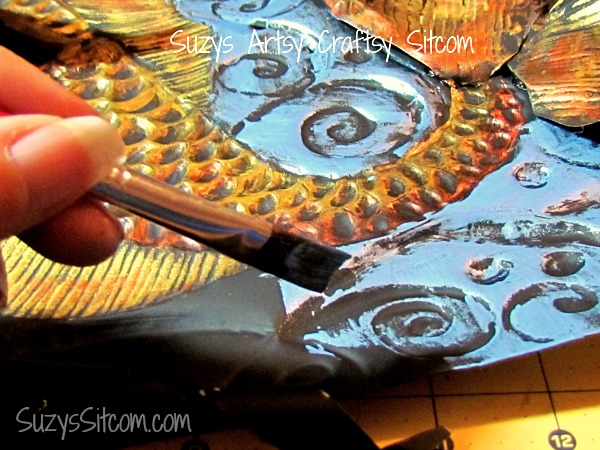
I used blue, greens and a mix of purple metallic paints for the water, and green in the seaweed, being sure to leave plenty of black showing.
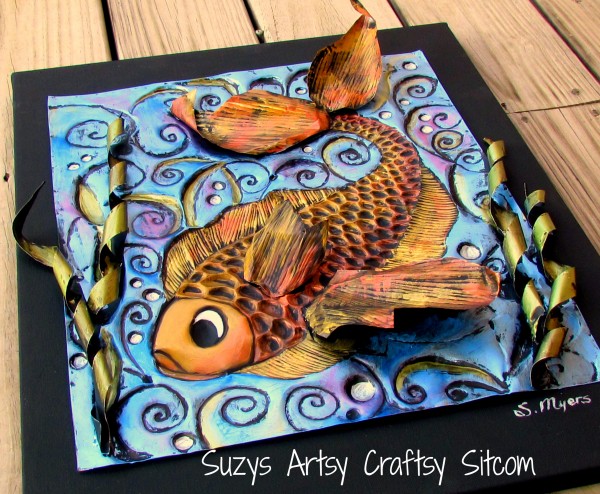
I finished by using silver paint to paint in the eye and the bubbles. To display this picture, I decided to paint a canvas black as the background. I chose a canvas that was about 2″ larger all around than the fish picture, painted it, then glued the metal picture down on it.
For the free pattern and more details on this project, click on the link at the bottom of this post!
Want more details about this and other DIY projects? Check out my blog post!
Comments
Join the conversation
2 of 3 comments
-
Well done, thanks for sharing.

-
Love it and plan to try soon.


Frequently asked questions
Have a question about this project?