


How to Create a Farmhouse Style Laundry Room
Today I am sharing how I created this farmhouse style laundry room for under $100 and in less than a month! This was not an easy task! The room isn't huge, more of a closet really, but the transformation of this space is amazing!
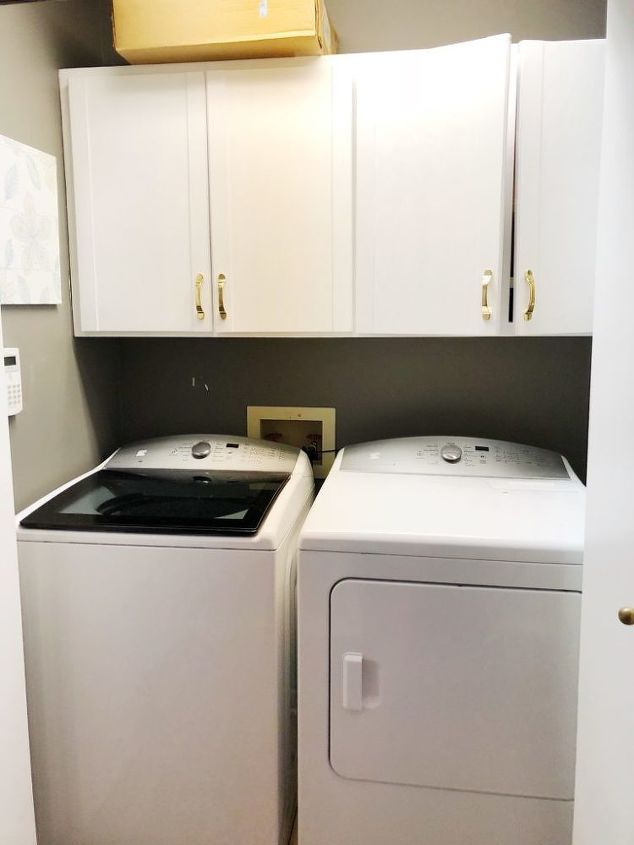
Here is the before photo. Yuck! Banged up gray walls and that ugly yellow box where the washer and dryer hook ups were. Not to mention the door that wouldn't close fully. UGH, this space needs some serious help.
Materials:
Underlayment
White Paint
White Pray Paint
Table Saw if Home Depot won't cut the wood
Nail gun and nails
Nickels
Wood for shelf
Shelf Brackets
Cabinet Pulls
Cute decor
Weekend 1: Paint the room white. You don't want the cracks in the shiplap to be dark colored so a good coat or two of white paint is needed, especially over this dark gray. It doesn't have to be perfect as long as you mostly get rid of the dark color.
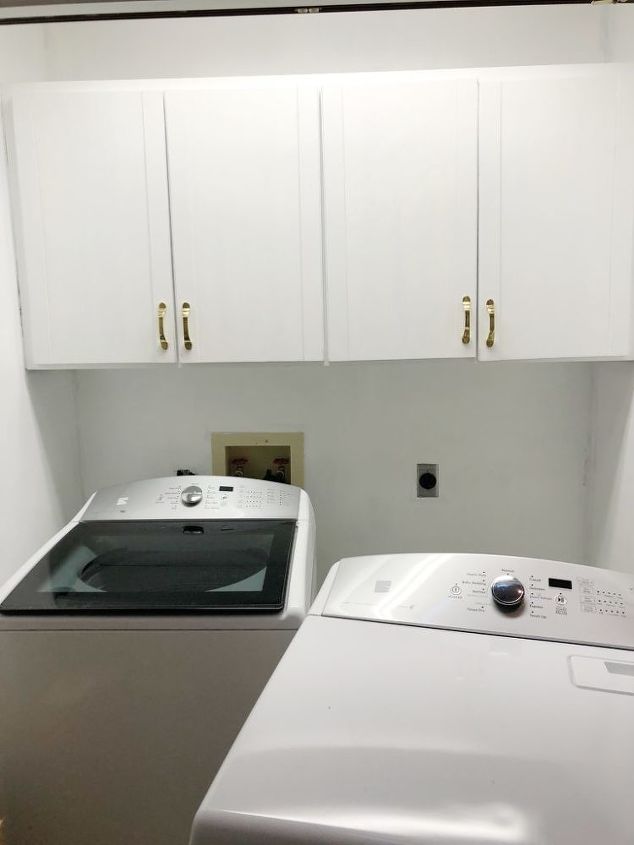
As you can see that ugly yellow box still sticks out like a thumb. I guess it's supposed to have been beige but time has made it yellow. I used white spray paint that I had on hand to paint it white like the walls.
Once the room was painted it was time to add the shiplap! I used underlayment as my wood panels which I had cut at Home Depot. Sometimes they will cut it for you and sometimes they get picky so check with your local store to see what they will do for you. I had them cut my underlayment into 6 inch strips.
I was able to go after work and pick up the wood and bring it home. Make sure you sand the edges where they cut the wood. If they won't cut it for you then you will need a table saw to cut it, if you don't have one hit up a neighbor or relative. You can also ask on the Next-door app for help, I have seen people do that.
Weekend 2: I started under my cabinets and went to the floor. Using my miter saw I cut the wood to length from wall to wall behind the washer and dryer.
I used a level to nail up the first board or two, using a nickel as a spacer in between boards.
Once I finished under the cabinets I went up the sides and did above the cabinets. I did have to cut a board down lengthwise (rip it) a couple inches, we did this with a circular saw but it was not easy. A table saw would have made that so much easier, but you use what you have right!

For the full details on all the steps I have done here check out the blog post to print out a pdf here.
Once you have the wood on the wall you need to wood putty the nail holes and caulk all the corners.
Weekend 3: After you sand the wood putty and clean it up it's time to paint! That is the fun part because then you can really see the fruits of your labor.
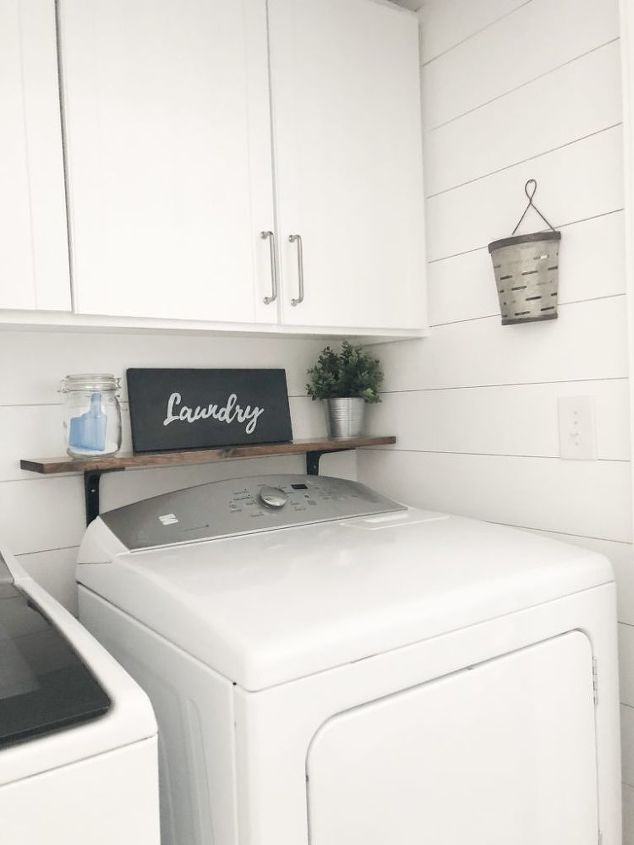
Final weekend: As you can see I added a shelf over the dryer, the washer is a top loader so I couldn't put it over that too (or else I would have). I used a leftover piece of wood I had from another project, if you don't have leftover wood you can get a 1x6 while at the home improvement store and stain/poly it for this step. Then I used brackets from Ikea to hold it up.
Some cute decor, new door pulls (also from IKEA) and some adjustments on the cabinet hardware so the door would close and I have a beautiful farmhouse style laundry room!
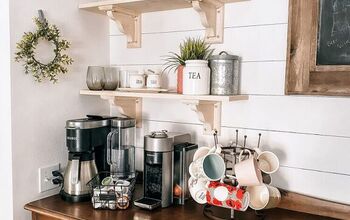
Check out how I created a Fixer Upper inspired coffee bar in my breakfast nook for under $100 too!
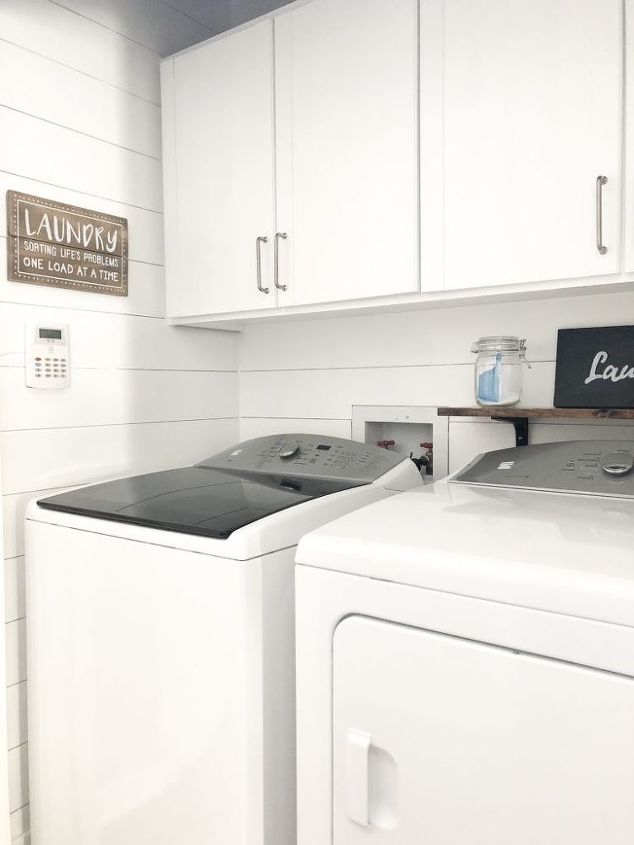
I hope you like my finished laundry room and feel like it's something you can do too! It wasn't hard, just took about 4 weekends to fully finish. Here is another photo of the finished project.


Frequently asked questions
Have a question about this project?