


Design Your Own Vintage Style Sign
I love vintage signs and apparently everyone else does too. The cost of a genuine old sign is somewhere in the hundreds of dollar range.
Did you know that you can make your own sign practically for free. Yup, free! I’m assuming you have some acrylic paints or latex paint just laying around your house and you have access to some pallet wood and a printer. Ok, it might not be totally free, but it’s pretty darn close.
Did you know that you can make your own sign practically for free. Yup, free! I’m assuming you have some acrylic paints or latex paint just laying around your house and you have access to some pallet wood and a printer. Ok, it might not be totally free, but it’s pretty darn close.
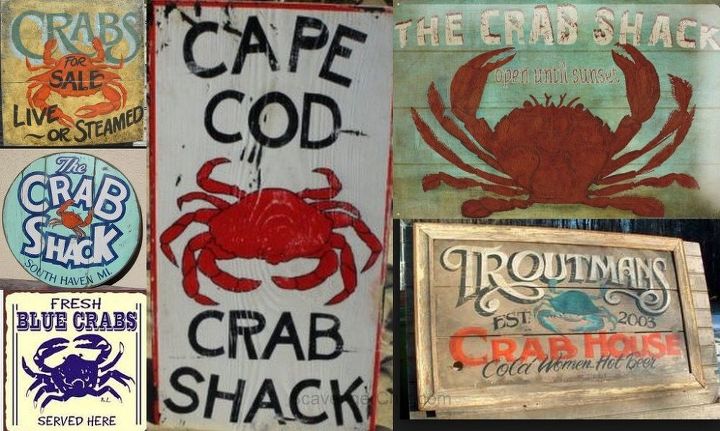
What I like about homemade signs is that you can choose absolutely any image you like. You don’t have to settle for an old Shell gas station sign that’s practically rusted out.
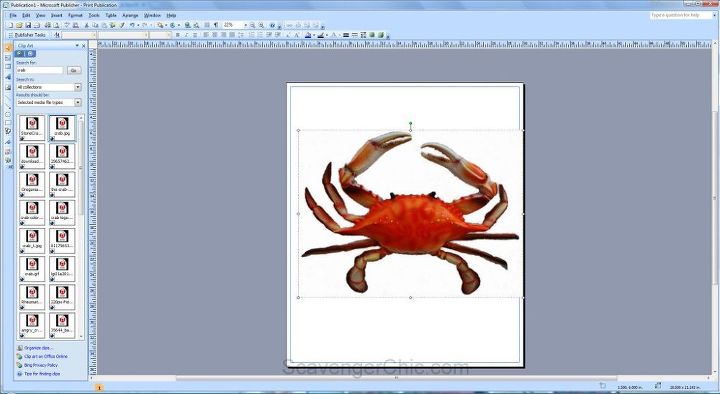
Once you decide on what kind of sign you’d like to make, start designing. My program of choice is Microsoft Publisher, but I’m sure there are others with just as many options.
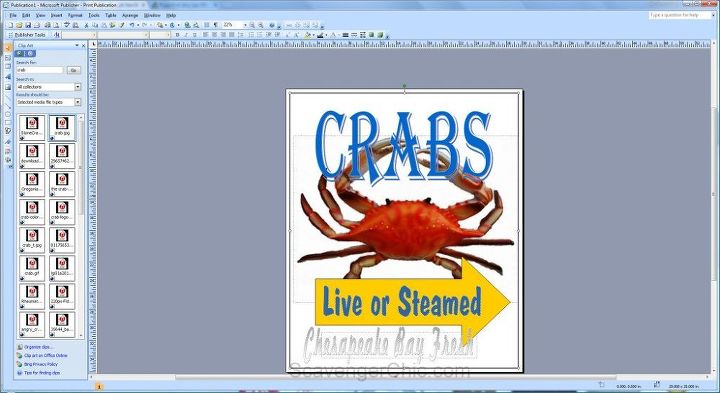
Add your lettering, graphics and borders. You may want to use genuine vintage style signs as your inspiration. Be creative...this is a great time to fool around with colors, image sizes and fonts.
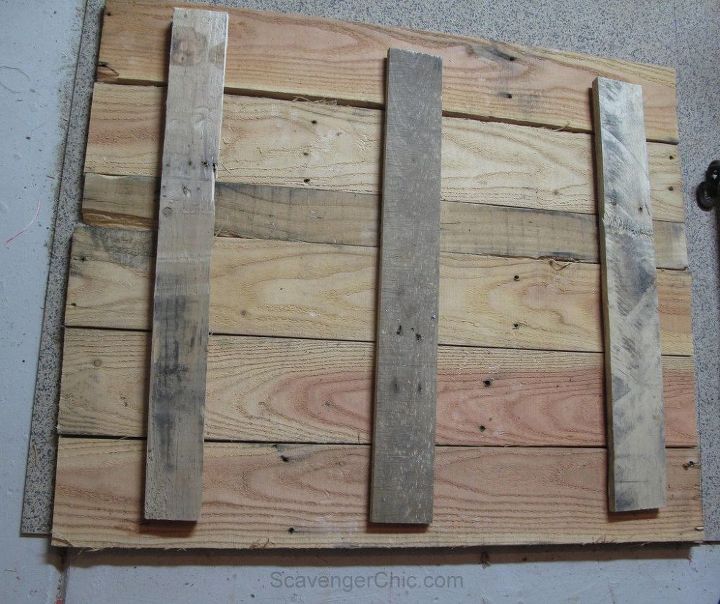
Make your sign the same dimensions of the sign you just created on your computer.
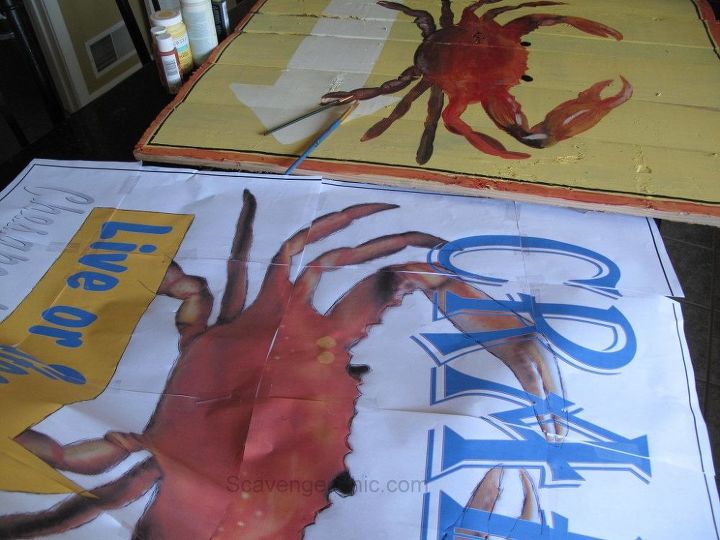
Transfer the image you created on the computer to the sign and start painting.
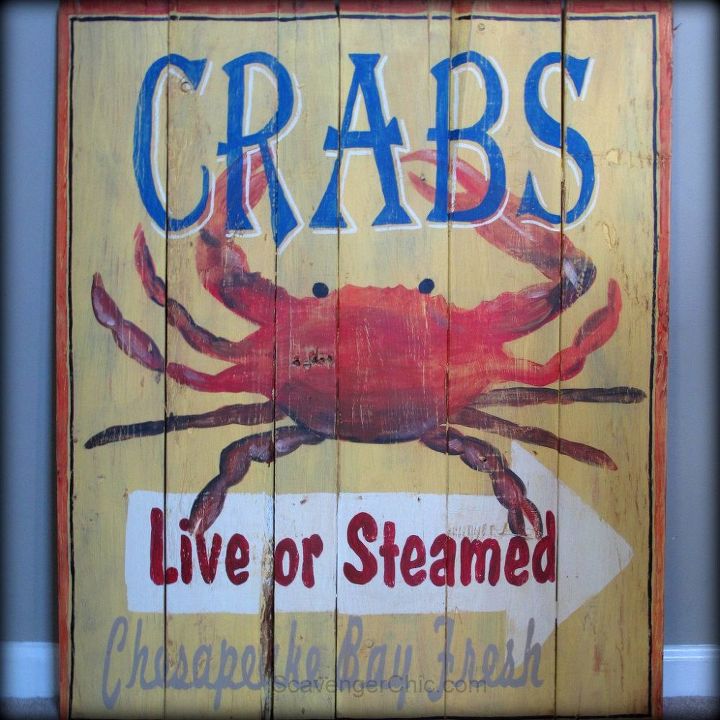
Finish off with a light sanding and wax. Voila, instant vintage sign.

Want more details about this and other DIY projects? Check out my blog post!
Comments
Join the conversation
3 of 4 comments
-
How do you transfer the image to the sign?? (not a crafty person)
-
reply deleted


Frequently asked questions
Have a question about this project?