DIY Dalmatian Accent Wall + Entryway Makeover

Is your entry way lacking those WOW first impression vibes when you enter your apartment? Before this accent wall, I didn't bat an eye when walking past it. Now, it's one of my favorite spots in my apartment. If you've been looking for something creative and different for your home, don't be afraid to take the risk and go for an eclectic, fun hand-painted spotted accent wall!
Best dalmatian wall decals!
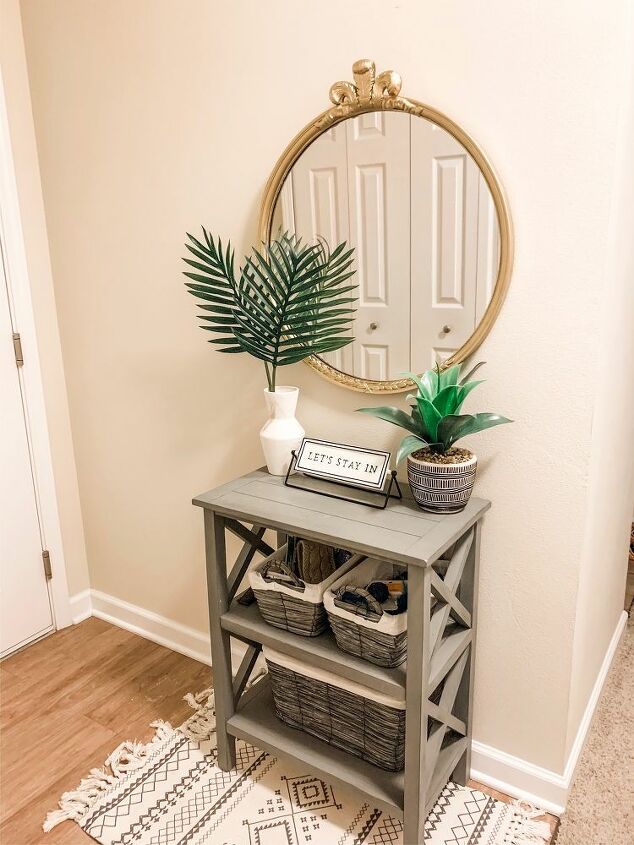
This is the "before" picture of my entry way. It's alright, nothing too special or interesting. I would frequently switch out the table décor to try and change the vibe, or the mirror (which I actually just recently bought and repainted gold, in preparation for this project), but it always felt like it was lacking something. Nothing had that "wow" factor when you walked through the front door.
I have been inspired by different accent walls I've seen on Instagram, Pinterest, and YouTube and came across Mr. Kate's spotted accent wall she did for Tati Westbrook with makeup brushes against a white wall and I LOVED the aesthetic. I also saw the Dalmatian wall that Lone Fox did for Gabriel Zamora, and after that, I knew that was the wall I was going to go for.
Gather your supplies
For this project, I thought about using a stencil (and there are plenty online if you want to go that route), but I didn't want to spend an extra $45-50 on one. I contemplated making my own stencil, but my X-acto knife skills are not the best. Ultimately, I decided to just wing it. The randomness of the Dalmatian spots makes it easier to not worry about making them absolutely perfect. Prior to painting, I gathered:
- 2 paint brushes - I used a Round 6 and a Bright 6 brush
- Paint roller and tray
- Black paint - I used Valspar paint in eggshell finish in the color "Tomcat"
- White paint - I used Valspar paint in satin finish in the color "Four Winds"
- Painters tape
- Sketchbook paper
Practice your spots
I looked at images online of Dalmatian spots and they all vary in size, shape, and spacing between them. I had used these on my watercolor sketchbook so yes these do look rough, but it is a rough draft and the main goal was to practice the technique of making the spots.
All I was doing was making sure my brush had a good amount of paint on the bristles, taking it to the paper and doing a light circular motion and trusting wherever the bristles went. I'd vary my hand motions with the brush and I'd make some of them rectangular, some square, some more circle, some triangular, some with irregular edges and also vary my spacing.
Once I felt that I had done enough practicing of the technique, I started to get my wall ready.
Prep the wall with painters tape
Tape off all the edges and walls that you do not want to paint with some blue painters tape or frog tape.
If any of you are wondering, I did make sure I got permission to paint my walls from my apartment office prior to painting! As long as you paint it back prior to moving out, most apartments will let you paint. Make sure you check with them if you are living in a rental.
Paint the background white
Using a roller, I painted the background of the accent wall with two coats of white paint. Make sure you have good ventilation while painting.
Take a deep breath... and start painting your spots!
Alternating between your round and square-edged brush, start making those dots that you practiced and just go for it!
Don't get me wrong, was I nervous to start this step? YES! But, what do you really have to lose? If you mess up, just paint over it in white, let it dry and try again, or if you really don't like how it turns out then you can always paint the wall again.
During this project I was posting this to my Instagram stories, and my friends were thinking I was crazy. But, I LOVE how this turned out in the end. Just keep at it and don't get discouraged :)
Keep on going!
Keep working your way across the wall and you'll see it come together nicely.
Nice thing about Dalmatian spots is that they are meant to be irregular and variable spots. If you were to do a polka dot, leopard or some other print for an accent wall, a stencil WOULD be recommended to keep them consistent.
Finishing details
After I had finished the initial layer of the spots and it was dried, I went back in and filled in any of the lighter areas of the spots with black paint and defined some of the edges.
Here you can find more information on how to paint an accent wall.
I repainted my entryway table
I decided to paint the entryway table darker to match the accent wall. I actually used the same paint, which actually turned out as more of a charcoal gray, and it really made a difference!
Finally.. time to decorate :)
My favorite part of any room makeover, the decorating. It really tied everything together to make this entryway exactly how I envisioned it. I went to my local Home Goods and picked up some wall and table décor. And finally... here is the official reveal of this makeover!
I am in love with how this turned out. I feel like the wall really is such a statement when you walk in the front door. No, the spots are not perfect, as you can see in the close up shots, but I think it actually adds character and uniqueness. Sure, you can totally use a stencil, but if you're feeling creative and want to make it your own, I suggest just going for it.
I hope this inspires someone to paint their own accent wall! It saved me a lot of money and completely transformed the entrance to my apartment. It's also right by my bedroom so I get to gaze at it every time I walk by. 
Enjoyed the project?
Resources for this project:
See all materialsComments
Join the conversation
-
 Cad60642994
on Mar 22, 2022
I most definitely would. just watching it bought ideals for what I can do to my own hallway!
-
-









Frequently asked questions
Have a question about this project?
Isn't it great how little changes can totally refresh a space? It turned out really cute! I gotta give you props for "going for it"! I have a foyer that is in need of some TLC ... thank you for the inspiration :-)