


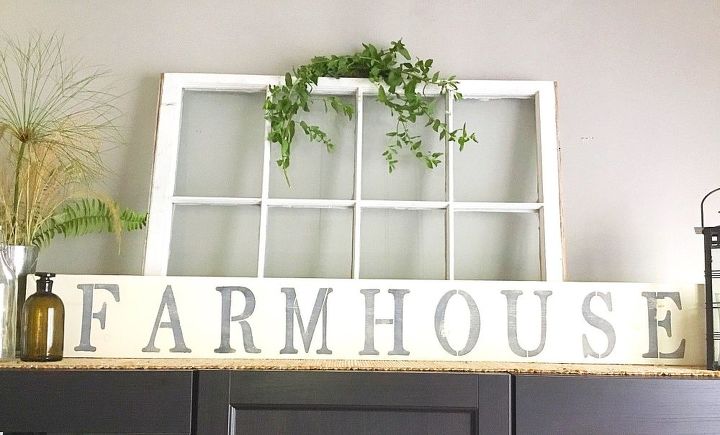
DIY Farmhouse Sign You Can Easily Make Yourself
6 Materials
I love the look of old stenciled signs. Today, I am sharing a DIY Farmhouse Sign you can easily make yourself. It’s not unusual to go out in the garage and find scrap wood from all of Dean’s projects.
To get the vintage look I was going for, stenciling was a must. Think about all the old farm and market vintage signs you see, the majority of them are stenciled.
The wood I used measured 5 feet 5 inches in length and 8 inches wide. It was a piece of pine wood that was 1 inch thick
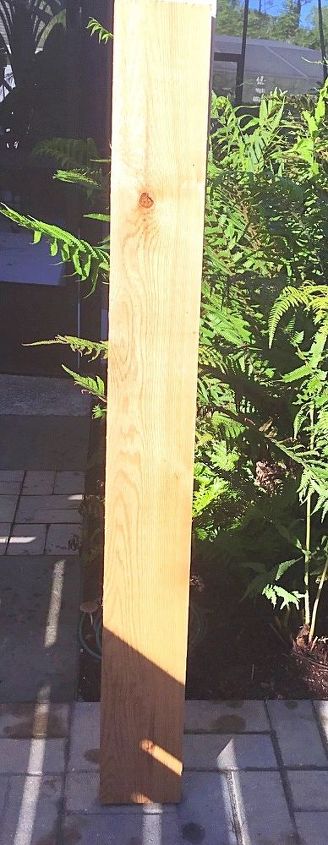
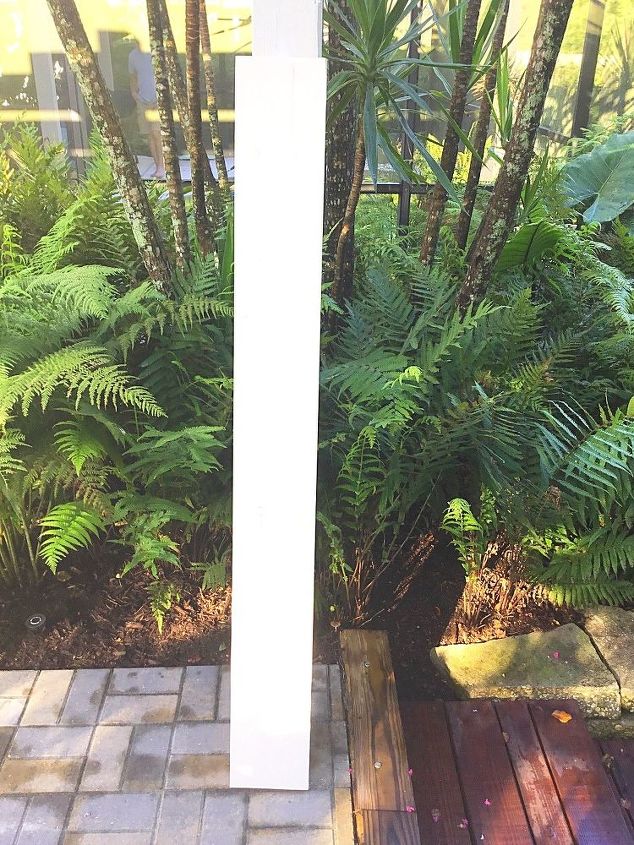
I painted the wood with Annie Sloan Chalk paint in Old White. No prep work was necessary. One coat was plenty but you can always use two coats if you prefer.
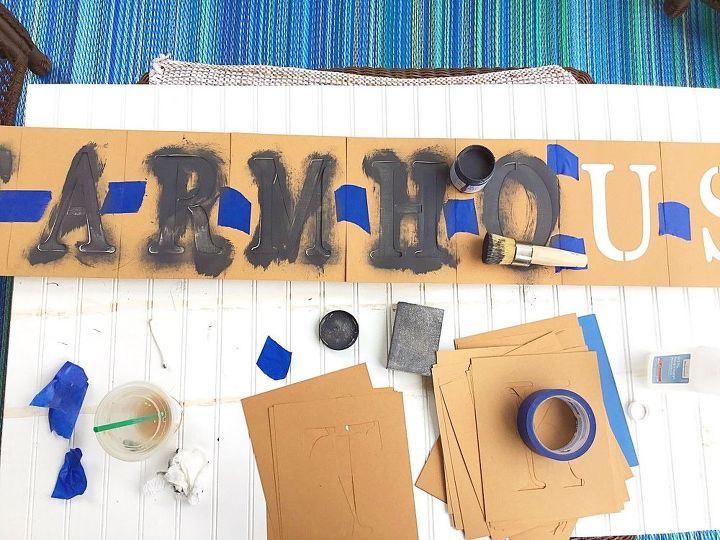
I used 6 inch stencils for my 8 inch wide board (5 inch will work fine too). Taping the individual letters in place helped with aligning in a straight line.
Granite chalk paint by Annie Sloan is one of my go to colors. It is a soft black that sands down really well. You can use whatever color you like. I think brown, gray or taupe would look good too.
Using a stencil style brush to apply the paint to the letters helps the paint not to bleed through under the paper stencils. Be sure not to apply too much paint to your brush.
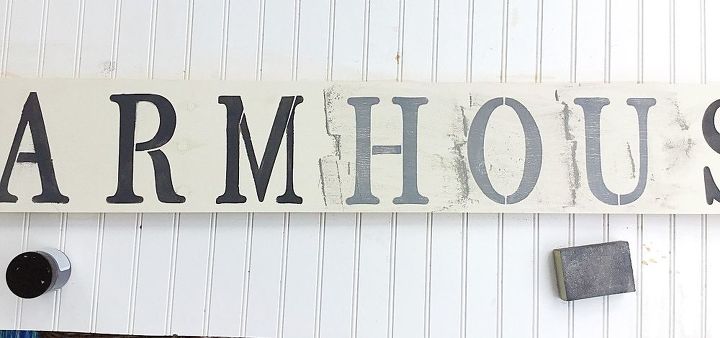
Once you have all the letters painted on and it has thoroughly dried, you will want to lightly sand the letters. This will give it the vintage look. I love sanding blocks or sponges and use them for all of my chalk painting projects. You can see one of my very first chalk painted projects here. I was hooked after that.
For different variations, you can stain the edges of the sign or nail stained pieces of trim on the sides to frame the sign. Here is an example of a hand lettered sign that I made where Dean nailed the trim on the edges.
This project took me about 2 hours to finish.
If you are buying all the supplies for the first time you can do this project for under $20.00. We had all of these materials from other diy projects.
To reduce even more on your cost of supplies, you could ask your big box home improvement store if they have any scrap wood available. They usually keep this in the back of the store.
Check out their returned paint section as well. You don't have to use chalk style paint for this project but it is easier to distress by sanding for the vintage look. There are several different brands of chalk style paint at most craft supply stores and most have 30-40 percent off coupons.
Instead of purchasing a stencil brush, you could pick up makeup sponges at the dollar store. These are great to use for dabbing on the paint with little to no paint seeping through on the edges of your stencils.
It was a fun project that you can easily make too. Have fun with it!

Want more details about this and other DIY projects? Check out my blog post!
Comments
Join the conversation
2 of 21 comments
-
Hi Pam! Right? I have a Silhouette machine but am still learning☺️ This really is an easy project for anyone to do with basic materials.
-
excellent job. You nailed this project. I can't wait for summer 2018 when the temps are nice outside, because I want to make this project. Thank you for sharing.


Frequently asked questions
Have a question about this project?