


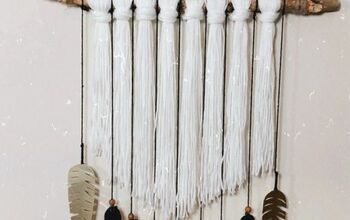
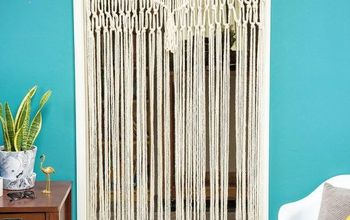
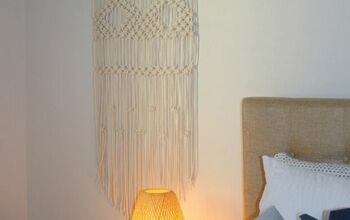
DIY Feather Macrame Wall Hanging

I have had a bag of scrap pieces of macrame cord from old projects laying around for what feels like forever. I didn't want to just throw the pieces away considering there was a good amount, so I decided to make something with them! I grabbed a stick from outside and got to work!
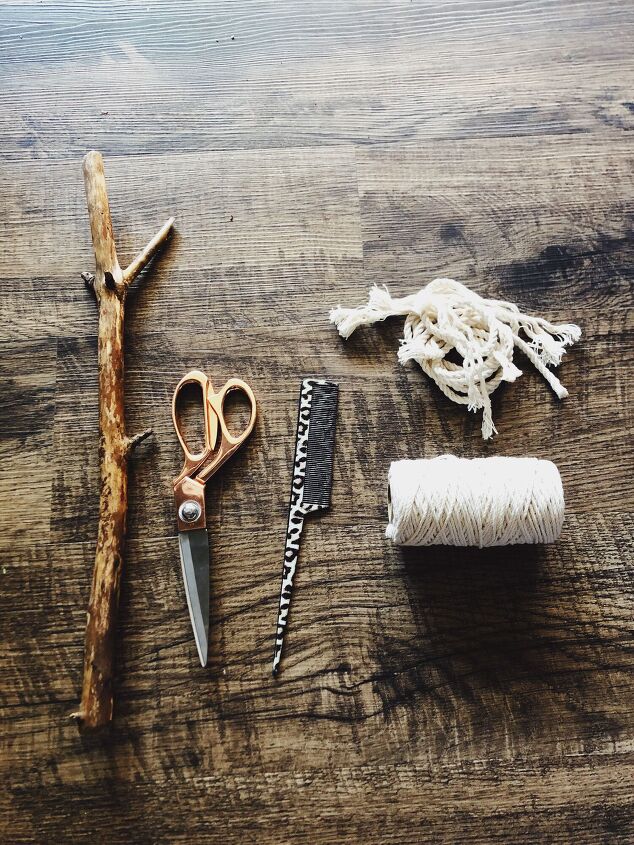
Materials Needed -
- stick
- scissors
- comb
- macrame cord
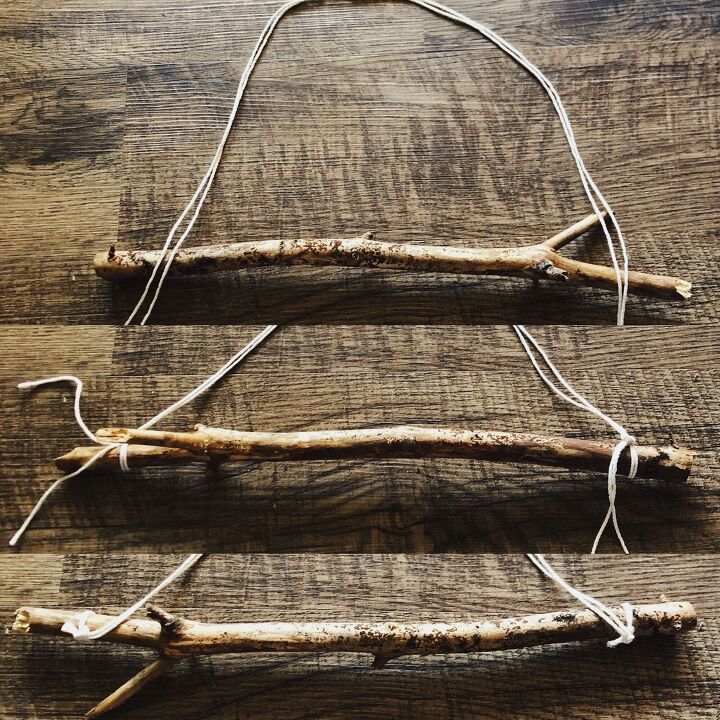
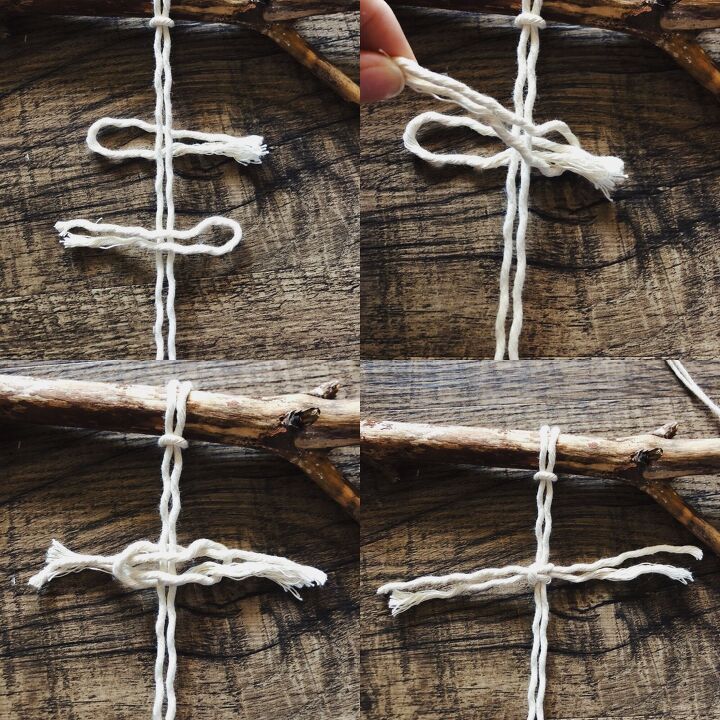
Step One - Attach cord to hang
After I grabbed my stick and removed the bark, I took some thin macrame cord and cut a piece to be able to hang the wall hanging up. I like to double or even triple the pieces up to give it a thicker look. I just triple knotted the cord onto the stick.
Step Two - Attach long pieces to stick
This is the piece of cord that the feather will be formed from. I used a larks head knot to attach this to the stick. However many feathers you want is how many of these you'll add. I did three total.
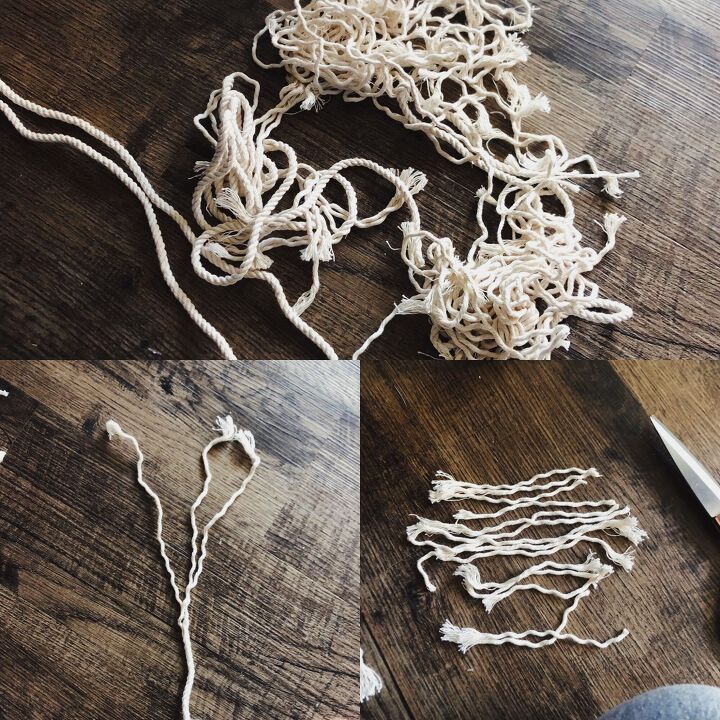
Step Three - Gather Cord Pieces
The bag of scrap pieces I had was full of random different lengths of cord. For this project you'll want them to roughly be the same length, 3-5 inches or so. Most of the pieces I had were already broken down pieces from a thicker piece of cord that had three pieces intertwined together. I just undid the ones that were still together in one thick piece.
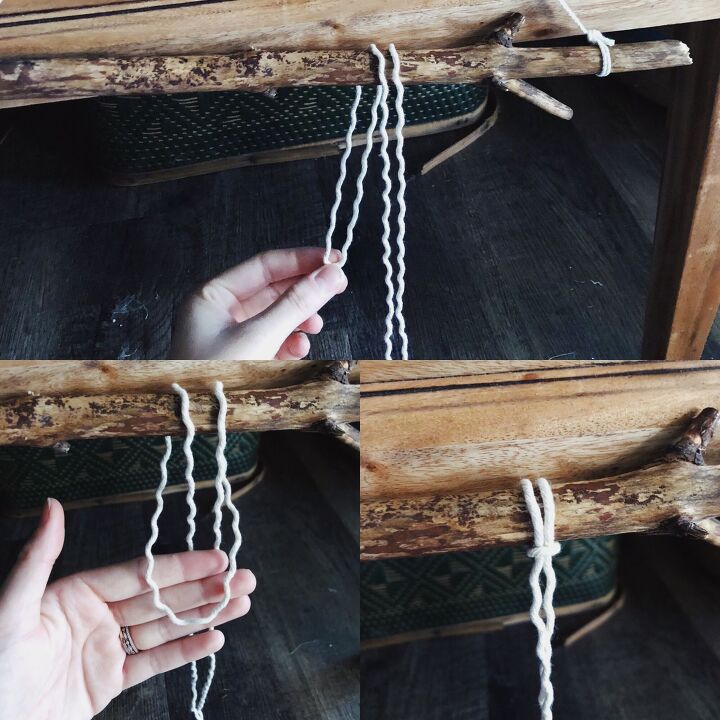
Step Four - Start to make feather
Now that I had all the small pieces of cord cut, I began to attach them to the long piece of cord attached to the stick. I did this by making a square knot - but with both ends loose. You do this by folding two pieces of cord and pulling them through one another. The long, main piece of cord will not move at all. You will only be pulling the shorter cords.
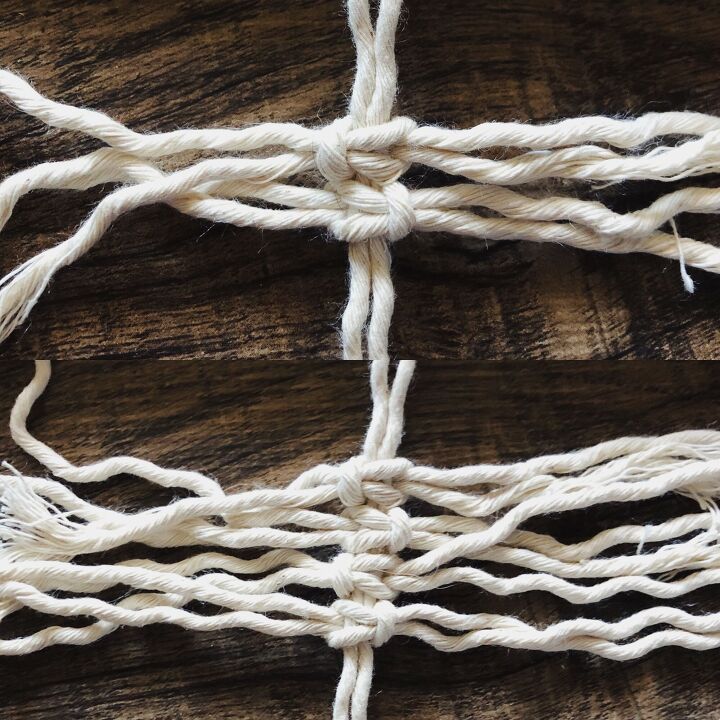
Here is how the knots will look after they are pulled tight. Notice I am alternating the knots.
Whatever side you have the bottom loop piece on, will be the side the loop will be on the top after you have pulled it tight.
Here's what it looked like after I added all the shorter cord. As you can see there are various lengths of cord - again this was using scrap pieces. You can use the same length but depending on the shape you want the end feather to be, a little variation in the length of these cords will not matter as long as they are similar.
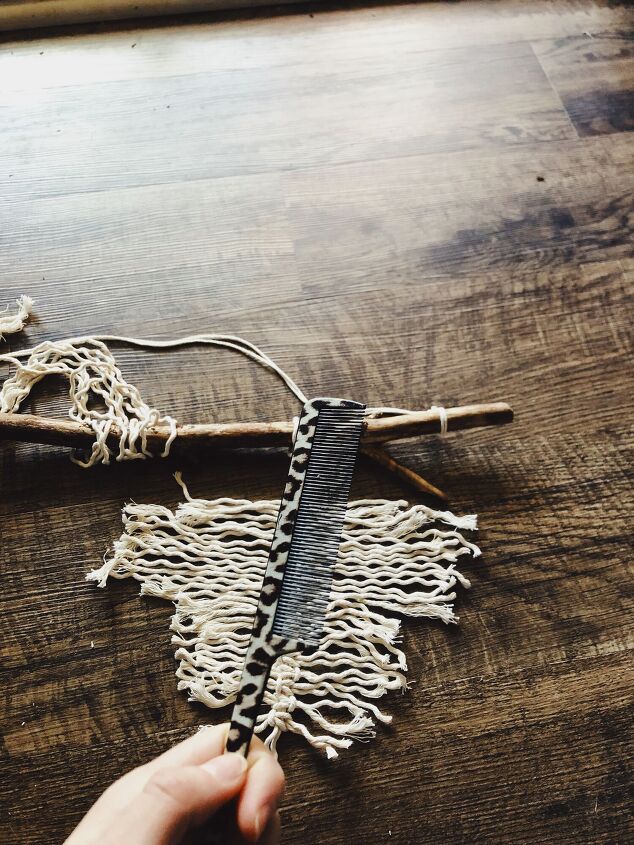
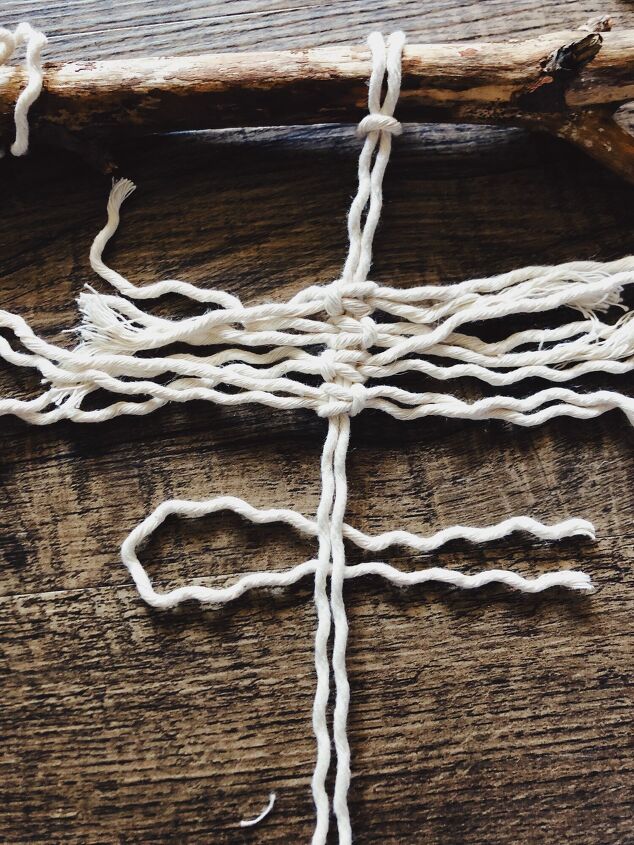
Step Five - Brush out cord
Now the fun part! After all the cord is attached tightly, brush out the cord to give it a frayed look. I hold onto the center of the feather with one hand tightly, and brush one side at a time.
Here's one side all brushed out
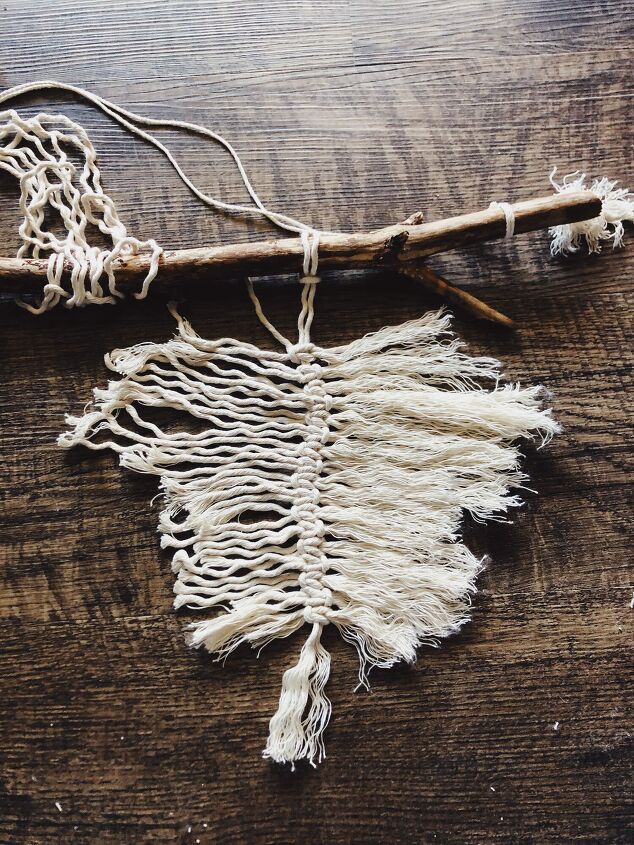
And now you're done, hehe only kidding! This is what it will look like all brushed out.
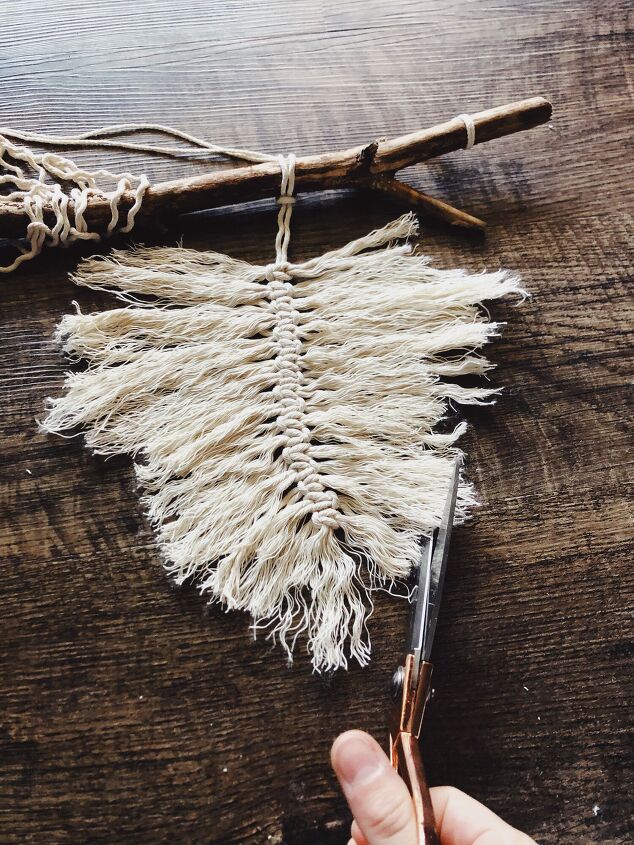
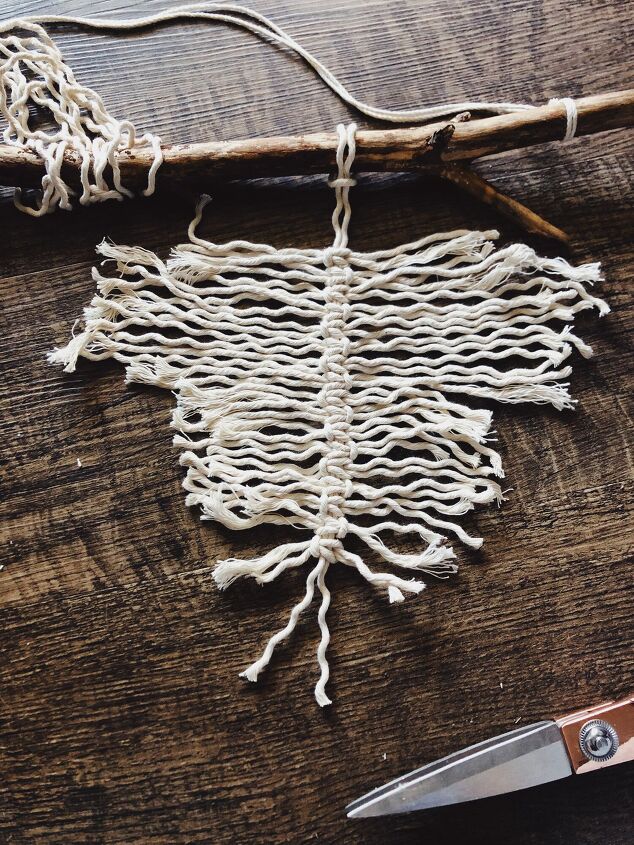
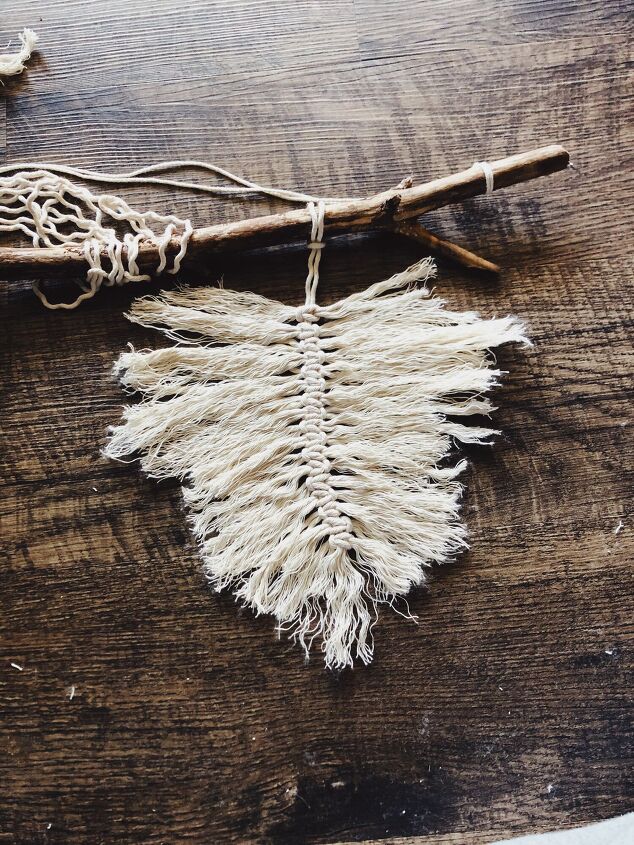
Step Six - Cut
Then I cut the cord to give it the feather shape I wanted.

This is what it looks like all cut, how cute right?!
I repeated making the feathers two more times resulting in three total feathers. I made each feather a slightly different size from the others.

And that's it, I used a small tack to hang it on the wall. This was a great project to use left over, random length macrame cord that cost absolutely nothing but time!
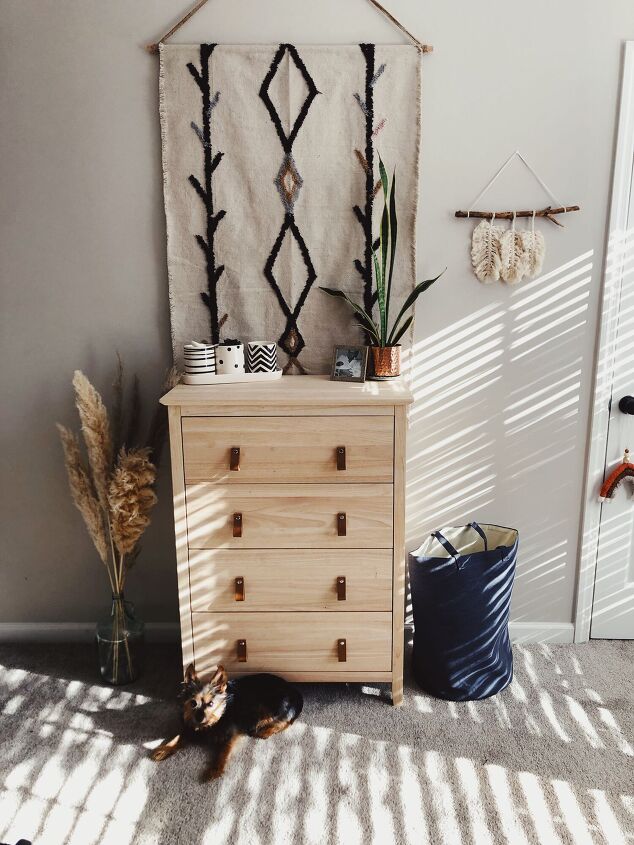
I hung this in my son's nursery and just love the way it looks with everything else!
You can make this piece as small or large as you want, it's really up to you! You could also use different color cord or dye the cord to make it have an ombré effect between the feathers. The beauty of projects like this is - you can take the general idea of it and get a little creative and completely make it your own! The possibilities are endless!
Resources for this project:
See all materials


Comments
Join the conversation
-
I love, love, love this!! So going to try. Ben a hot minute since I heard macrame!
-
Don’t look now but here come the 70’s! Fringe on everything including hair. Bell bottoms that got wider by the minute with significantly narrower tops. Looked like triangle walking around on platform shoes and EVERYTHING was orange or orange tint. Saturday night fever was real and polyester was everywhere. Real fun going dancing in fabric that doesn’t breath. I can still smell the pits, beer, cigarettes and feet in bars. Good times


Frequently asked questions
Have a question about this project?
How did you make the piece over the dresser?