


DIY Gather Wooden Sign
9 Materials
$30
2 Hours
Easy
Hi, I'm Christene from the blog Keys to Inspiration. My blog is all about helping you discover creative, simple, and affordable ways to design a home you love!
Today I want to share my latest home decor project - this pretty Gather wooden sign. One of my passions is creating home decor and teaching others how to create too! Even if you don't think you're a crafty person, I can show you how easy it is to create beautiful things for your home on a budget.
Large wooden signs can sometimes be pricey if you find them in a store. I've wanted a big wooden sign for my dining room for a while. So, I decided to DIY one myself!
You can see the full tutorial on my blog here.
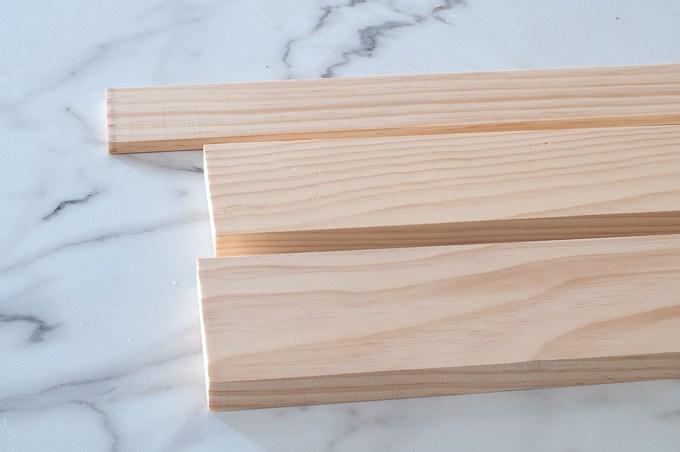
To create the wooden sign, I first came up with a basic design. I wanted the sign to be two board widths wide and have cross section pieces at the top and bottom. The style I was going for was a little rustic, but also finished and modern.
I knew I wanted my sign to be about 5’ tall, so I cut the boards and sanded the rough edges after each cut. Then I used wood glue to attach the boards together to create a wider wooden sign (2 board widths wide).
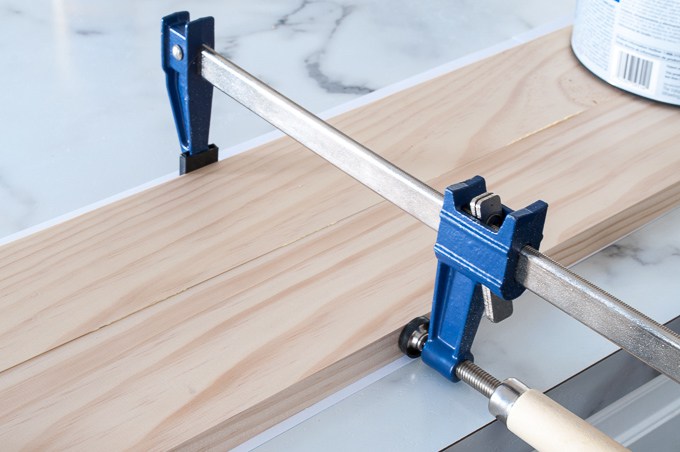
I used the quick clamps and a few heavy paint cans to hold everything in place as they dried. I also made sure to wipe off any excess glue that squeezed out of the seam between the boards using a paper towel.
Next, I cut my smaller 0.5” x 2” pine board to create 2 cross section pieces.
I wanted the cross section pieces to be a little bit longer than the width of the main boards so I measured the width of the sign and added ½.” That way the cross section pieces would stick out over the edge of the main boards by ¼” on either side.
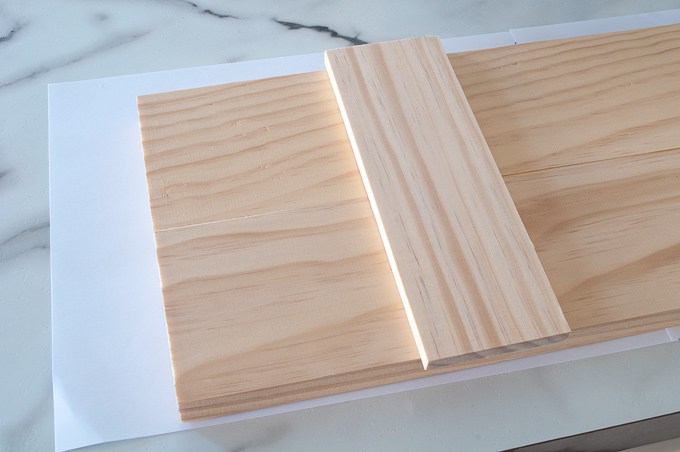
I used some wood glue to attach the cross section pieces to the main boards. To position the pieces, I just eyeballed about 4” from the top and bottom of the sign.
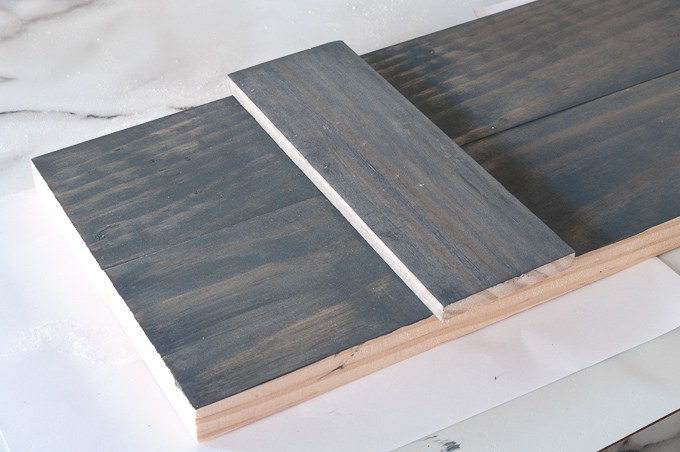
After the glue was dry and everything was set, I grabbed my stain and applied a single coat to the entire sign.
While the sign dried, I got to work on my letters.
To paint my unfinished letters, I grabbed a sample that I had laying around of {affiliate} Fusion Mineral Paint in the color Pebble. I actually have two larger sizes of this because I love the color so much, but the sample was the perfect size for these letters.
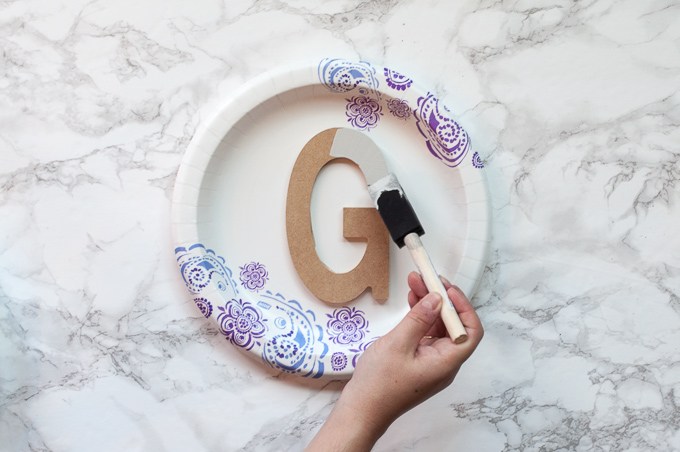
Using a foam brush, I applied one coat of the Fusion Mineral Paint to all the letters. Once it dried, all the brush strokes were gone and I had a nice even finish.
If you’ve never heard of Fusion Mineral Paint, you have to try it! It’s my new favorite specialty paint because it levels itself! It’s perfect furniture projects and small crafting projects.
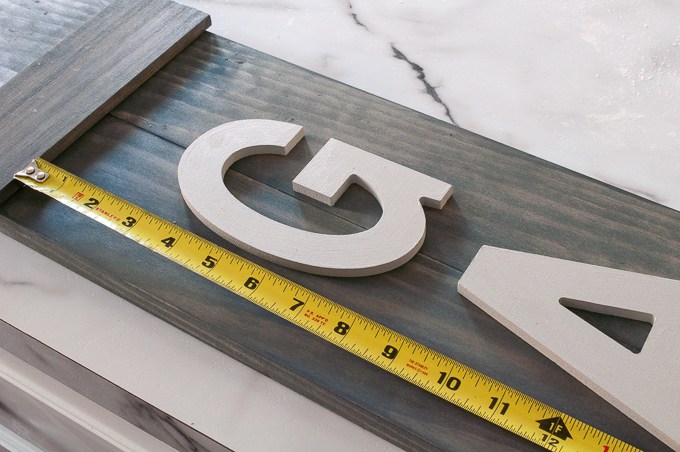
Once all the letters were painted and dried, I brought them over to the sign and spelled out “Gather.” I used the tape measure to try and evenly space the letters between the two cross section pieces.
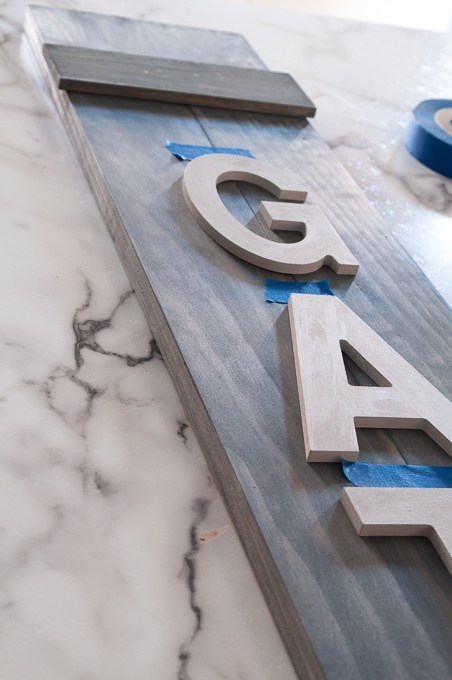
Once I got the spacing right, I used some tape to mark the tops of each letter. Then, working one letter at a time, I applied wood glue to the back of the letter and placed it on the sign where my tape marking was. I just repeated this process until all my letters were attached.
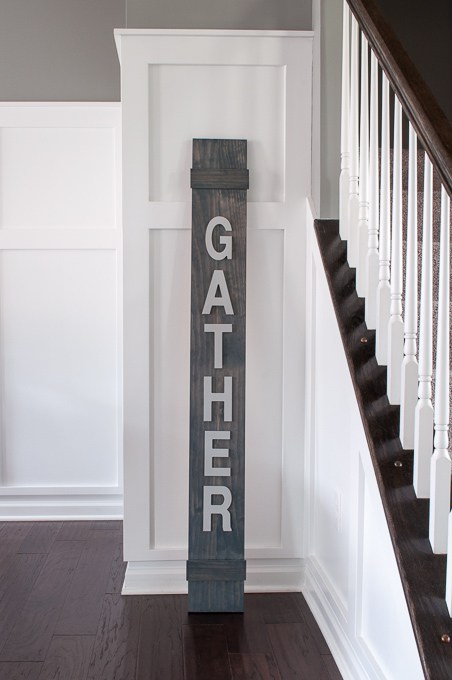
I let the sign dry for a few hours, and then it was done! Super easy and no nails or screws needed. Just wood, paint, and glue. Now I’ve got a brand new custom sign for my home.
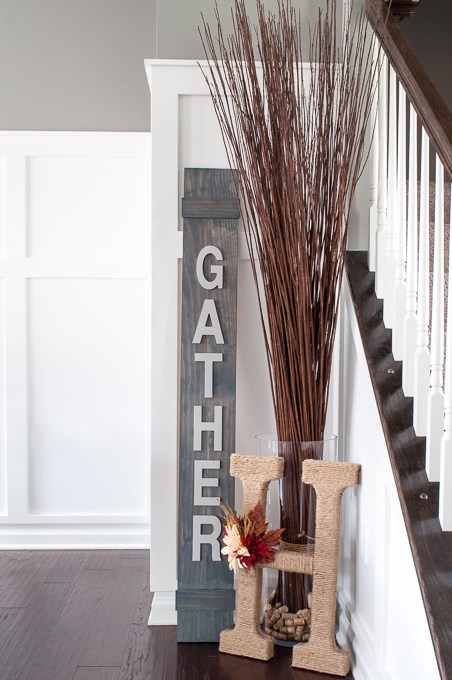
This project turned out exactly as I imagined. I think the wood looks great against the board and batten in our dining room.
What do you think? You could easily make one of these signs in an afternoon, and you can customize it with any words.
You can see the full DIY tutorial for the Gather Wooden Sign on the blog. Just click on the link at the end of this post.
>> Christene
Connect with me on Facebook -- [facebook.com/keystoinspiration]
I also love Instagram! -- @keystoinspiration
Resources for this project:
See all materials


Any price and availability information displayed on [relevant Amazon Site(s), as applicable] at the time of purchase will apply to the purchase of this product.
Hometalk may collect a small share of sales from the links on this page.More info

Want more details about this and other DIY projects? Check out my blog post!
Comments
Join the conversation
2 of 31 comments
-
I think I am going to try this. but put family on mine.
-
very nice!!!


Frequently asked questions
Have a question about this project?
Hi: great idea and craftsmanship - and- how did you do the really big H in the photo..,,?
Very nice corner! What is in the bottom of the planter? It looks like corks....😕
I absolutely love the gather sign! But, I also really like your H that is in the photo. Did you make it?