


DIY Porch Sign With Cricut
This is a sponsored post written by me on behalf of Cricut. All opinions are 100% mine.
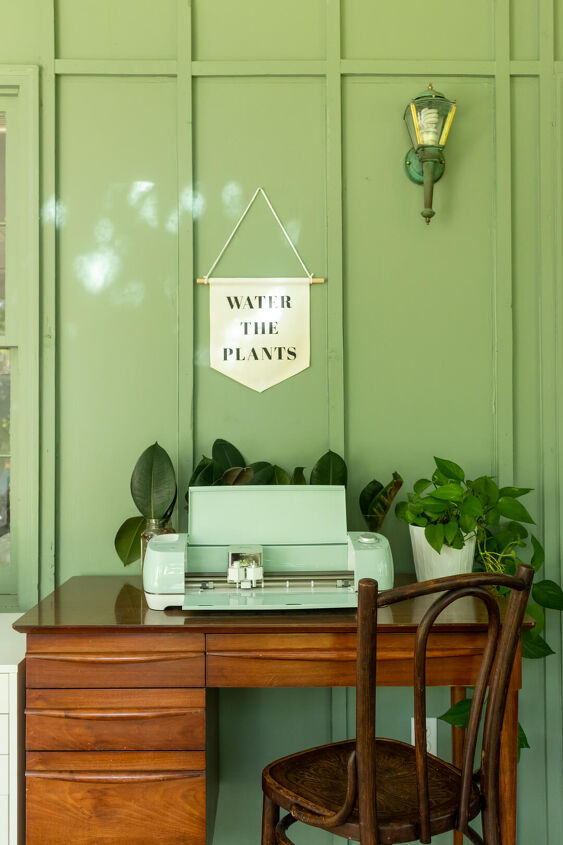
The sunroom is arguably my favorite spot in our entire house. My plants are thriving with all the sunlight they get and it’s the perfect temperature controlled place to hang out now that the days are so hot here. That’s why I put my desk out there, because it’s the best spot in the house to work!

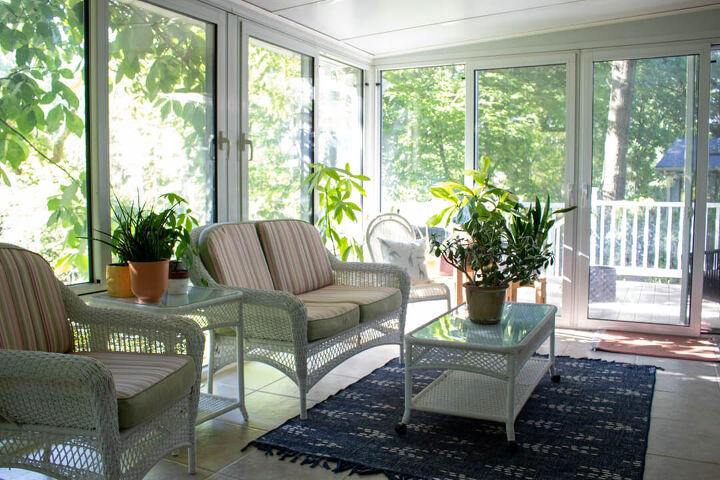
I’m working on sprucing it up a bit and decided to make a couple new things with my Cricut Explore Air 2 to add a bit of personality to the space. New cushion covers for our wicker furniture will be delivered next week and I’m on the lookout for some better shelving for my plants, then it’ll really be looking snazzy.
Using my Cricut is a super simple way to make a quick, easy and affordable upgrades to our home decor. And the kids love “helping.” The Explore Air 2 can cut over 100 materials, including iron, paper, vinyl, card stock, material and a bunch of other custom materials. I just used iron on for both of these projects.
How to make DIY Porch Sign Using Your Cricut
Supplies needed:
- Cricut Explore Air 2
- Cricut Machine Mat
- Everyday Iron On (I used black for the banner and silver for the pillow)
- Weeding Tool
- Banner and/or Pillow Case
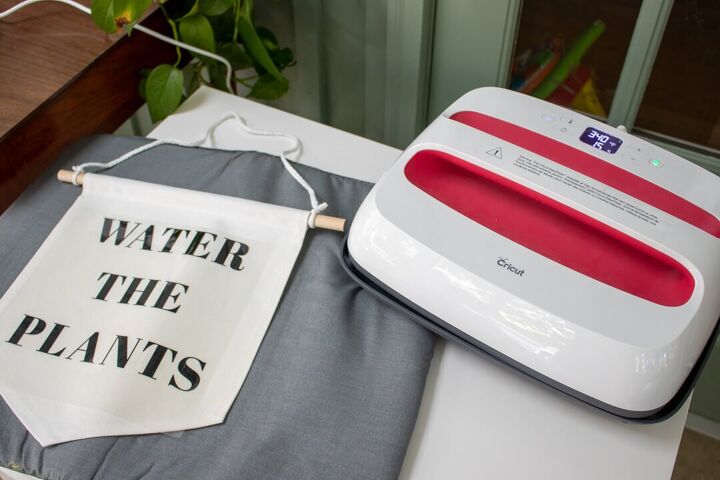
- Easy Press 2
- Easy Press Mat
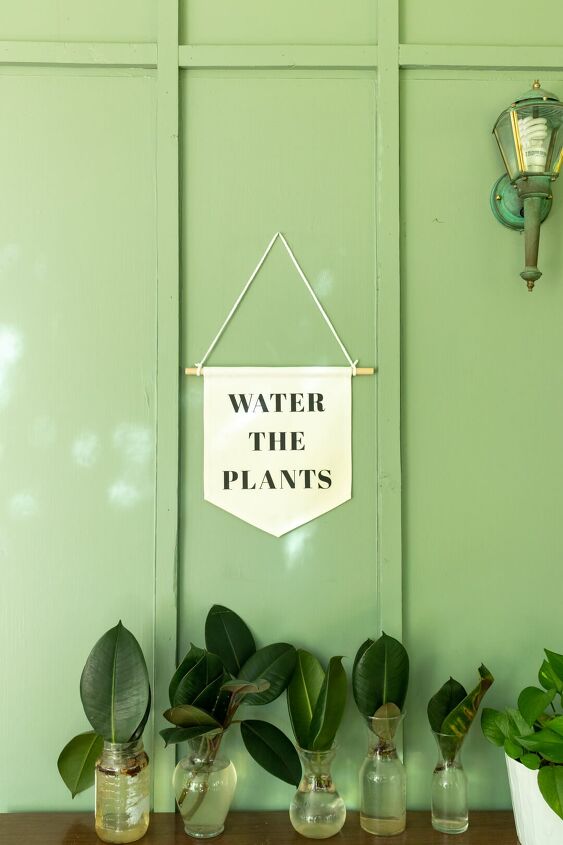
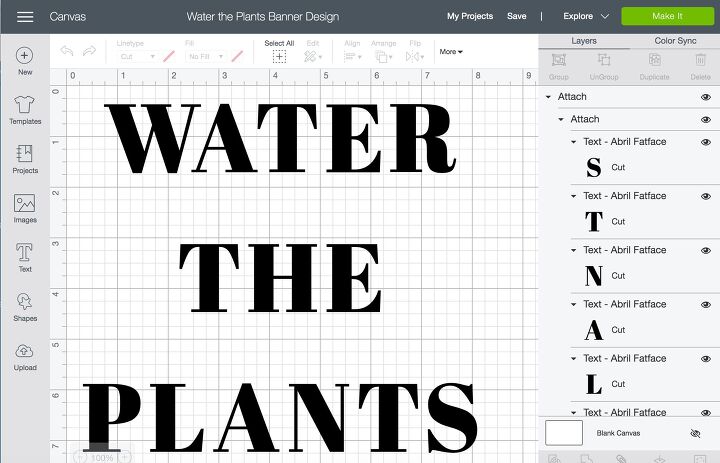
This banner was super simple to make. I just used the text tool to type in Abril Fatface font. Then I grouped each line of text together and used the align tool to distribute horizontally to center it. Here’s my project if you’d like to use this and just resize it to fit your sign.
After cutting the design with my Cricut (don’t forget to mirror it first!), I used my Easy Press 2 and mat and followed the directions on the Cricut Heat Guide to iron them on.
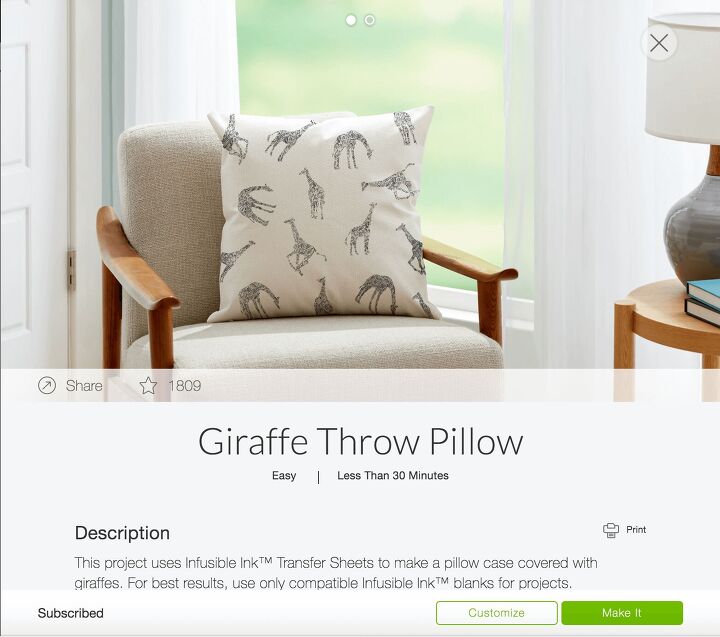
To make the giraffe pillow, just grab the project from Cricut Design Studio and follow the directions. Easy easy!
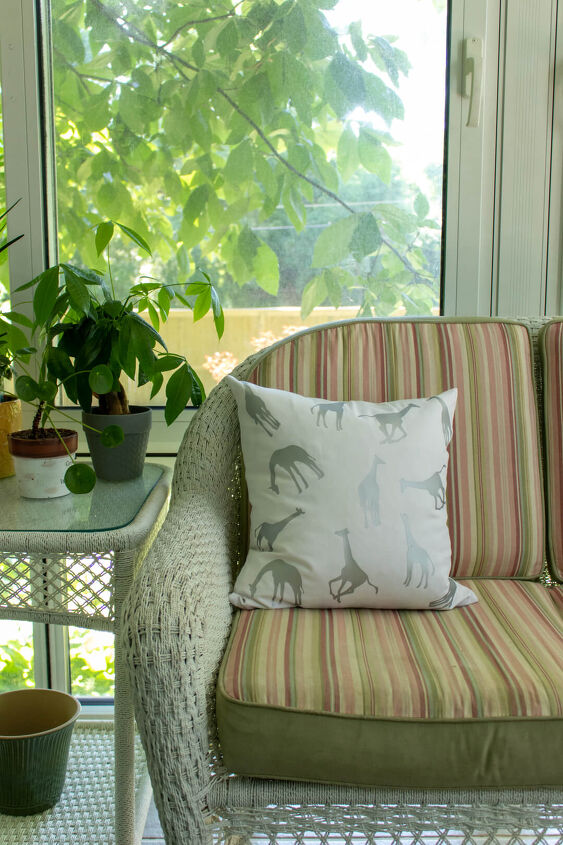
The kids really liked the giraffes and I think it’ll look much better with the new cushion covers when they get here. Although I do kind of wish I used black instead of gray. Maybe I’ll add black giraffes to the other side at some point, ha!
There are endless possibilities with the Cricut Explore Air 2. I also think it would be fun to make some name tag/labels for my plants. There’s so many things you can make with the variety of materials it can cut, as well as its ability to draw and score using a Scoring Stylus. Once you start making with it, it’s hard to stop!


Frequently asked questions
Have a question about this project?