


DIY Stained Wood Sign for Kids Bedroom That is Reversible

Learn to make a colorful wood sign for kids' bedrooms that serves as wall decor and as well as an entertainment piece for kids to play with.
Check out this video to know the basics of wood stained and why I did chose a particular stain and a sealer to make this sign. Also, is paint good or vinyl?? More information like that are discussed in detail.
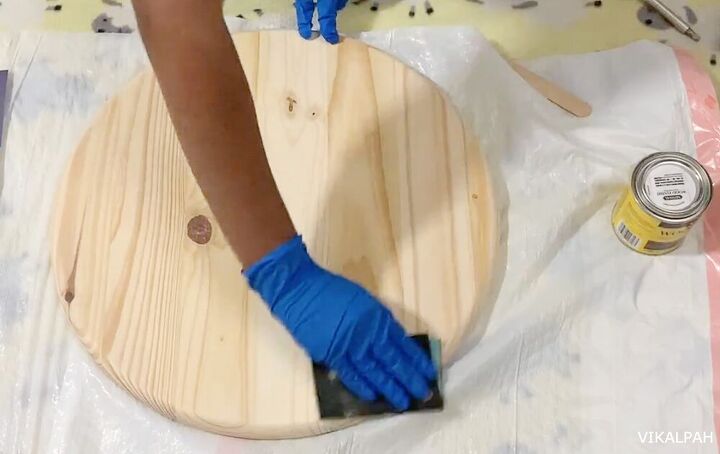
The first step in stained the wood is to sand the wood panel. Then comes the staining process. And then once the stain is cured, a sealer is applied to seal the stain. I have discussed in detail each of these processes in my blog post - 2 in 1 DIY stained wood sign
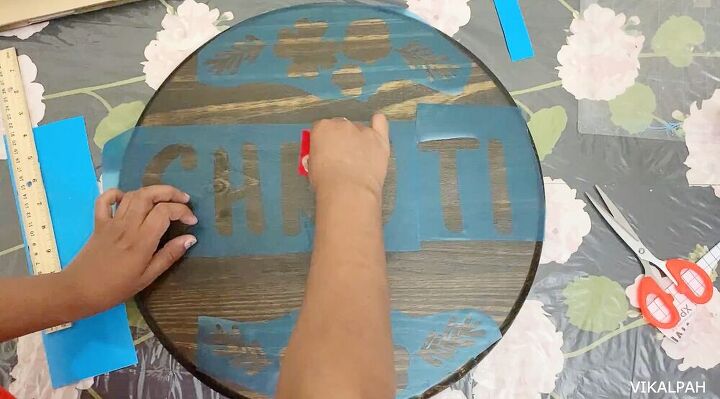
To apply paint over the sealed surface you need to cut and paste the stencil. In my case, the paint doesn't work out so I decided to go the Vinyl route.
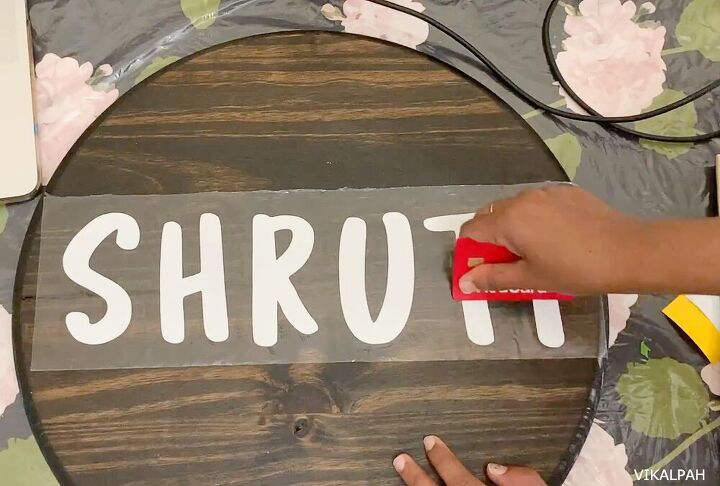
Cut all the designs in Oracal 651 vinyl using a silhouette cutting machine and use transfer tape to transfer all the vinyl designs onto the wood. I used a card to make sure the vinyl sticks to the wood and remove the transfer tape.
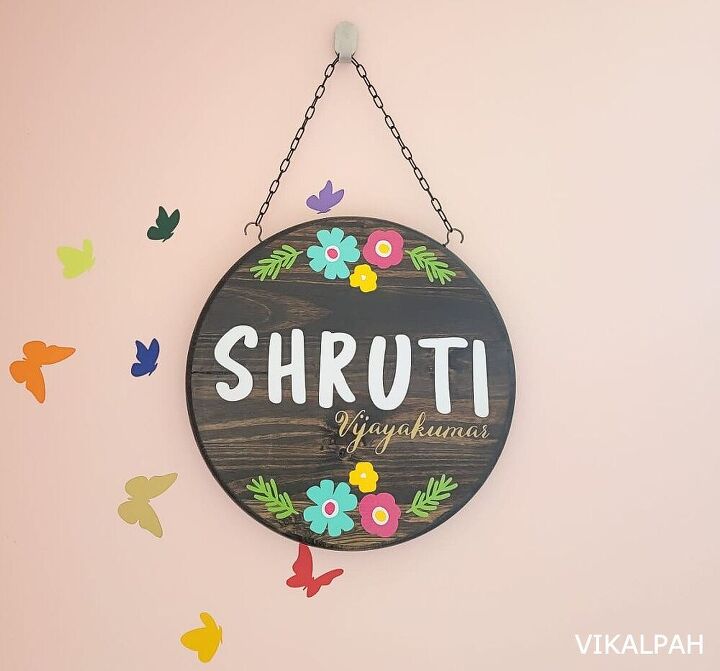
Here is the final output of the DIY stained wood
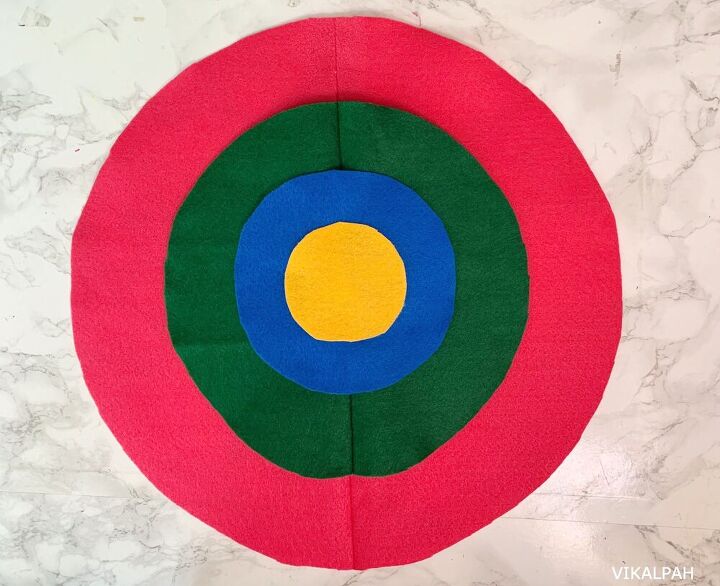
Use parchment paper as a template and trace the paper on the felt to cut circle pieces. Stitch it together and use glue to stick it onto the wood. Write the scores using white acrylic paint and size 0 brush.
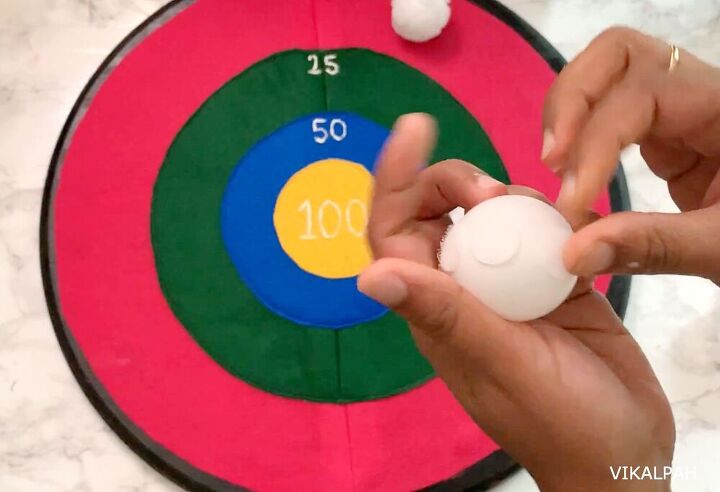
For the balls, use velcro sticky dots on white balls to play the target game.Next, attach hooks and chains to hang it on the wall.

This is the backside(Reverse) of wood sign that kids can play with. Hope you liked this reversible wood sign. Let me know your comments below. For more details check the blog post or the video above, not clear? Ask me in the comments below.


Frequently asked questions
Have a question about this project?