


DIY Thin Brick Wall - Vintage Society Co.
April 22, 2020
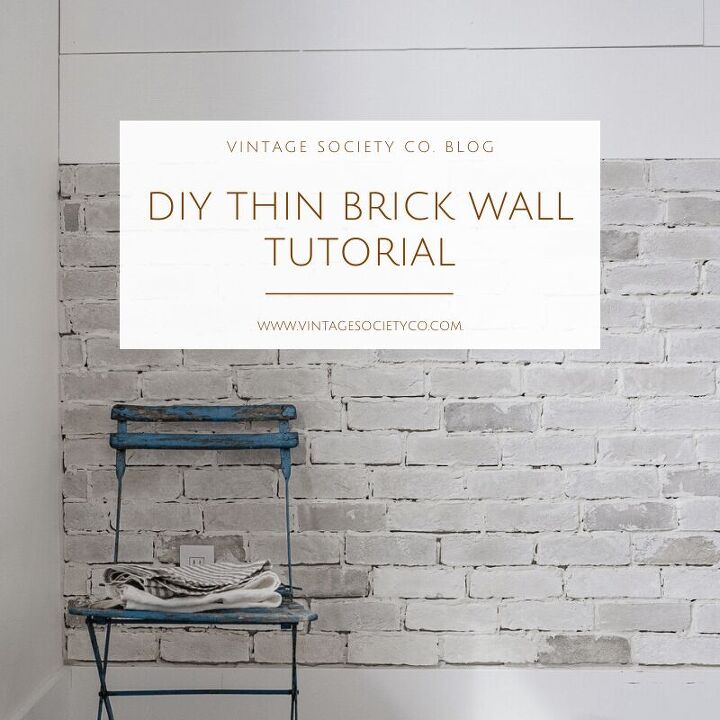
DIY Thin Brick Wall
Brick is a great way to add texture to your home! There are so many different colours of bricks that you can achieve almost every style from modern to vintage. Bricks also have come a long way and you can now get so many varieties of thin brick veneers. Let us show you an easy step by step tutorial so you can install your own brick feature wall!
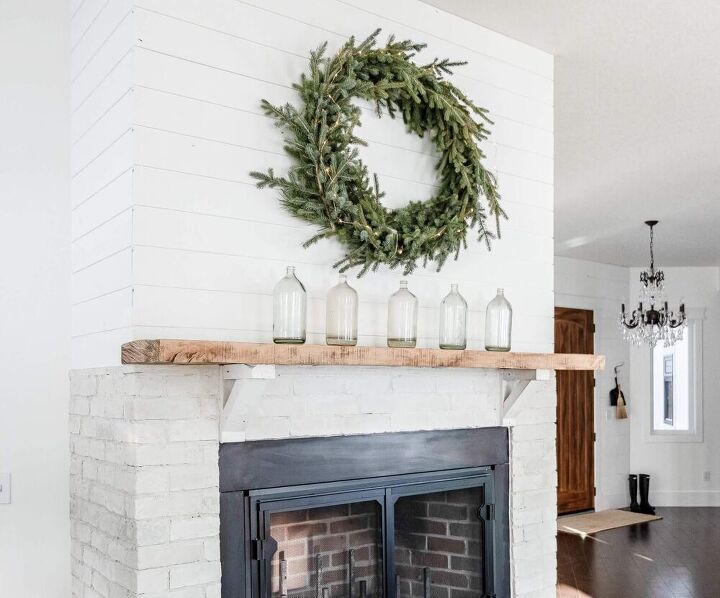
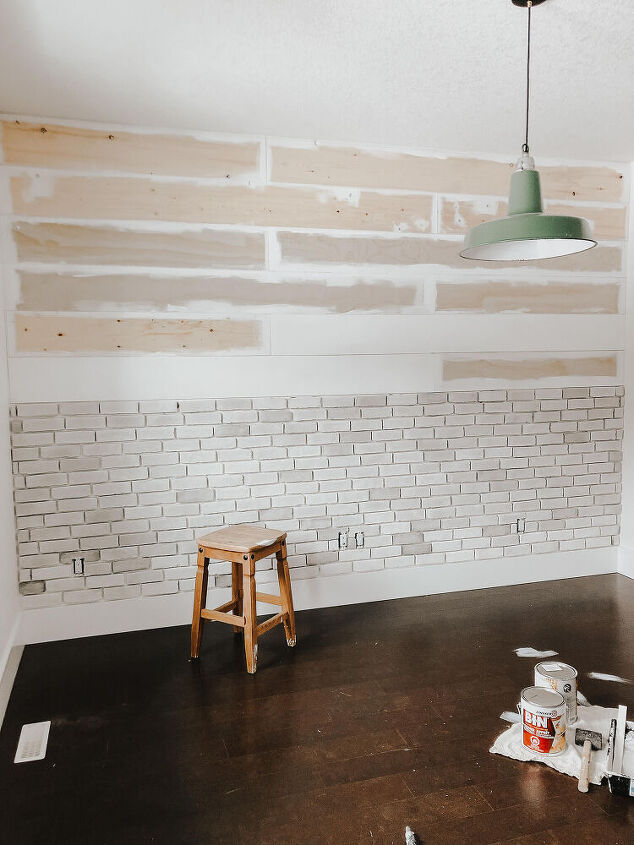
Britt has now done 2 spaces in her home with thin bricks. Which, thin bricks are basically the front of the bricks sliced off so you don't have the bulk of real bricks. When Britt bricked her fireplace she used a more traditional method of using mortar the entire time. However, with the recent feature wall Britt did, she used an easier technique. Both have their pros and cons and we will go over those here.

These vintage bottles and more of our favorite home decor pieces can be purchased in THE SHOP!
Materials
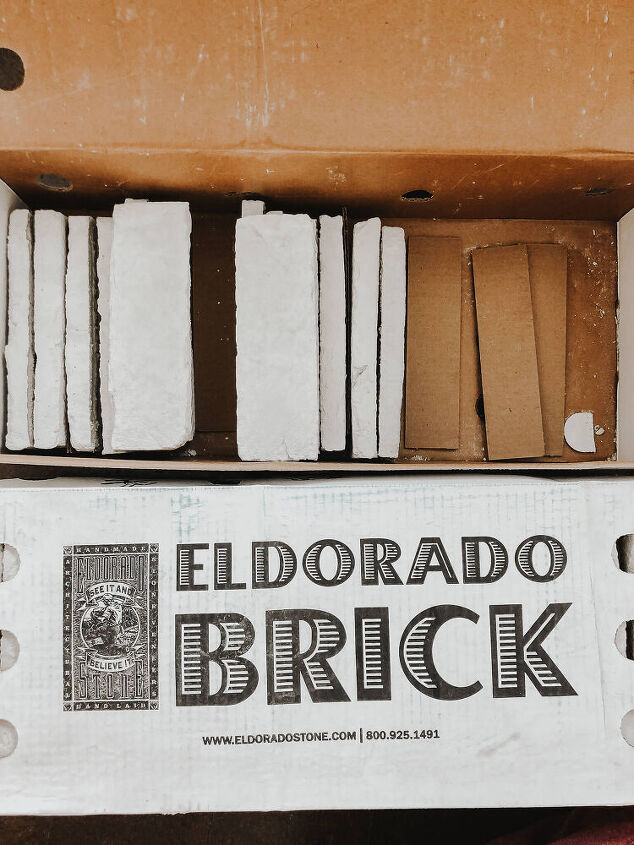
- Thin Bricks
- Quick Setting Glue (if you are using the glueing method; read on to decide which method you prefer)
- Mortar
- Tile Spacers
- Piping Bag for Mortar
- Hand Grinder or Tile Cutter
- Gloves
- Old Bucket and Stir Stick for Mixing Mortar (you will have to throw these away after)
Preparing the Wall
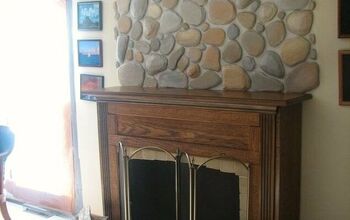
Before you jump into this project please consider these few things. If you are installing the bricks around a real wood burning fireplace you will need to put cement board around your fireplace and you will want to mortar the bricks onto the cement board as opposed to glueing the bricks onto the drywall. If you ever want to remove the bricks you will most likely ruin the surface behind the bricks and will need to re drywall.
Looking for more Fireplace Ideas? Check out Andrea's Brick Fireplace over on the Pine and Prospect Home Blog!
GluEing vs. Mortar
So you have decided where you are going to brick, now it's time to decide what technique to use. If you are doing a wall in the bedroom, or a regular living space as an accent wall we would suggest glueing the bricks to the wall. However, if the thin bricks are going around a space with high heat (stove or fireplace) or an exterior surface we recommend applying the mortar to the back of the bricks and attaching them to the wall that way.
Step 1
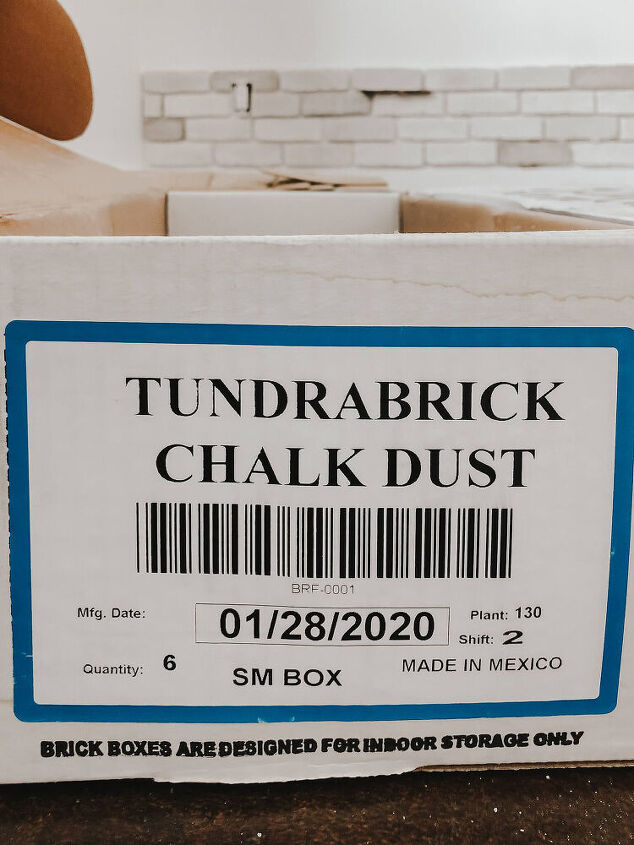
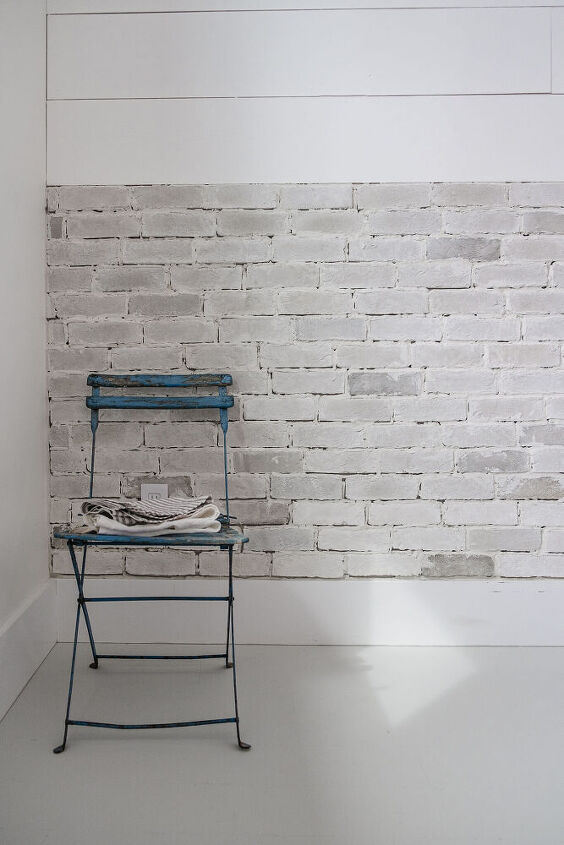
Decide on the colour of bricks you want. Britt used Eldorado Bricks in the Style Tundrabrick in the colour Chalk Dust. The brick's were purchased from IX-L Building Products. You will need to measure the approximate square footage you need to cover the surface you are doing. The square footage of the brick's will go slightly further as you will be leaving gaps between the bricks.
Step 2
Determining your pattern - you probably do not want to stack the thin bricks straight on top of one another. So start one row with a full brick, then start the second row with half a brick so your seams are staggered. You can also create a more random affect by starting row 1 with a full brick, row 2 with a third of a thin brick and row 3 with a 2/3 piece of brick. You will have fewer seems aligning with this technique. Both techniques are perfect and achieve a different look!
Step 3
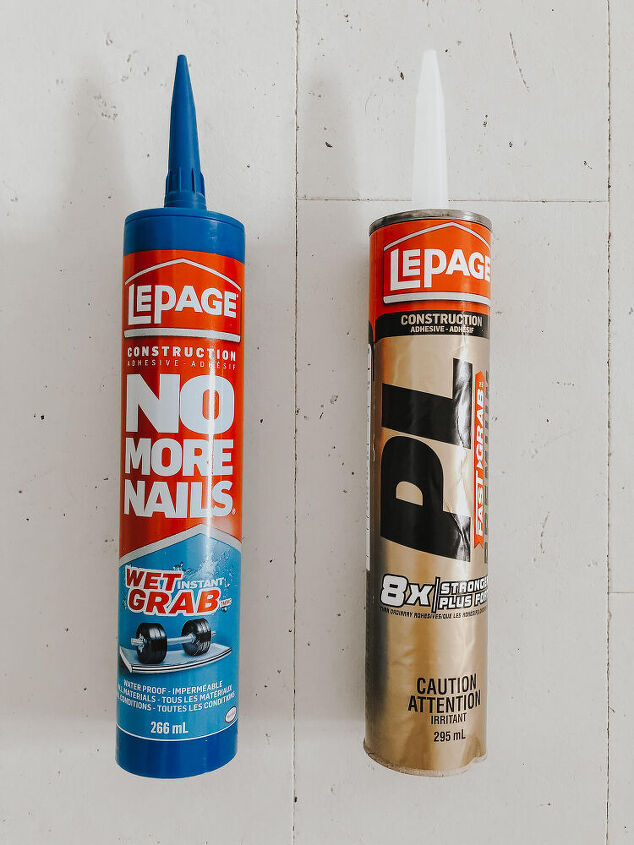
If you are glueing the bricks to the wall, apply glue to the back of the bricks and then place the thin brick on the wall! Finding the proper glue will make the process so much easier. Britt tried 2 quick set glues and preferred the Lepage No More Nails Wet Grab glue. 2 bricks actually fell off the wall that had been attached with the Lepage PL Fast Grab glue.
You do not need to apply a large amount of glue to the back of the thin brick because when you mortar the bricks this will help attach them to the wall as well. Britt still used approximately 15 tubes of glue for the 1/3 of the wall she did - so you will need a lot of glue!
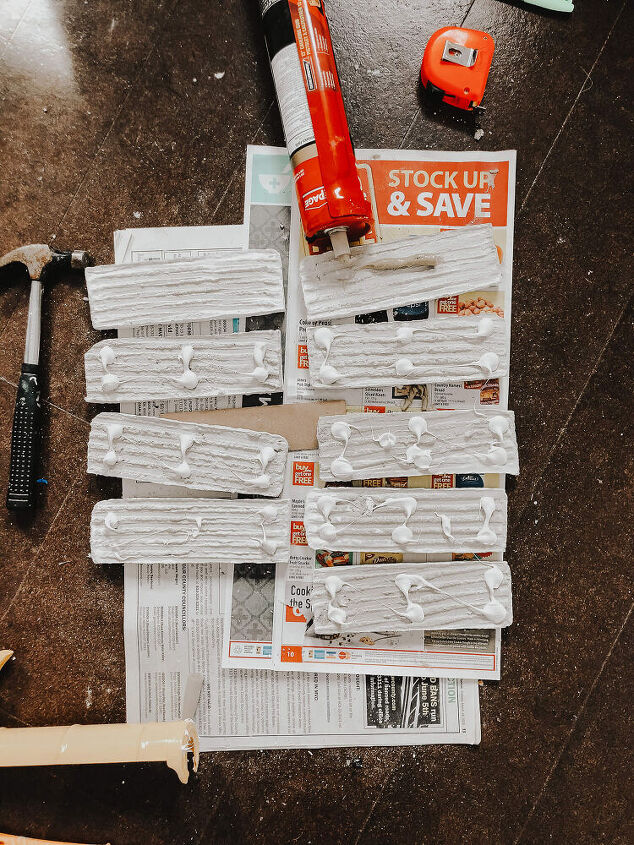
If you do not use a quick grab glue you will need a lot of tile spacers. Even using the quick grab glue Britt still had to use some tile spacers as sometimes the bricks still slid.
If you are attaching the bricks with mortar you will need some sort of spacers and the mortar takes time to set up and the bricks will slide down the wall without spacers. Britt did her fireplace without spacers and you can do this but you can't work as fast and you will need to allow time for the mortar to set up.
Step 4
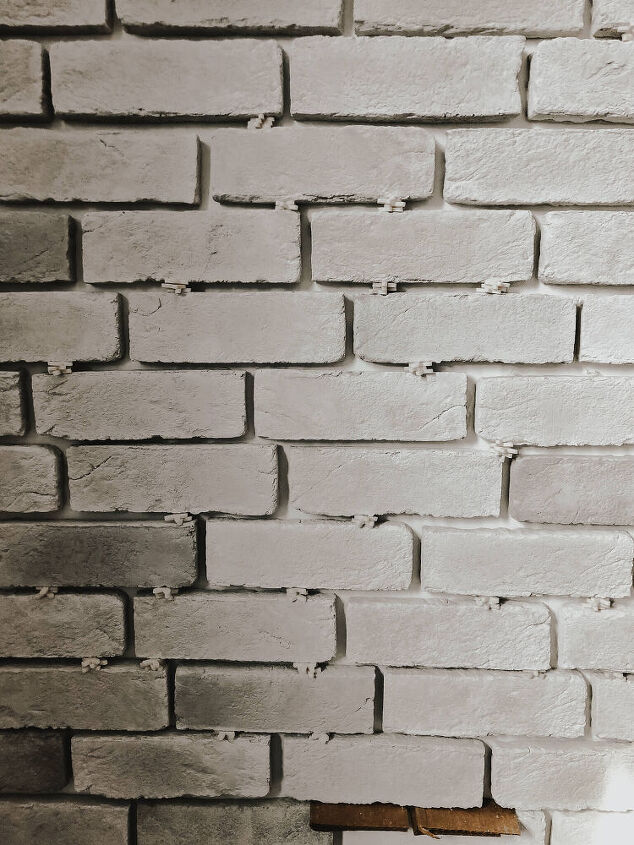
After all of your bricks are applied to the wall then you will need to mortar in between the bricks. If you attached the bricks with mortar then you will be done at this point because the mortar will be between the bricks already.
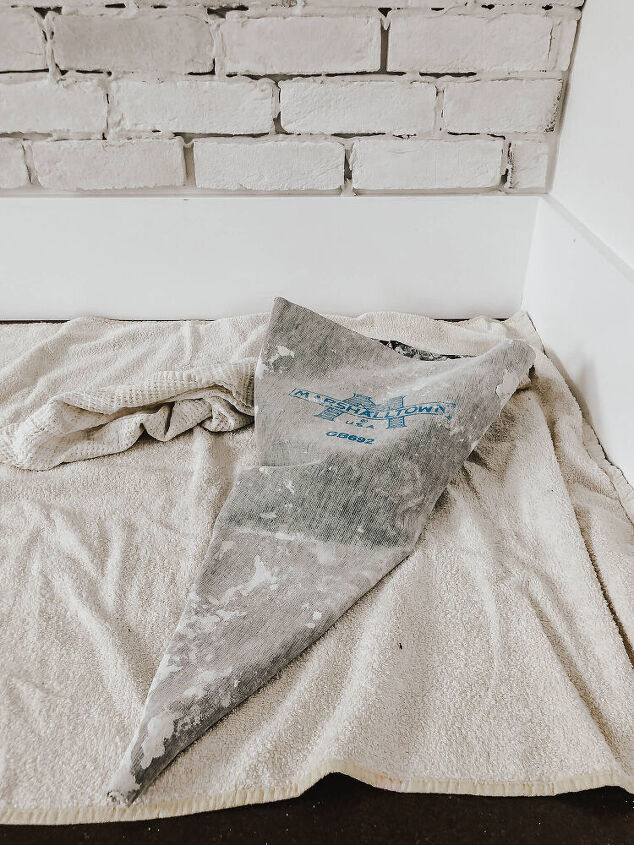
So if you glued the bricks to the wall then the easiest technique to apply the mortar is to get a piping bag. Piping bags are available from brick stores or home hardware stores.
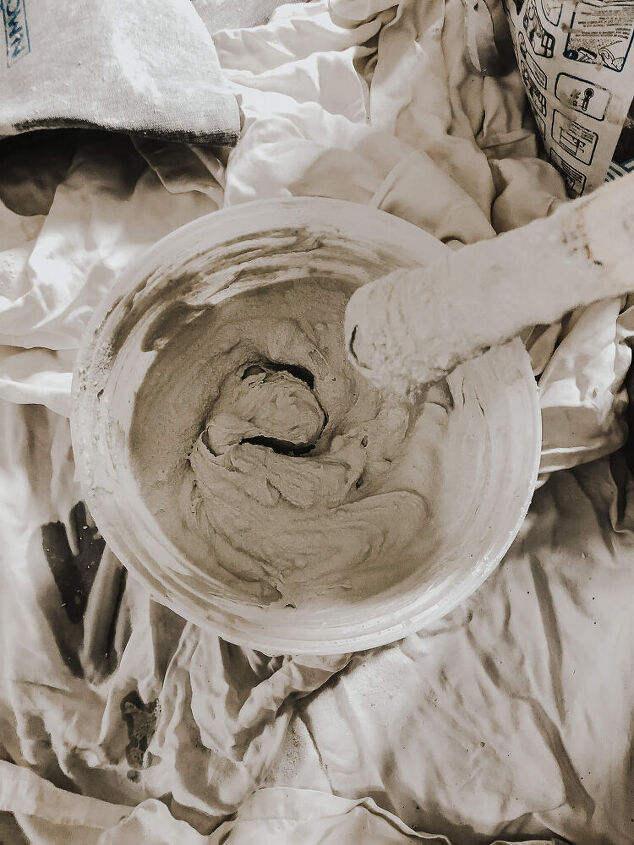
Mixing the mortar. The Mapei mortar is an amazing product. Mixes easily and doesn't rub off and make a mess after it has set. Britt even scrubs the mortar around her fireplace when it gets black from soot and it still looks perfect!

You will want to mix the mortar to the consistency of a DQ Blizzard! Thick enough that it doesn't run off of your stir stick but thin enough that its easy to stir.
When mixing your mortar start with approximately 3 cups of warm water in the bottom of the pail. Add mortar powder to the water and mix. Using water water makes mixing easier. And adding the water to the bucket first also allows for easier mixing and prevents the powder from sticking to the bottom of the pail.
Step 5
Fill the piping bag with the mortar. The mortar will slightly set up as you are applying it so you may want to start with the horizontal spaces and work your way onto the vertical spaces where the mortar is more likely to sag and run down.
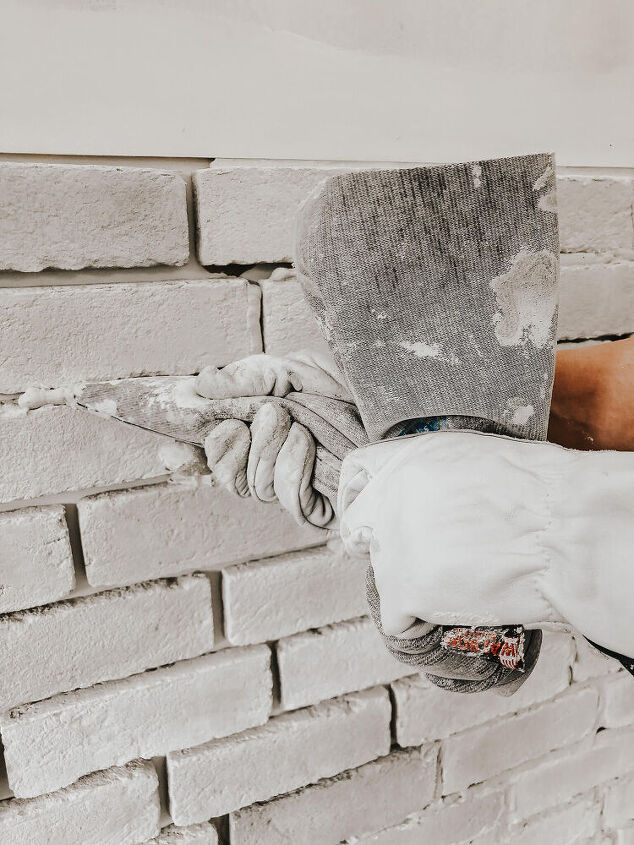
Continue on until all of the spaces are filled!
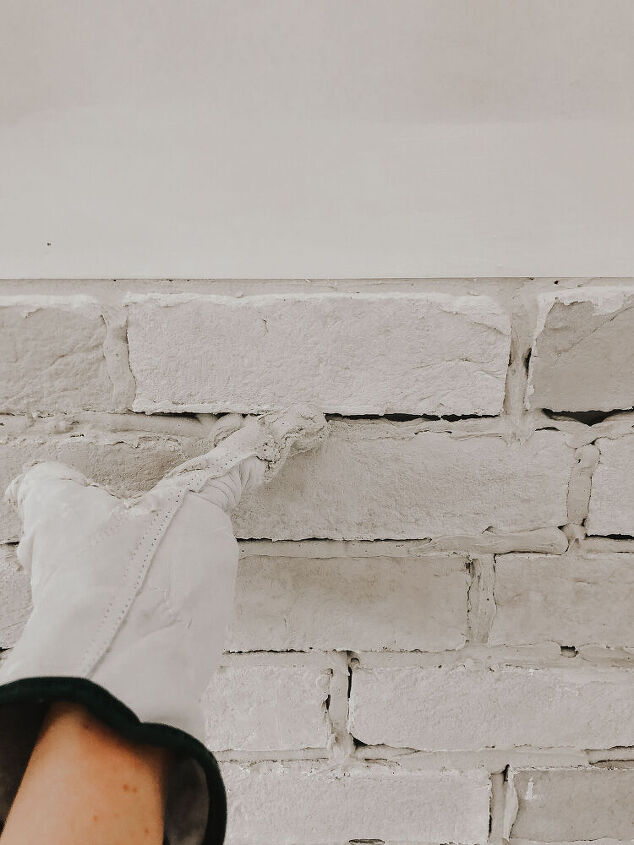
Step 6
Finishing the edges! At the end wherever you have the brick meeting another wall pipe a bead of mortar into the space and then use your finger to press it into the seem creating a smooth line.
Mortar Looks
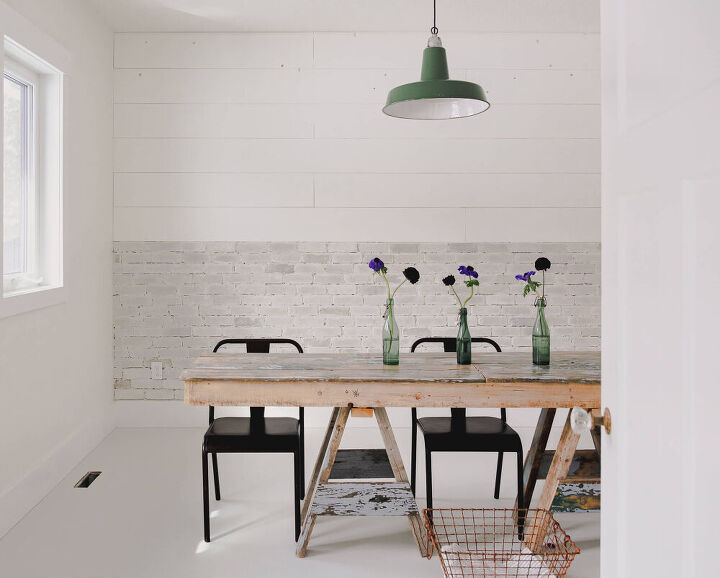
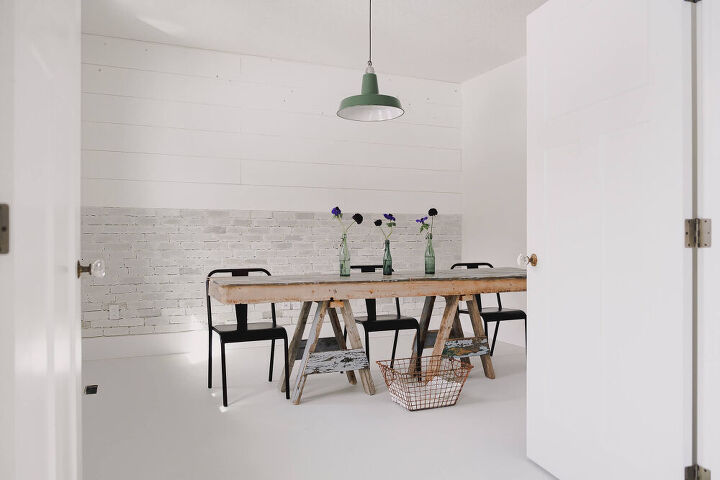
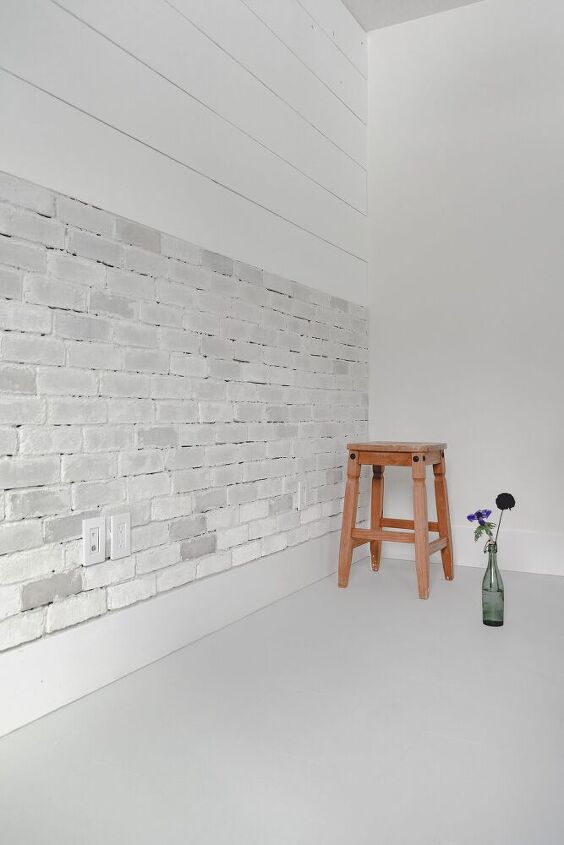
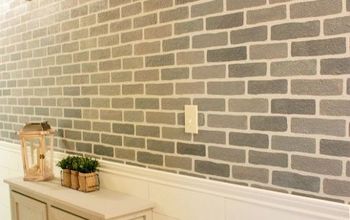
You can completely alter the appearance of the wall with different mortar techniques. For a cleaner look you could keep the mortar recessed where the bricks stick out further than the mortar. Or like what Britt did is that you can create a weeping mortar appearance. Pipe the mortar in between the bricks and from here you can do a few techniques.
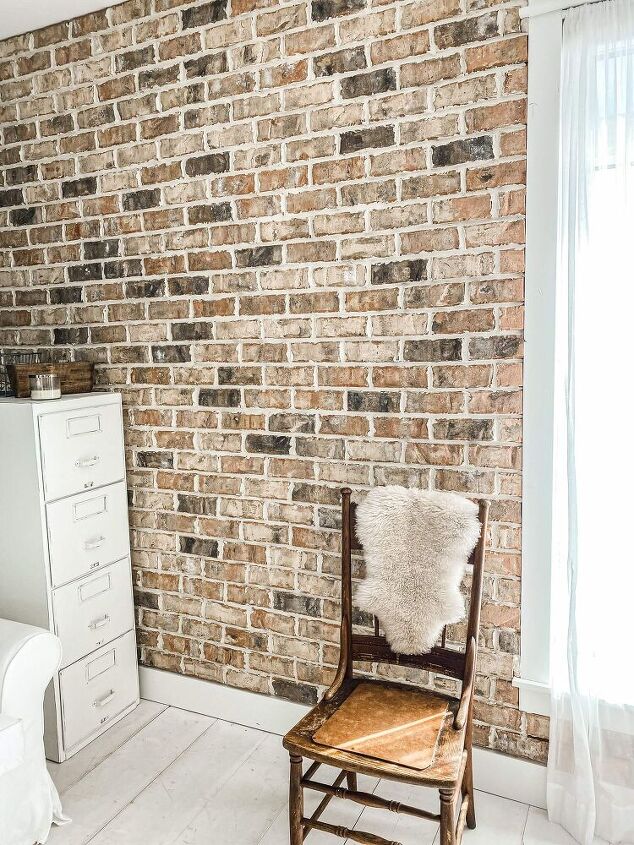
First you can leave it as is for a slightly cleaner look. Look how pretty White Creek Ranch Photography's Brick Feature Wall turned out!
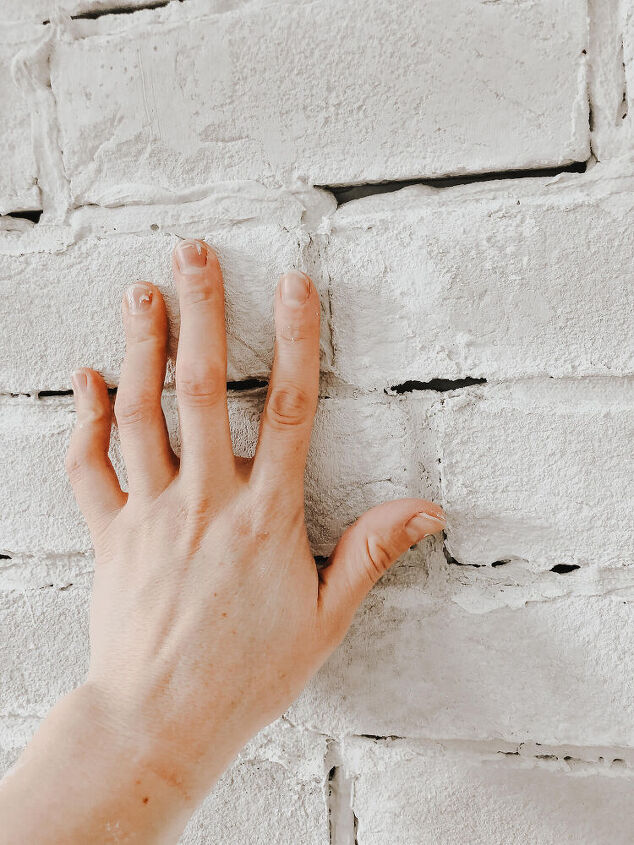
Second you can wipe it with your glove to create a rougher appearance.
Third, you can let it set up for a few hours and then use your finger (without a glove because at this point the mortar will not stick to your finger) and push the mortar around.
Fourth you can german smear the bricks. This would mean wiping the mortar on top of the bricks in a distressed pattern. Britt did the german smear affect on her brick pillars at the end of the driveway and loves this look!
While redoing the brick feature wall Britt also painted the floors in this room. You can see all of the painted floor tips here!
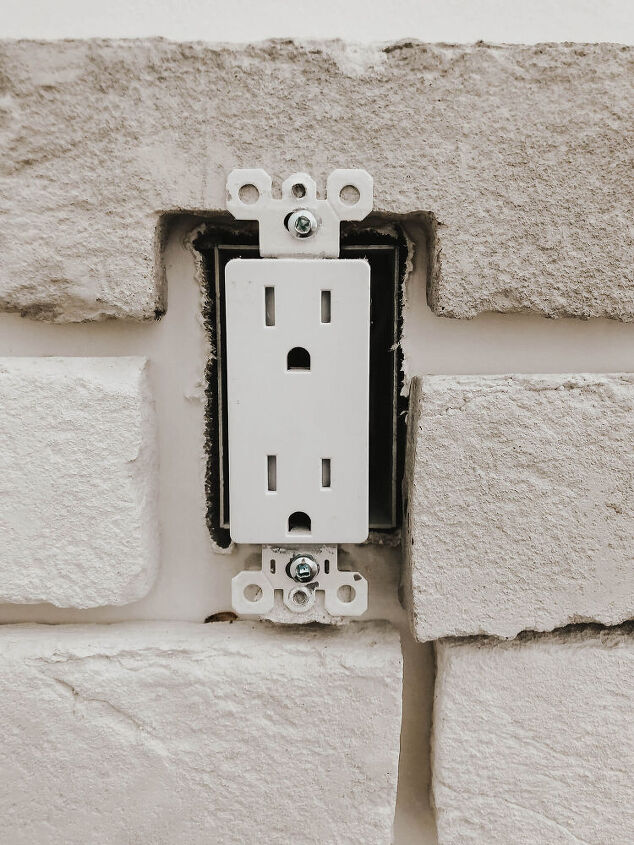
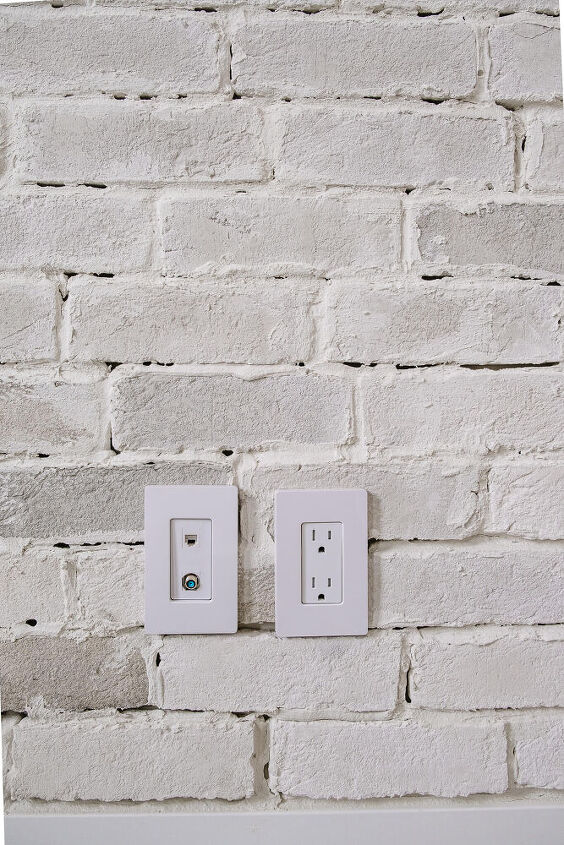
Bricking around outlets
If you have electrical outlets on the wall you are applying the thin brick to you will want to pull the outlets out from the wall so they are flush with the bricks. You can buy outlet extenders or you can place chunks of bricks behind the outlets. Please turn off the power while you are doing this!
Bricking Tips
Bricks are easy to work with as they are various sizes so exact measurements aren't required. Imperfection can look good!
Mortar is messy! Mortar makes a big mess so make sure you are placing something on the floor to protect it from mortar.
Brick walls can add so much texture and dimension to a space! Britt mixed her brick walls with shiplap - you can see all of our shiplap tips here!
We love to hear from you!! Please leave a comment below with your thoughts on this project!
Resources for this project:
See all materials


Comments
Join the conversation
-
Nice! My father did this year's ago in my parents kitchen. Back then it was called Z-brick I believe.
-
Huge drawback is the glue/mortar is much tougher to remove cleanly when one wishes to do something else. Shiplap, at least in my case, was attached with my Brad nailer.


Frequently asked questions
Have a question about this project?
Are there special bricks for corners?
How expensive is this?
Why did you leave spaces in between the mortar for dust to collect against the drywall? And did I miss the feature step that you have above the brick that looks like big shiplap is that fake is that cement look is that wood?