


DIY Wired Word Art
I absolutely loooove word art as home decor. And judging what I see on the store shelves, I'm not the only one.
In this post, I’ll show you how to make an easy and inexpensive cursive letter sign that you can customize in so many different ways!

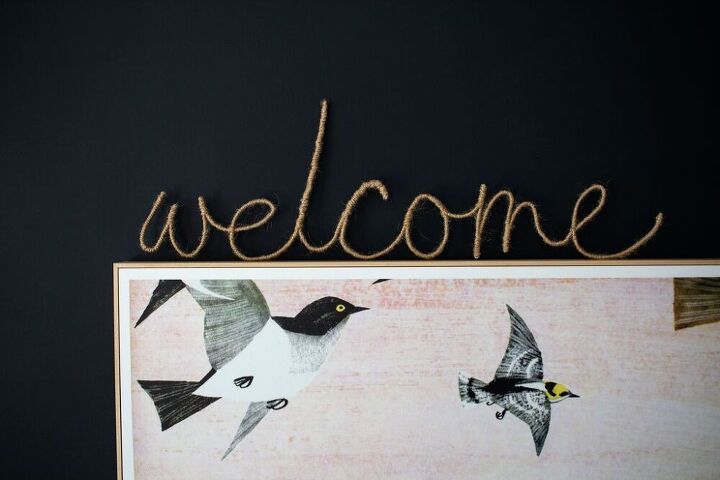
In this tutorial, I'll show you how to make the jute wrapped welcome sign in this photo. If you'd like to follow along, you can download the free template.
Keep in mind that I'm simply teaching the method. You can customize these with your own words and finish materials. Your only limit is your imagination on this one!
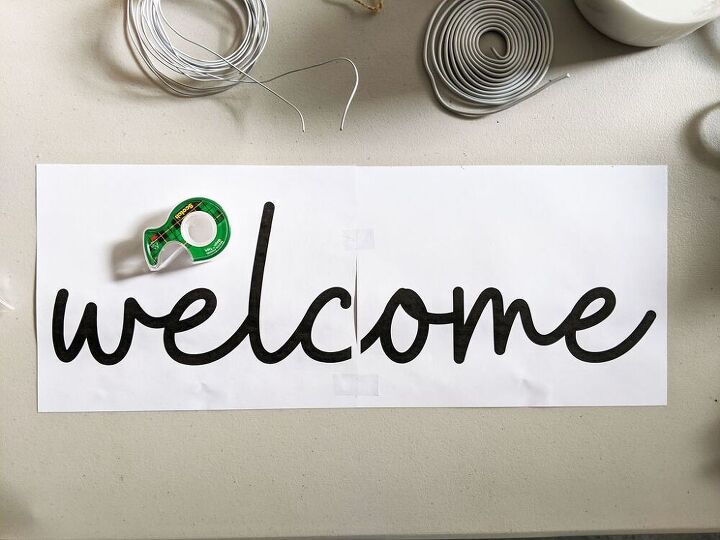
Type the word or phrase you want to turn into a wire sign, apply a font, adjust the size, and print it out. I use a design program to make mine large, then print it across multiple pages.
If you don’t have a program like this, you can download the free template that I mentioned in the previous step! The PDF is already set up to print across two standard 8.5″ x 11″ pages to make an 18″ sign.
Or, you can just make a smaller sign.
Tip: Use a script font that has a consistent line thickness for best results.
Line up the printed sheets of paper, tape them together, then tape the whole thing to your table. Don’t worry if your printer didn’t print the word all the way to the edge. Gaps are fine since we’re just using this to guide the wire placement.
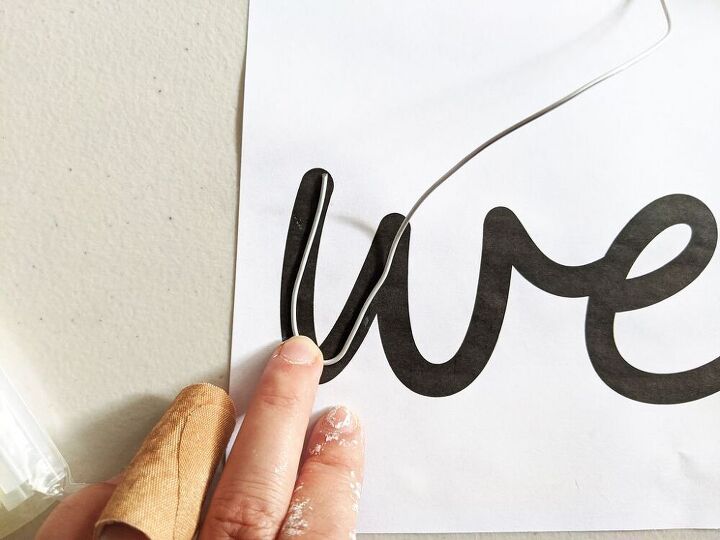
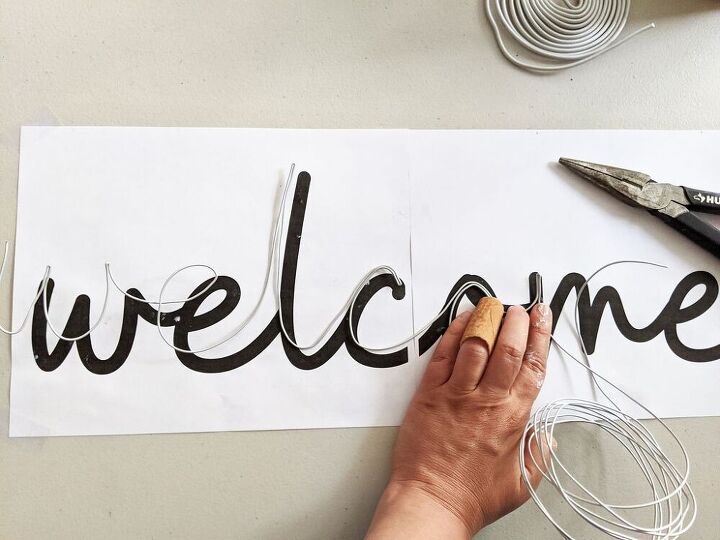
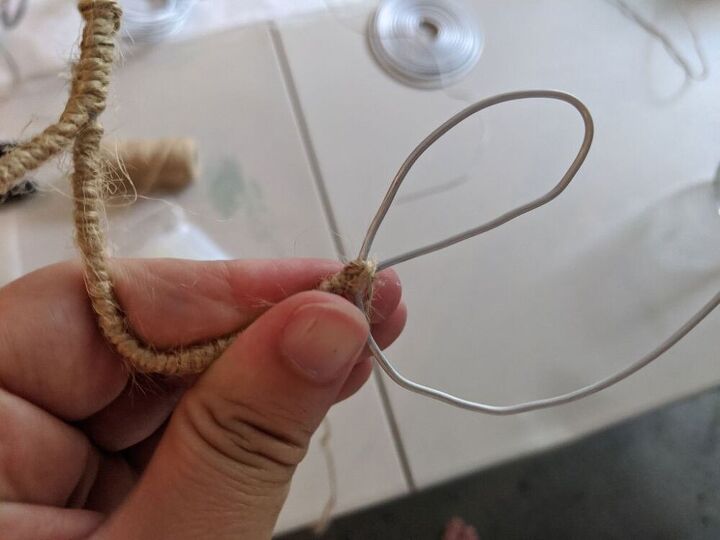
Starting from the left-hand side, guide the wire along your template. Armature wire is super easy to bend so this step is a snap.
Don’t worry if the wire isn’t laying perfectly flat or pops off track as you go. This process is very forgiving — the shape will sort itself out once you wrap it.
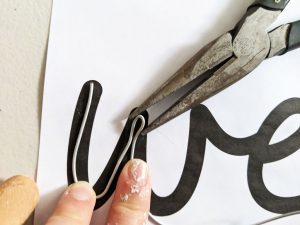
For sharp bends like in the letter "w", use a pair of needlenose pliers to squeeze the wire into a point. You can do it with your fingers, but it’s a little more difficult than using pliers.
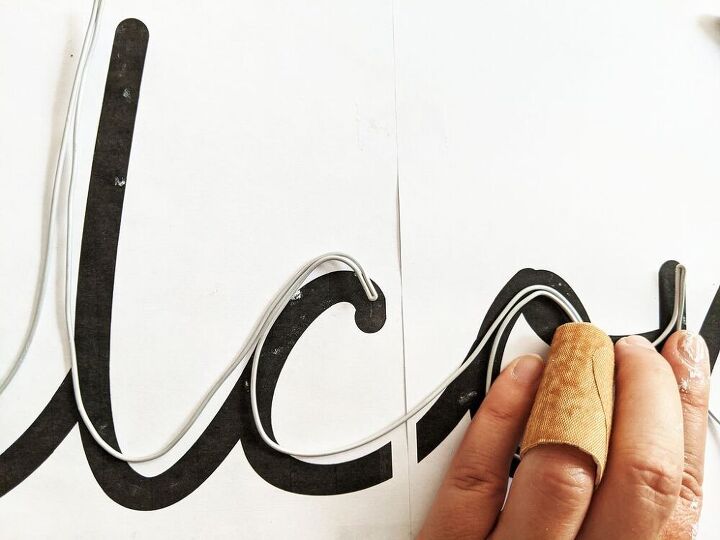
For some letters, you’ll need to double the wire back. Simply use the pliers again to squeeze a tight point and guide the wire back along itself. Try to keep the wire as tight to itself as possible (the jute wrapping will take care of the rest).
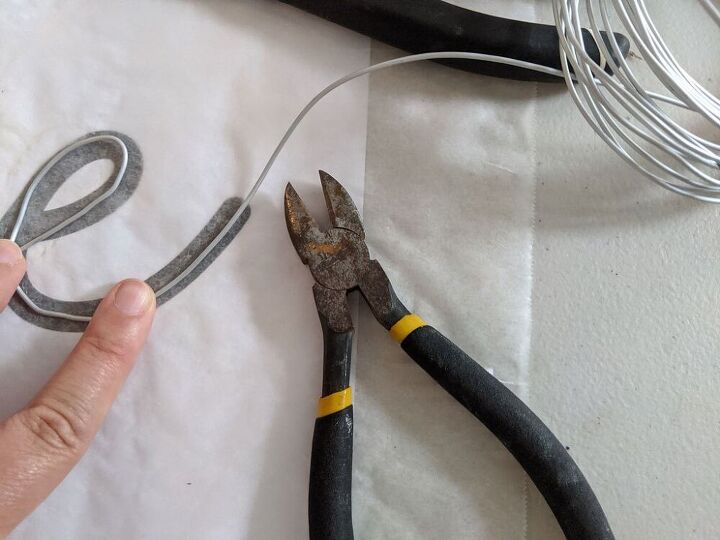
When you get to the end of your word, clip the end of the wire with your snips. You can try scissors but I wouldn’t recommend it. It’s very difficult and will dull your blades.
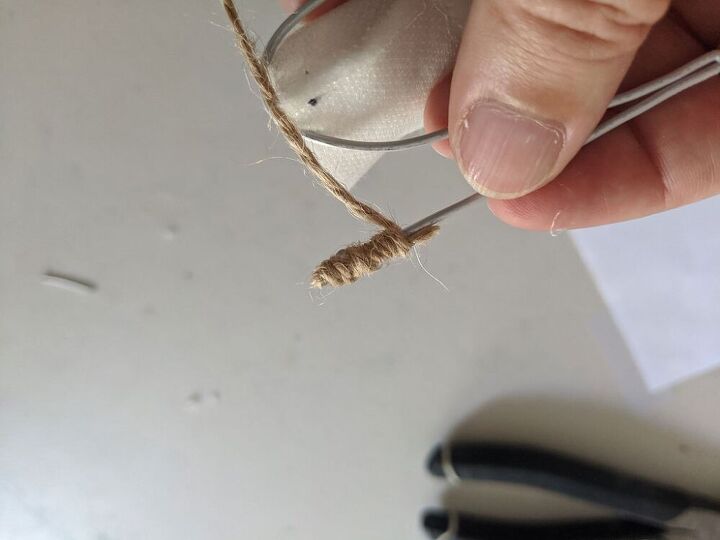
Starting with a dab of hot glue, wrap your wire word tightly with jute. Get the twine as close to the tip of the wire as you can for a cleaner look. I do this by laying about 1/4″ to 1/2″ inch of twine down the length of the wire with hot glue — with the end toward the continuation of the letter and the long end of the twine towards the tip — then wrap tightly back onto itself to start the full wrap.
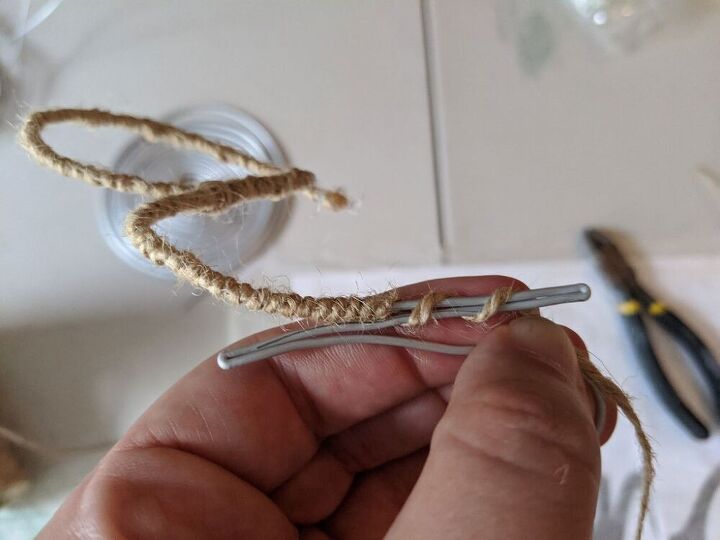
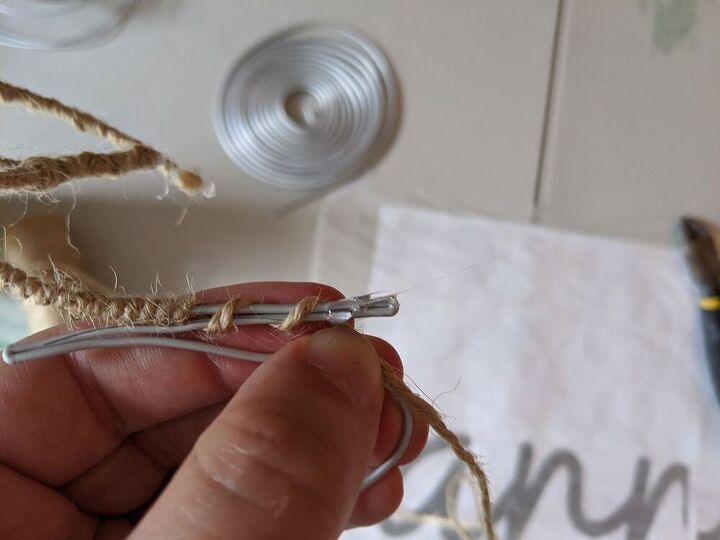
When you reach the tip of a letter that doesn’t continuously loop into another -- like that "w" -- squirt a line of glue along the letter to the tip. Then wrap the twine a bit spaced out to reach the end, and quickly double back with your tight wrapping to continue down the letter while the glue is still sticky.
The spaced wrap is to prevent that section from becoming too thick.
Letters that cross over themselves, like the letter “e” benefit from a little reinforcement to hold things steady. It’s easy — just wrap in an x pattern, once from top to bottom, then once from left to right.
Note: If your ball of twine is too large to pass through the loop of a letter, just pull a long strand free from the ball and cut the end to be able to pull through. I pulled about 5 feet for this “welcome” sign, but if you underestimate, glue the end to the wire when the twine runs out then continue with a new strand.
To further secure the twine wrap, add a small dot of glue at transition points, or if things feel like they might be slipping. In general, though, the twine will be so tightly wrapped that it will remain fairly secure on its own.
Continue wrapping to the end of the word, add a dot of glue at the end to secure the tail of the twine, then cut off the excess.
This sign took me around 20 minutes. Longer words and phrases will obviously take longer and vice versa.
But what if you don’t like the look of jute? No worries. There are SO MANY options for finishing a these fun signs. I've included a bunch of ideas and some photos of my glow-in-the-dark and twinkle light versions in the full blog post.
Resources for this project:
See all materials


Comments
Join the conversation
-
Love this! I plan on using this method to make some Christmas gifts, using last names. This would also be a great baby shower gift, using yarn or heavy crochet thread. Thanks for the great idea!!
-
Love this! So glad you got some ideas from it 💖


Frequently asked questions
Have a question about this project?
What design program do you use for the words?