DIY Wood Wall Pocket

Make a DIY Wood Wall Pocket to display your faux spring florals! Learn how to distress wood and create a beautiful hanging wall vase.
DIY Wood Wall Pocket
Is there such a thing as too many Spring DIYs?! I love creating beautiful home accents for each season, and DIY Spring home decor is no exception! All the birds, and bunnies, and flowers have my heart.
I have a REALLY cute spring project in store for you today! You could honestly use these year-round, but I think they look so sweet with a few tulip buds tucked inside. These DIY wall vases are really simple to make, and they are inexpensive too!
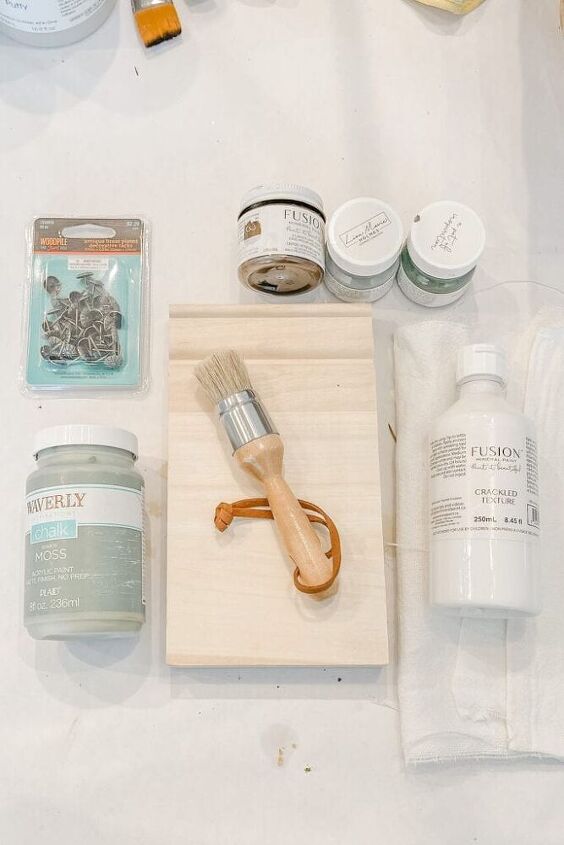
You need a few basic supplies to get started.
- Wood Baseboard
- Paint Brush
- Chalk Paint
- Fabric of Choice
- Upholstery Tacks
- Command Strips or Triangle Ring
Click here for links and sources to the exactly supplies I used!
Create a DIY WOOD wall pocket in 3 steps
Step One:
Start by painting your wood baseboard piece. You can pick up a small unfinished wood baseboard piece at Lowes, or you could also use an old architectural salvage piece of wood!
Use several layers of paint to create an aged, distressed look. I used chalk paint, Fusion Mineral Paint Texture, and Fusion Mineral Paint Crackle Medium. See my exact process by watching my YouTube video down below.
Step Two:
Nest, trim your fabric to your desired width and height.
Step Three:
Finally, secure your fabric to the wood piece by nailing in furniture tacks on the bottom and sides of the fabric, making sure to leave the top “open”. I decided to put a little paint on my tacks so it felt a little more “like me” but you could leave bronze. Tuck in a few tulips to complete the look!
DIY WOOD WALL POCKET
VIDEO TUTORIAL
Scrap Wood Baseboard Craft Ideas
Can you believe how easy these were to make?! And are they not SO CUTE?! So many other wood baseboard craft ideas came to mind while I was busy making these. Here are a few I thought of!
- Paint and distress the wood baseboard, then screw a wall hook on the board to create a towel rack
- Create 10 or more of these and hang them in a large grouping for a Spring wall art statement
- Paint the scrap baseboard, then secure a small glass bud vase to the board with wire to keep fresh flowers
- Distress the wood baseboard, then layer on a small picture frame to add interest
- Paint and distress the wood baseboard, then use an IOD Mould ( similar to this project) to add an element and use it as a shelf sitter
HANGING WALL VASE
PIN IT FOR LATER
I’d love to hear what you think about this sweet, Spring craft down below! And it we’re not friends over on Facebook or Instagram, what are you waiting for! 😉 You can find me @liveoaknest
Click here to see more of my simple DIYs and craft projects!
Blessings,
Kayla C.
Enjoyed the project?
Resources for this project:
See all materials
Comments
Join the conversation
-
 Dl.5660408
on Dec 13, 2021
What a nifty idea!❤️❤️❤️
-
-
 Sharon L Rabideau
on Dec 13, 2021
That is really cute! Would be great to put your cell phone in at night too!
-









Frequently asked questions
Have a question about this project?