


German Schmear DIY Faux Brick Wall
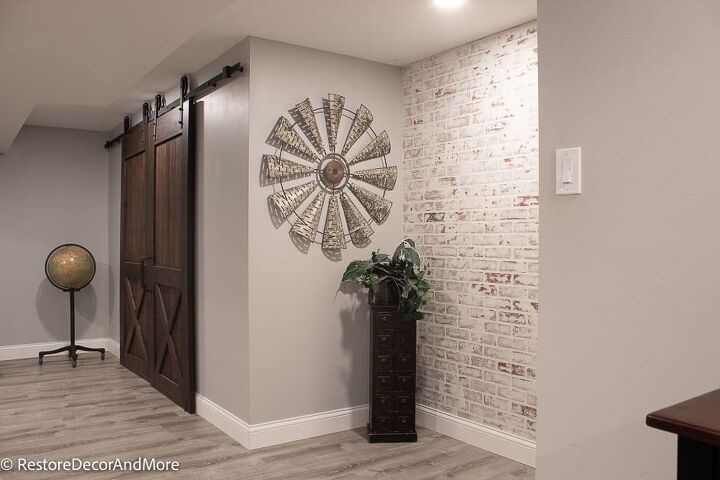
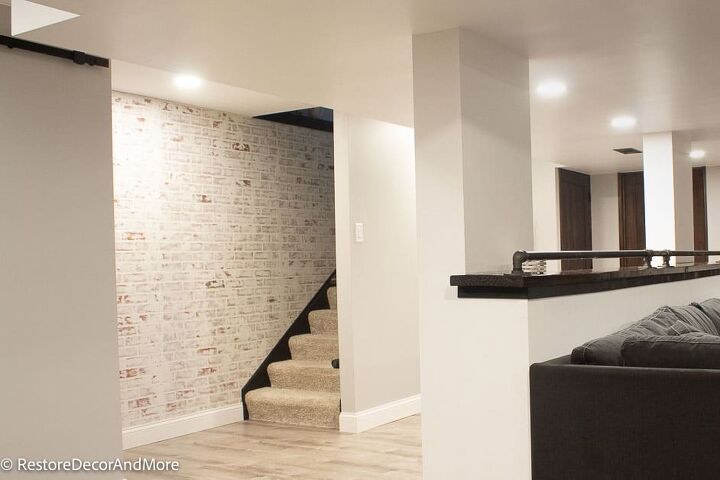
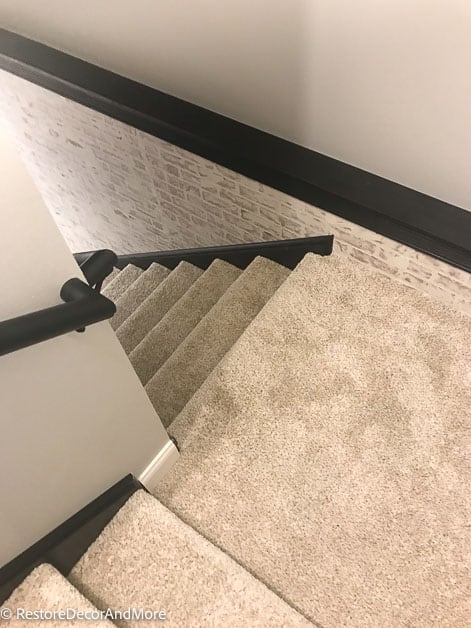
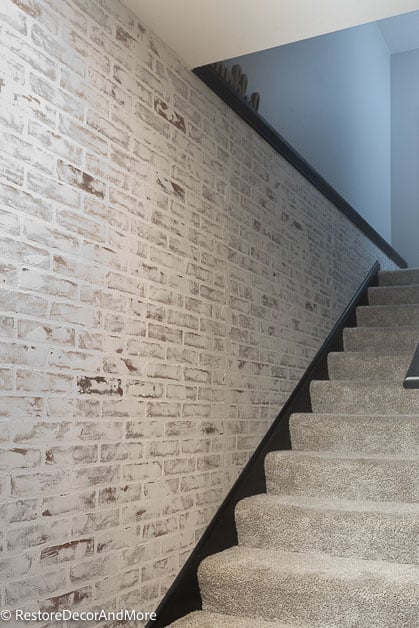
By far the biggest thing that people notice about our finished basement is our brick wall going down the stairs.
Check out below how we created this DIY faux brick wall using a German schmear technique.
It is also one of the easiest and least expensive projects. The majority of it was done in 1 day which just a few finishing touches the next day.
This post may contain affiliate links, which means I’ll receive a commission if you purchase through my links, at no extra cost to you. Please read full disclosure for more information.
Supplies Needed
- Brick Wall Panels
- Jigsaw
- Liquid Nails
- Caulk Gun
- Brad Nailer
- Level
- Pencil
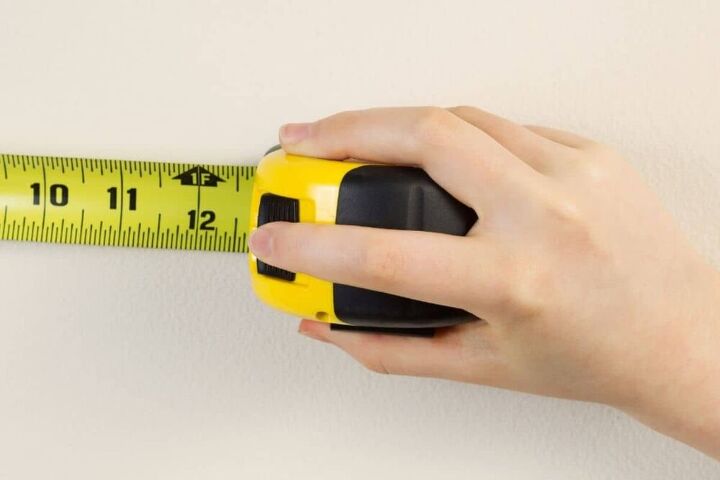
- Tape Measure
- Pre-mixed Joint Compound
- Plastic Putty Knife
- Polycrylic Sealer (Make sure you get Polycrylic NOT Polyurethane….it will make your walls yellow!)
Step 1 – Choose Your Brick Paneling
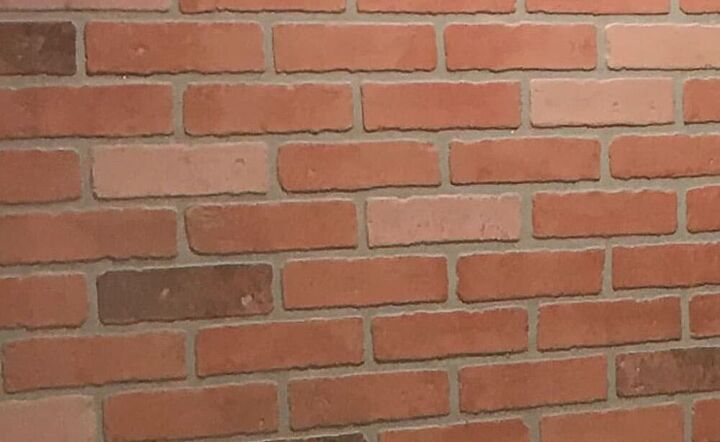
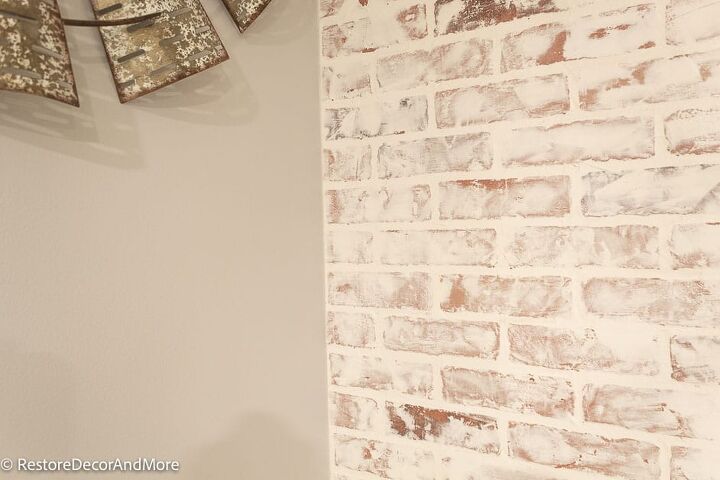
I used Kingston Brick Panel from Home Depot. It had enough texture where I knew it could mimic real brick and I wanted some of the red to show through and give the space some color and texture so these seemed like the best fit.
Step 2 – Prep The Wall
Since we did this project as part of finishing our basement, we first needed to hang the drywall. We obviously didn’t have to worry about the baseboard but I would recommend removing it if you already have it up.
If you have any outlets on the wall, make sure to remove the covers as part of the prep.
Mark the studs. Find the studs on the wall and run a pencil line down it. Trust me this will make things a lot easier once it is time to hang the brick panels.
Step 3 – Measure For Brick Panels
Measure your wall to determine how much paneling you will need. Also, note that not all walls are exactly the same height, so measure each panel as you go – you could be off a quarter of an inch here and there.
These panel boards from Home Depot come in 4’x8′ sheets. Since our wall was shorter than 8 feet we did need to cut them down a bit. If you have a taller wall you may need to account for some extra paneling.
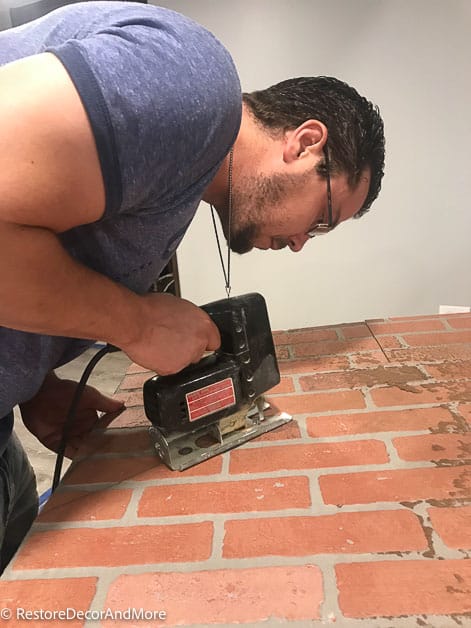
Step 4 – Cut Brick Paneling
When we did this project, we opted to hang the panels just as they were straight up and down.
The problem with this is that there is a large noticeable seam that runs down where they meet.
If I were to do this project over again, I would have taken the time to cut out every other brick so they fit together more organically. As much as I tried to hide the seam – it is still more noticeable than I would have liked.
When you make your cuts make sure that the panels line up with each other pattern-wise first. In other words, make sure the grout lines and bricks match up. We used a jigsaw to make all of our cuts.
Then we dry-fitted them to make sure we didn’t need to make any adjustments (which of course we did!).
Finally, we ran a quick sandpaper block down the edge to clean it up. Since our DIY faux brick wall was going up our basement staircase, our trickiest cuts were the angles going up the stairs.

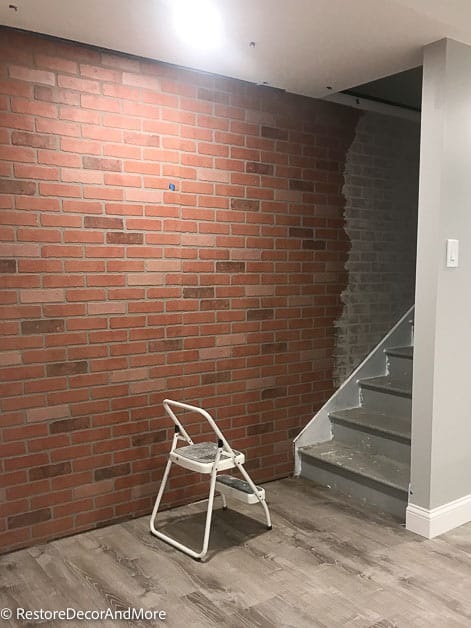
Step 5 – Hang Faux Brick Wall Panel
We installed our brick panels with a combination of liquid nails and a brad nailer.
In my opinion, it really is best to use both to reinforce the wall. This will ensure you don’t risk any of the walls being saggy or uneven.
Start with the first panel. Lay in upside down on the ground, and use a chalking gun with the liquid nails.
Pay attention to the edges as those seemed to be where it needed it most. (Just make sure not to put it too close to the edge as it will leak out when you hang).
Once you have applied the liquid nails, it is time to hang your first piece. Start with the corner of the wall. Since not all walls are straight, make sure you have a level handy to check that it is straight.
No need to worry if there is a slight gap in a corner or by the ceiling, you can fix that later. Use your hands to press all over the panel to ensure the liquid nails have adhered. After you have pressed it in place, it’s time to use the brad nailer.
We choose to nail in between the grout lines. Since I knew they would be covered anyway when we did the German schmear, I figured it would be the safest way to go since I did not want any nail heads showing.
Hanging the faux brick paneling was a pretty easy, straightforward process. My husband and I had the brick panels hung within a few hours.
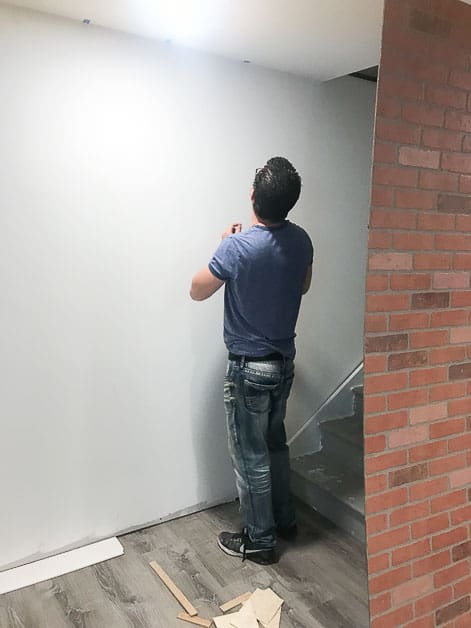
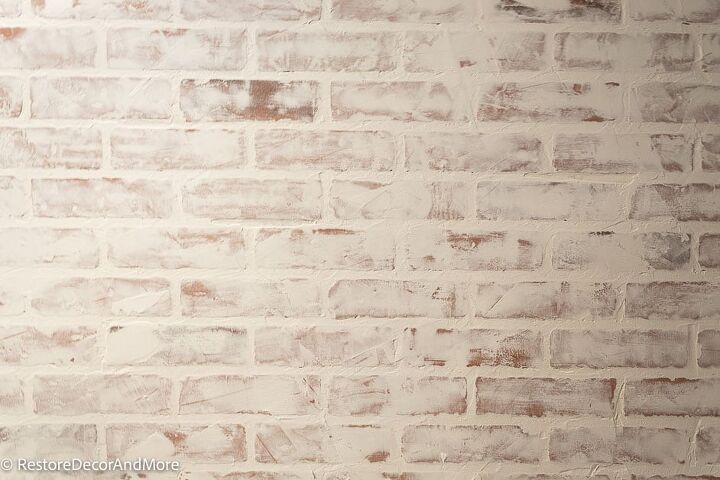
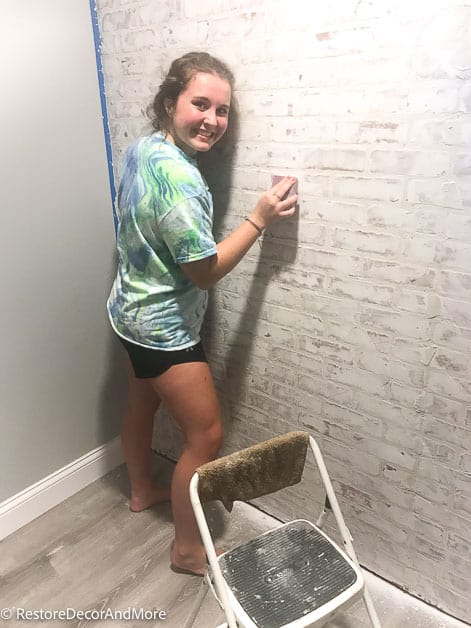
Step 6- German Schmear Technique
This is where the magic happens! Fake brick paneling looks just like that – fake!
By using the German schmear technique over the paneling you will be left with a more realistic look.
I’ve had a number of people think this was a real brick wall and were surprised to learn it wasn’t!
German schmear adds texture, so the faux brick looks a lot more realistic. This technique also helps you to hide the seams between the sheets of brick paneling.
How To German Schmear?
The first thing you will need is some joint compound. Since we had just drywalled our entire basement, I had plenty leftover. If you are going to buy some it’s probably easier to buy the pre-mixed version. (You may have to water it down a bit).
For the application, all you need is a putty knife. I found that the plastic one was way easier to work with than the metal one.
Start with the seams and then move on to the grout lines. If you put a little pressure on the putty knife it will help it to fill in the grout lines so that it is not even with the brick.
This will help the texture of the fake brick to stand out. After I had all the grout lines filled, I moved on to the brick itself. Don’t be afraid of messing this up!
The nice thing about the German Schmear technique is that it’s not supposed to be perfect. I worked in about 3 feet sections and would take a step back, look at it and then make any adjustments that I wanted. I also found it easier to apply in a criss-cross motion.
How thick you put it on is a personal preference. I personally wanted a little bit of the red to show through so after I had all the joint compound on and it had dried slightly, my daughter and I went back and sanded some areas to allow more of the red brick to show through.
Step 7 – Seal Faux Brick Wall
The final step is to seal your wall. I would highly suggest you don’t skip this step.
Just make sure that you use this polycrylic so that it won’t turn yellow afterward. (DO NOT USE POLYURETHANE)
This was a super easy process. I used a small roller and just rolled it over the whole wall. A little goes a long way and we had plenty left over when we were done.
There was absolutely no yellowing afterward which I was happy about!
Step 8 – Caulk Edges
The final step was to caulk the edges in the corner and at the ceiling. Just run a small bead and smooth out with your fingers. This step gives clean lines and really makes the wall look finished.
Finished Basement Stairs
We completed the look by painting our basement stairs black. This was a little tedious but in the end, I’m so glad we went this route.
Thanks for checking it out!! This project is still one of my favorites.
Be sure to check out the Entire Finished Basement Here.
SHIPLAP ACCENT WALL


Comments
Join the conversation
-
Great job! One of the best DIY posts I've seen in a long time!
-
I agree. I am retired and don't have a lot of monies for redecorating. This would work well. Thanks a lot.


Frequently asked questions
Have a question about this project?
What did you do with your joins.
Could this technique be used as as backsplash?
Could this be done over wood paneling?