


How to Make Old Signs New Again With Decoupage and Stencils

If you don't want to confess that's fine, I'll go first 'I' bought into the saying Live, Love, Laugh or Love, Laugh and Live maybe because it was so versatile and you could state it backwards, forwards and even sideways! Hahaha. I first purchased the phrase in the form of rub on decals and then the multitude of signs. My daughter would often tease me about the theme I had going on everywhere...now I cringe when I see the lingering remnants of my obsession .
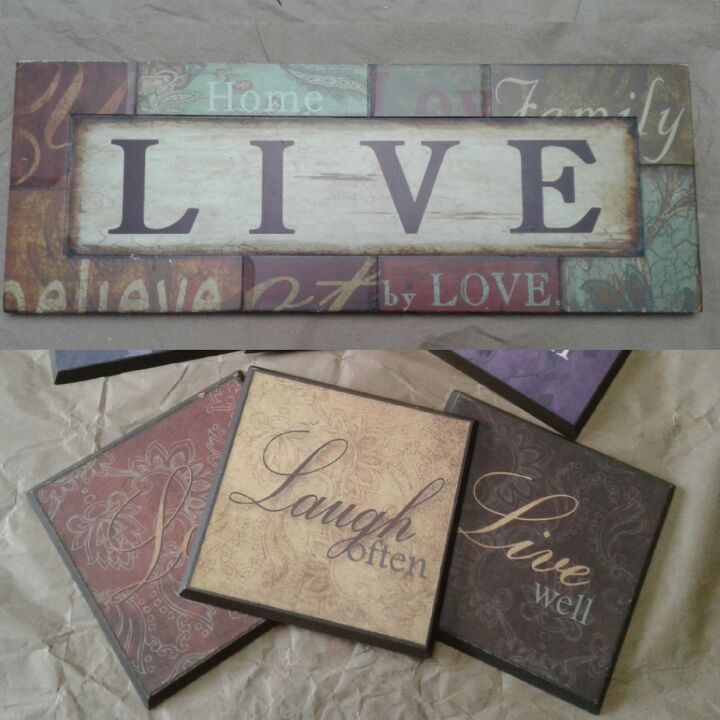
Spoiler alert, this will be a super easy facelift and it will be finished in a jiffy! I am just going to reuse the old signs, they are perfect because they are ready to hang on a wall as soon as the paint dries. Time to move on to something fresh and new, how about honeybee decor?
In the past I soaked and removed the paper fronts on the MDF board prior to painting but today I'm going to be a rebel and have the satisfaction of painting over those tired words.
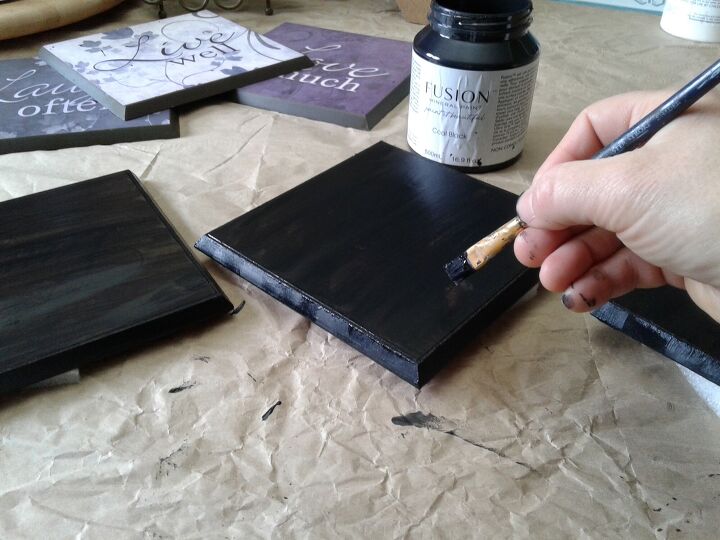
I'm using Fusion Mineral Paint, it gave great coverage and drying time is a snap.
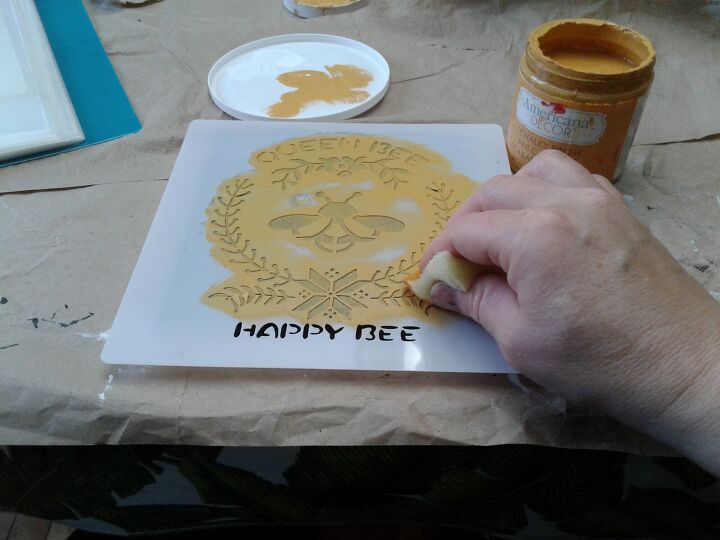
I am using brand new stencils that I just received from Amazon which are all things Bees. I chose the square size stencil that best corresponded to the size of my board, with minimal paint onto a sponge I blotted the paint all over the stencil cut out area except for the bottom wording. I'm using a muted yellow Americana Decor Chalk paint for the contrast color. Keep the stencil in place with your free hand or temporarily tape it in place. Once all areas are covered, simply pull the stencil up and off to reveal your design.
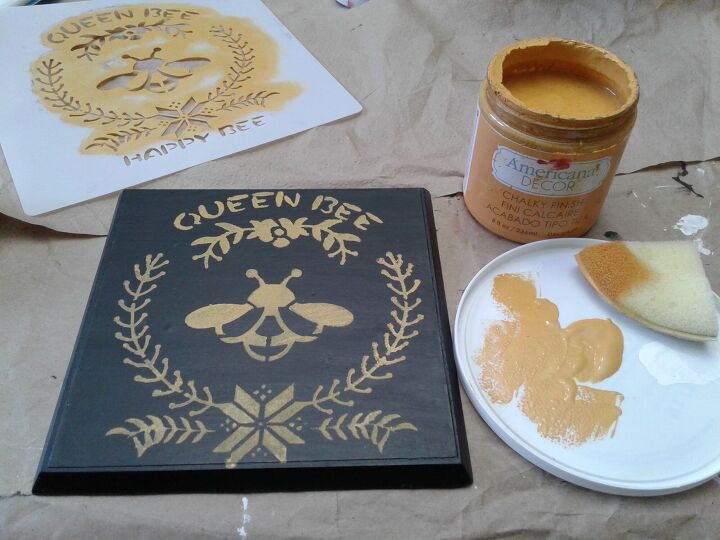
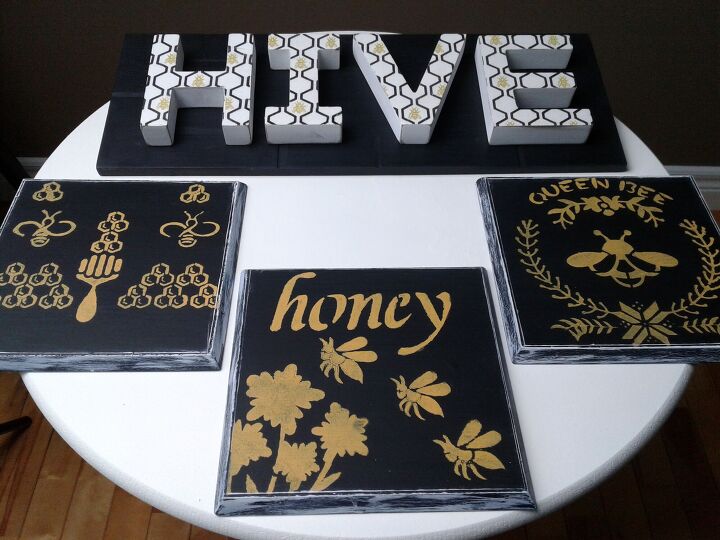
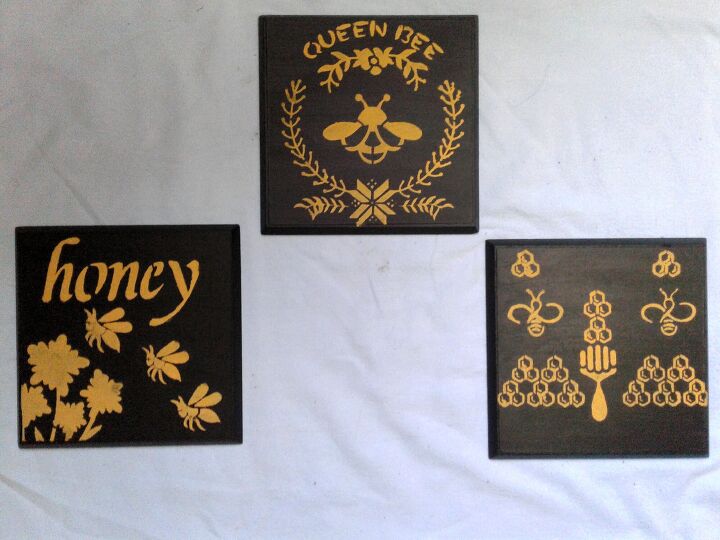
You can't see me but I am smiling from ear to ear with satisfaction over how beautiful something so easy turned out! Love, love, love my new stencils! Moving on next to update the other two from the original trio each with a different design.
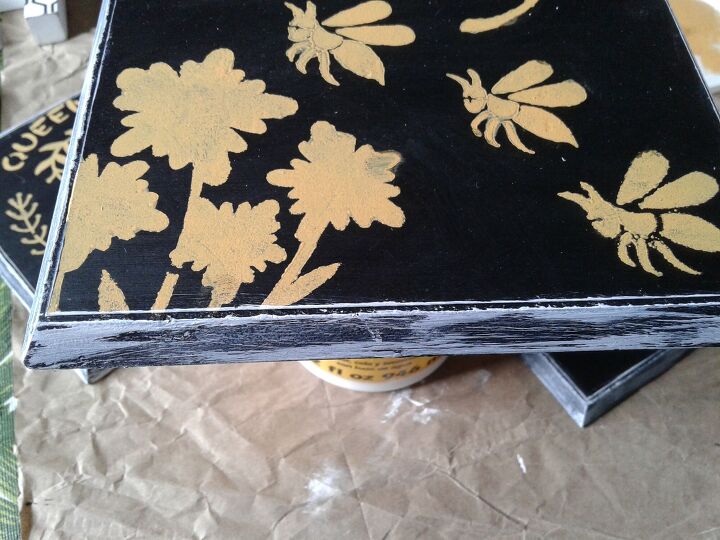
The mustard color was a perfect fit for the honey signs and it popped off the back background but I wanted to make it really pop so I framed the signs with a white, shabby paint look. With minimal paint on my artists brush I held the brush at an angle with light pressure and glided it along the outer edge.

The goal isn't to have a solid white edge but rather a hit and miss highlighting along the edge.
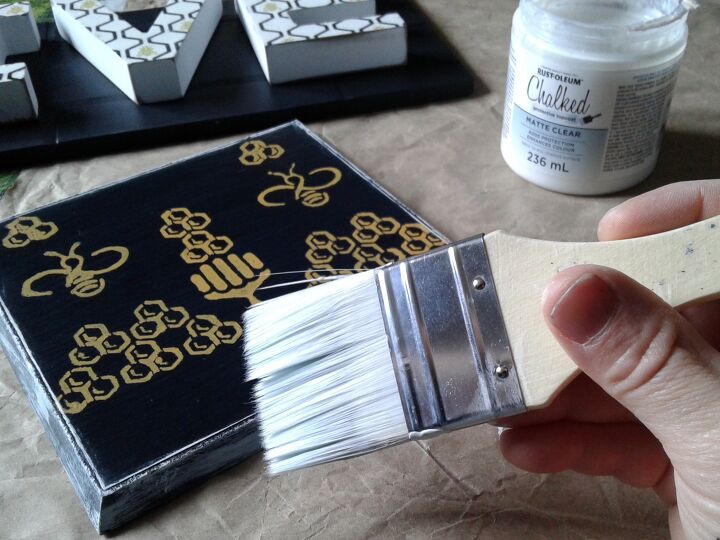
Lastly I sealed the artwork to protect it for a few years to come...before the time passes by to try something else yet again.
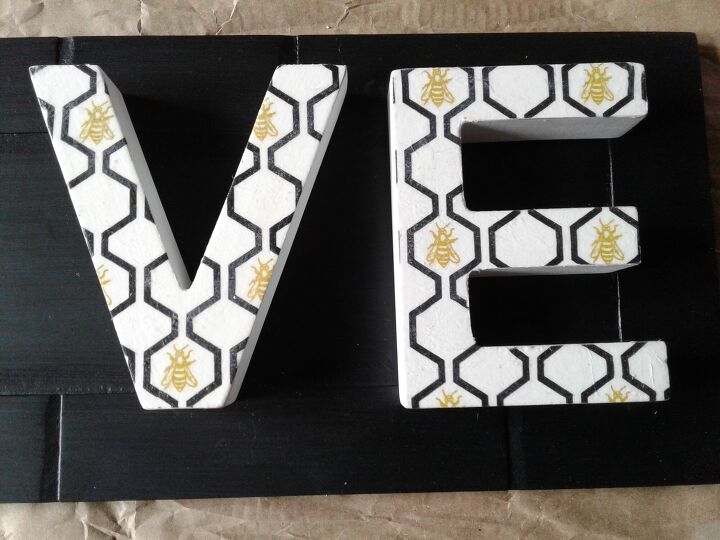
Next was the longer sign, I wanted to continue with the same bee theme but I wanted to mix it up just a little. I know, I'll add lettering, like raised, wooden lettering. Hmm, well that's just boring so it had to be jazzed up a notch.
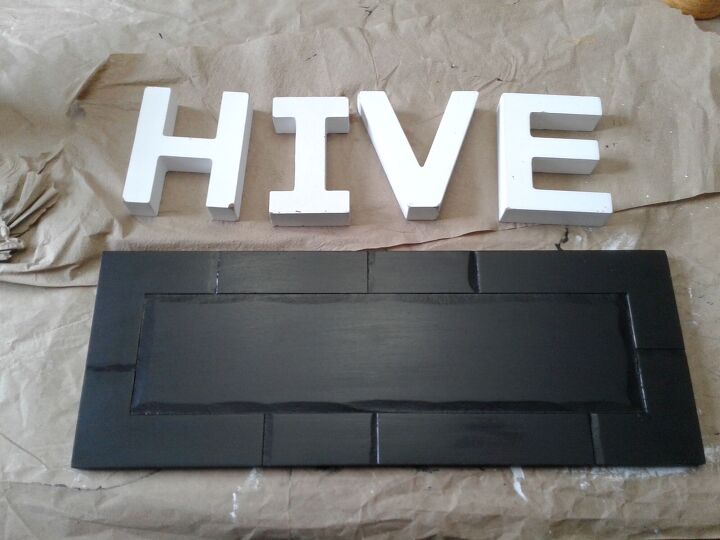
Let's get out some bee napkins and try that, white letters on a white napkin backing...not going to pop!
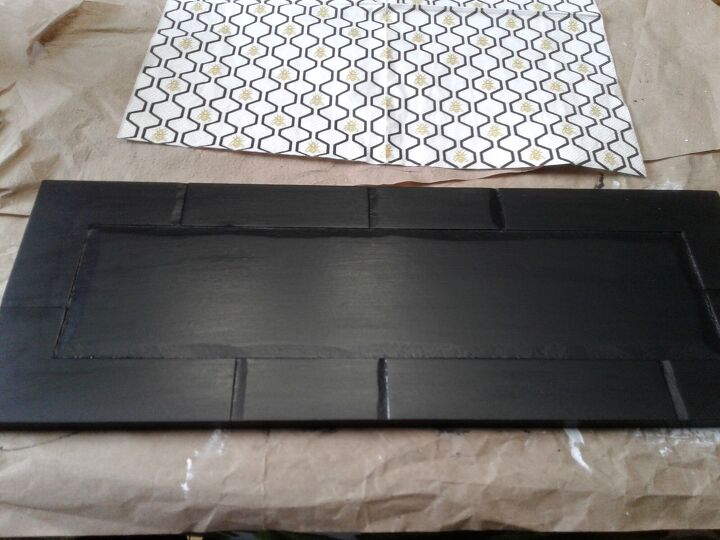
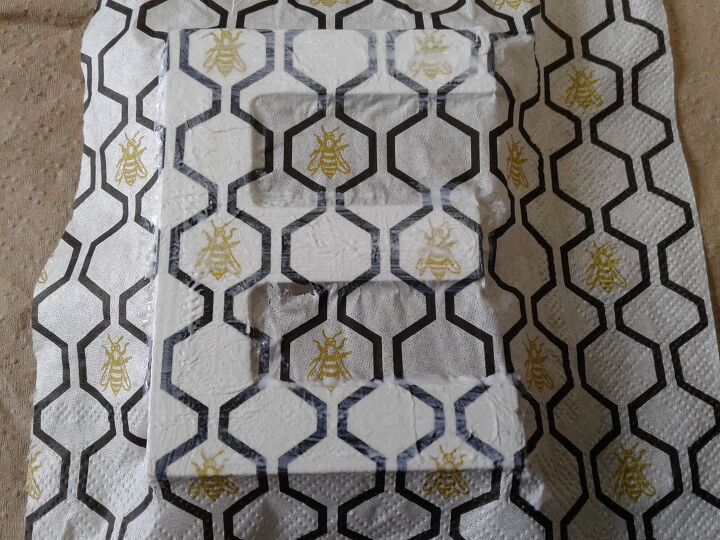
Instead I chose to decoupage the napkins onto the letters which would then pop off the black background. A napkin usually consists of 2 or 3 layers which need to be separated and the top patterned sheet is what gets used to decoupage with.
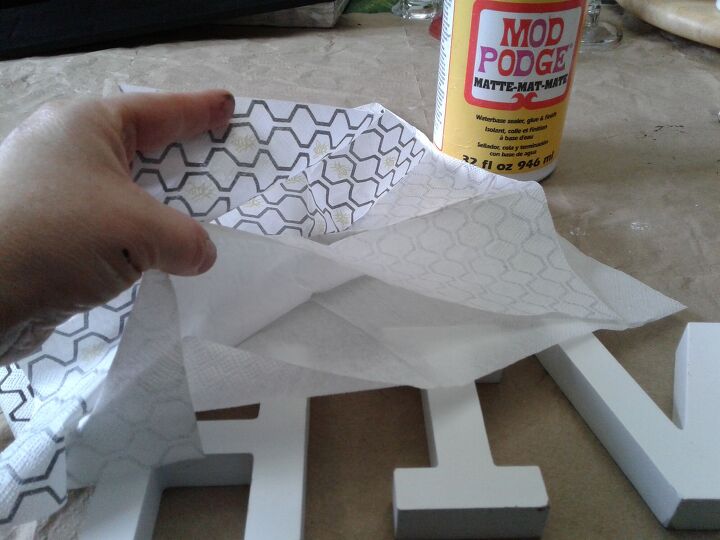
Apply the glue/sealer mod podge to the top, flat surface and carefully place the patterned napkin over top. Gently finger press out the wrinkles and ensures all of the tissue gets adhered. I left the letter afterwards to dry before scuffing off the excess napkin away from the letter edge.
"Aren't they looking so fly now that they're dry?" I'm sorry I should have said, "don't they look so beeeeee there on the V and E?" The letters were just glued onto the backboard with Aleenes Tacky glue which dries clear.
Anyway you say it, it's a vast improvement and a super easy way to update the decor without a big hit to the budget
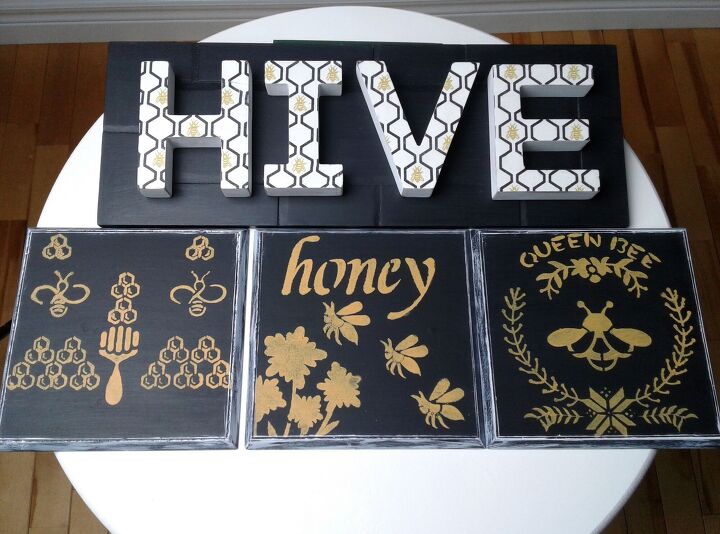
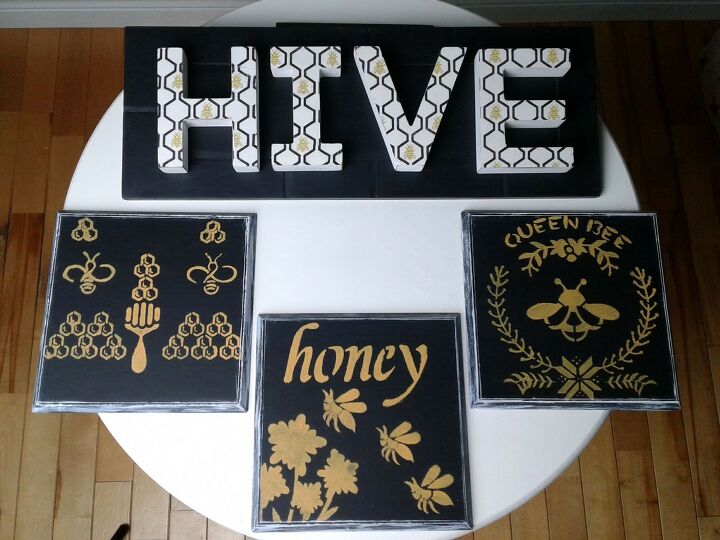
Two different looks but all sharing the same theme and color scheme.
There you have it, how I updated the decor with just a few pennies in just a few minutes and maybe you'll want to do the same with some tired signs that you have. Thanks for checking in to view my latest makeover, if you have any questions or comments I'd love to hear from you. In the meantime happy crafting!
Resources for this project:
See all materials


Comments
Join the conversation
-
This has got to BEE the cutest way to upcycle those napkins!
-
Love the black, white and gold theme. And the bees are so cute! 🐝


Frequently asked questions
Have a question about this project?