


Guest Room Reveal & Board and Batten Wall

It has been a HOT minute since I wrote a blog post! Don’t worry – this site is still here! I just haven’t had anything super exciting to share until now. The least favorite room in our house skyrocketed to one of my FAVORITES with the help of some wood, a little paint, a new light fixture, new hardware, and some fun decor. It’s truly amazing how the smallest of swaps make the most significant impact!
The Before
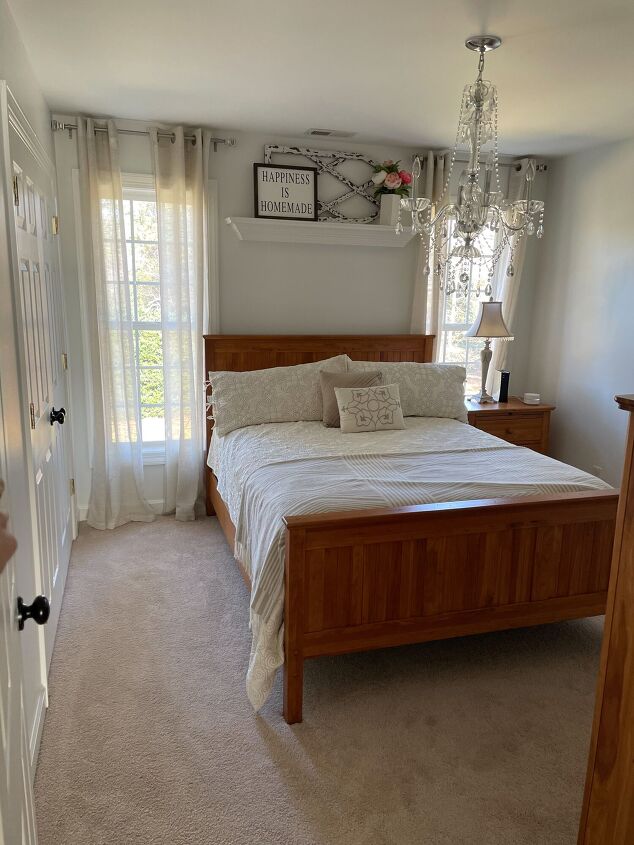

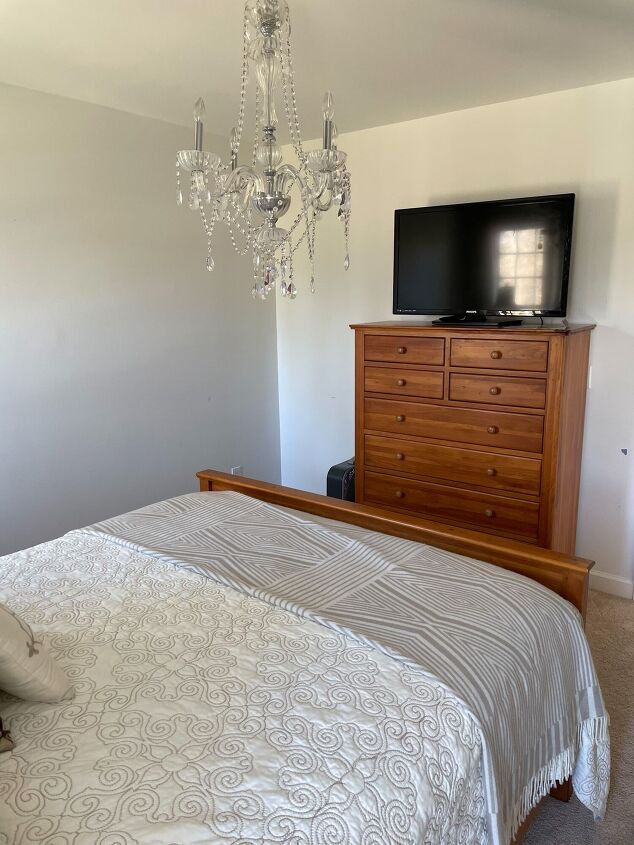
Pretty “blah,” right? This room was the previous owner’s daughter’s nursery, hence the light fixture choice. This room was just a dumping ground for some well-loved items we were given. I had a hard time even thinking of a “vision” for this room because I wanted to shut the door and run away.
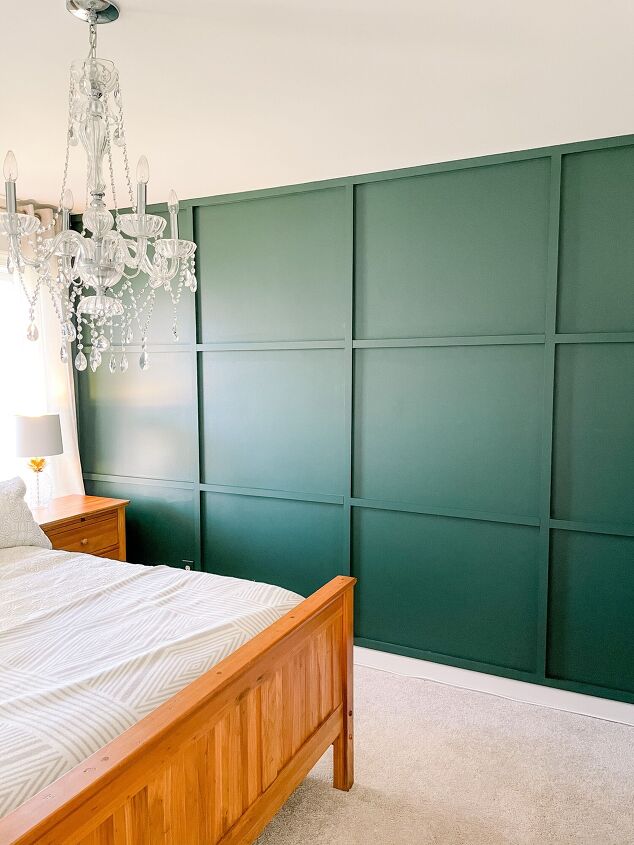
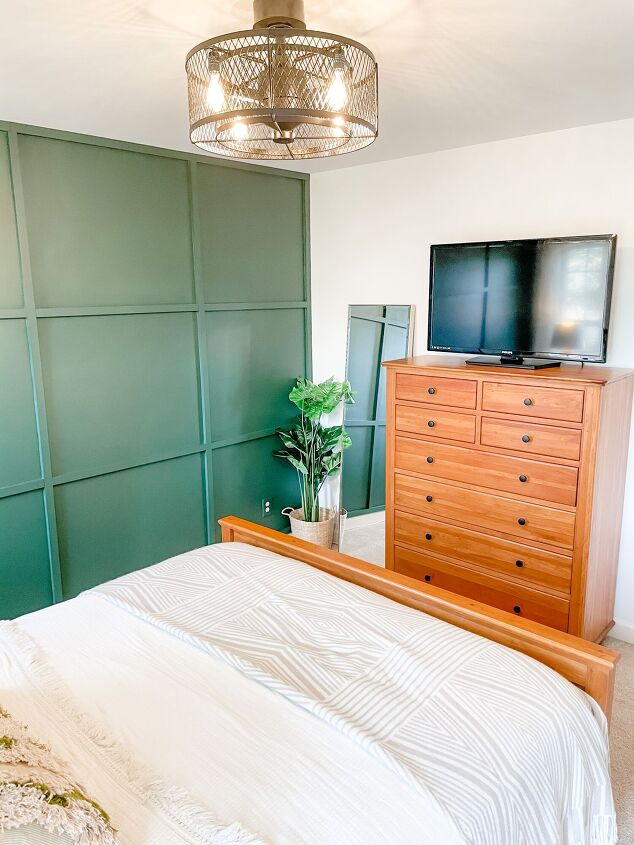
Well, my love for green got the best of me, and I decided I wanted to take a stab at those gorgeous board and batten walls I’ve seen people have in their homes. I will admit, I was SUPER intimidated by this project’s idea, but honestly, it was NOT that hard! It was also the first DIY I entirely tackled by myself!
Grid Board and Batten Wall How To
Supply List
- 1in. x 2in. x 8ft Primed Pine Finger-Joint Board – We used 14 of these boards, and the dimensions of your wall will determine your number
- Nail Gun – I used this one
- Miter Saw or Circular Saw – I used a circular saw. It was what we had on hand. Whatever you have will work!
- Paint color of your choice – I used Sherwin Williams Dard Hunter Green
- Paint roller and pan
- Paintbrush – This puppy is my favorite!
Disclaimer: The math of this project will be the WORST part. I used my better half (Kyle) to help me with measurements because math is not my forte. Let’s talk feelings not numbers okay?
The Process
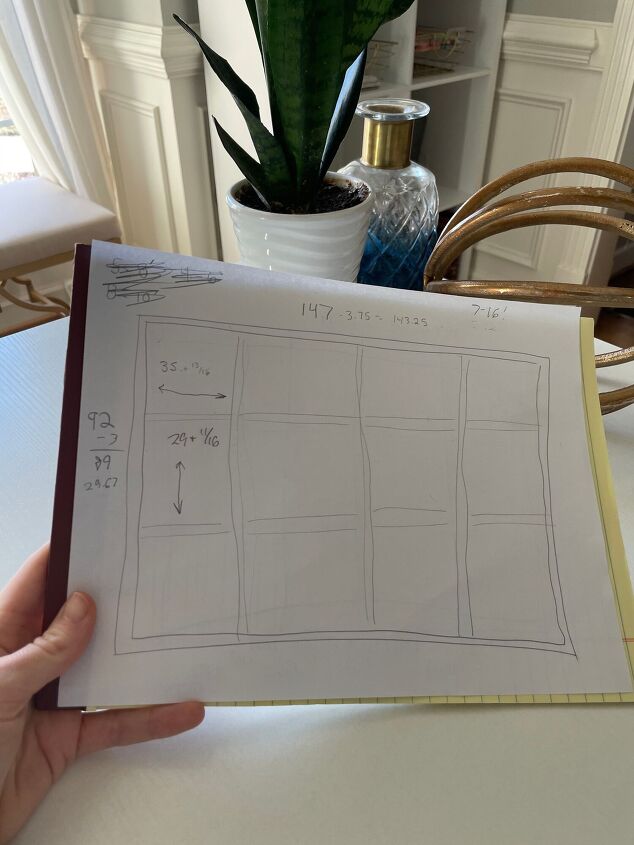
Step One: Sketch out your wall on a piece of paper. Gather the length and height of the accent wall then decide how many “squares” you want on your wall. I decided to do four across and three down. IMPORTANT FOR MEASUREMENTS – 1x2in board is actually 3/4 x 1.5 in, a 1×3 is 3/4 x 2.5 in. Remembering this will allow you to make the correct measurements. Below is my sketch with measurements
Step Two: Based on the measurements, figure out how many boards you will need and head to your hardware store.
Keep in mind that you will need trim pieces to create a border on the wall. We decided to go with 8 ft boards because the length of our walls was a little under 16 feet and for transportation reasons. I used two pieces of boards for the length of the wall border.
Step Three: Measure and make the cuts with your saw. Walls are WEIRD. Your accent wall will probably not match your exact measurements on your paper and that is OKAY. It is always good to make a cut a little longer than you need rather than shorter. You can always take more off but you cannot add to a board. I did a lot of running back and forth from the guest room to the garage to get the right cuts.
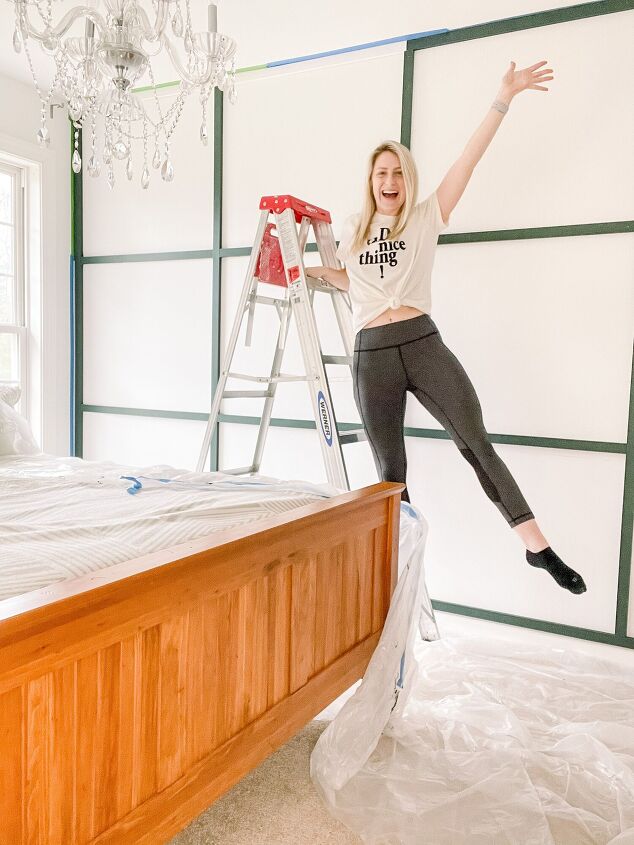
Step Four: Attach horizontal frame boards to the wall first using a nail gun. You CAN use liquid nails, but I don’t advise it. A nail gun may seem scary, but it’s really simple to use. I made sure to attach nails at each end of the board and in the middle.
Step Five: Attach vertical boards
Step Six : Add shorter horizontal boards
Step Seven: Fill all nail boards with spackle and sand then Caulk ALL the seams. This will MAKE the project look professional! If you skip this step, your wall will not look as good as anticipated. Caulking is no fun. Feel free to add a “that’s what she said” joke throughout this entire paragraph. I used DAP Premium Molding and Trim Sealant. Also, a caulk gun makes this process easier! You just place a bead of caulk on all the seams and take a damp paper towel or microfiber cloth and wipe!
Step Eight: Paint! Here are some things I learned in my process that may be helpful to how you decide to tackle the paint. I did NOT paint the wall first, which I later regretted. I would recommend painting the entire wall first. I DID however, paint the trim boards before I put them up, which I was very glad I did because I am a messy painter. I’ve seen people do this multiple ways so you cannot paint “wrong.” Do what works best for you. Just make sure you paint over all the caulked seams with a hand brush!
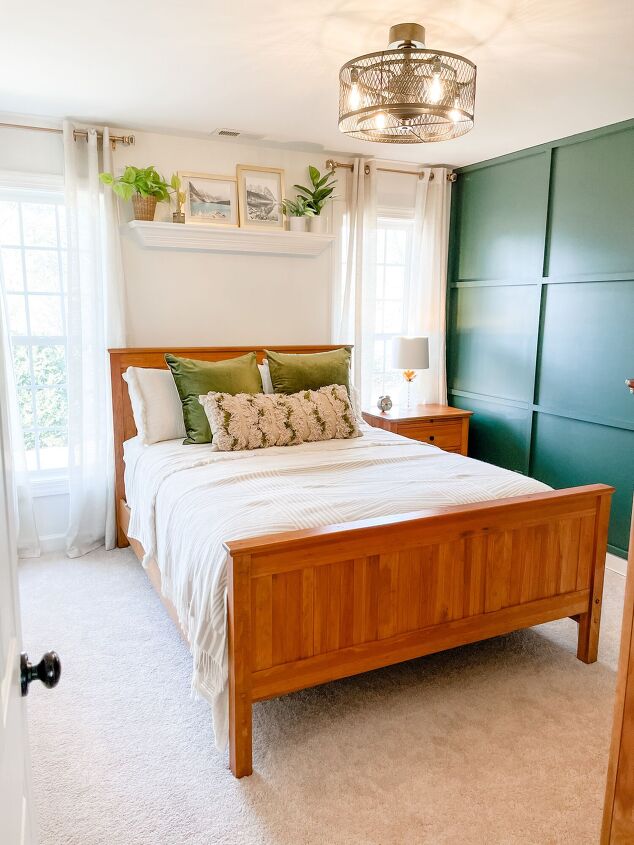
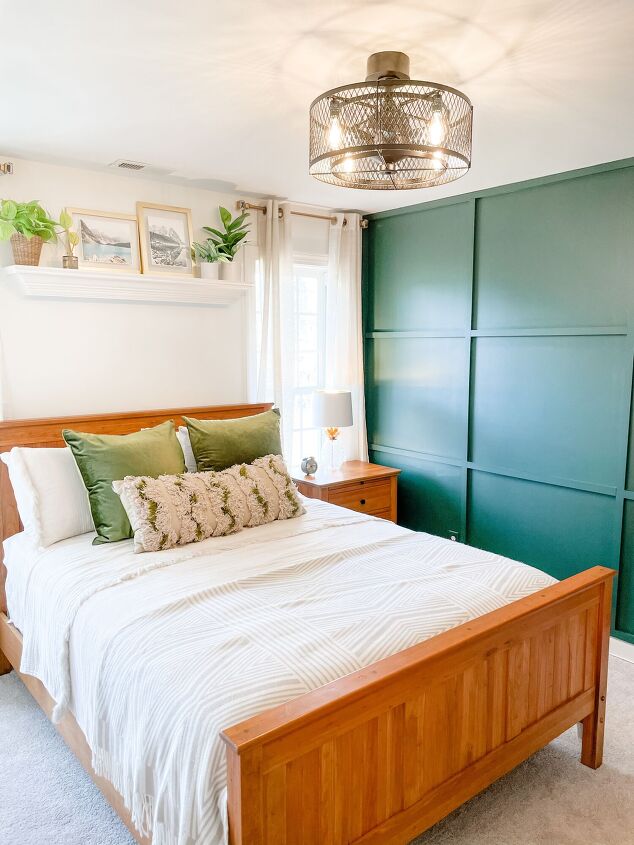
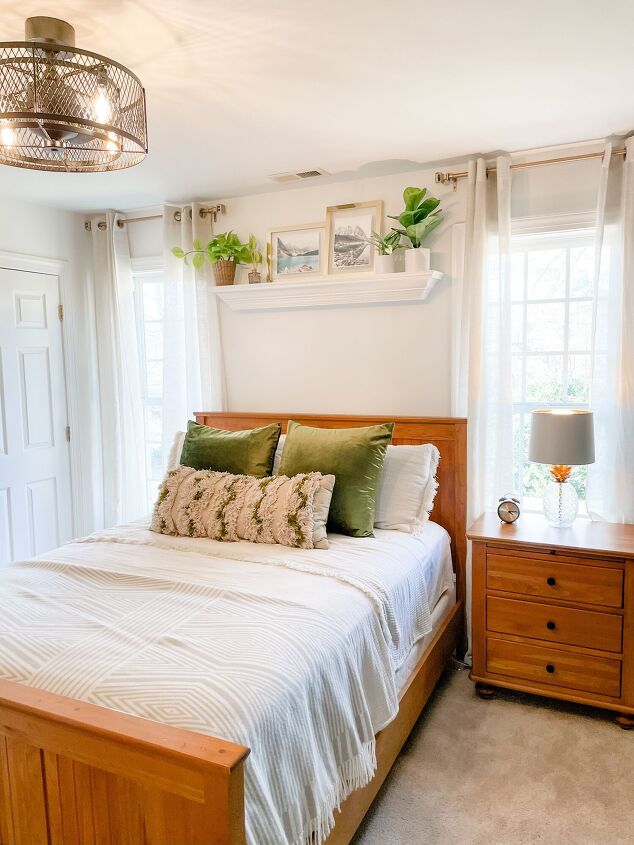
Guest Room Reveal!
I talked about how small changes make the great impact. Well I’m here to show you they can! I was going for a cozy modern rustic mountain vibe for this guest room (Is that a thing? I am making it a thing!) Here is the list of things I modified in this room to transform this space!
- Changed the chandelier for a flush mount ceiling fan – I found this ceiling fan from Amazon
- Swapped out the round wooden dresser knobs for more modern matte black ones – Also from Amazon!
- Used rub n buff to turn the existing silver curtain rods gold to match frames I place in the room
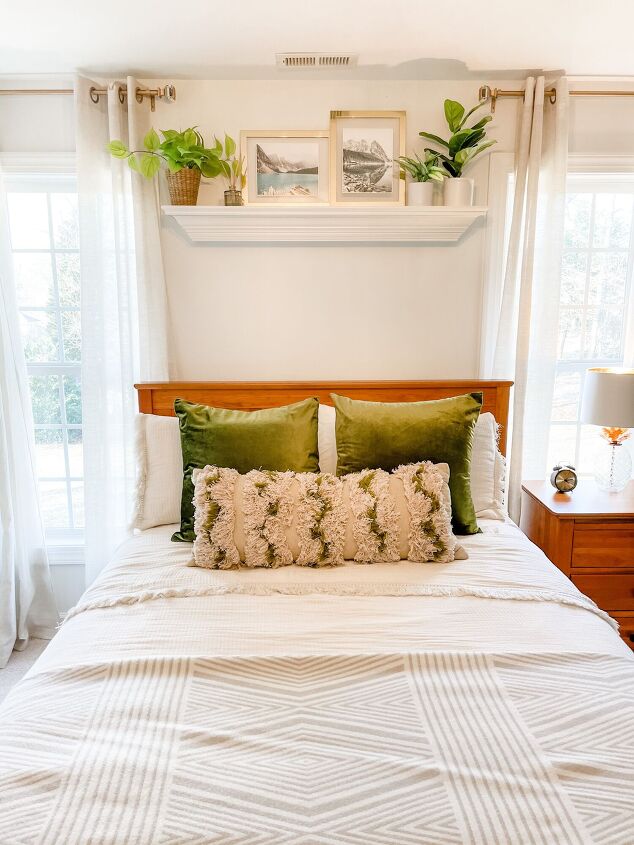
- Refreshed decor! I ended up retiring the existing bedding for this adorable coverlet from the Hearth and Hand collection. I added more modern, timeless elements into the bedroom that will hopefully withstand the ever-changing trends. Most of the decor is from Target, frames are from Michaels, and mirror is from Home Goods
- 2cf5edb43484496aa9d4a0e8eddb2a72-mov
Whatcha think friends? Have you tried a board and batten wall? I want to hear all about it!
Resources for this project:
See all materials


Comments
Join the conversation
-
I like the look but I especially like you didn’t go overboard. A nice accent/surprise when entering the room. I think if you did to another space it could be overkill and take away the uniqueness of this wall. Nice job
-
I am doing this!!!! Thank you for the inspiration 🥰


Frequently asked questions
Have a question about this project?
It’s fabulous……but is it more greenish than teal?
Looks amazing. I’m curious why you didn’t do this for the wall behind your bed? It would have extended your headboard to the ceiling. Or placing your headboard on the wall you created. Just thinking out loud 🥸