


Hanging the Twin Nursery Wallpaper Mural

Eeeesh you guys, it's been a minute. I mean *cough* almost an entire year...
But for (two) really good reasons! I've been figuring out how to be a twin mom to two beautiful baby boys! Meet Jacob and Lee - my double sunrise babies who came into this world 7 weeks early in January 2021.

Yes, I do still get them mixed up almost 9 months later. But that's not why you're here (as cute as they are  ). After the insane year I've had, I'm back to finally give you some more details about hanging the temporary wallpaper mural that I chose for their woodland-themed nursery. If you're impatient about what the room ended up looking like in the end, you can jump to the full reveal post here.
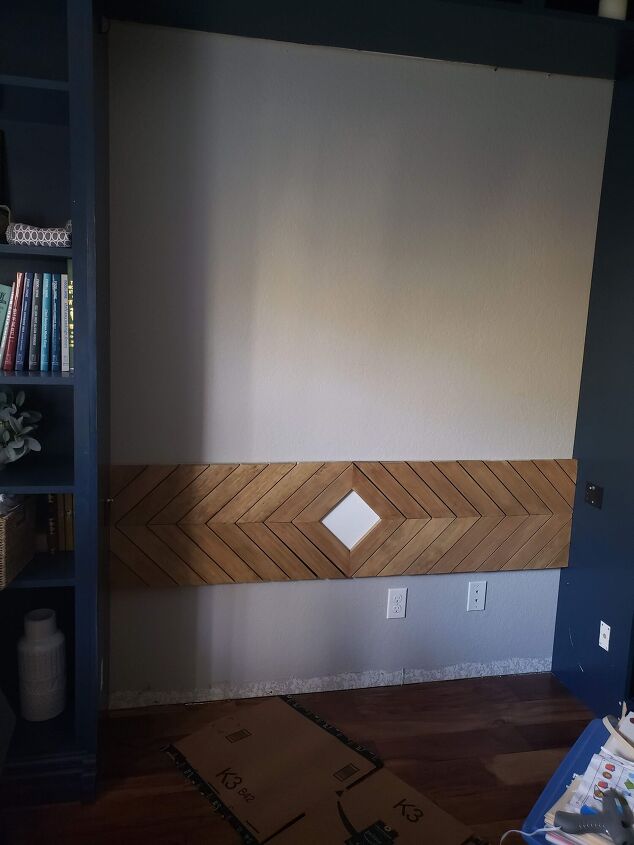
Here's Where We Start
This location between the shelves used to house a murphy bed that completely broke because I used the wrong material when I built it in the spring of 2020. Definitely a lot of learning curves in DIY. After 6 weeks of refusing to go into the room, I finally let it go.
I had never wallpapered before, so I had to do a lot of reading on how to hang wallpaper and figure out the best approach. One of the first things I picked up on was that wallpaper will not adhere very well to textured walls. The walls in our Texas house were textured, so we had to prep the surface first with a little skim coating. If you were around for my newbie subway tile adventure, you can see how I managed this technique.
After the Skim Coat...
At 23-24 weeks pregnant with twins, this was soooo draining. Once the walls were prepped, I took a few days off and then jumped to arranging the panels in the correct order. Easy enough.
Now it's time to hang your first panel.
Choose one side to start on. For me, I chose the top left hand corner. Using a laser level, I took a pencil and drew a straight line down to help me align the first panel of the wall mural. I drew it about a half inch less than the width of the panel. Example: each panel was about 24" wide, so I drew my line at about 23.5" from the left hand side.
This particular temporary wallpaper mural came in almost sticker form... so you peel off the back and then stick it straight on the wall. It is also a little forgiving in that if you get it on a little bit crooked, you can peel it off and try again.
It was pretty much like mixing cling wrap and stickers - stressed me out.
Once I had the panel up, I used the wallpaper squeegee that came with the mural to smooth out any bumps or bubbles. I also used that tool to push the slight bit of extra wallpaper into the corner where the built in shelving unit met the wall. I used a utility knife to cut along that edge.
I needed to work around the old headboard, since I couldn't remove it without disassembling the entire built in cabinet or cutting it off. However, did I mention I was halfway through my twin pregnancy? Yes. Not going to do that.
So instead, I cut the panels and incorporated it into the nursery design.
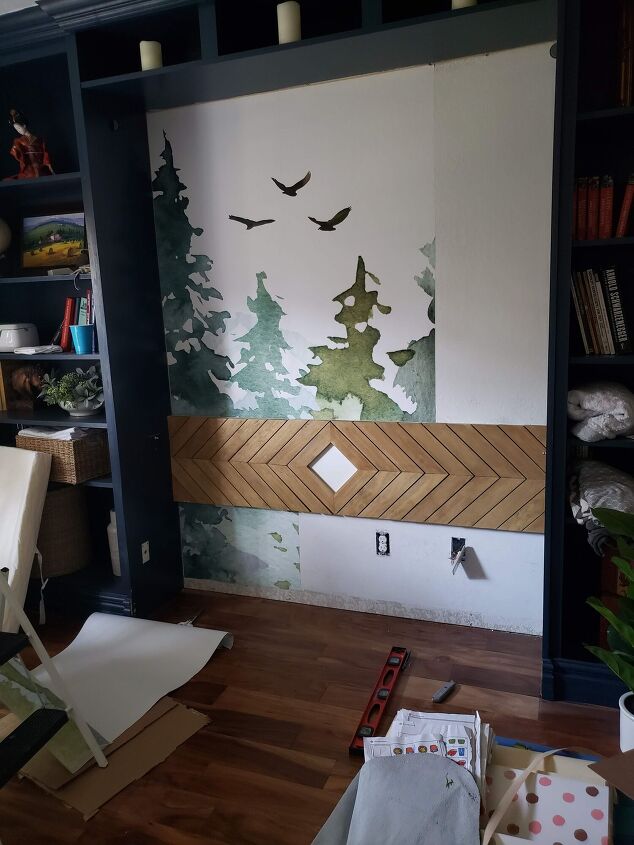
The Subsequent Panels
The first panel is the hardest! Once you have that on properly, you just visually line up the subsequent panels from left to right, peeling and sticking as you go. After each panel application, use the squeegee to smooth it out before you move on to the next.
For Outlets and Switches
Outlets or switches are pretty easy to work around as well. Shut the power off to that particular area, remove the cover and then make sure your panel is lined up correctly.
Using a sharp utility knife, cut an X right where that opening is and then carefully cut until you have the opening exposed. You will replace the cover, remember, so it doesn't have to look perfect. It just has to be able to hide completely behind the cover!

The Finished Product
The mural was SO BEAUTIFUL! It ended up being a selling point for the new owners of our home (in addition to the German Schmear fireplace update I did when the boys were home). 
If you're interested in seeing how their nursery came out in the end - head on over to my blog or Instagram. I think I'll probably be updating my site soon, since it's been so long, but you can catch me on one platform or another every now and then!


Frequently asked questions
Have a question about this project?