


How to Add Charm With Inexpensive DIY Wall Decor
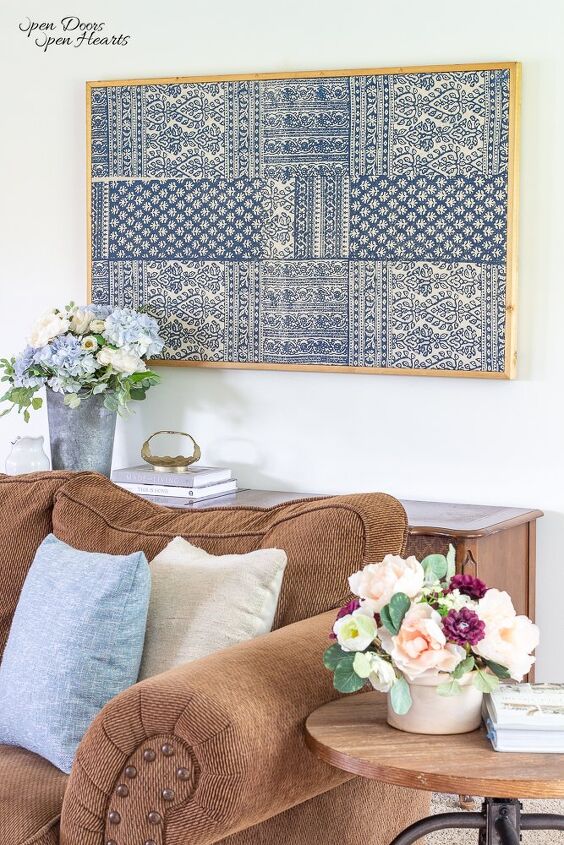
Our open concept home has many large walls. Today I want to share a how-to for an easy and inexpensive way to DIY wall decor for large walls.

I’m so excited to share this DIY with you.
In so many ways this has completely changed our living room in a way that I absolutely love!
Before this simple DIY, I had a very neutral vintage window hanging on the wall. There was absolutely nothing wrong with it, but lately I’ve been craving a little bit more color in my life.
I figured why not add it in simple ways that would be easy to swap if I should ever change my mind.
Not that I do something like that.
I clearly would NEVER start a project and then realize I wanted something else.
Never!
I didn’t just ask my husband to swap out the smooth MDF back of the built-in bookcase for bead board AFTER the bookcase was built and had primer on it.
That’s absolutely not something I’d do haha!
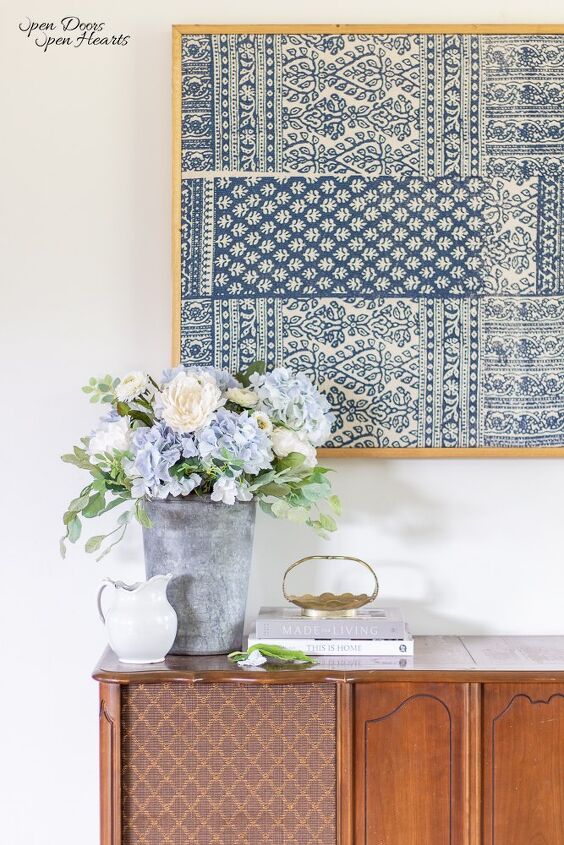
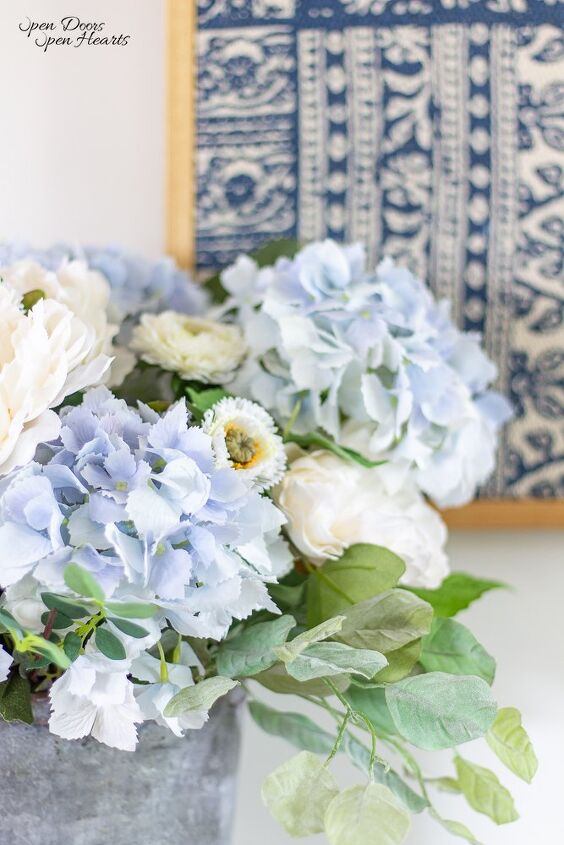
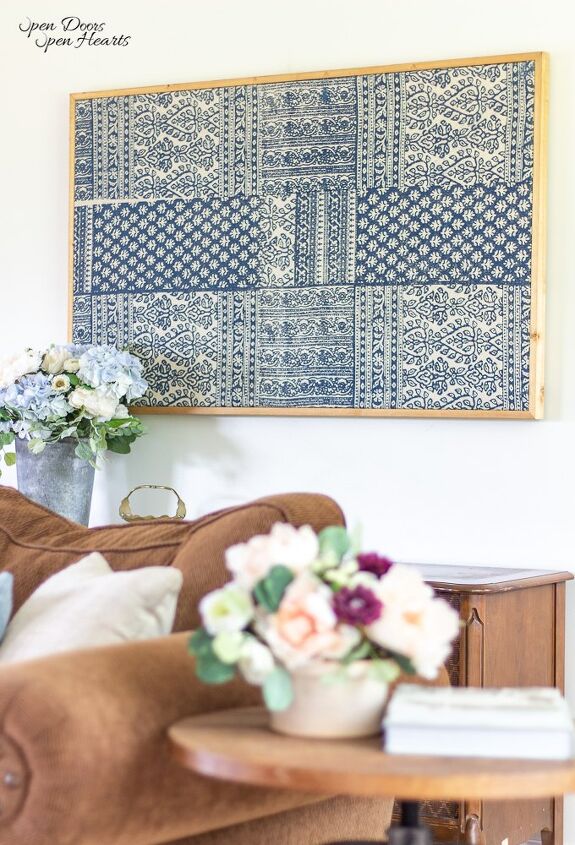
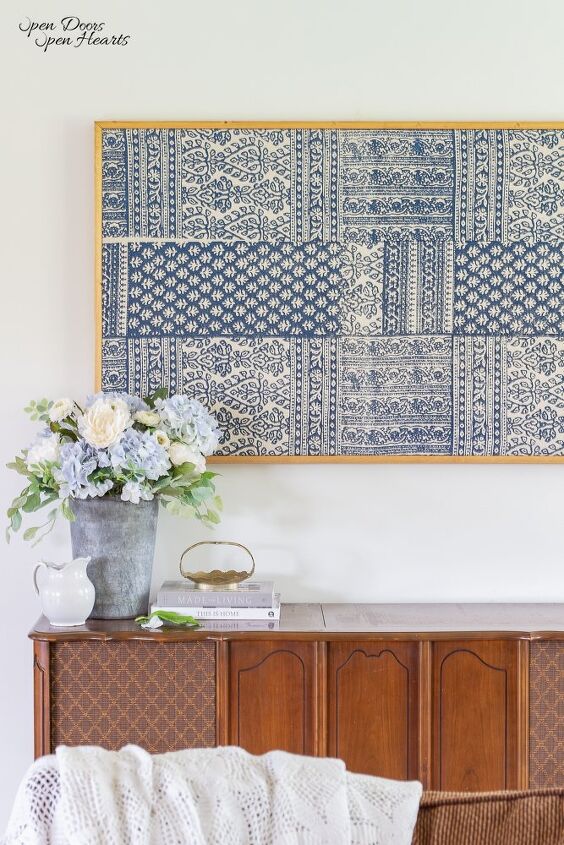
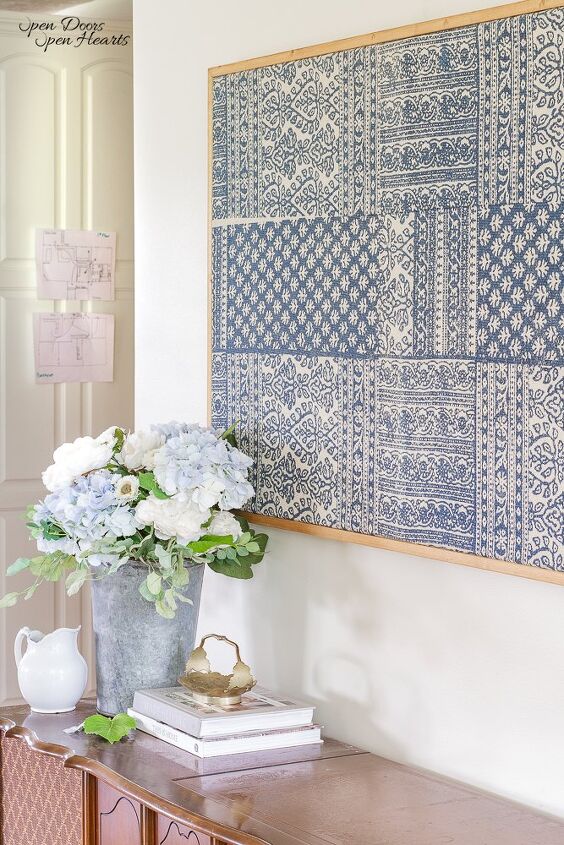
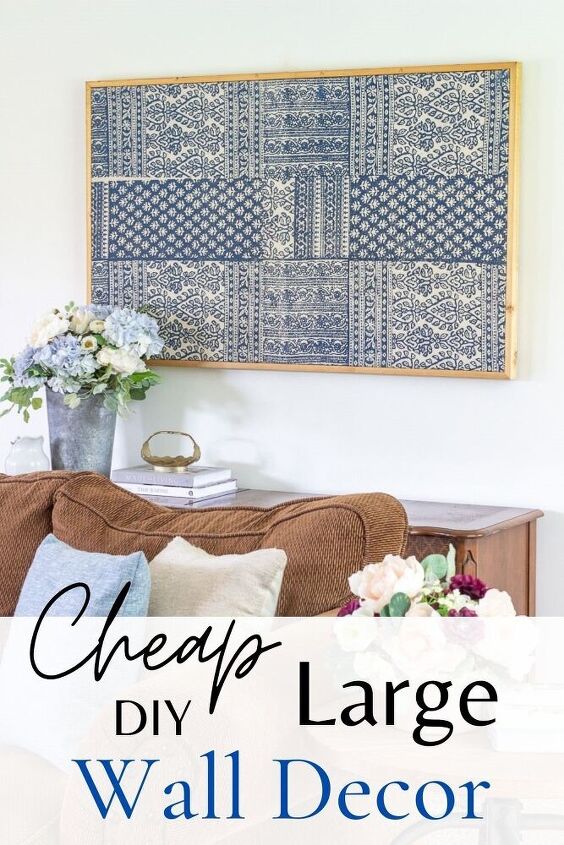
Our New Rug Wall Art
Okay guys. This isn’t actually a rug.
I honestly can’t count the number of times I’ve corrected my daughters when they tell me they love the new rug I put on the wall.
But suffice it to say, it’s been A LOT.
I guess if it looks like a duck and walks like a duck…haha!
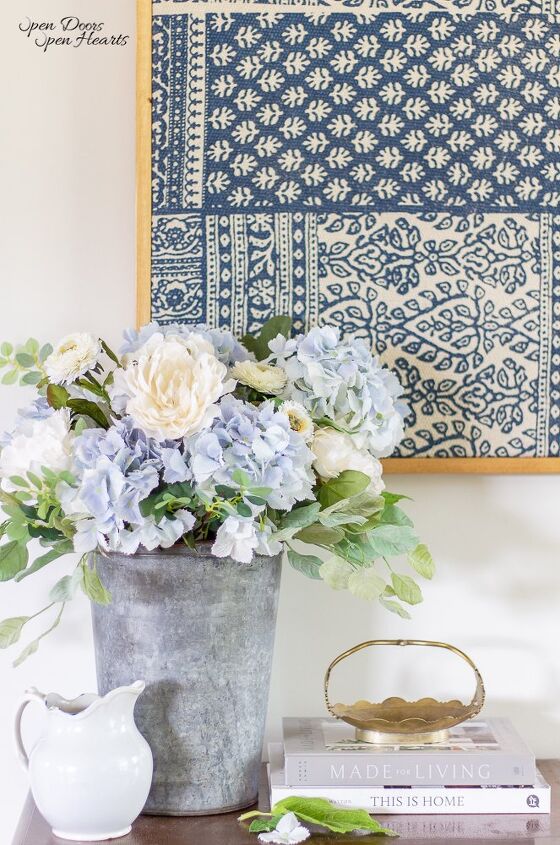
What this actually is, is a piece of upholstery fabric I got at Joann’s a couple of years ago.
I bought it for this exact project way back then, but over time I forgot about it and it was shoved all the way to the back of my closet.
I was recently reminded about it when I saw Deb with Seeking Lavender Lane turn one of her old rugs into wall art.
It took me a minute, but I finally found this beautiful piece of fabric and got to work giving this big wall a makeover.
How do I decorate a large wall cheaply?
The Secret About Decorating a Large Wall
I don’t want this wall to feel cluttered, but it’s also too big for me to just leave it empty.
Solution: 1 large flat piece
The secret when decorating large walls is to hang large items.
A large wall can feel very scary. You don’t want to have too much stuff, but you don’t want it to feel like you didn’t do anything either.
When you fill the wall up with a bunch of little things it can begin to feel crowded and overdone.
But if you hang 1-3 large items, you’ll notice you’ve filled the space and it feels less cluttered.
For instance: Don’t hang 1-12×16, 3-8×10 & 4-5×7 pictures frames.
Instead hang 1 – 20×30 canvas print.
Spacially they take up about the same amount of square footage on the wall, but one is much busier than the other.
Keep it Inexpensive
All of that said, purchasing large wall decor can get pretty expensive.
Even thrifting it can be difficult to bring home a large piece without over spending.
This is often when I start thinking about doing DIY projects, and in this case a DIY wall decor project.
Like I mentioned before, I went to Joann’s when they were having a sale on their fabrics and purchased this large piece of upholstery.
It was 2 years ago that I did this, but I want to say the sale was 40% off.
Not only did I save a lot of money on this diy wall decor, but I also was able to customize it to be exactly what I wanted!
So can you!
Before
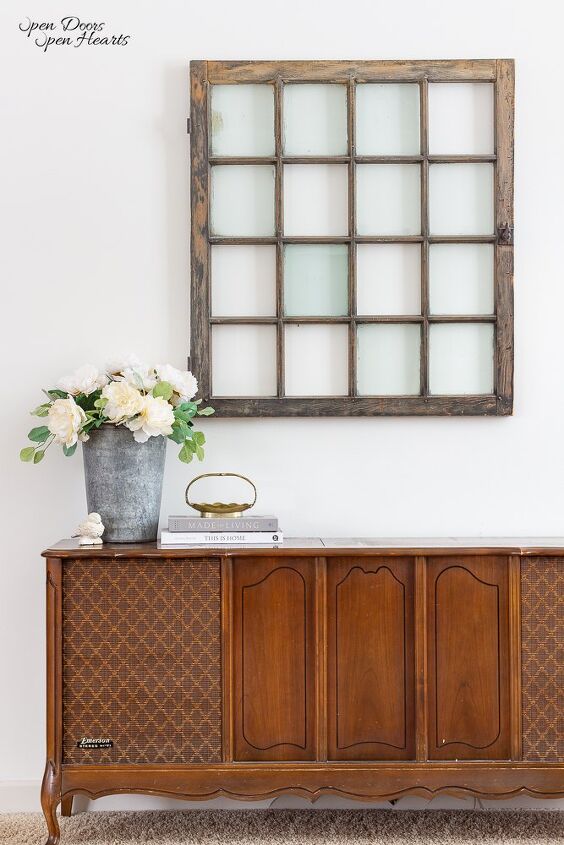
There was nothing wrong with what I had on the wall before, but I wanted a change and I wanted something a little bigger.
Supplies
- 1×2 pine wood
- fabric
- stain (color of your choice)
Tools
- circular saw
- nail gun
- staple gun
Instructions
Building the Inner Frame
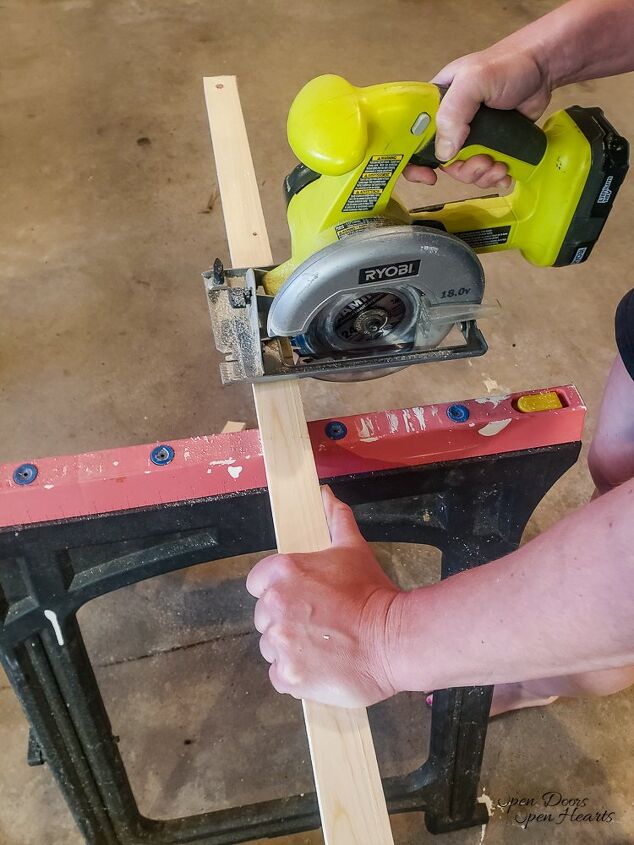
Step 1. Take the 1×2’s and cut them to the appropriate length for your fabric. I made sure that this frame was small enough that the fabric would wrap all the way to the inside of the frame. (Mostly because I didn’t want the staples I used to attach the fabric to rub on the wall.)
Step 2. Once the 1×2’s are cut lay them in the shape of a rectangle/square and use the nail gun to secure them to each other at the corners.
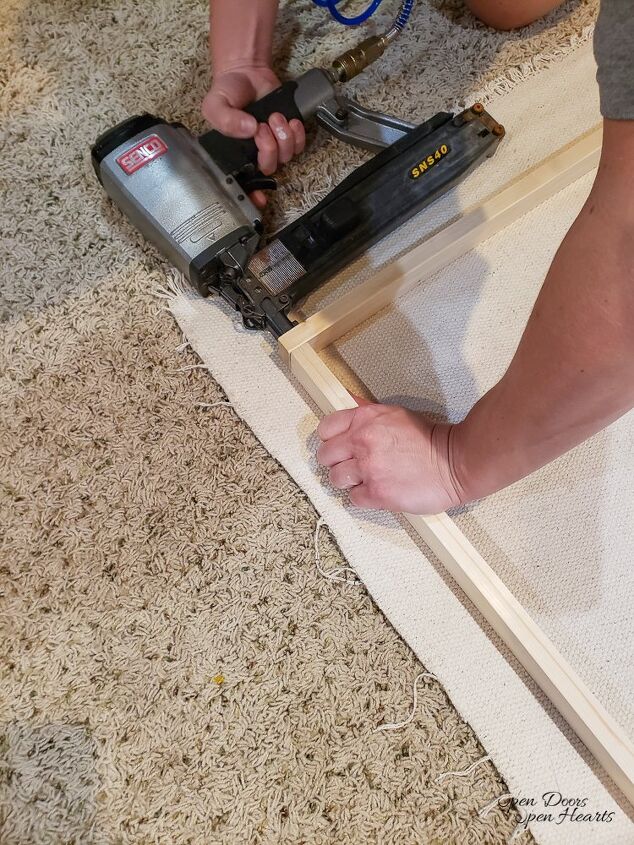
Attach the Fabric

Step 3. Once the inner frame is finished take the piece of fabric and lay it face down on the floor and then put the frame on top of it. Begin wrapping the fabric around the frame and staple it to the frame.
I used thumbtacks to temporarily secure the fabric so I could see how the fabric was looking before it was permanent. I wanted to be able to adjust it if it didn’t look quite right before I secured it with the stapler.
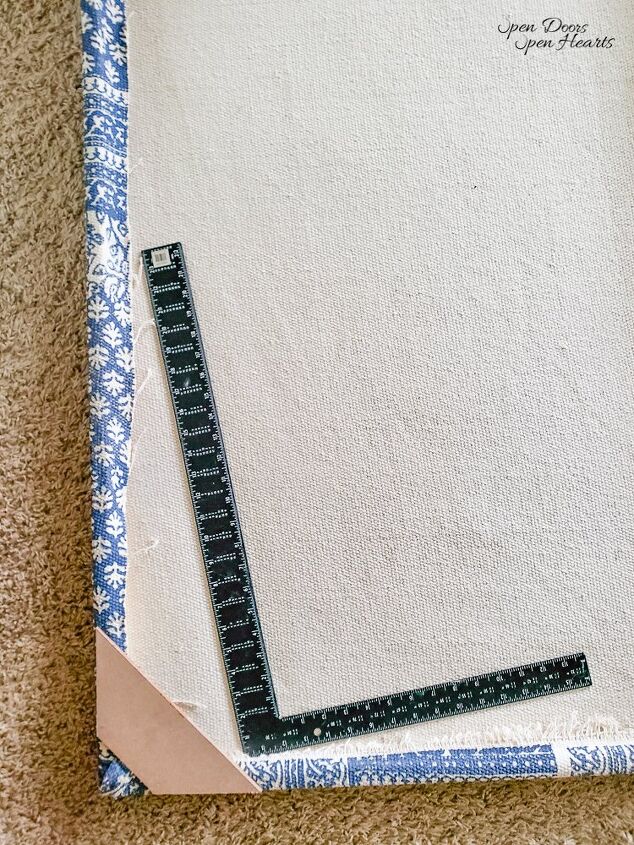
Step 4. To square up the inner frame, we add little square pieces of 1/4” MDF. (Only because we had some leftover from the girl’s built-in bookcase.)
We used a large framing square and nailed the MDF to the back of the inner from on all 4 corners.
Build the Outer Frame
Step 5. Now that the fabric looks like a canvas, I added an outer frame of 1×2’s.
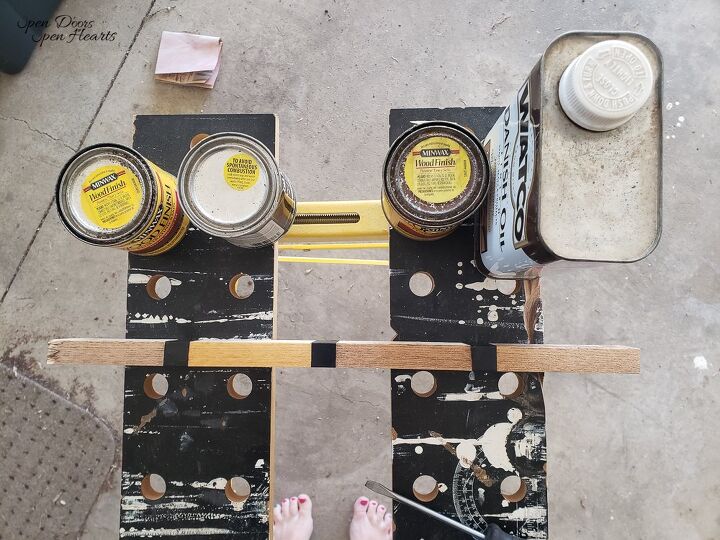
First I stained the wood the color I wanted.
I know that the console below this canvas will be a different color soon, which is why I chose the color I did. (I can’t wait to show you my plans for this!!) I used a piece of the scrap to see which color of the stain I wanted to use on the actual frame.
Step 6. Next, I measured and cut the wood at 45-degree angles. I’ll be honest, I don’t trust myself to do this without my husband to help make sure I don’t mess it up haha!

Step 7. Finally we nailed the outer frame around the “rug” canvas.
How to Hang Large DIY Wall Decor?
My favorite way to hang just about anything is with this wonderful thing called a Monkey Hook! If you haven’t used them, I’m telling you they are GAME CHANGER!
I used to be afraid to hang a picture on the wall without my husband.
Monkey hooks were what started my journey toward using circular saws, table saws, drills, and nail guns!
I’m telling you if you’ve never used one you HAVE to try them!
How do you make a wall not look plain?
Not every wall needs wall decorations.
Let me repeat.
Not every wall needs wall decorations!
In fact, some walls actually will look better if you don’t add decorations to them at all.
In this instance these are a few options you could use to help your walls look beautiful but not plain:
- Wall treatments such as wainscoting, board and batten, or vertical shiplap
- Wallpaper
- Bold paint color
Please Pin!
Thanks so much for stopping by! I hope that you were encouraged to create something new. Whether it’s DIY wall decor or something completely different!! Tell me all about it!
Head over to Instagram and share your fun projects with me there!
I can’t wait to hear what you’re doing!
Make sure you follow along on Pinterest and Facebook so we can stay connected in between posts! Also, join the mailing list and never miss a thing!
Have a great week! XoXo
Open Your Doors,
Aliya
Popular Posts:
- How to Create A Simple Boho Table From Pallets
- Functional Storage for Copper Pots and Pans
- My First Milk Paint Experience – Faux Fireplace Mantel
- Barn Finds – How to Style Vintage Glass Bottles
- Create an Inviting Dining Room: Mixing Vintage and New


Comments
Join the conversation
-
You made me look when I saw thumbtacks. Most underused item ever. You can get in clear and they go away. From decorations inside/outside to hanging things on walls. Glad you pointed out their value in home arsenal of tools of homeowners and rentals
-
Thanks for sharing your beautiful project! I have a question…what is a Monkey Hook? How is it used? Thank you.


Frequently asked questions
Have a question about this project?