


How to Caulk Like a Pro
Today we are chatting about my ONE amazing trick that’s going to teach you how to caulk like a PRO! [Head to my BLOG for more fun and easy DIYs!]
Caulking the seams of any wood working project is absolutely essential for a professional finished product! Caulk can take you project from looking like a newbie DIYer did it, to the work of a professional contractor. So don’t skimp!
For those of you who’ve tried your hand at caulking before, you know it can be a MESSY job. I usually end up using half a roll of paper towels just to clean up all the excess, plus having to touch up the wall paint anytime the caulk is against a wall. In and of themselves, those things are a huge bummer… caulk may be cheap, but I don’t like to waste things! And I hate wasting the little bit of wall paint I have left to do touch up work. And by the end of a long DIY, the last thing I want to do is touch up paint!
This tricks is especially useful when you are caulking between wood and a textured wall. But now I use it no matter where I’m caulking because it helps me use less caulking overall, wasting less!
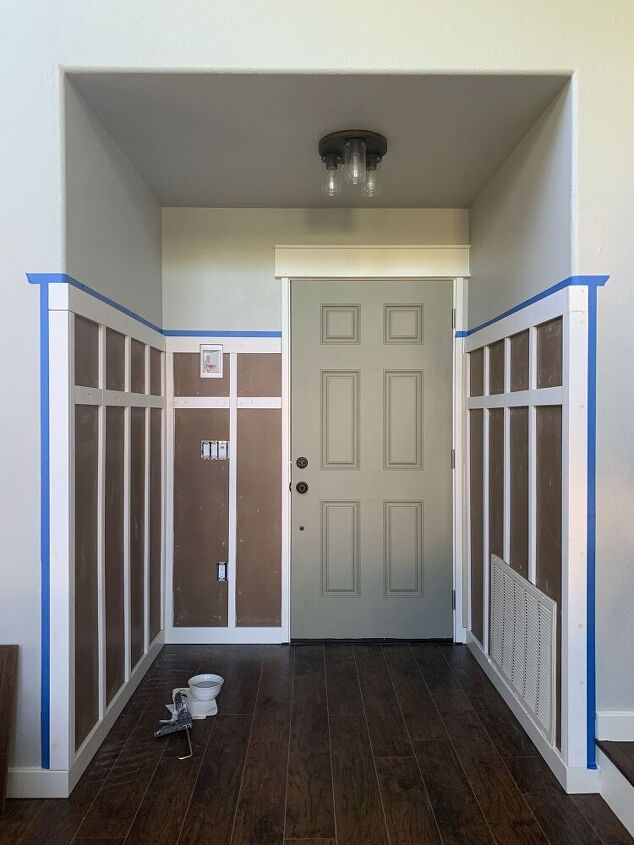
This was a huge project that required a lot of caulking. Each board needed to be caulked, as did the border. With this entryway project, I didn’t use the blue painter’s tape between every board, as you can see. I only did in on the border. But now I know better and I use the blue tape trick EVERYWHERE!
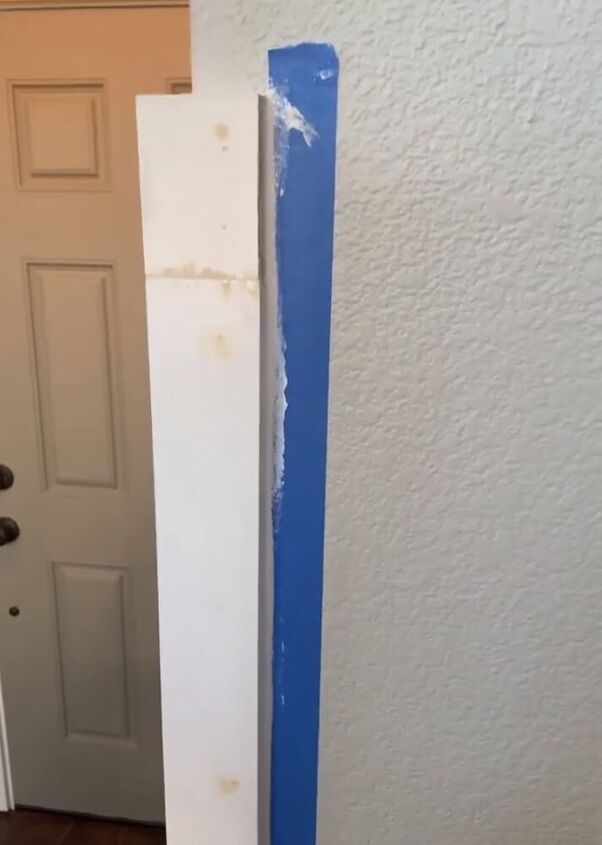
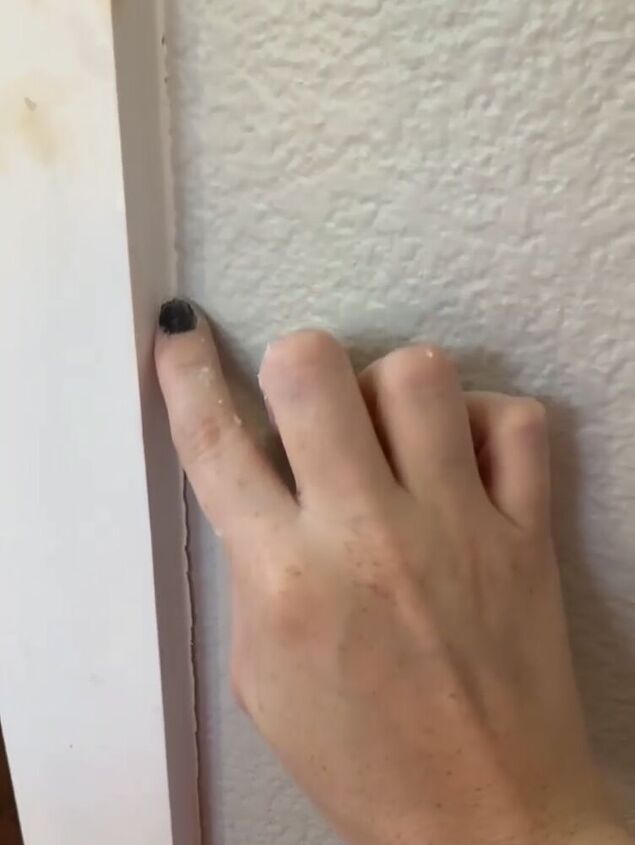
Step 1: Let me show you how wonderfully this works – especially on textured walls. With a textured wall, the caulk tends to spread out into all of the little nooks and crannies… not a cute look. Like I said earlier, I would always have to touch up the wall paint after the fact, but not anymore!
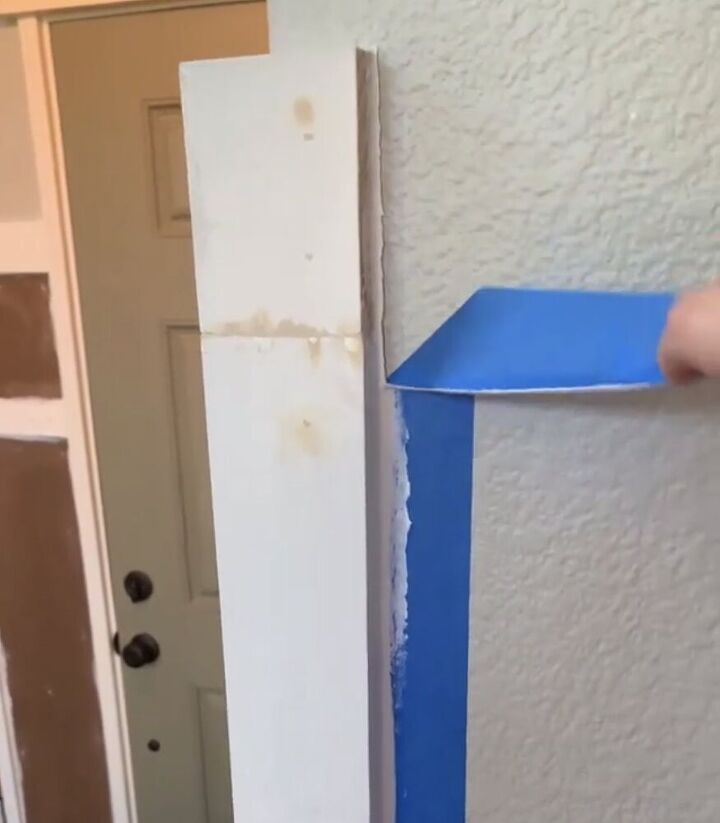
Apply your blue painters tape on the wall (or wood) next to the seam you need to caulk. Make sure your tape is not actually UNDER the wood, but rather that there is a small gap in between the seam and the tape.
Step 2: Apply a small bead of caulk to the seam using your caulk gun, and run a wet finger or sponge over it until smooth. (I always have a bowl of water and paper towels nearby when caulking!)
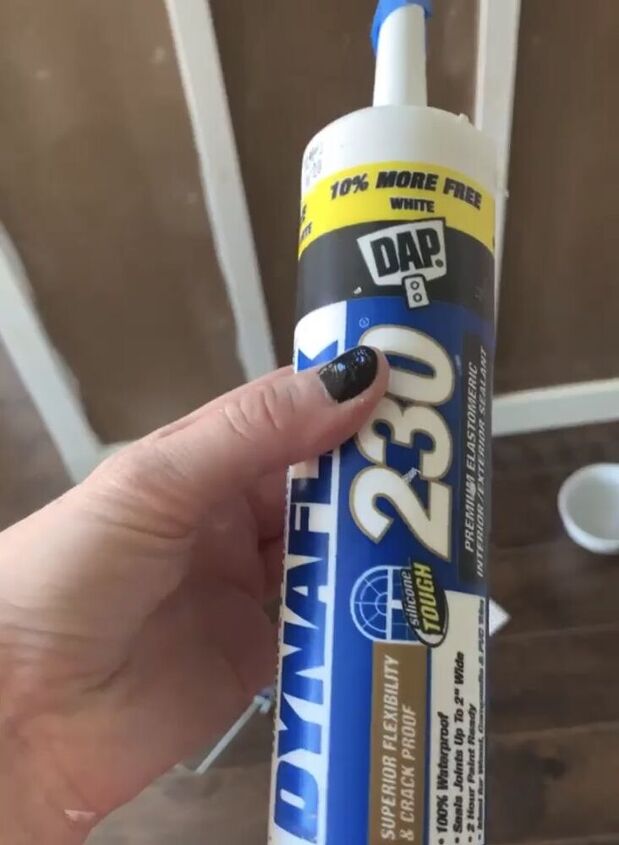
I always like to use quick setting caulk, but if you are newer to caulking, I’d recommend DAP Dynaflex 230, which sets in about 2 hours, giving you more time to work with it. Also be sure you are selecting the appropriate caulk for your project (caulking for wood is very different than caulking for tile!)
Step 3: Once you’ve smoothed out the caulk, carefully pull up your blue tape. If you’re using fast setting caulk that sets in 20-30 minutes, I recommend working in small sections and pulling up your tape every 5 minutes or so after the caulk application. If you are using the Dynaflex, you’ve got quite a bit more time, so you can work in larger sections with no problem!
Here you can see my blue tape was TOO close to the wood – under it even. Remember when I said don’t do that… this is why! It pulls up the nice crisp edge of the caulk. Thankfully, because there is no EXCESS caulking here, I was able to just run my finger over it again without an issue!
See! No problem at all – a second go with a damp finger fixed the problem!
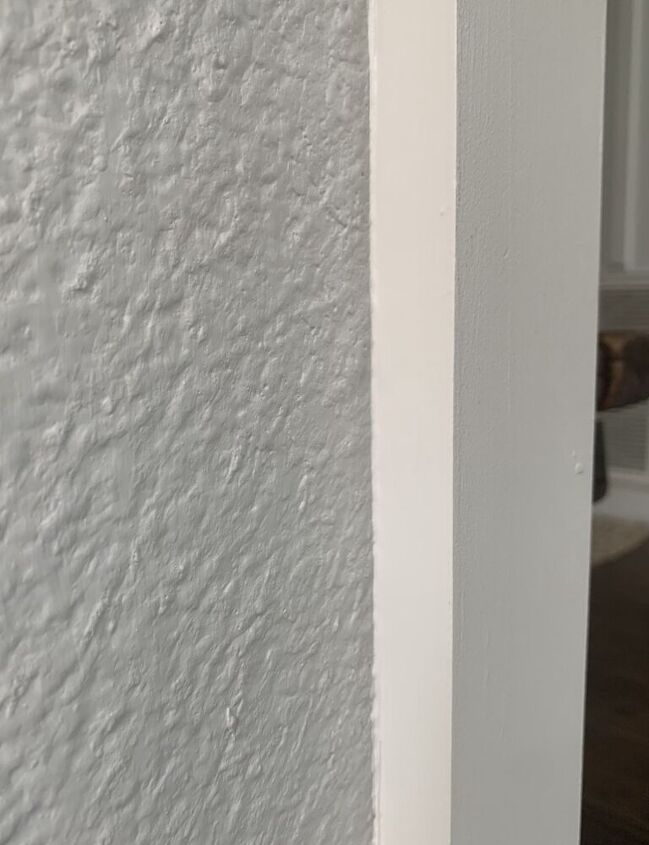
Step 4: Step back and admire your work! No touch up paint needed!
Allow to dry, and then paint your project as you wish!
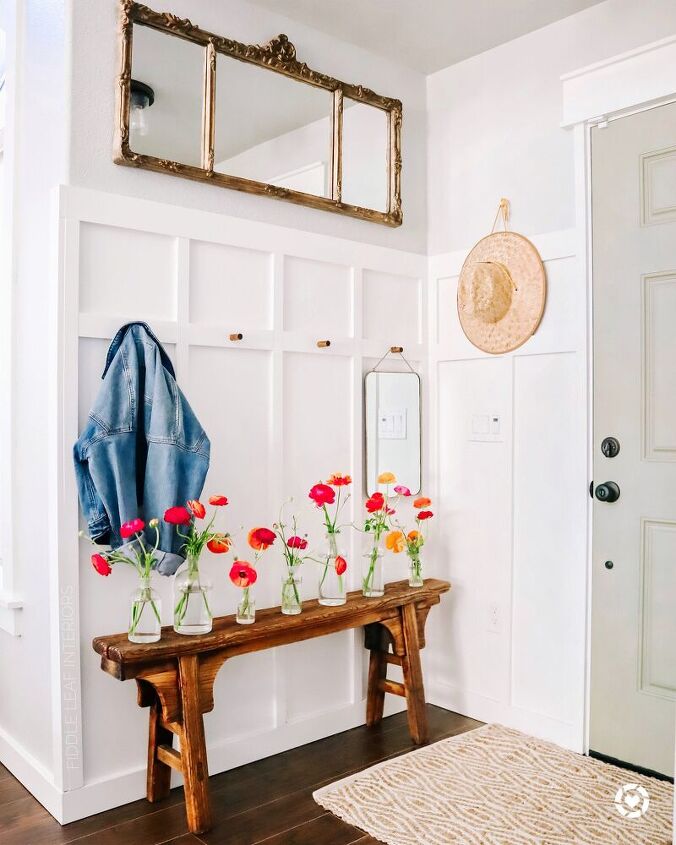
And here is the finished product! No open seams or gaps, and it looks like a professional could have done it for me! Exactly what I like to see!
Now that you know how to caulk like a pro, what are you waiting for?! Let me know in the comments below if you try this easy and effective trick!
And I hope I'll see you over on the blog soon!
Resources for this project:
See all materials


Comments
Join the conversation
-
Great tip for the DIY. Once someone has mastered caulking with tape they can try without tape. I have never used tape. Just too much time and trouble. The secret to a good bead of caulk is to cut the tube at an angle and only cut it at the smallest bead you want. If the bead is too small cut off a little more. That is why the tube tips are tapered. And of course, smooth out the bead with a wet finger.
-
Great tips!
I noticed the mirror and was reminded how they used to be angled downward so idk, so people could take a look at themselves, I’m not sure, lol.


Frequently asked questions
Have a question about this project?