


How To Create a Modern Accent Wall

This is the perfect project to shake off some DIY cobwebs OR ease your way into some high impact DIY that goes beyond paint. It’s easy and affordable, which means that it’s low stakes.
The materials are also easily available and you don’t need a ton of fancy tools to get started - in fact this is the perfect project to use miter shears so the only power tool I recommend is a pin nailer nail gun!
You can tweak the plans to use more or less molding to fit your budget and/or design aesthetic, because there aren’t a ton of rules. I recently discovered some PVC trim at the hardware store that’s light-weight, easy to work with, and pretty cost effective! The best part? You don’t have to carefully check each piece to see if it's square! Since it’s not wood, you just have to give it a quick once-over to ensure it’s not damaged, but every piece is straight AND splinter free!
Supplies Needed:
- PVC Lattice Trim
- Caulk
- Spackle
- Nails for the pin nail gun
- Paint
Tools I used:
- Miter saw or Miter shears
- Finish nailer
- Stud finder
- Measuring tape
- Speed square
- Dripless caulk gun
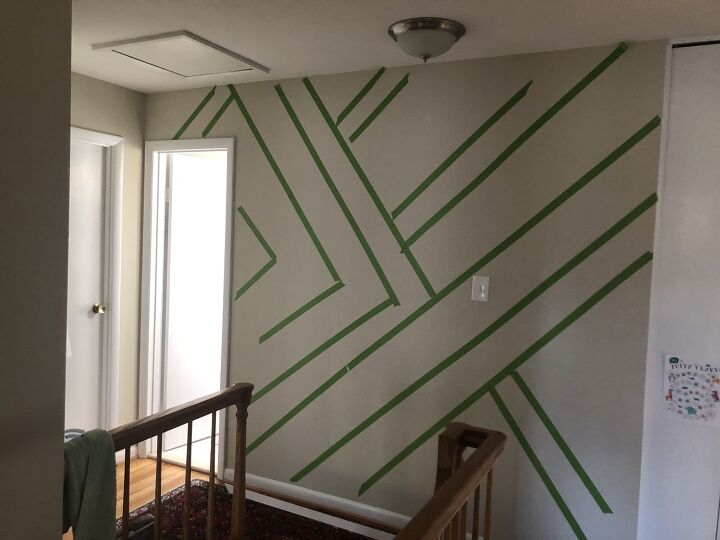
I taped out various patterns on the wall to get a feel for where I wanted to install the molding. In the end, I took all the tape off the wall, drew out a design on paper, and mostly just winged it.
After really struggling to figure out the angles, I found a post that said to make all cuts 45 degrees. As soon as I took that approach everything worked out. That way you’re only cutting the molding 45 degrees (where it meets an edge) or 90 degrees (where it meets another piece of molding).
I started with the longest piece of trim. Since I didn’t want to patch two pieces together, that determined how my pattern would come together. If you have a really large wall, I recommend adding a vertical piece to section off the wall into two areas.
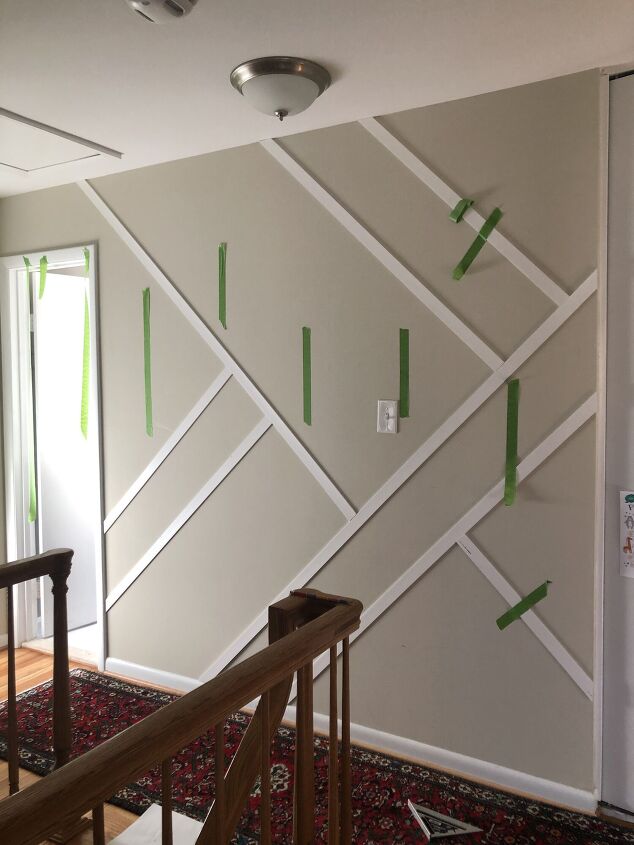
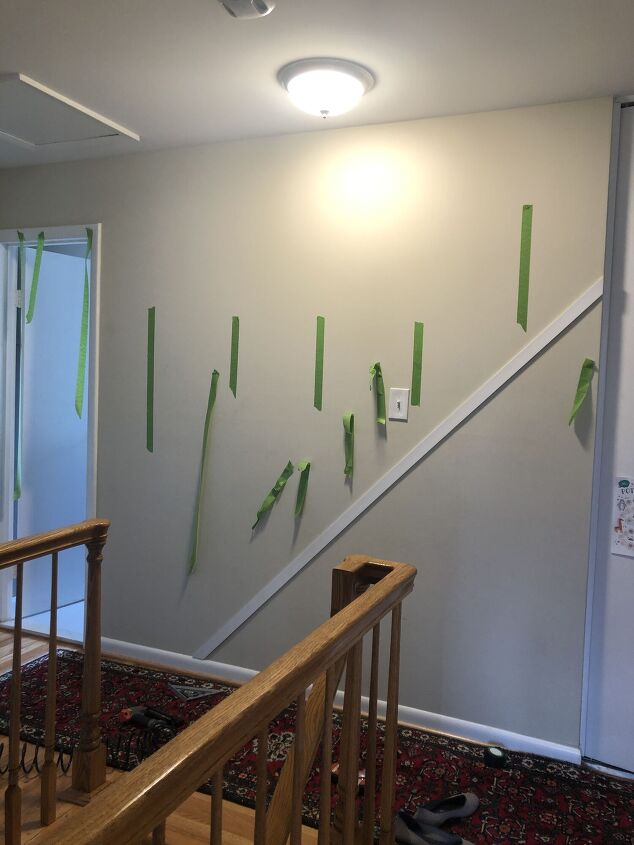
Beyond that, there really are no rules EXCEPT to make sure every corner is exactly 90 degrees. That way all of your parallel pieces of trim will ACTUALLY be parallel, and you won’t end up with janky angles! Beyond that, just keep adding trim pieces until your pattern is done. Because the PVC is so light, you can tape the trim up using painters tape so that you can step back see how it looks.
One important tip: DO NOT attempt to perfect the spacing between your parallel pieces. Just go with the flow and aim for imperfect spacing.
Once you have all the trim on the wall, it’s time to prep. Caulk along all the edges where the trim meets the wall. Then used wood putty or spackle to fill al the seems where trim meets trim and to cover the nail holes.
This part is important to ensure a professional looking result! It’s annoying and takes time, I know, but please don’t cut this corner!
Once the caulk and spackle is dry, sand down the spackle/wood filler and prime those spots (to prevent flashing). And no, your paint and primer in one isn’t good enough - slap some actual primer on the wall!
Once this part is done, tape off your wall/ceiling/wherever you don’t trust yourself to have a steady hand, and get to painting.
I use a short-angled brush to get a first coat on the trim and cut in along each piece of trim, as well as at each wall edge, then I used a 4” roller to fill in the spaces between the trim. When doing a second coat, I rolled the trim to ensure a smooth finish!
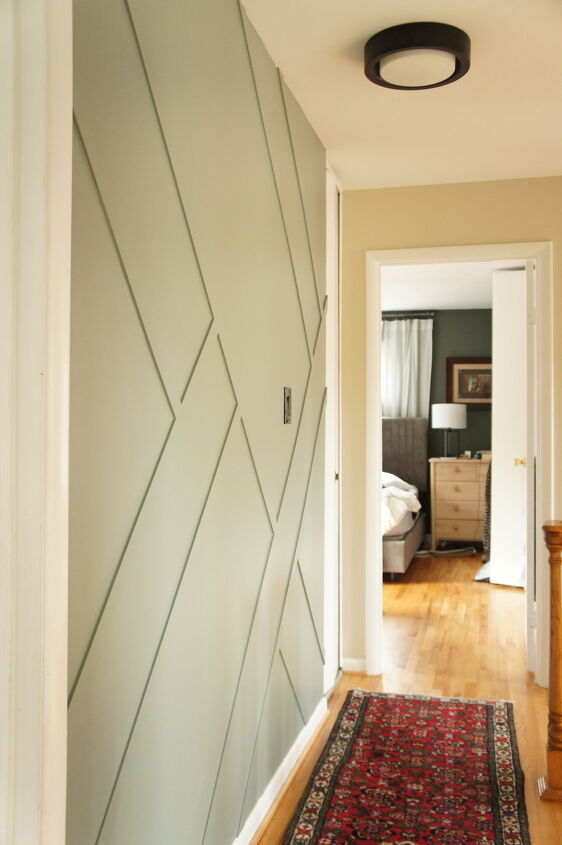
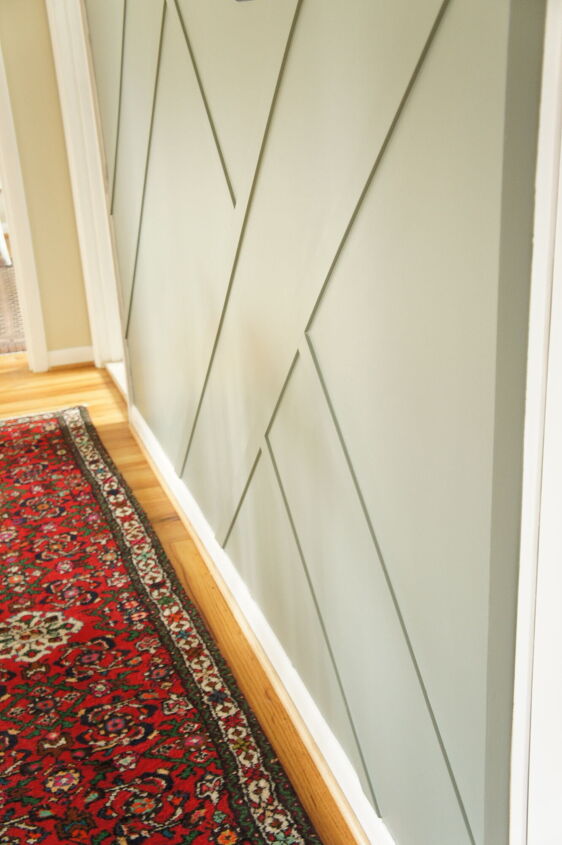
And here's the finished wall! What do you think? Would you do this in your house?
Resources for this project:
See all materials


Comments
Join the conversation
-
I love to see ideas done. Mine are still in my head from 30 years ago and no money. Glad to see that yours are getting done and it looks wonderful. Beautiful job, well done.
-
I really like your project… I’m doing my bath and bedroom, and wanted a similar wall as yours, but I also wanted a long picture rail above my bed to put assorted paintings and mirrors, then change them around as I wanted. So, I don’t think I can do both. So now I’m thinking maybe another wall, as in my long hallway, or somewhere else. Thanks for the great ideas!!


Frequently asked questions
Have a question about this project?
That really looks great! Could you add a photo straight on? Thanks.