


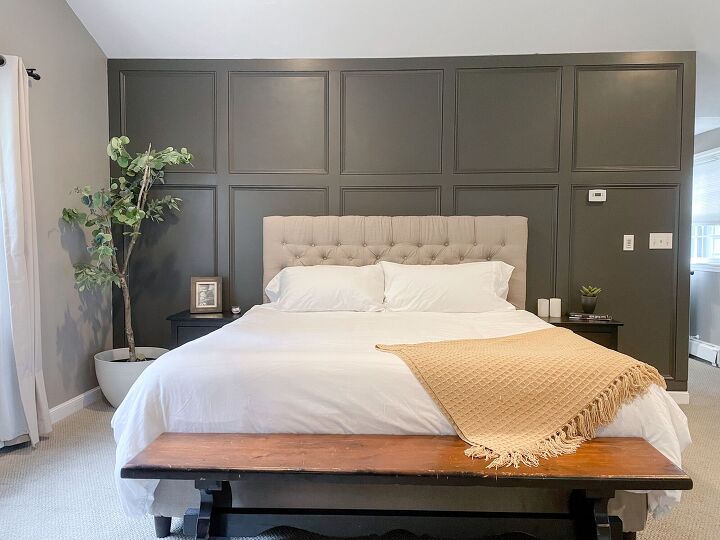
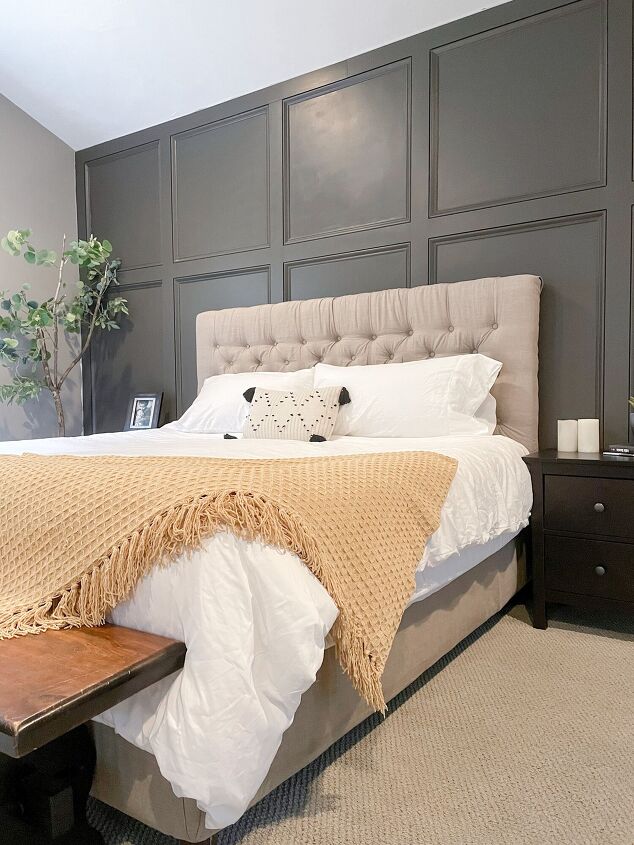
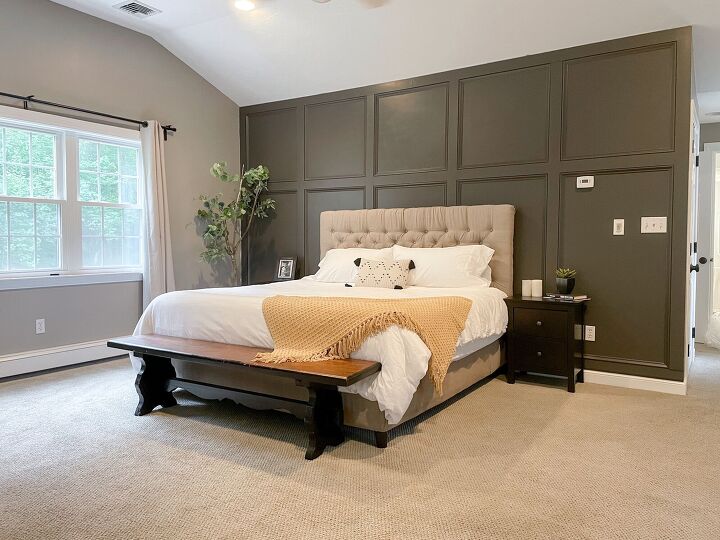
How to Create a Moody High End Feature Wall

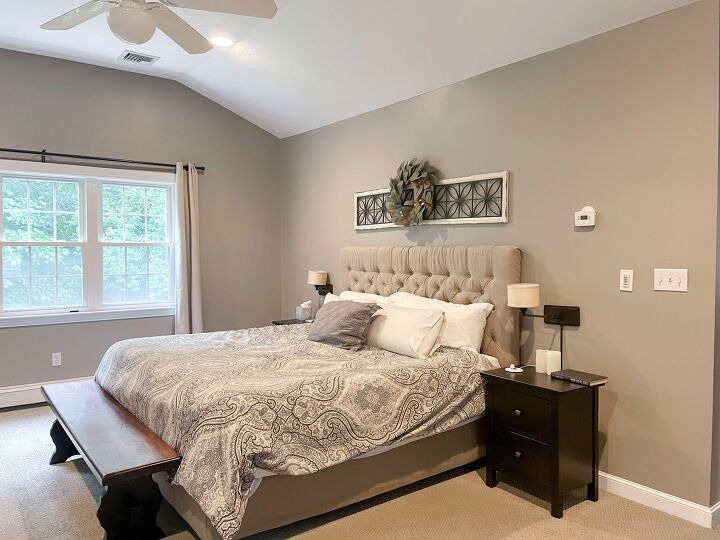
A well done feature wall can seriously elevate a space and turn it from blah to wow! Feature walls, especially those done with trim, can look intimidating. But they are surprisingly easy if you just follow a few steps and know a few tricks to simplify!
Disclaimer: This post was sponsored by 84 Lumber but all thoughts and opinions are my own.
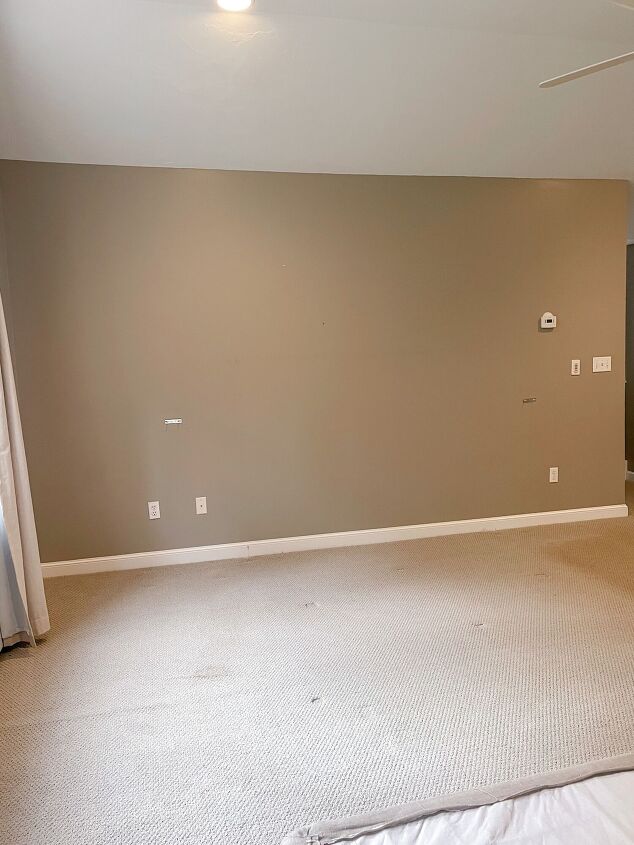
Prep the space
First remove everything off the wall including light switch and plug covers. Remove any furniture, pictures, nails, and fill nail holes. Then wipe down the wall for a clean starting surface.
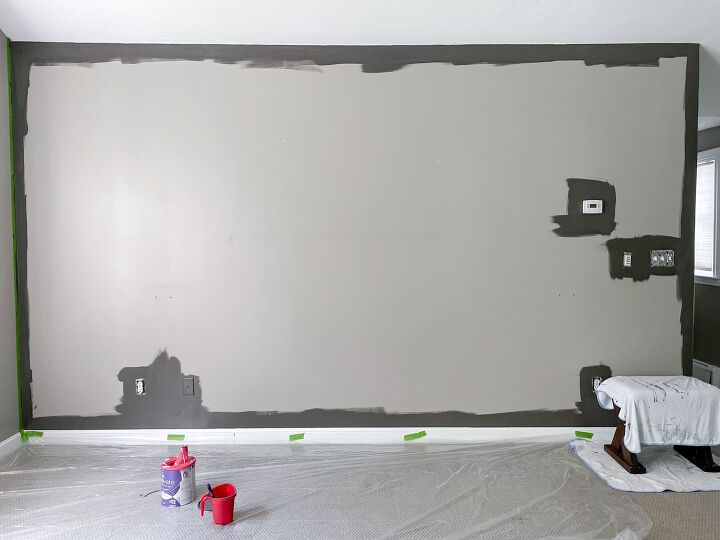
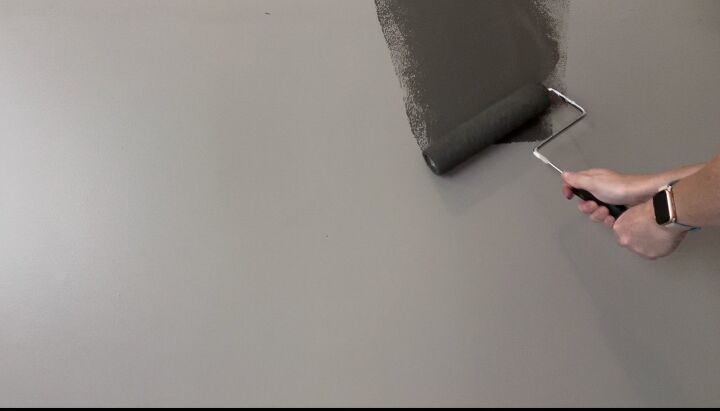
Paint
If you are planning to change your wall color, now is the time, before trim is added. Once the trim is added you can’t really use a roller to apply paint, so it is just a bit more tedious. Quick tip: Go slow and use an angled brush to cut in along the wall/ceiling line and above the baseboards. It takes a bit longer than regular painting but then you can avoid all the prep with painters tape which saves both time and money.
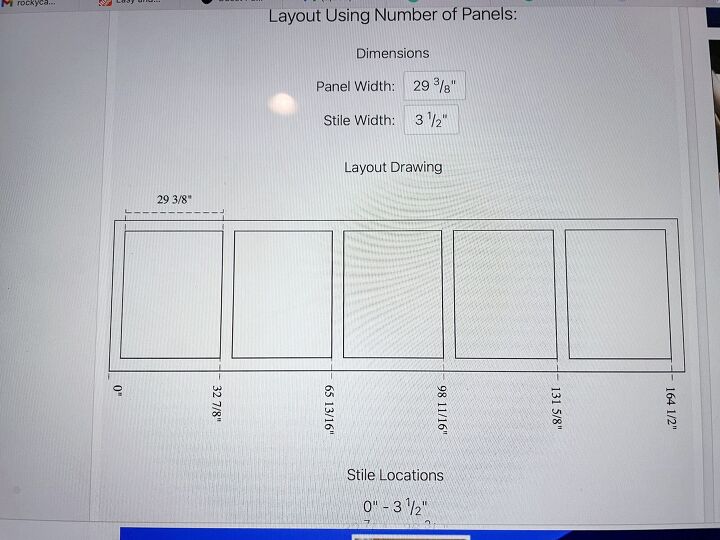
Decide your design and spacing
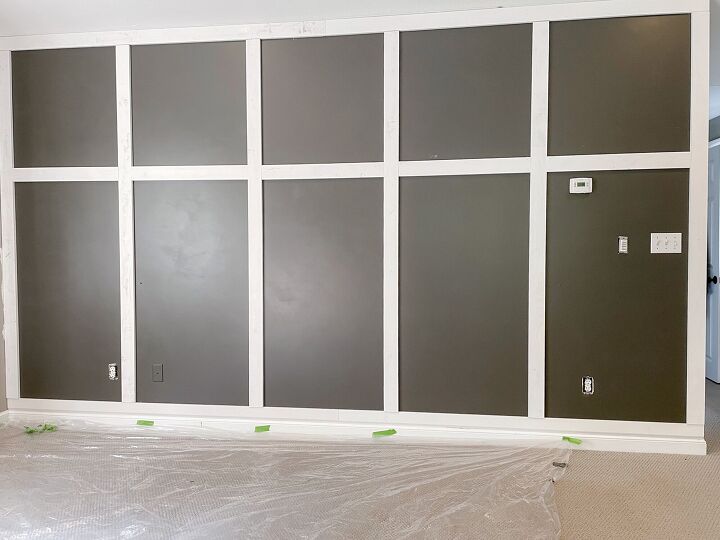
There are countless options when deciding how to layout your feature wall. I wanted something a bit more luxurious and traditional for my master bedroom space, so I chose a full wall wainscoting type design.
The free website inchcalculator.com can help you figure out your board spacing if you want it!
Add your trim boards
Now it is time to bring your design to life! I got all my trim boards from 84 Lumber. They are super high quality and the ones I got were pre-primed which saves a ton of time if your plan is to paint! My boards are all 1x4 dimension.
The best part of having 84 Lumber supply my wood for this project was that they delivered it to my front door (garage, really)! It was super easy and way better than going to pick up in person. That said, if you need to go in person, they also have a lot of locations to choose from so be sure to look them up!
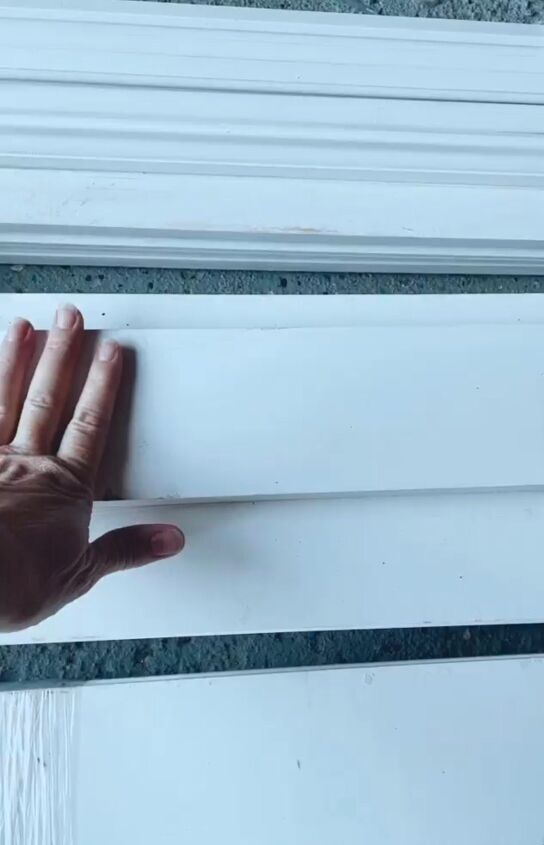
Quick tip: If your baseboard has a tapered top like mine, you have two options.
- Remove and replace all your baseboards with those that have a standard flat top
- Use another tapered baseboard, flip it upside down, and use that as your bottom trim piece.
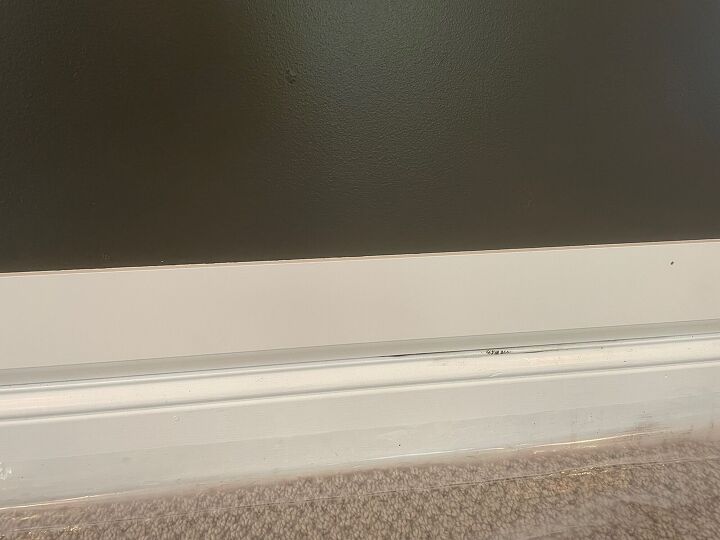
With this design, I recommend starting with the top and bottom horizontal boards.
Once the top (ceiling) and bottom (baseboard) trim boards are cut, it is time to hang them! Make sure they are level and nail into the wall. I don’t recommend using glue because that will tear up your drywall if you decide to remove the trim down the road.
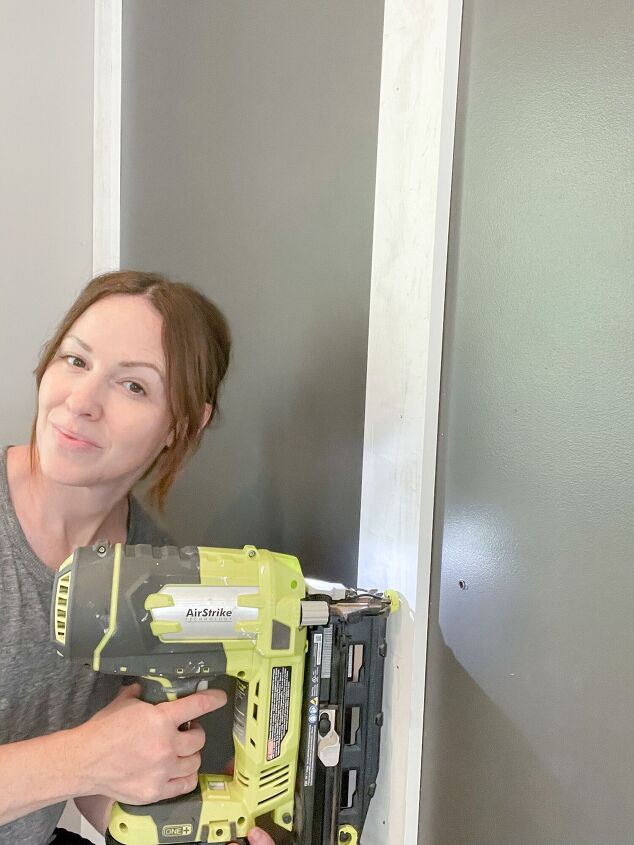
Now it is time to cut and hang your vertical boards.
Quick tip: make a spacer board the size of your wainscoting space between boards (see the board spacing from the calculator referenced in step 3). The spacer makes it super easy to get the exact same spacing between your trim boards every time, without having to continually check and measure.
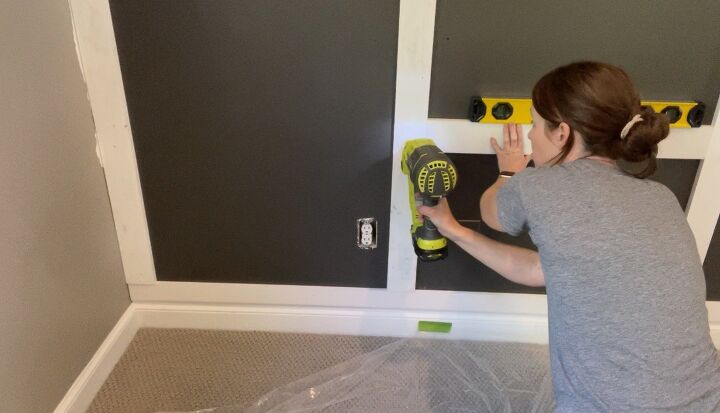
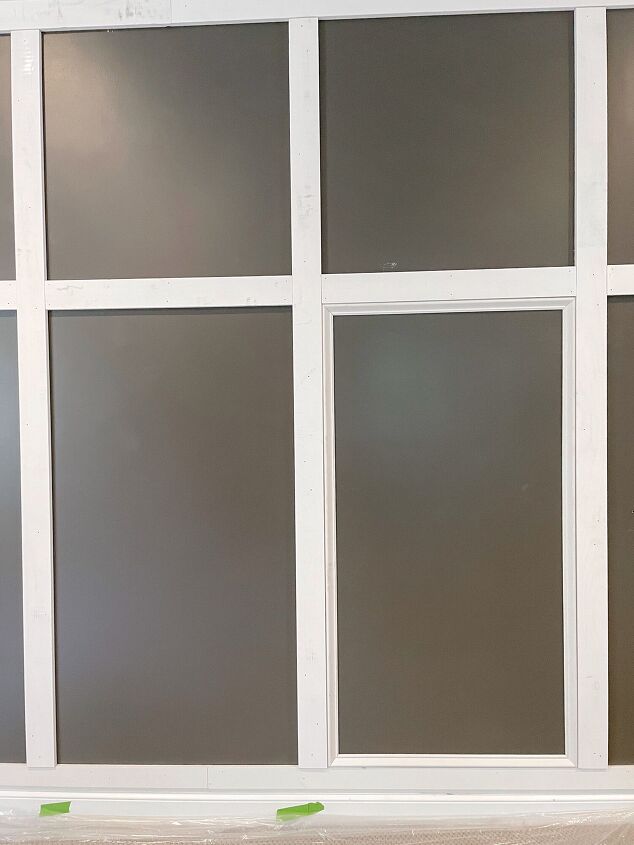
When the vertical boards are all up and spaced appropriately, you will begin adding your horizontal boards. These will actually be the same size as your spacer used above! So, if you’d like, you can use a trim board as a spacer and then as your template for the other horizontal boards. This design has one square at the top and one larger rectangle at the bottom. Again, you can use your spacer board from before to determine the spacing for the horizontal board. You will just nail in place the same as before.
Add Details
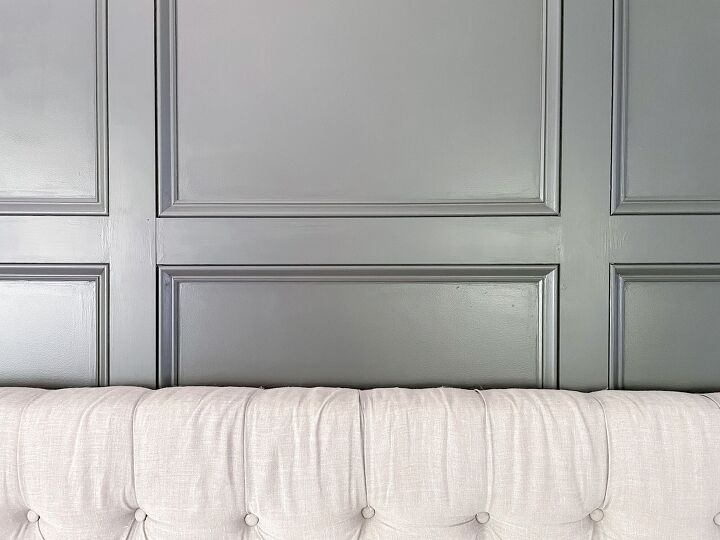
Ok, your wall is already gorgeous, but if you want to take it to another level consider adding some additional base cap trim inside your wainscoting panels. These will need to have mitered or angled edges so they will meet up in the corner of your piece. They do take a little practice but once you get the dimensions right it goes super quickly. And don’t worry if they are 100% perfect. Caulk can conceal any imperfections.
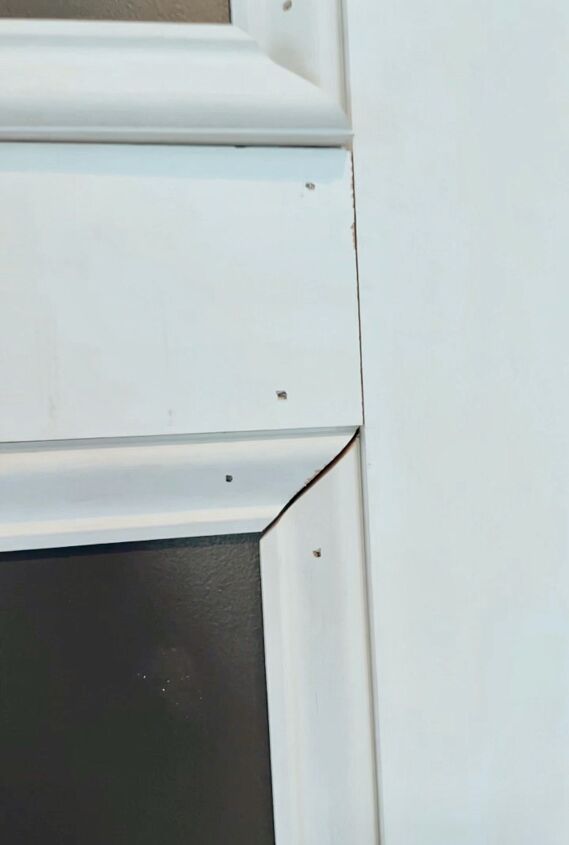
So, speaking of caulk, now it is time to caulk all of your mitered trim corners and all along the edges of where the trim meets the wall. This creates a nice clean look and eliminates any gaps. I like to add a thin line of caulk, smooth it with my finger, and go over it with a damp paper towel to remove any excess. Also be sure to fill all your nail holes with spackle and either wipe away excess with a damp cloth or sand it gently once it is dry for a smooth finish.
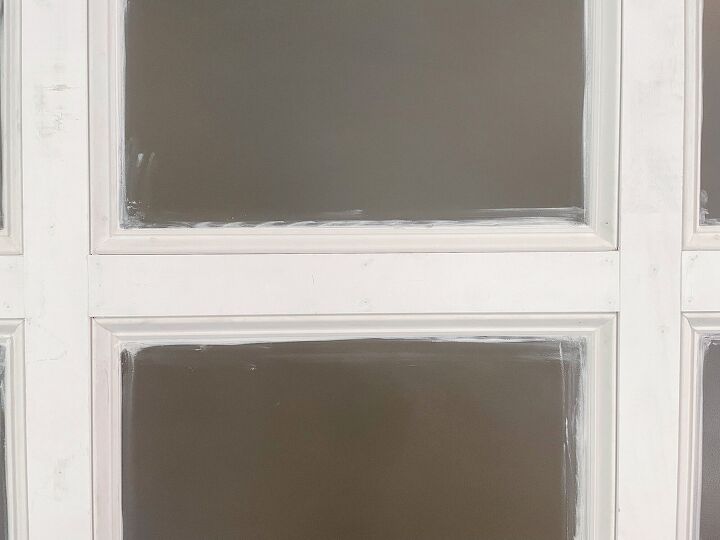
Lastly, it is time to paint all the trim! Using a paint brush, paint all of your added trim with two coats of paint matching your wall color. Now is a good time to do any additional touch ups to the wall if need be as well. Once the paint is dry, stand back and admire your feature wall because this one is GORGEOUS! You will not be disappointed in the work you put in for this incredible project.

Resources for this project:
See all materials


Comments
Join the conversation
-
Beautiful 💕
-
it read Bathroom not Bedroom … too dark
for me.


Frequently asked questions
Have a question about this project?
Would this work with navy blue semi gloss panels and white semi gloss trim.
Love this! Have you thought of painting the outlet and light switch covers to match the wall so they blend with the color and don't stand out? We did this when we painted our bedroom a deep color. We primed them with a spray primer, let dry for a day them rolled them with the wall color which we let dry for a day before reinstalling. It's been 8 years and they still look great.
I LOVE this