


How to Make a Charming and Affordable Yarn Boho Wall Hanging
One of the things I enjoy most is creating affordable fun home décor and this charming DIY Yarn Wall Hanging fits that criteria perfectly.
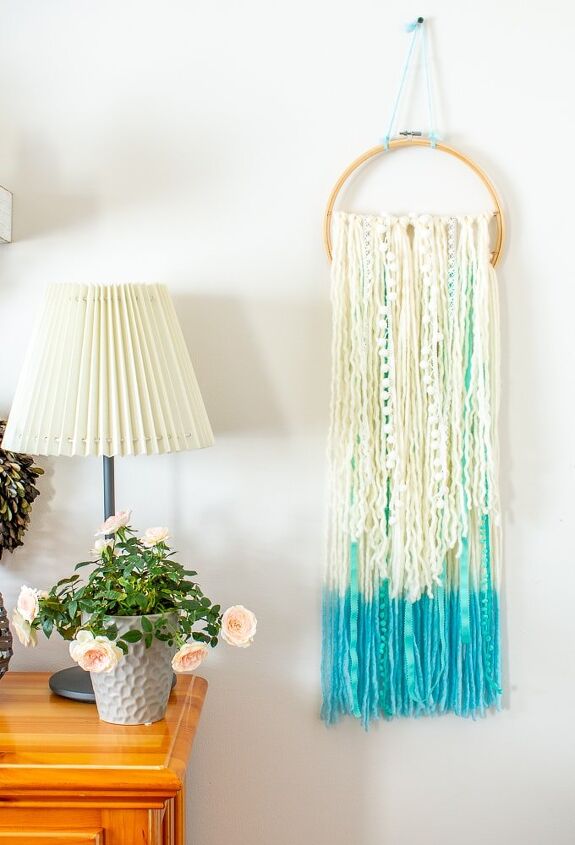
DIY yarn wall art is a great way to be thrifty and on-trend at the same time with your wall and home décor.
Hometalk Recommends!
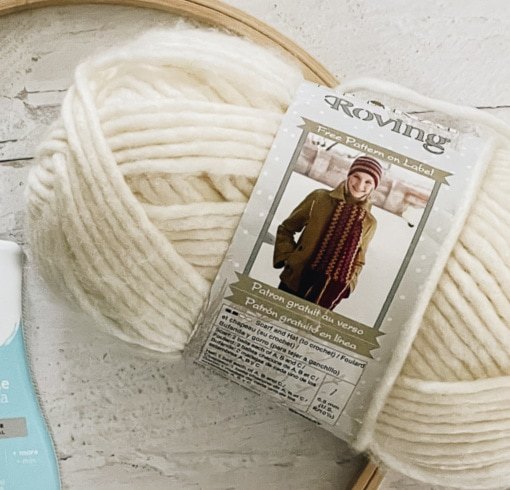
You only need three supplies to make this and a good pair of sharp scissors.
- Roving Yarn
- Embroidery Hoop
- Rit Dye
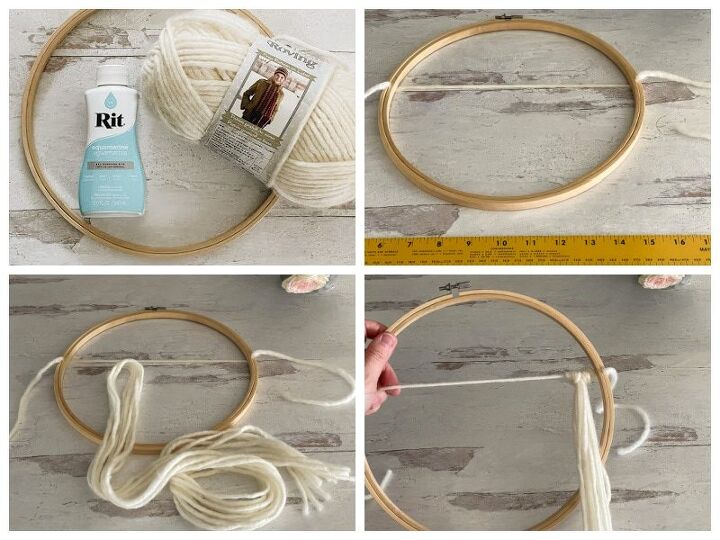
Gather your supplies.
Start by separating the embroidery hoop inside from the outside and lay a length of wool across the middle of the larger ring. Allow a few inches to hang over for adjusting.
*Please note: In the photos, I used a piece of wool yarn but found that it wasn’t strong enough to hold and adjust the bundles so I switched to natural jute twine for the final wall hanging.
Once the twine (or yarn) is in place, push the smaller ring into place inside the larger one so that that it is clamped tightly between the rings. You’ll be adjusting and moving the twine throughout this process so don’t worry if it’s not perfect at this point.
Now, cut the yarn strands for the bundles.
The bottom layer bundle pieces of yarn are 72″ long, with 5 pieces of yarn in each bundle.
Bottom Bundle: 5 pieces x 7 bundles = 35 strands, 72″ each strand.
The top layer pieces are 48″ long, with 4 pieces of yarn in each bundle.
Top Bundle: 4 pieces x 8 bundles = 32 strands, 48″ each strand.
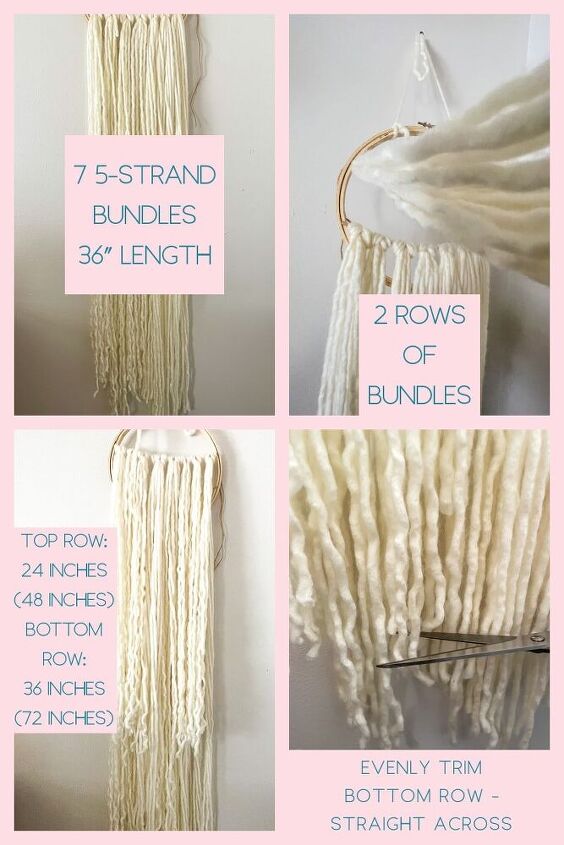
Now, attach each bundle to the tight string section. You’ll be using a larks head knot for this step. Do this by folding each bundle in half (72″ is now 36″ and 48″ is now 24″) and pulling the ends through the loop that’s created in the middle.
Continue adding bundles until the row is full.
Once the bottom row is complete, trim it evenly across with sharp scissors.
Repeat these same steps to create the shorter row of bundles for the top layer.
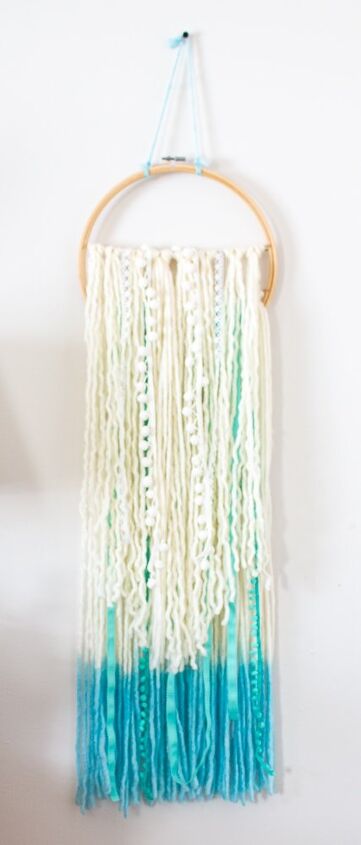
Next, it’s time to dye the bottom few inches of the lower row of wool bundles.
Follow the directions that are on the Rit dye bottle carefully.
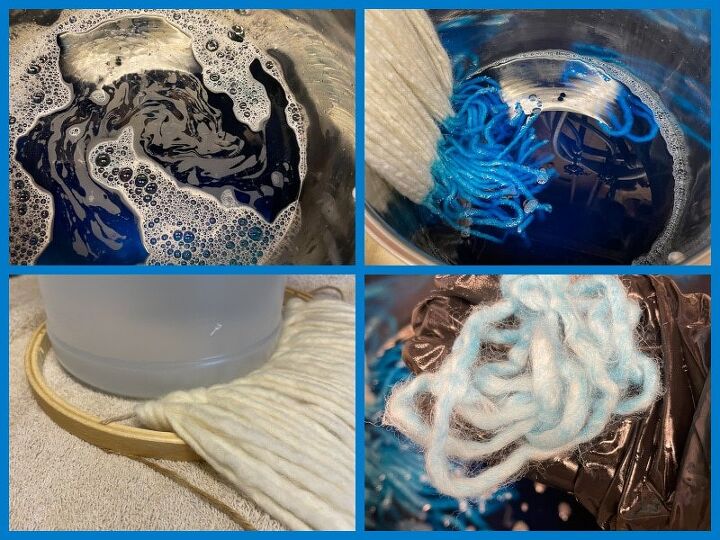
Once you have achieved the color you desire stop the dyeing process following the directions on the bottle.
Allow the dyed layer to dry before completing the assembly.
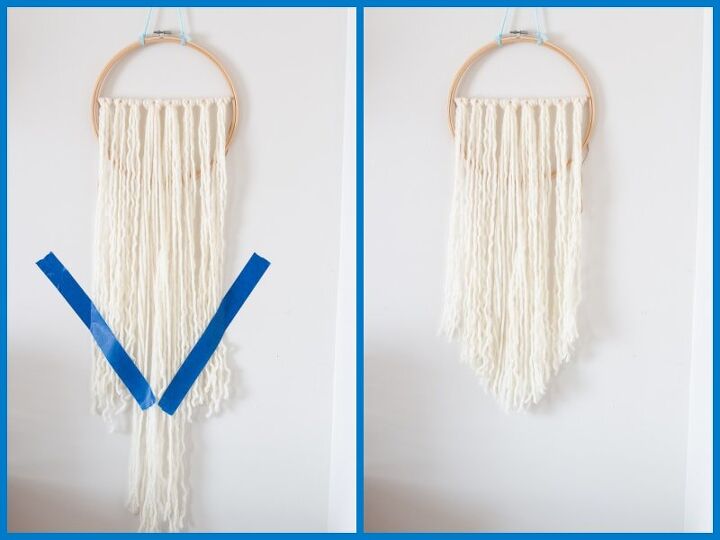
Before adding the bottom layer back to the wall hanging, cut the top layer in a V-shape.
I like to use painter’s tape to hold the shape and then cut along the outer portion of the tape.
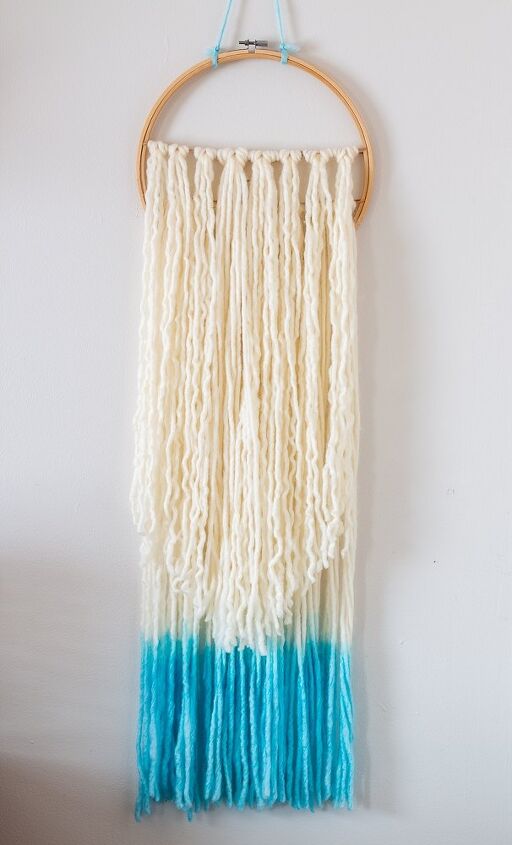
The above is the wall hanging assembled and plain….. you can check out my blog post for the details on the extra froufrou that was added to get the final look of this wall hanging. https://thehowtohome.com/how-to-make-a-charming-and-affordable-yarn-boho-wall-hanging/


Comments
Join the conversation
-
Darling.
-
I rarely like this look but the color elevates this immensely into a work of art. Thanks for sharing


Frequently asked questions
Have a question about this project?