


How to Make a Geometric Wood Mosaic
Learn how to make your own geometric and floral wood mosaic wall art in this simple tutorial. It's a great beginner's woodworking project. Plus you can download the detailed plans at the Girls Build Club blog (click here), which includes the complete list of paint colors and cut dimensions.
Let's get started!
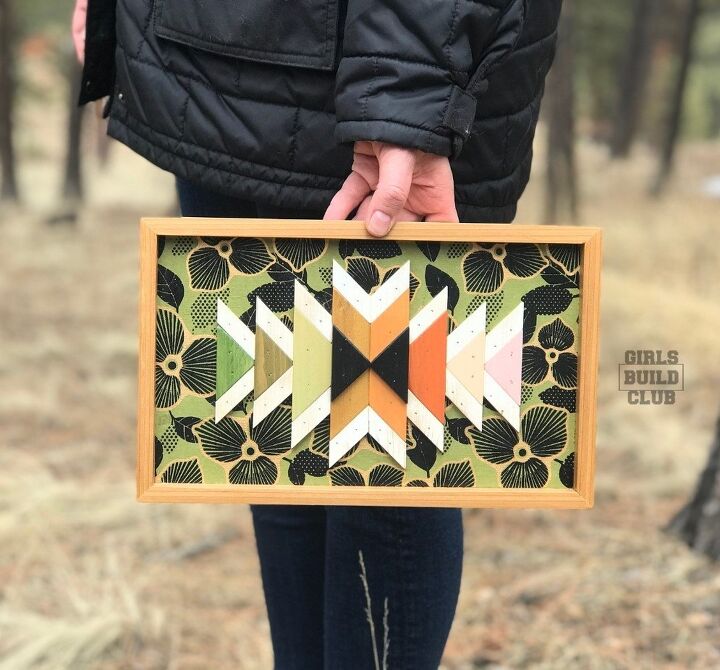
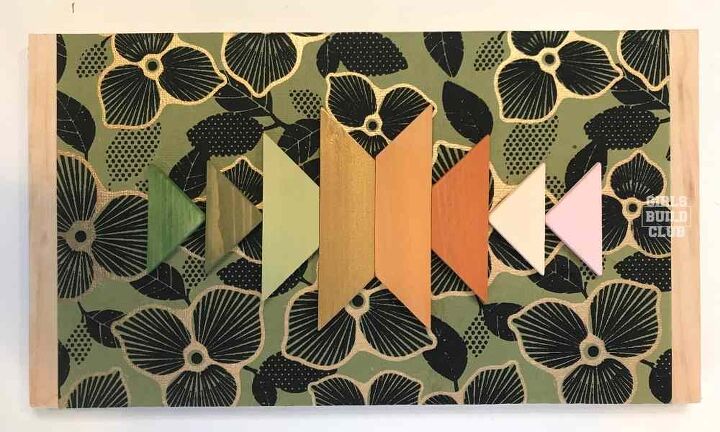
^^ This is what we'll be making! ^^
Quick Overview of this DIY Geometric Wood Mosaic:
- Cost: under $25
- Difficulty: medium
- Time: 2 hours
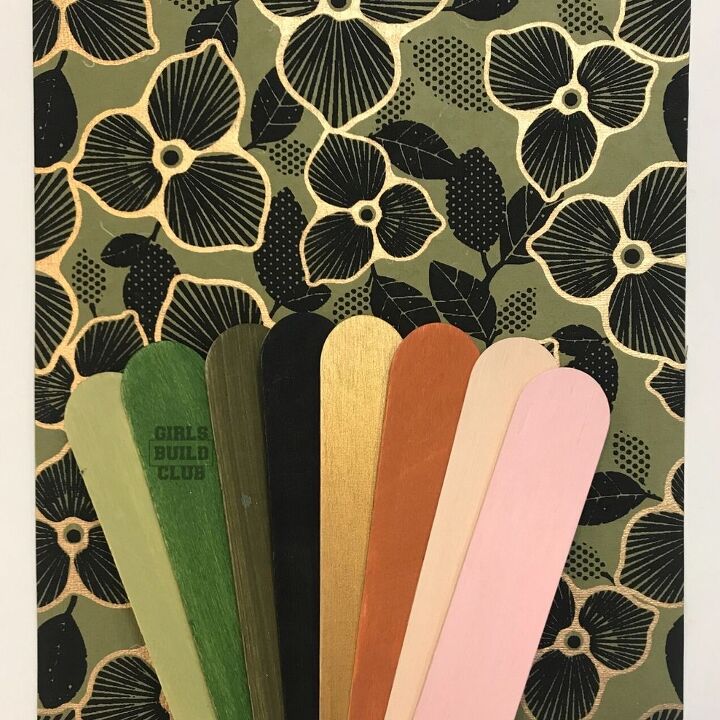
This is the color scheme I want to go with for my mosaic. It reminds me of my (future) secret garden and gives me all the feels. :)
I got the paper at the University of Oregon bookstore a couple years ago. I was never able to find it online anywhere.
And the paint is nothing special - just acrylic craft paint from Hobby Lobby. I usually don't spend more than $1.50 each bottle.
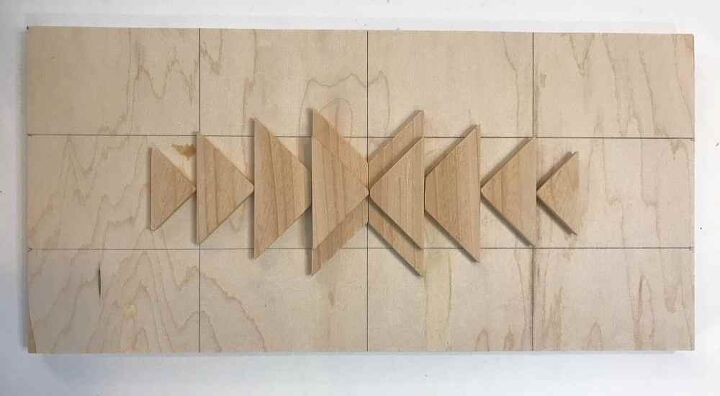
First cut a piece of plywood for your backer board. This one is about 11in x 6.5in. Then cut all your little triangles and trapezoids.
I use 1.5" wide lath wood (it's used for making lattice) from the lumber store.
All the cuts are 45 degree angles. I give you the complete cut list and build plans in the free download.
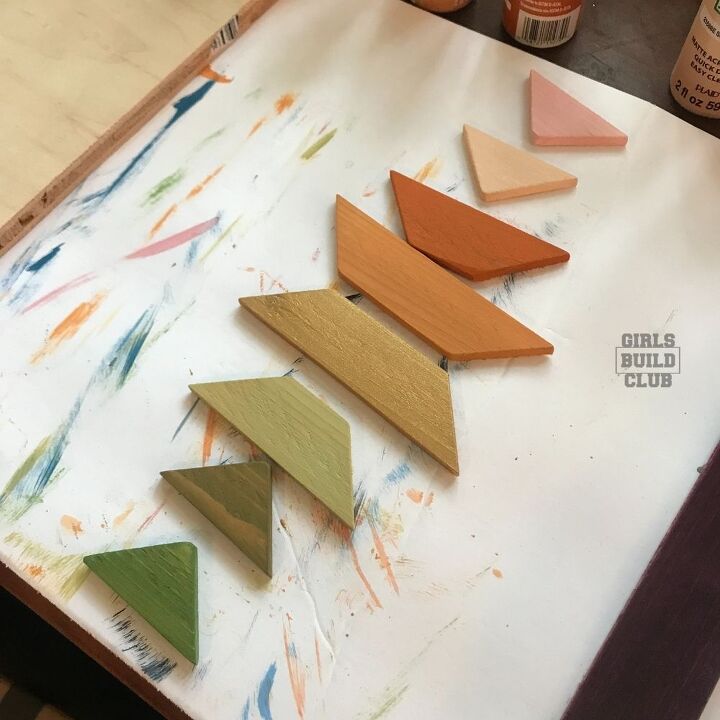
Now paint your little pieces. Not pictured here are the white outer pieces and the black triangles. Also, I used mod podge to put the decorative paper on my plywood backer board.
Lay out your pieces and make sure you like the color scheme and arrangement.
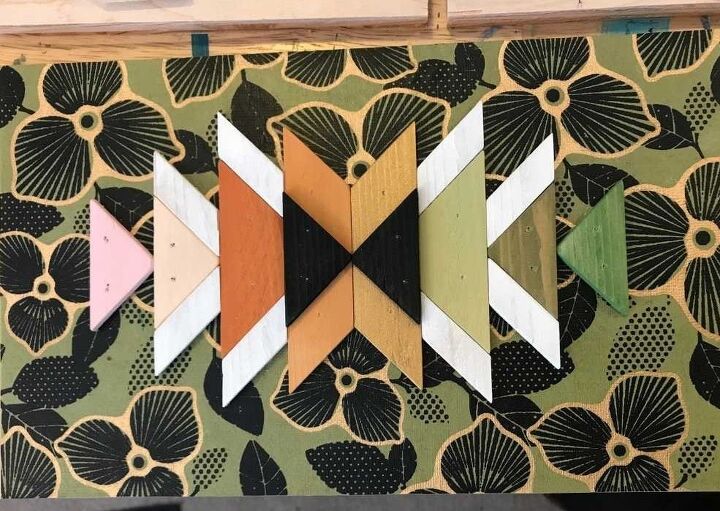
Start gluing and nailing down each piece.
The black triangles actually sit on top of the pieces below them.
Place white pieces on the outer edges all around.
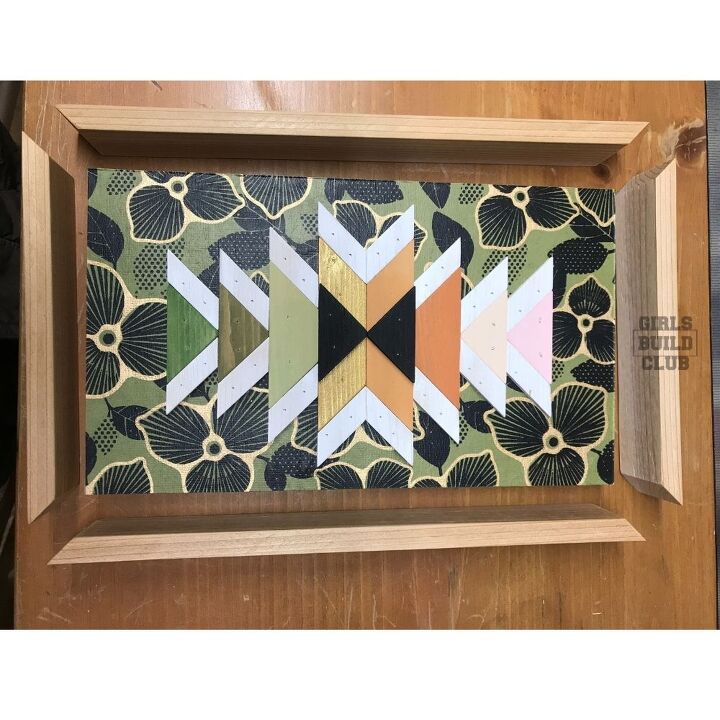
Cut your frame pieces to fit the backer board. Line them up, glue them, tape them in place, and then nail them on.
Framing can be a pain and is probably the part that takes the most attention. You have to be very precise.
You can make a simpler frame by avoiding the mitered corners and just going for straight cuts.
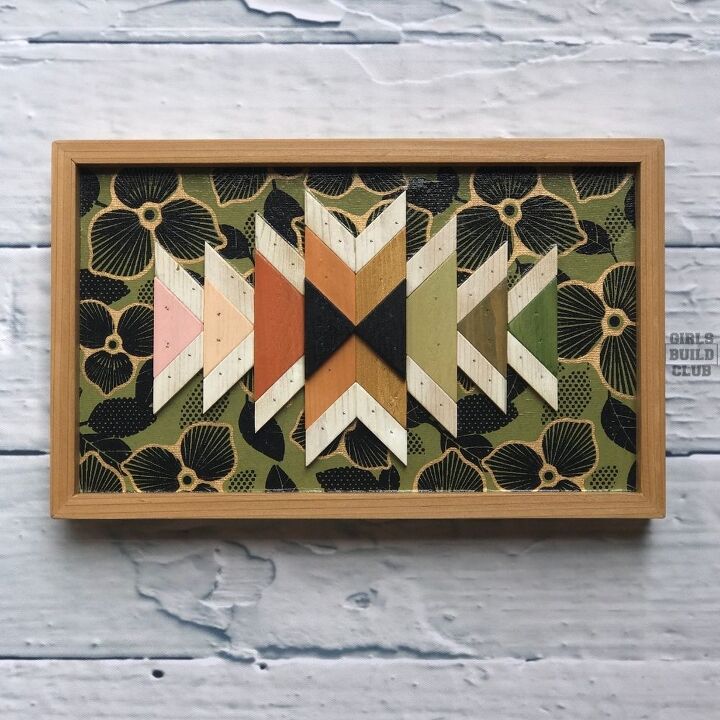
Once you're done, you can clear coat it with Minwax Polycrylic. I love using the Satin finish.
Add some picture hanging hardware to the back, and you're done!
Did you like this project? Let me know in the comments how I can make it better!
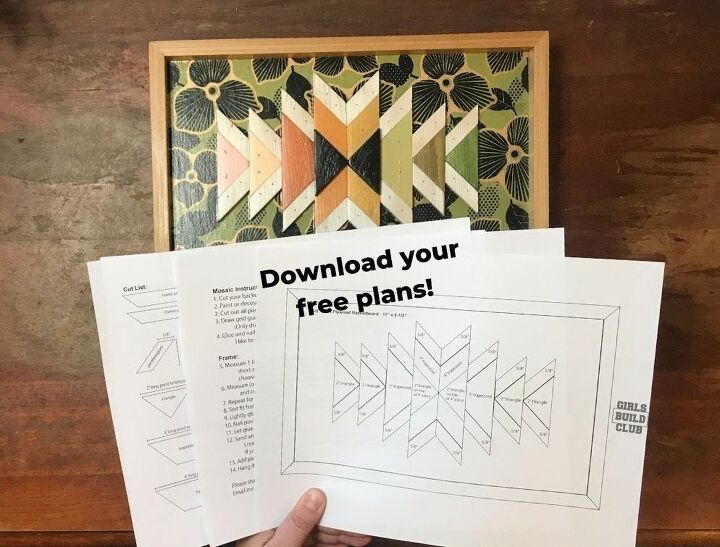
You can download the free plans here.
You'll get a blank mosaic coloring sheet so you can sketch out your own color scheme, a paint color shopping list, supply list, instructions, FAQ, cut list, and it's free!
It makes your life easier. Grab it for free in the link above! 
Please let me know if you have any questions in the comments.
Thanks for stopping by!
~Liesell at Girls Build Club.


Frequently asked questions
Have a question about this project?