


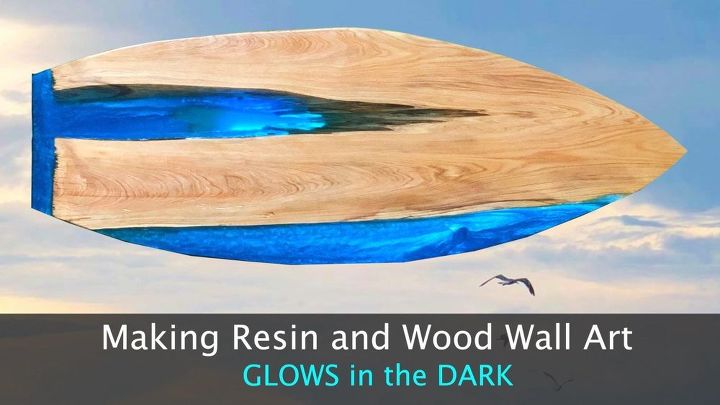
How to Make a Resin and Wood Surfboard GLOW Table (or Wall Art)
In this HomeTalk Post, I show you how to make resin and wood wall art that glows in the dark. This surfboard wall art can also be used as a resin and wood table.
Making Resin and Wood Wall Art
First, I obtained this piece of Cypress wood from a local cypress sawmill in Louisiana.
This piece of cypress was in the scrap wood pile, so I grabbed it on my way out after I received permission from the owner. Ultimately, this piece of cypress wood was located at the top of the trunk just before the tree split into 2 main branches. In turn, the wood sort of looked similar to a pair of pants. Regardless, I liked it and knew I could make something unique with it.
This piece of cypress sat around my shop for months until I finally decided to run it through my planer to get a better view of the grain. The grain of this cypress wood is simply beautiful, so I decided to start my project the following week.
As you know if you follow my projects, my family and I love anything that has to do with the ocean. In turn, I decided to make a resin and wood surfboard that can be wall art or a small table. So, now that you know some background on this project it is time to walk you through the steps on how to make resin and wood wall art that glows.
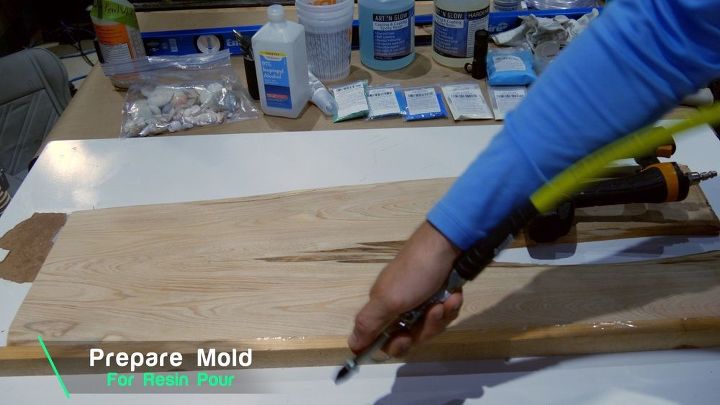
Prepare Resin Mold
I prepared the resin mold by using the same piece of 1/8″ melamine I used on my Sand Dollar River Glow Table.
First, I used my air compressor to remove loose debris.
Next, I applied furniture wax to the bottom of the table before laying the cypress wood on top.
Then, I used my brad nailer with 1.5″ brad nails to secure scrap 1x2s to the back and 2 sides of the wood. Also, I covered the scrap pieces of wood with packing tape covered with furniture wax to prevent sticking.
Next, I clamped a scrap piece of 2×4 on top of the table to hold it down.
Then, I used a scrap 2×4 on the opposite. This 2×4 was severely warped, which was fine since it resembled the shape of a surfboard side.
While the boards were secured with clamps, I sealed the wood on the inside and outside of the table with silicone caulk.
Resin Pours 1 through 4
I wanted the void in the middle of the table to be transparent blue and the side of the table to be opaque blue.
Essentially, the transparent blue resin part of the resin and wood wall art would be shallow water and the opaque blue would represent deeper water. First, I mixed 1 large batch of epoxy resin and split them equally in 2 different containers. Next, I put one drop of transparent blue dye in one container and sky blue pearl pigment powder in the other container.
Then, I added sky blue pearl pigment powder and neutral sky blue glow powder to the second container.
I mixed the pigment and glow powder for roughly 3 minutes.
Quick Tip
As a quick tip, always use the inside of the measuring cup when pouring resin as opposed to outside. By using the inside, you will be much more accurate.
Also, I use a sequence when mixing resin to make certain it is mixed correctly. I explain my method in the video at the top of this page.
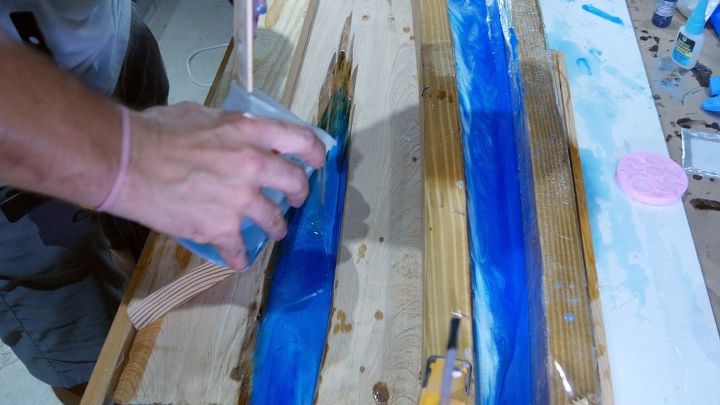
Blending Resin
First, I poured the transparent blue resin within the void. Once the transparent blue resin reached the end of wood and resin surfboard, I poured the opaque blue.
Next, I covered the section on side of the wood and resin art with the opaque blue resin. The depth of the resin pour ended up being about 3/8″.
Then, I used my heat gun to remove bubbles and further blend the resin.
Second Resin Pour
First, I mixed a large batch of resin the following day and split the resin into 3 different containers.
The first container contained transparent blue dye, the second contained sky blue pearl pigment, and the third contained sapphire blue pigment. Additionally, I added fluorescent blue glow powder to the second and third containers.
Next, I poured these in a methodical way to facilitate proper blending and color patterns.
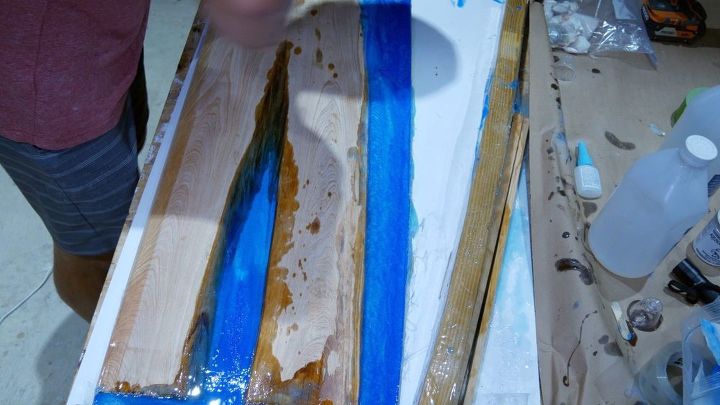
Third Resin Pour
First, I mixed pearl white pigment with a small batch of resin immediately after the second resin pour.
Next, I drizzled this resin in front of the sapphire blue resin on side of the wood and resin surfboard. Essentially, the purpose of this white is to represent wave crests and crashing waves.
Then, I blended the resin together with my heat gun until the pearl white pigment looked cool to me.
Fourth Resin Pour
First, I mixed a medium sized batch of resin with transparent blue dye immediately following the third resin pour.
Essentially, I needed more transparent blue dye to pour in the void to push the opaque resin back out to sea. The darker blue was creeping into the transparent dye too much. Additionally, I needed about 1/8″ more to complete the resin pour and move to the next step.
Next, I used my heat gun to blend the resin and remove bubbles. I let the resin cure for 24 hours.
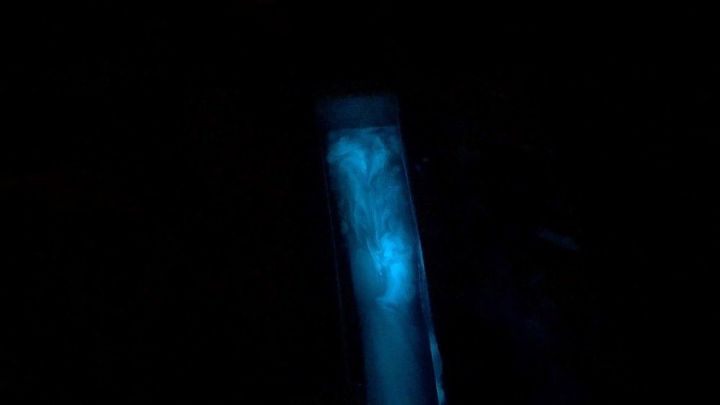
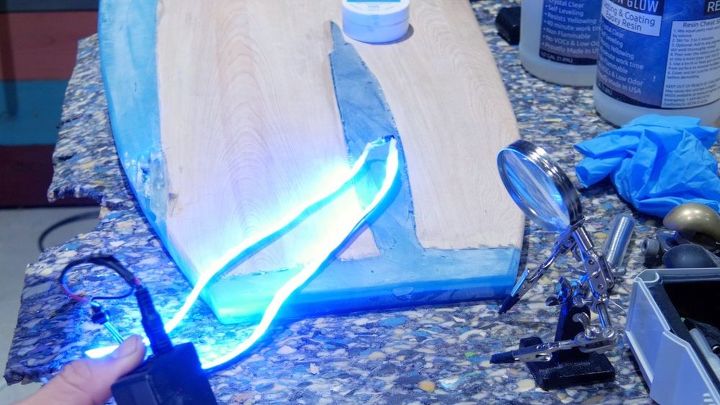
Resin Glow Powder Black Light Test
While the resin was curing, I tested the glow powder with a black light. The black light quickly charges the glow powder and it is a great way to test the glow powder.
First, I turned off the lights and held the black light on the glow powder for a few seconds. The longer the black light shines on the glow powder, the brighter the resin glows.
Ultimately, I find shining the black light for 3 to 5 seconds provides an accurate representation of how bright the resin will glow.
Remove Mold
Two days after the fourth resin pour, I removed the resin mold with relative ease.
First, I used a rubber mallet to tap on the sides until the wood and resin wall art releases.
Next, I lifted the wood and resin surfboard from the melamine easily.
Rough Sanding & Draw Surfboard Template
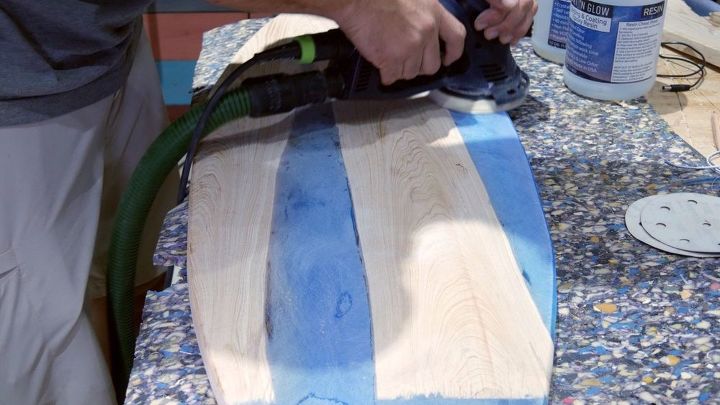
After I removed the resin and wood wall art from the mold, I used my festool RO125 sander with 40 grit sandpaper to rough sand the entire piece.
Ultimately, the purpose of this step is to get the resin and wood surfboard as flat as possible by removing the high spots and rough areas.
I realize the festool sanders are more expensive than most sanders; however, this is when they are worth every penny. Additionally, the dust collection on this sanders catch the majority of resin and wood dust particles.
In order to accomplish this step without it, I would need an orbital sander, belt sander, and twice the time.
Surfboard Template
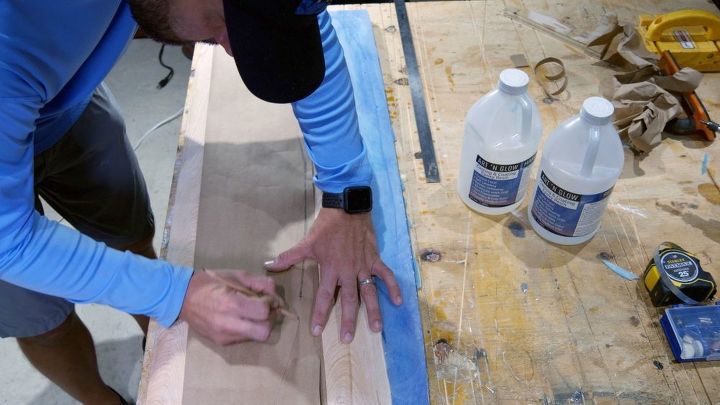
First, I used Kraft paper and covered one side of the board.
Next, I flipped the board over and cut out the Kraft paper the exact size of the board. Or, as close as possible to exact.
Then, I flipped the resin and wood surfboard over again. I folded the Kraft paper in half, sketched a half moon, and cut it out with a pair of scissors making sure to stay just outside the lines.
Next, I used painters tape to tape the wood and resin surfboard template to the board.
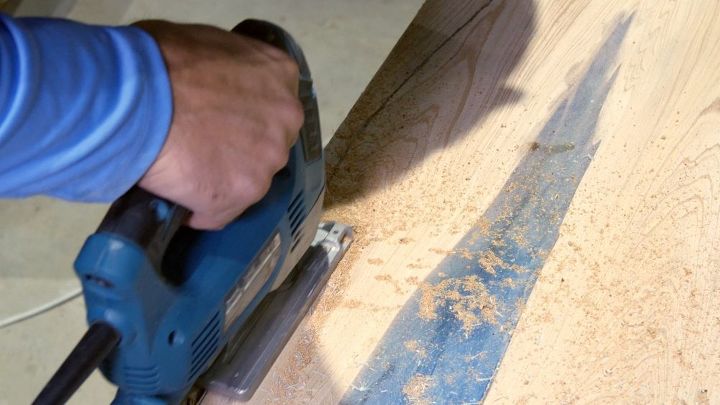
Cut Out Surfboard Template
Then, I traced it with a pencil and used my jigsaw to cut it out just outside the line.
Finally, I used my rotary sander with 40 grit sandpaper to sand up to the pencil line.
NOTE: This step is not necessary.
Shape Surfboard
After the rough sanding was complete, I used my trim router with a 1/2″ roundover bit to roundover the top and bottom.
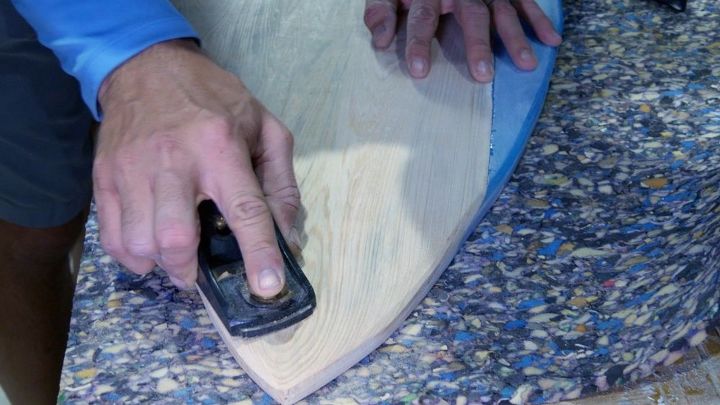
To shape the resin and wood wall art to look like a real surfboard, I used my sander with 40 grit sandpaper along with my block plane.
First, I flipped the surfboard around (top facing down) and I removed the material with my 40 grit sandpaper. I started at the tip and worked by way back to create the upward angle.
Next, I used my block plane to smooth out any indentions from the sander. 40 grit sandpaper is a very course grit and removes material very quickly. Consequently, it causes indentations on the board.
NOTE: This step is not required if you don't want LED lights OR if you don't mind a power cord wire hanging from the wall art or table when the LED lights are lit.
Solder LED Lights and Rechargeable Battery & Make compartment
Even though this surfboard will glow without LED lights, I decided to add them to the bottom in case the resin and wood wall art is placed in an area with low light.
Furthermore, the resin and wood surfboard is meant to be wall art. Therefore, I used a rechargeable battery with an on/off switch to prevent the need for a power cord or wall outlet behind it.
First, I soldered 2 small LED light strips together. Soldering is a great skill to learn as it can be used in many different applications. Checkout this post for more detail on how to solder LED light strips.
Next, I used my heat gun to heat the shrink wrap in order to protect the solder.
Then, I soldered a male plug to one end of one LED light strip. This male connector will connect to the battery to power the lights.
Finally, I connected the LED light strips to the rechargeable battery to make sure they work. And, they did. 🙂
The battery is about 1″ thick, which would create a space between the wall and the resin and wood wall art.
So, I decided to use my router with a straight bit and create a small compartment in the back of the surfboard. Also, I made the compartment to fit the battery charger both horizontally and vertically.
First, I drew the outline. Next, I used my dremel tool to create a pathway to start my router.
I removed 1/8 of material at a time until the I reached 3/4″, which allowed the battery to slightly protrude to access the switch. This allows access to the on/off switch without needing to take the wall art from the wall.
Then, I used my chisel to clean up the edges.
Sanding
Now, to the fun part of the resin and wood wall art project. I’m kidding, it is my least favorite part of any project. However, it is very important.
First, I used 80 grit sandpaper to sand the top and bottom with my festool sander.
Next, I worked my way through the grit sequence of 80, 120, and 220.
Then, I wiped the surface with a damp rag to raise the grain and sanded with 320 grit sandpaper.
Oil and Urethane Finish
After sanding, I proceeded to applying a finish to the resin and wood wall art.
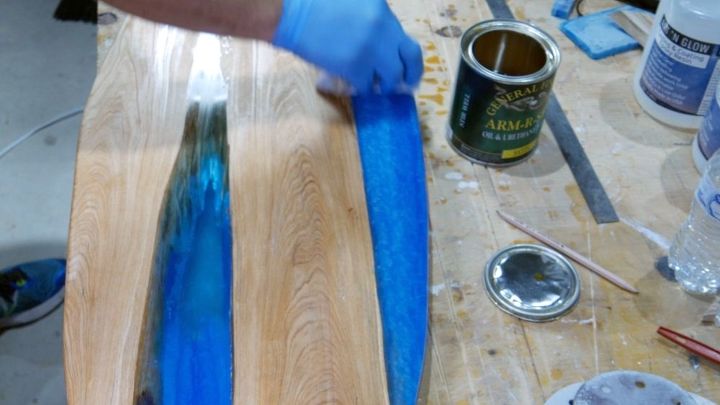
I used an oil based urethane Satin finish by General finishes on the top and bottom of the resin and wood wall art.
First, I applied the first coat with a lint free rag.
Quick Tip: Smooth out the finish by making a soft circle with the rag and lightly wiping the length of the table.
Next, I hand sanded with 320 grit sandpaper and applied a second coat.
Then, I repeated the process above for the third and final coat.
Hairpin Legs
As I previously stated, this resin and wood wall art can also be an end table or couch table. So, I used a set of hairpin legs I had in my shop from a previous project.
To install the hairpin legs, I centered the back and front pair both vertically and horizontally.
Next, I marked the holes and drilled pilot holes.
Then, I secured the table with screws.
Hairpin Legs and Install LED Light Strip
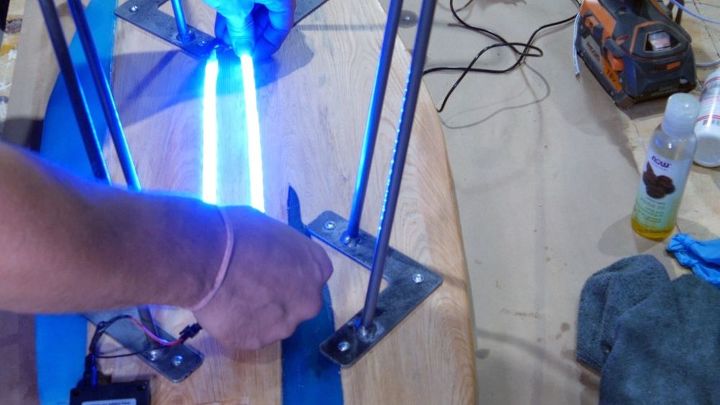
After I secured the hairpin legs, I installed the LED light strip.
First, I placed the rechargeable battery in the compartment and secured it with hot glue.
Next, I laid out the LED light strips and peeled off the paper covering the adhesive side. Then, I pressed them down and secured the LED light strip with hot glue for extra security.
Hairpin Legs
As I previously stated, this resin and wood wall art can also be an end table or couch table. So, I used a set of hairpin legs I had in my shop from a previous project.
To install the hairpin legs, I centered the back and front pair both vertically and horizontally.
Next, I marked the holes and drilled pilot holes.
Then, I secured the table with screws.
Resin and Wood Table
This resin and wood surfboard can be an end table, couch table, or entryway table.
Or...
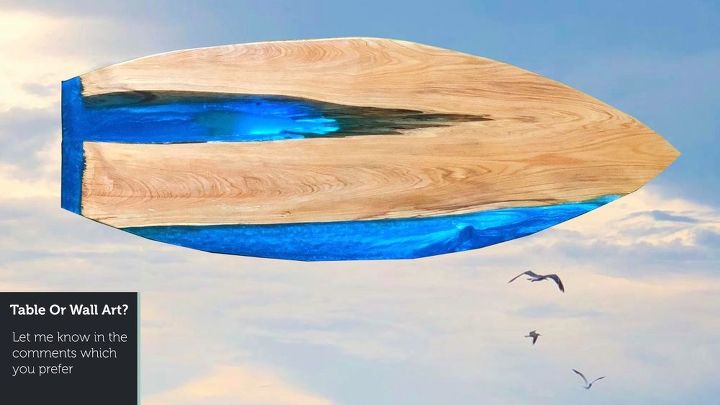
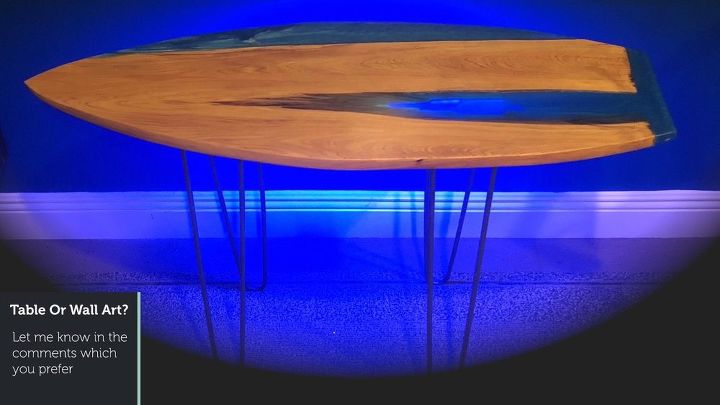
Resin and Wood Wall Art Conclusion
It can be wall art. The wall in my shop drowned out the color of the surfboard. So, I used a green screen and some photo editing techniques to put a picture of the sky above the ocean.
I took the background picture a few days ago - the ocean is a few blocks away from my house and going to the beach in the evening to play games with my family, relax, swim, and/or take pictures simply never gets old.
I hope you learned how to make resin and wood wall art (or table) and this project brought you some value.
Please consider subscribing to my YouTube channel and visiting my website for more projects and other fun stuff. If you want to make wall art like this, I will have detailed digital plans available for download that walk you through entire process step by step.
For those of you who want to make this project, but believe it is too difficult or beyond your skill level - I encourage you to reconsider and realize you are more capable than you believe yourself to be.
"You can never cross the ocean unless you have the courage to lose sight of the shore." - Andre Gide


Frequently asked questions
Have a question about this project?