


How to Make a Simple DIY Poster and Art Hanger

by | DIY

Do you have a favorite poster or piece of art to hang? Check out how I used chippy architectural salvage to create an easy DIY poster and art hanger with vintage style! This DIY is budget-friendly and only takes minutes to make!
It all started with a $0.50 vintage find at the Rehab Vintage Market open air market! Isn’t that how a lot of snowballs start, after all?!
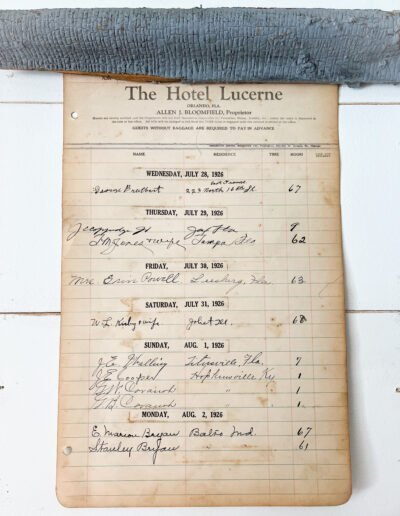
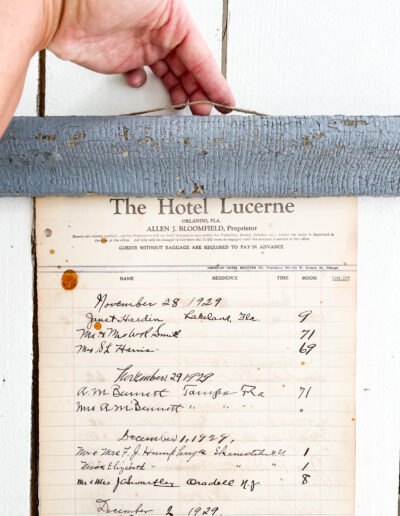
This stack of old hotel ledger papers caught my attention and when I saw that they were from a hotel in Orlando, Florida, I knew I’d have to find a way to use them. Such fun pieces of history! (My daughter also thought they were fun because she was studying Switzerland for her country notebook and had just written about the city of Lucerne!)
To make a long story short, this $0.50 find inspired my whole “decor story” for this summer. Our family loves to travel and we have big ambitions and ideas about where our family adventures can take us. But at the end of it all, home sweet home is the best place. And so, a decor theme of “summer travel” was born!
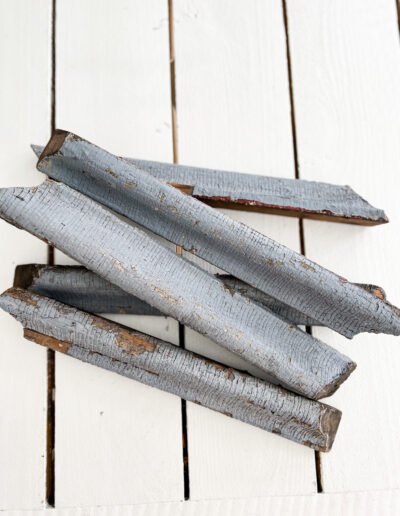
I knew I really didn’t want to have to make any holes in these old pages or use tape that could rip them either. A poster hanger seemed like a really great option, but they just didn’t have a lot of vintage appeal. After that idea, it led me to hunting for some salvage pieces and I couldn’t have been more excited to find $6 chippy salvage pieces in my favorite blue-gray color!
Here’s how I made them (and how you can make some too!):
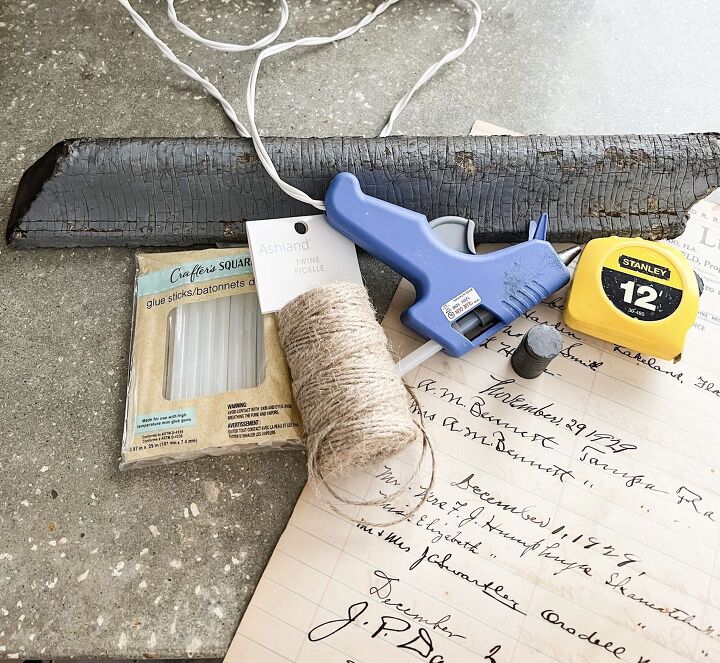
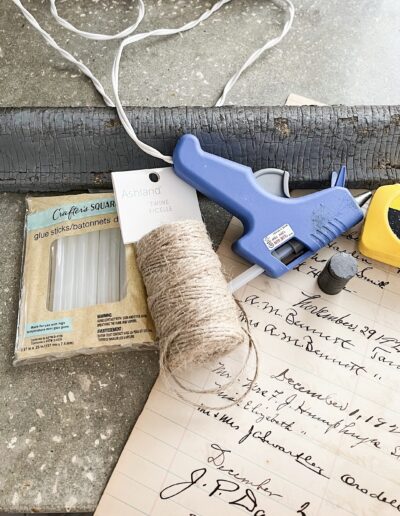
- Piece of salvage (these would be perfect if you cut them in half, length-wise), a thin board (paint or stain to your color preference), old piece of fencing or trim
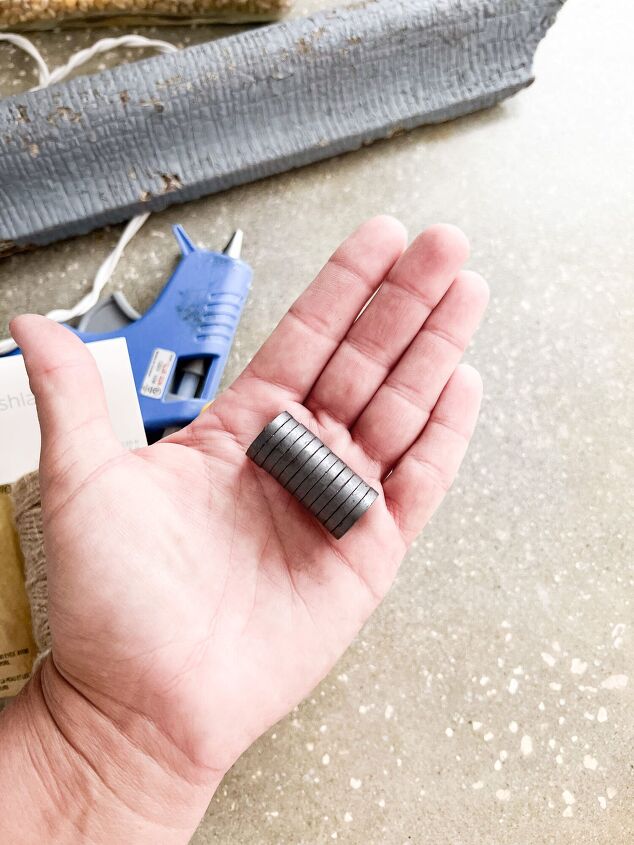
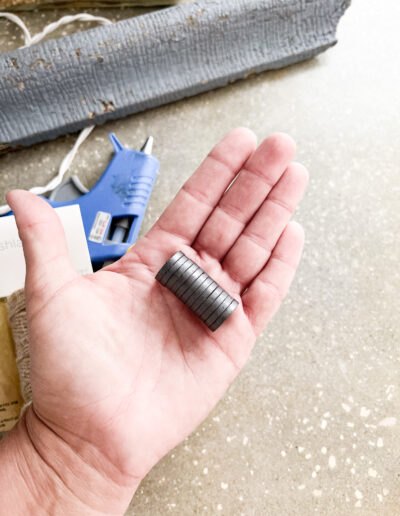
- Small magnets
- Hot glue gun
- Hot glue sticks
- Jute twine
- Tape measure
- Scissors (these are my favorites!)
- favorite poster, art, book or music page
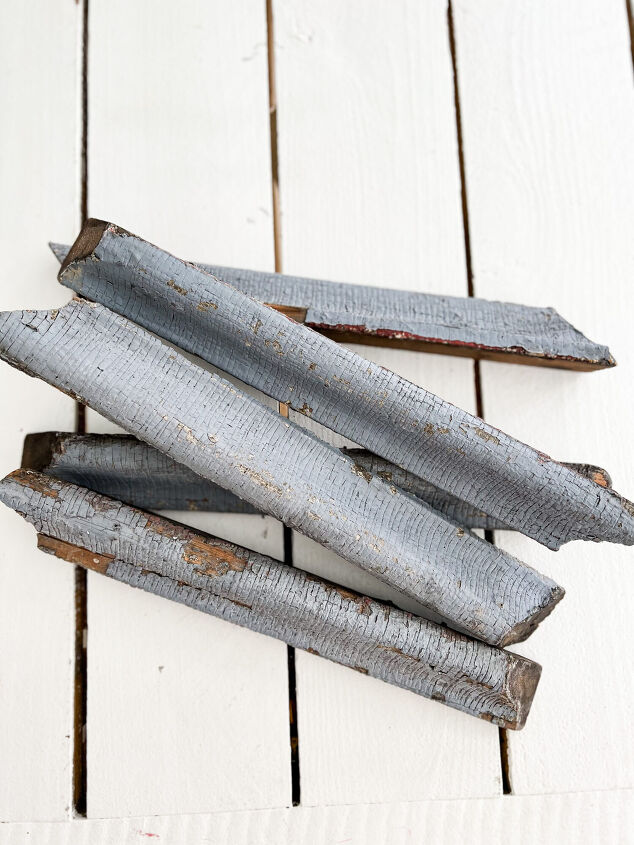
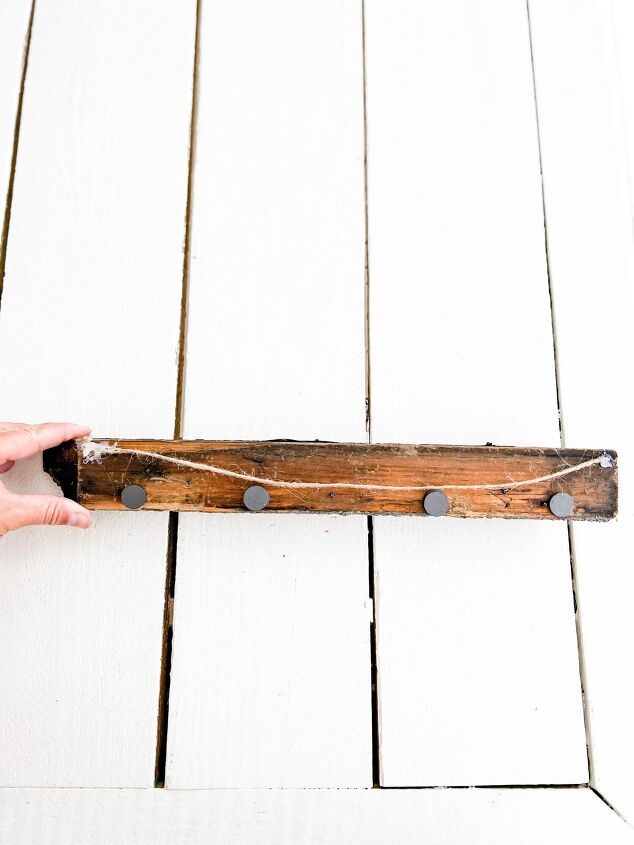
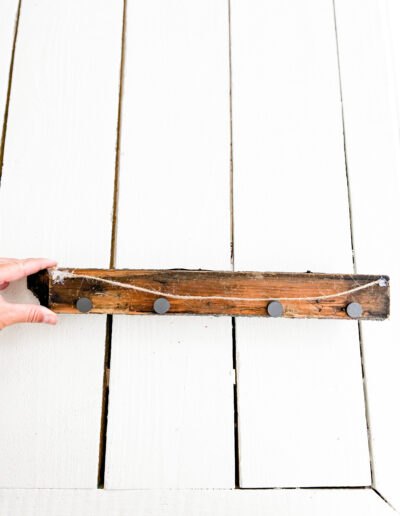
Cut your salvage piece to the desired length. I want to be able to use mine for a variety of things down the road (plus I like the overhang), so I left my pieces the length that I found them. Fortunately, a whole section of trim had already been cut into matching pieces.
I got lucky on this one. Since then, however, I have seen a number of salvage bundles, thin sticks, etc. that would work perfectly. Maybe you can get lucky too, since you now know what to watch for!
My pieces are approximately 16″ on the flat back side; the corner cuts stick out an inch or so further on each end.
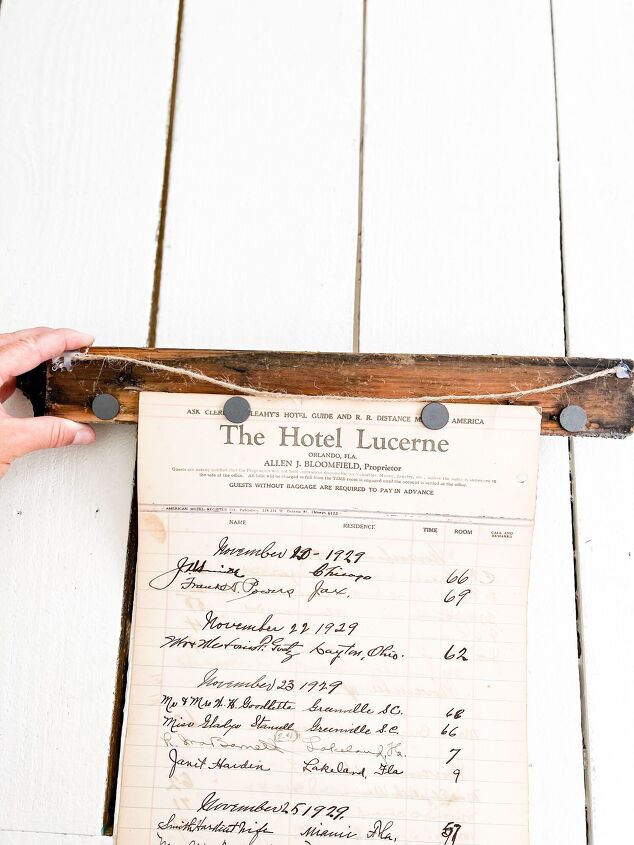
Next, you’ll space out your magnets and hot glue to the back of the salvage piece. While I needed magnets closer to the middle for my vintage ledger pages, I went ahead and put magnets at the ends too. This will give me more size options down the road and I can always add more magnets, if needed, to fit a different piece of art or poster.
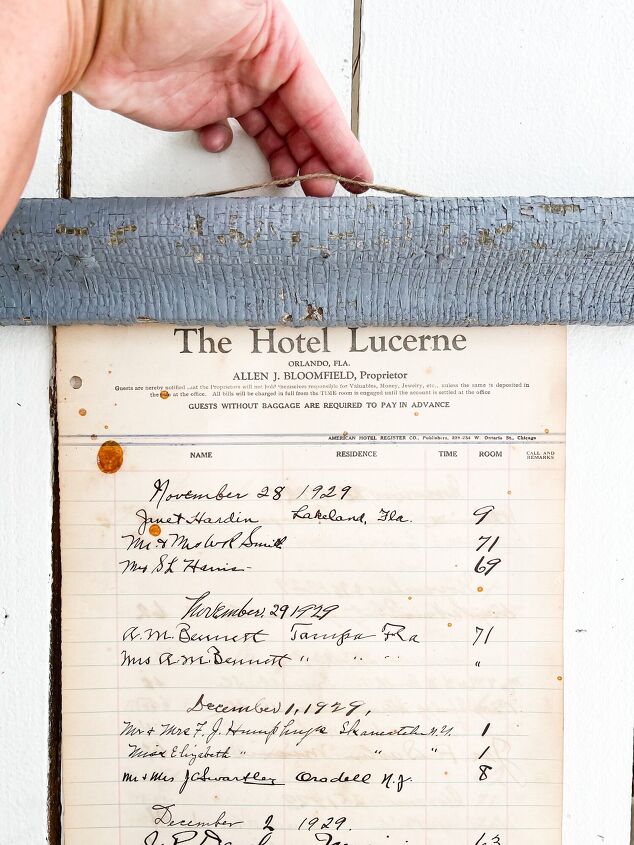
After that, it’s time to add your twine. I chose jute twine because I feel like it just blends with my decor. You could add any kind of rope or ribbon that you prefer!
First, you need to determine how much swag you want when you hang your DIY poster or art hanger. I know I’ll be using mine in a gallery wall. Consequently, I chose to go with a shorter length so it takes less hanging space.
I cut my twine to 15 inches for the size wood and swag that I wanted.
Next, hot glue each end of the twine to the back of your salvage piece. The back of my DIY poster or art hanger isn’t beautiful, really, but an extra layer of hot glue over the top of the twine adds more security since the wood is a little heavy.
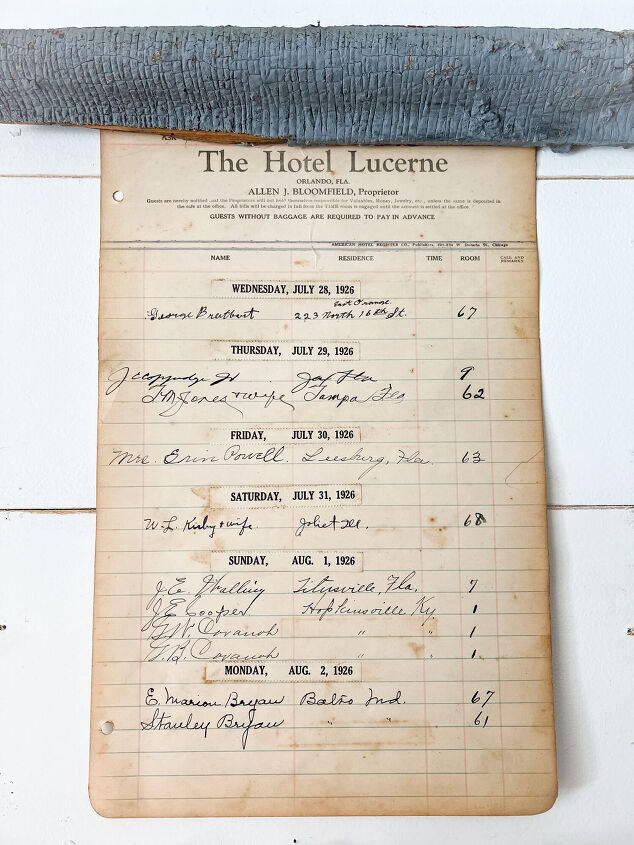
Choose what art or poster you will hang! A pretty picture from a book, a piece of thrifted sheet music, or a favorite drawing from your child or grandchild are perfect budget-friendly additions! In fact, if you have children’s artwork that you like to rotate, this is a super easy way to do it!
You can find pretty watercolor or sketched art in thrift stores or flea markets but you may not love the frame. Making your own DIY poster or art hanger is a great way to still enjoy these pieces, especially for thrifted prices! You can find more tips of things to look for at thrift stores over on THIS POST.

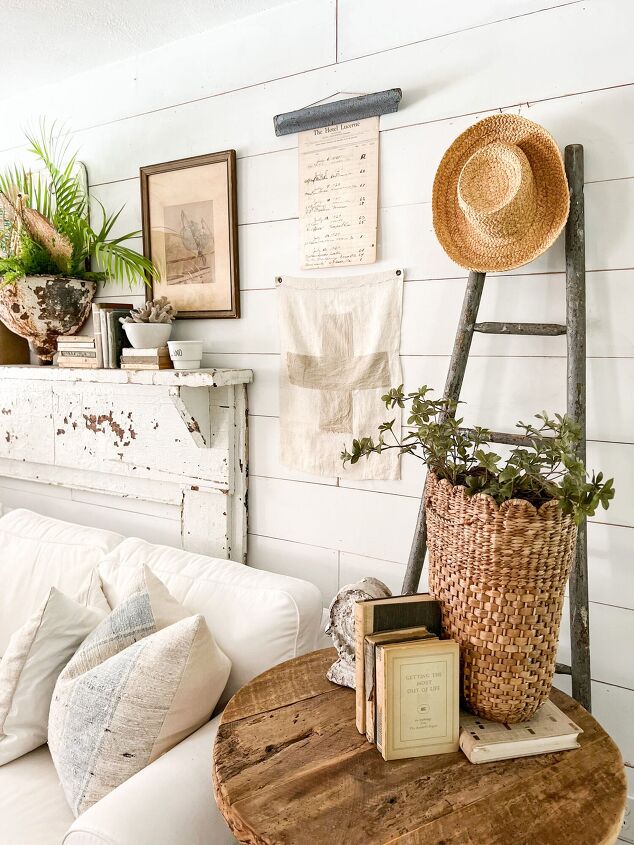
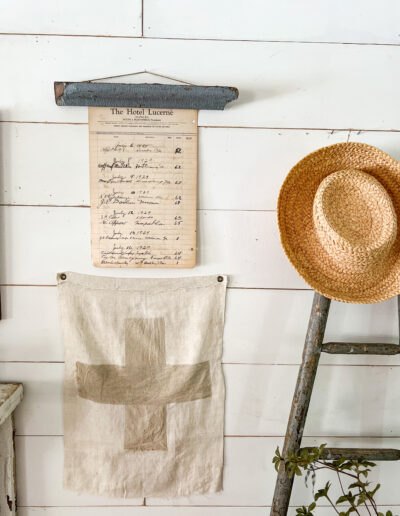
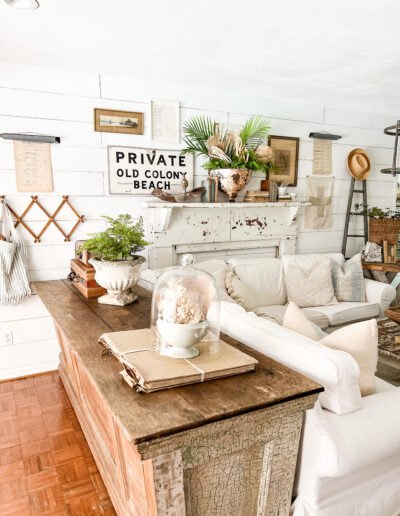
Last but not least, hang and enjoy! A DIY poster or art hanger is a great way to add even more character and charm to a gallery wall. You can find my favorite gallery wall tips over on THIS POST!
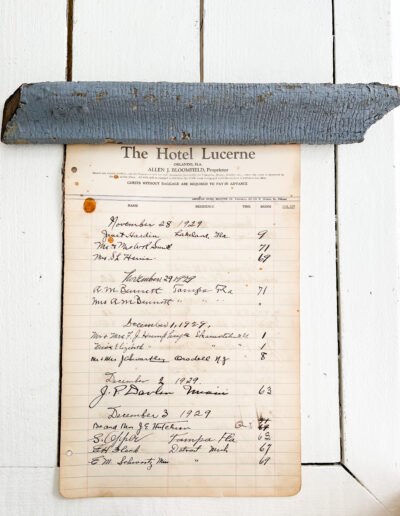
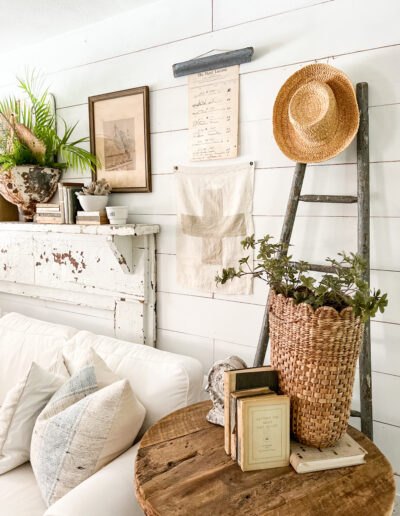
Since I found several ledger pages from the same 1929 book, I thought it would be neat to feature the collection as part of my gallery wall!
Tip: Consider grouping similar art or pages in a gallery wall to make a beautiful statement!
There you have it! All because of my fun 50 cent vintage find! It took me maybe 30 minutes to make all four of my DIY poster or art hangers, and that includes interruption time from kids (because…real life).
All that to say, they are super easy, budget-friendly, and a fun project to try too! In addition, it makes a very simple way to switch your decor by just switching out your art or posters too!
Will you try this DIY? Where would you hang it?!

I’d love for you to follow me on social media! You can find my home decor inspiration on Instagram, Pinterest, and Facebook!
Blessings,


Comments
Join the conversation
-
I absolutely love this vintagey hack on a frame. I am definitely going to make this I have some vintage maps I’d like to display and this will be perfect! Thanks for your inspiration it truly was inspiring. It’s lovely and so simple your a gagenius. 😁


Frequently asked questions
Have a question about this project?