


How to Make a Wooden Shiplap Rustic Farmhouse Sign
12 Materials
$30
2 Hours
Easy
We used white Hamptons Stikwood to clad the ceiling of their my moms master bedroom (that’s almost done!), I thought it would be fun to use some of the leftovers to make a wooden shiplap rustic farmhouse sign for my mom & dad. It was so enjoyable to make that I think I need to make one for our home soon, too! Here’s how to make your own rustic shiplap sign
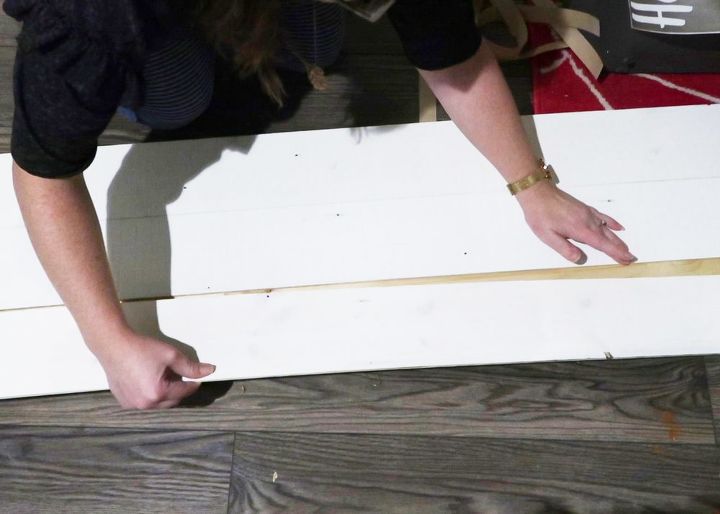
First, cut a piece of 1/4″ plywood to the sign you’d like your sign to be (minus the frame). I decided to make this sign 48″ by 12″. Next cut some Stikwood pieces (sticky-backed thin barnwood – I used three pieces) to size and stick it to the plywood. If you don’t want to use Stikwood, you could use another piece of plywood cut into strips & painted to create this shiplap effect.
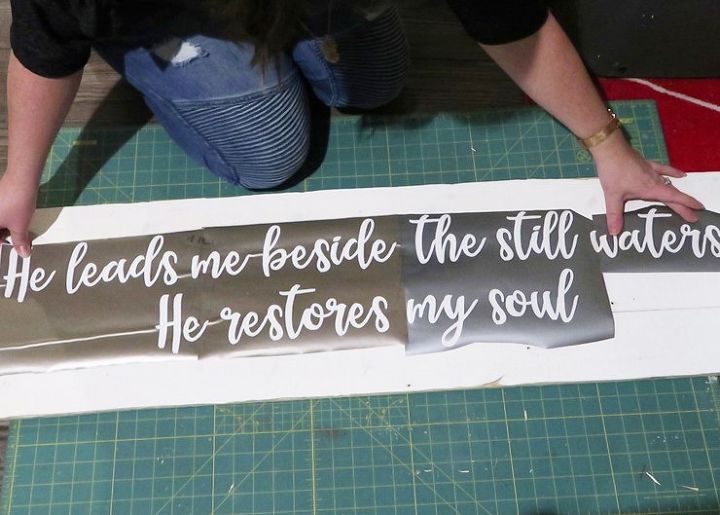
Use a Cricut machine to create a vinyl stencil with your desired saying. If you want to use this Bible verse like I did, you can go to my blog and get it there!
Apply transfer tape on top of your vinyl stencil, peel off the paper backing, and apply the vinyl stencil to your sign. Make sure to measure and mark you sign and stencil so that your design is centered.

Next, carefully peel the transfer tape off of your vinyl stencil. This can be a little tricky, so use tweezers or your fingernails to gently put things in place on your wood as needed.
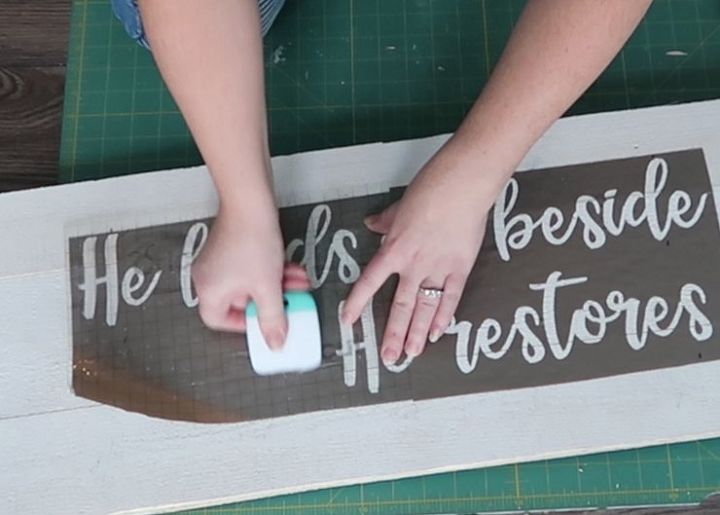
If you’re using rough wood like I am, it’s a good idea to go over your stencil with Mod Podge first. This seals up any lifting that might be happening where the stencil meets the wood.
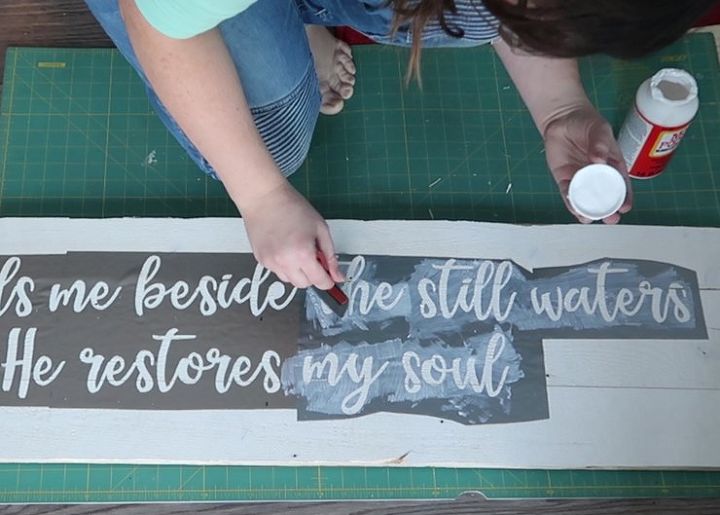
Once the Mod Podge is dry, go ahead and use a sponge brush & chalk style paint to paint over the stencil. I painted 2 thin coats on my sign.
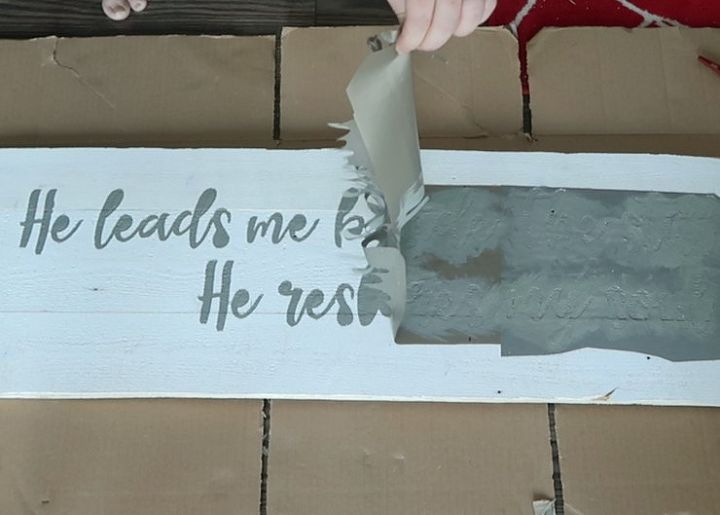
Next, pull off your vinyl stencil to reveal your design. This is the BEST part!
Use tweezers to remove any small vinyl details from your sign.
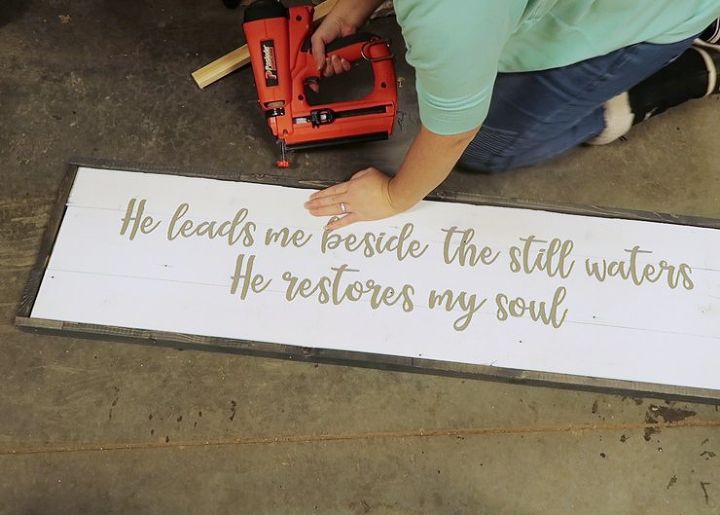
To make your sign frame, measure the vertical sides of your sign and cut 2 pieces of 1 x 2″ pine or spruce to that length. Then, put the sides of the frame in place, and measure the horizontal side of your sign PLUS the side frame pieces. Cut 2 pieces of wood to that length.
Then, stain your frame pieces if desired, and when they’re dry, use a finishing nailer to nail them to your sign. I raised my sign up first with some scrap pieces of 1 x 2″ wood so that there was a lip at the back and front of my sign when I nailed on the frame.
If you desire, you can sand the lettering on your sign slightly to give it a weathered look.
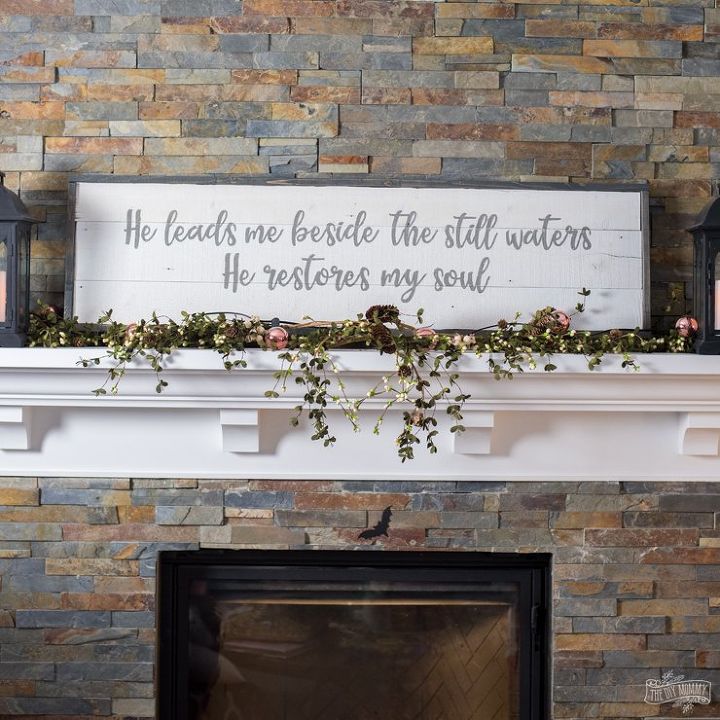
And that’s it! Your beautiful farmhouse style sign is complete.


Any price and availability information displayed on [relevant Amazon Site(s), as applicable] at the time of purchase will apply to the purchase of this product.
Hometalk may collect a small share of sales from the links on this page.More info

Want more details about this and other DIY projects? Check out my blog post!


Frequently asked questions
Have a question about this project?