


How To Make Fluid Resin Art

In this DIY tutorial I teach you everything I know about art resin and how I made my resin art.
Which resin to use and why?
How to color your resin?
The basics of resin for beginners!
Big NO NO's
and much more..
If you're new to resin you'll love this tutorial and if you're experienced I hope this inspires you.
To begin let's start with the resin basics.
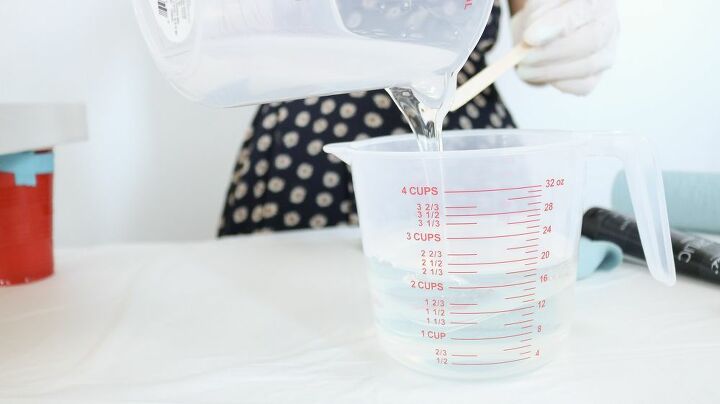
Your resin could make or break your project. If you aren’t really familiar with resin here are some basics.
You’ll usually have a liquid hardener and the liquid resin. Your resin will not start hardening until you add your hardener to the resin liquid. If you don't combine the two liquids correctly it will not harden correctly as well. You also have to remember, there are a lot of different types of resin for different projects. Jewelry resin, table resin, art resin, casting resin etc.. Each of these different resins set differently ( time wise).
I love reading reviews on everything I buy and when it comes to resin I’d say I’ve read my fair share of reviews to know that casting resin (its’ cheaper) would not work for my art pour. Casting resin is made for creating jewelry and other knick knacks. It sets a lot quicker than Art Resin and will not give you enough time to create artwork like this. Even though casting resin might say it has a working time of 30 min (that’s what I read on the label) in most cases it’ll start setting in as little as 10 minutes (from the reviews I’ve read) So with all that in mind I knew I didn’t want to risk buying the casting resin if other folks have tried it and mentioned it sets so quick. 10 minutes isn’t even enough to mix your paints. You need to mix your resin for at last 3 minutes to start off with so it sets right anyways. ( If you're looking for good resin I talk way more in depth about the resin I used and where to get it on my blog ) - https://www.lilyardor.com/diy-resin-art/
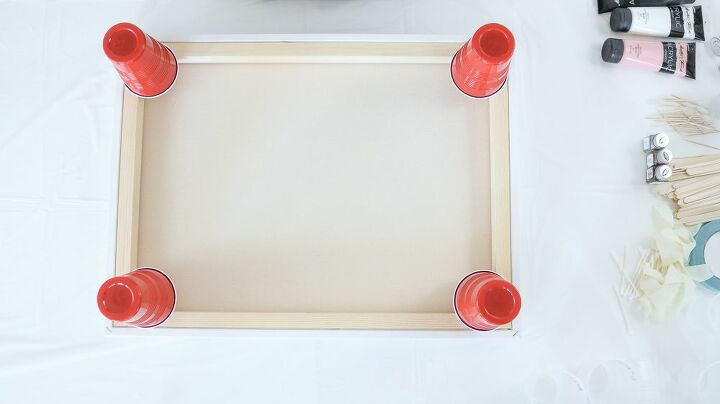
If you're new to resin and are looking to create art from start to finish I would highly recommend visiting my blog as I've made a thorough video that really answers all the questions you might have but, if you're familiar with resin than here we go. I made sure my surface was level.
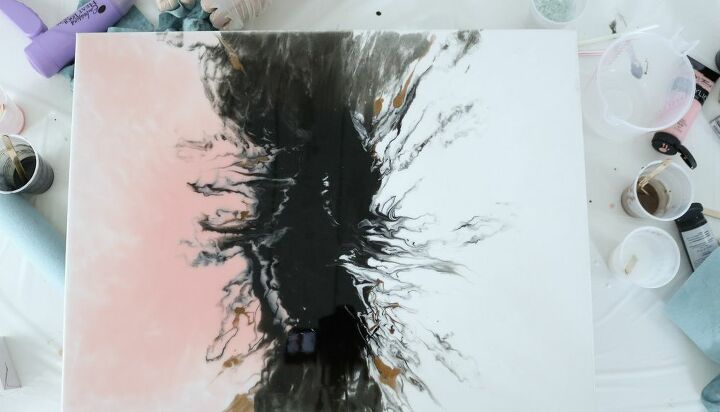
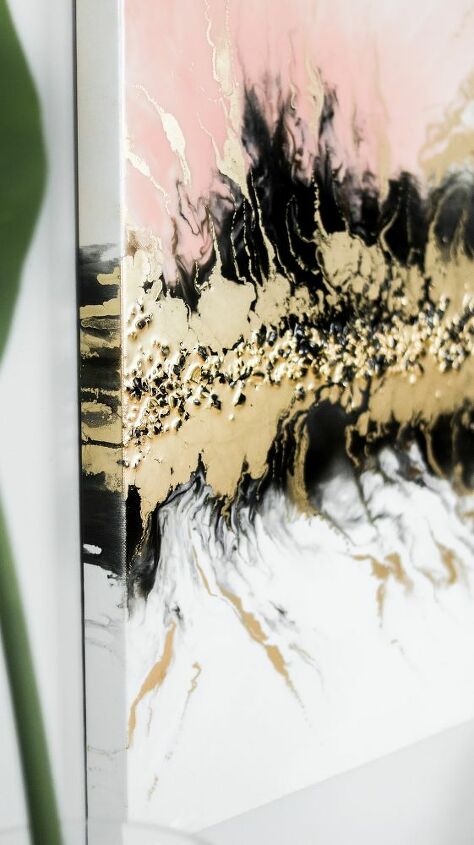
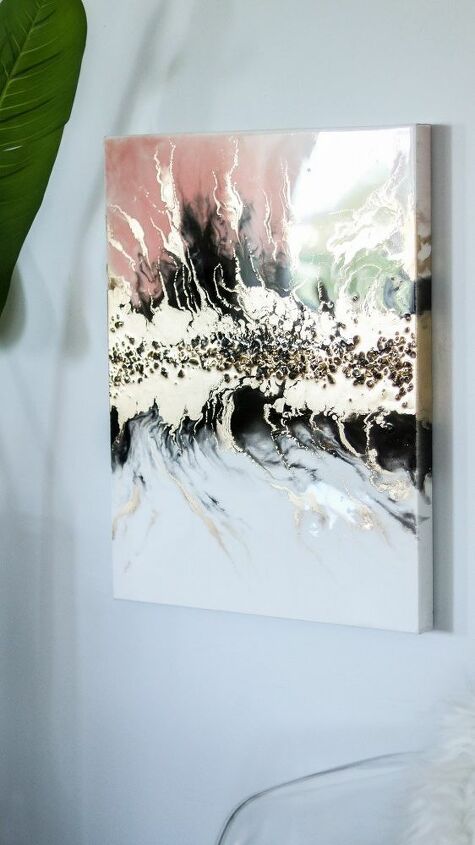
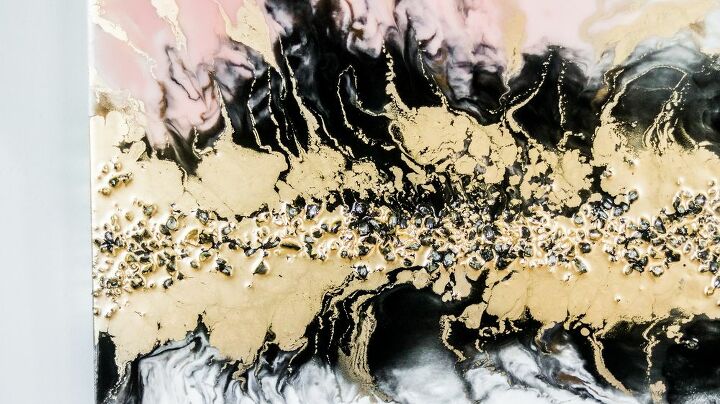
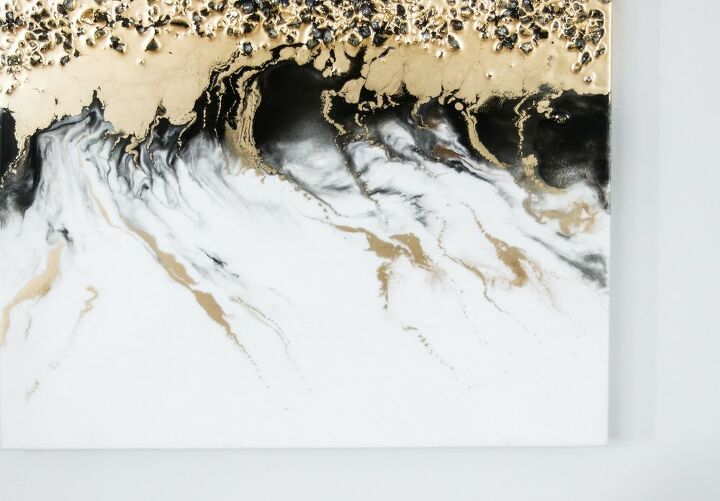
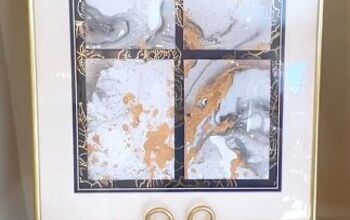
Than I divided my canvas in half and added white resin to once side and pale pink to the other. Following that I added a black line in the center and created bursts using my favorite method.
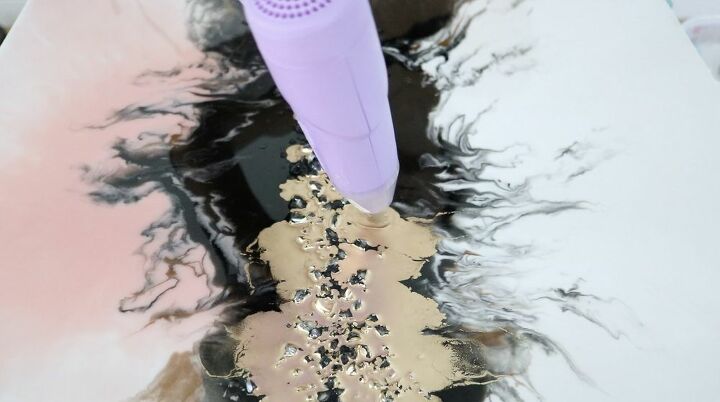
and for a pretty gold effect I added some crystals that I had made and added enamel gold paint around the crystals. I used my heat gun to spread the gold around a bit and that's it!!
Any questions? For the full tutorial visit my blog

That's it! I hope this is inspiring.
There's my DIYs on my blog
www.lilyardor.com
Resources for this project:
See all materials


Comments
Join the conversation
-
Love it.
-
Absolutely gorgeous


Frequently asked questions
Have a question about this project?
If I did this on my kitchen counters, would it hold up?
would craft resin work for pouring over a painted canvas?
The cost of the project was listed as $100. How many pictures were completed for this amount?