


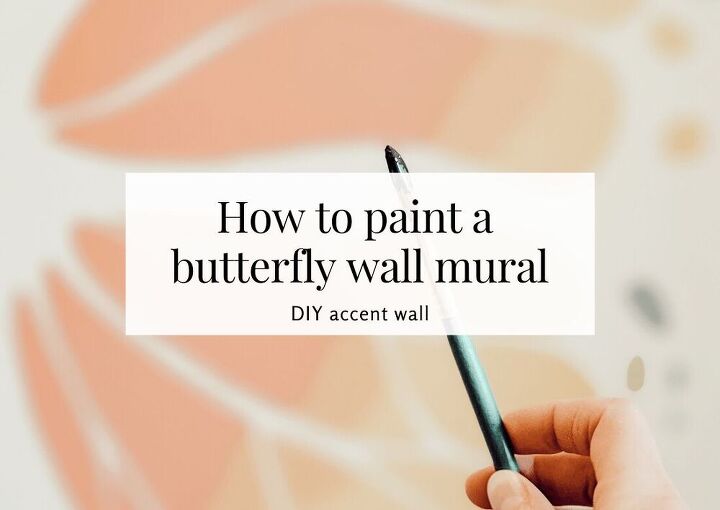
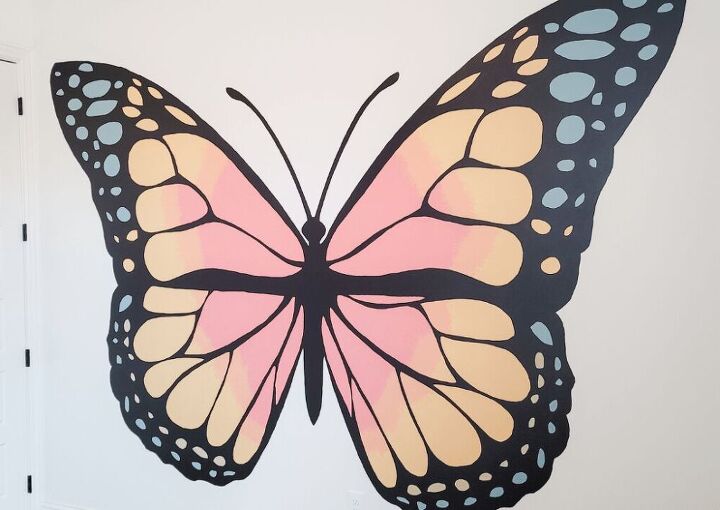
How to Paint a Butterfly Wall Mural - 804 Sycamore
The accent wall in my daughter, Quinn’s, room took me a while to decide on. My first thought was wallpaper, but that was more costly than I anticipated. Then I thought board and batten trim would be cute, but it didn’t have that wow factor for my little girl. That’s when I thought about painting my own design, except for the fact that I’m not an artist, can’t sketch or really paint anything with dimension, it seemed like a great idea. Once I decided on the object of Quinn’s adoration, I began looking into how to paint a butterfly wall mural.
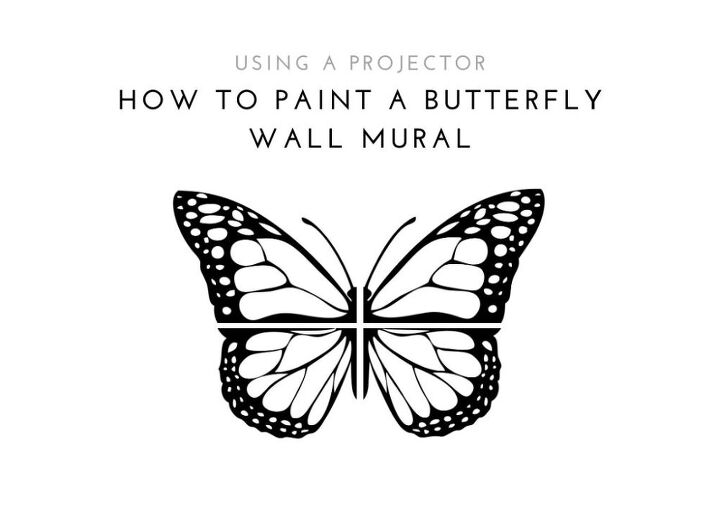
This easy wall mural project can be done by anyone, no artistic ability necessary. If you can trace and paint along lines, you’re good to go. This small projector has come in handy for several projects so far. It’s very affordable and works great. I first used the projector to project words from Jane Austen’s Pride and Prejudice novel when I coordinated a Jane Austen Faire. The large faire poster turned out beautifully and looked like a book font all because I was able to trace the courier font using the projector. Then I used it to trace a pretty cursive font onto poster paper to create cheap wall art for my Christmas dining room decor. Using this projector to trace beautiful fonts and shapes is a must for me, I have horrible drawing skills and a shaky hand.
I use several programs for my graphic design needs, but for this project, Canva, was the best choice. Canva had the butterfly image I wanted to use and so I just used their program to divide the butterfly image into four quadrants. If Quinn’s room would have been larger than it’s modest 10′ wide, I could have probably moved the projector further back to enlarge the butterfly on the wall. However, once I projected the butterfly, I quickly realized this was not big enough. I considered adding a medium and small butterfly to the largest butterfly I could project, but it just didn’t have the same wow factor I imagined. So I divided the image into four separate images and projected one at a time while I traced it. It wasn’t perfect, but it worked well and the imperfections are minimal.
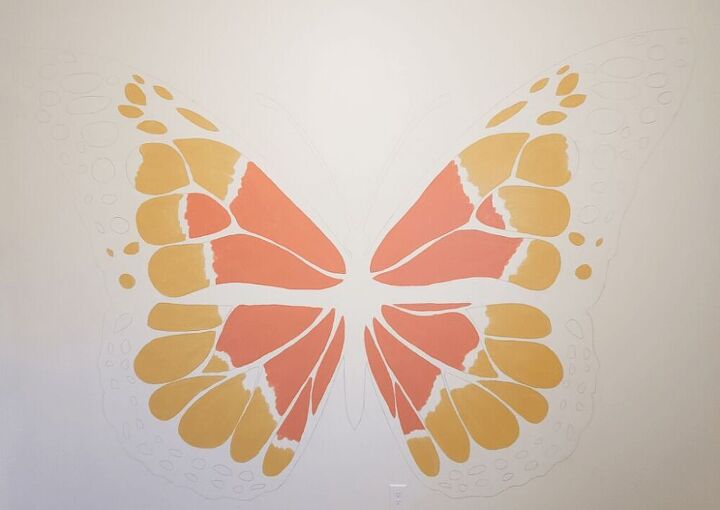
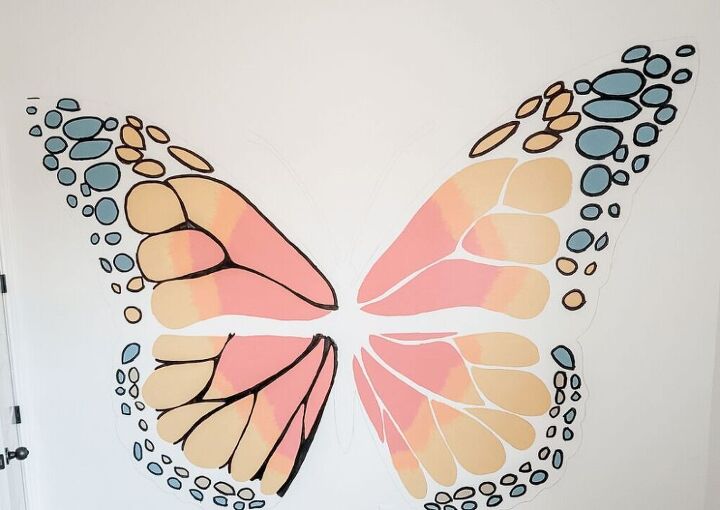
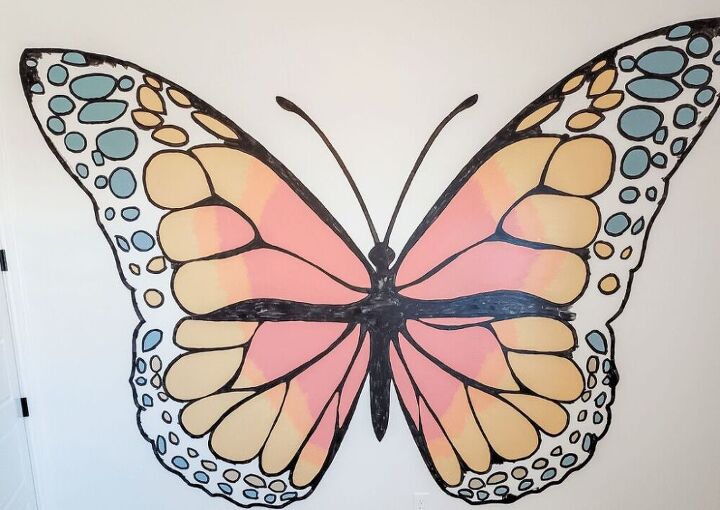
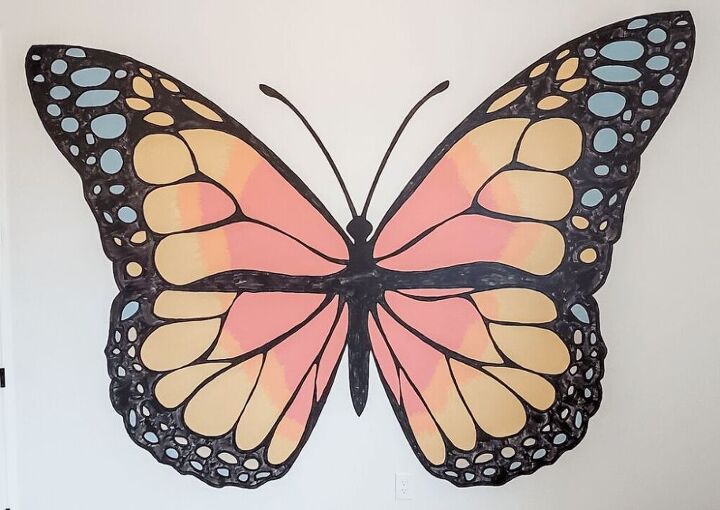
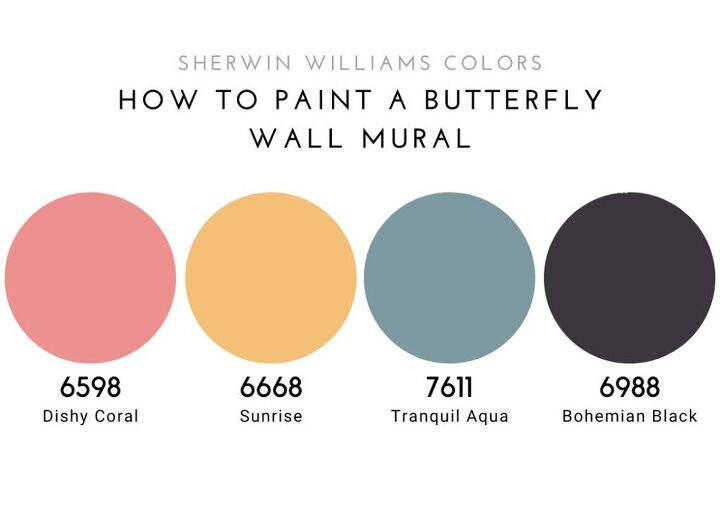
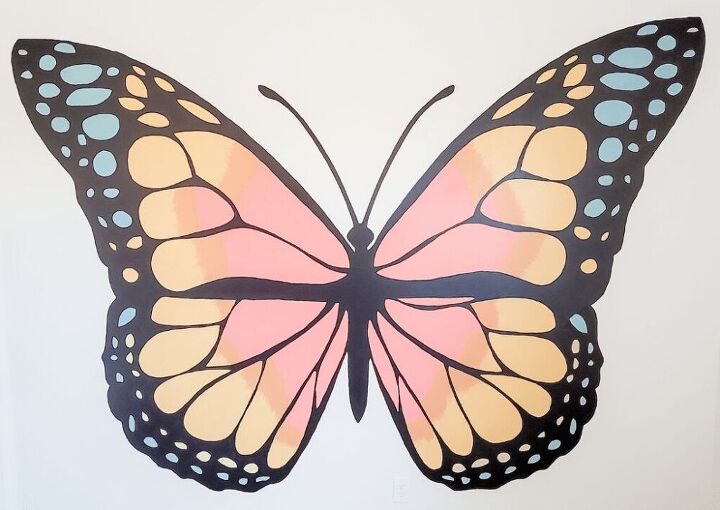
I typically use Behr, Sherwin Williams, and Magnolia paint colors, but for this butterfly I went with shades from Sherwin Williams. I tried to select colors that coordinated with the rug I found for her bedroom design as well as colors that I know Quinn prefers. She loves pink, pink, and pink! But she also says she loves all colors except for brown unless it’s on a bird or animal. So, I used a lot of pink (aka Dishy Coral) and also blended it with yellow (aka Sunrise) to give it a smooth transition. I was actually really worried about this part, again I’m not an artist, but it turned out fine for this two-dimensional object. I also mixed yellow and blue (aka Tranquil Aqua) to add a touch of green to the butterfly’s wings. I think having the main colors of a rainbow are fun for this space and will work well for Quinn’s colorful bedroom design.
How to Paint a Butterfly Wall Mural
Here are the basic steps I followed to tackle this hand-painted butterfly wall mural:
- Prepare the area for painting. Tape baseboards and cover flooring.
- Project the first quadrant onto the wall and add a small piece of painters tape to the bottom and side borders of the image.
- Project the other quadrants onto the wall to make sure each image will fit exactly where you want it to appear. I made sure the butterfly was centered on my wall.
- Get several pencils or at least have a pencil sharpener because the lead wears down quickly. Have a ladder handy.
- Project the first quadrant again, and trace the image. Don’t press too hard or too lightly.
- Project the next quadrant, lining it up with the traced image, and trace the next image.
- Repeat for the last two quadrants.
- Prepare your paint, have stir sticks ready, a paint can opener, hammer to close, round and flat paint brushes, and some rags. I used plastic cups to hold my paint.
- Paint one color at a time. I made sure each color was fully dry before starting the next. I didn’t want to smear or mess up the other colors.
- I stored the paint in the cups in the fridge. This prevents the paint from drying out and I knew I’d need to do a second coat as well as touch ups.
- Once all the colors were done with a second coat, I began outlining with the black.
- Once all the lines are traced or outlined with black, I filled in the rest of the butterfly with the black.
- A second coat is necessary as well at touch ups.
- Once the butterfly is completely painted and dry, you can use a gum eraser to remove any pencil lead smudges around the butterfly. Or you may need to use the original wall color paint to make touch ups.
How to Paint a Butterfly Wall Mural – Paint Colors
To save money, I only purchased paint shades in primary colors. That way I was able to blend colors to create orange and green. I think the green adds a simple touch, it’s not very noticeable, but it adds a variation which is aesthetically pleasing. I was initially unsure and worried about fading and blending the orange, but I like the way it turned out! As a non-artist, I think the subtle blending and color change is nice and adds to the rainbow transition of colors. I know that Quinn will love it, so overall I’m very happy with the color choices and how it turned out.
Overall, this hand-painted butterfly wall mural was a success. I have several more projects to complete before revealing Quinn’s little girl bedroom design, but with the most tedious project done, I’m feeling great about my progress! Be sure to subscribe to my blog to stay up to date on this room design along with many other planned projects for our builder-grade home! If you’ve considered painting a mural in your home I’d love to hear about it in the comments below, what would you like to paint or what did you paint?
You may also like:
- Little Girl Bedroom Makeover – Wall Unit
- Little Girl Bedroom Makeover – Bed Décor


Comments
Join the conversation
-
Thanks so much! The possibilities are endless, and it's not a difficult project! Best of luck and have fun!
-
Great art for a little girl! You really did a good job


Frequently asked questions
Have a question about this project?